


Sakiri Guide & Best Builds
Welcome to our Sakiri build guide for Neverness to Everness. Sakiri is an S-Rank Gas Charac ter available in Neverness to Everness who utilizes the Incantation element.
In our Sakiri guide, we'll cover everything you need to know to get the most out of her, from building the best gear and weapons, to important skill priorities and combos.

Sakiri's Best Arcs
 Good Boy's Grand Adventure (M1)
100%

ATK - 45%
Morphix
Increases Charge Efficiency by 18%.
Increases Team ATK by 10% for 20s after the wearer casts an Ultimate. Increases Team ATK by an additional 6% if enemies are controlled by the Ultimate. Effects with the same name do not stack.
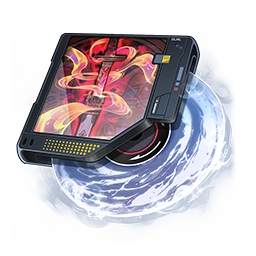 Ravenous Blade (M1)
110%
CRIT Rate - 24%
Cursed Blade - Soulbound
Increases Crit Rate by 16%.
Grants the wearer a 9% Crit DMG bonus for 15s when they deal Incantation DMG. Stacks up to 7 times, with no more than 1 stack gained every 0.3s. Resets the duration when triggered again.
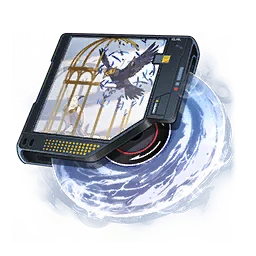 Crime and Punishment (M1)
99%
CRIT Rate - 24%
Twinflight
Increases Cycle Intensity by 72.
Increases the wearer's Psyche DMG by 20%. Increases the team's Crit DMG by 16%, and the wearer's by an additional 32%, for 15s after the wearer casts Ultimate. Resets the duration when triggered again.
 Fluff of Finesse (M1)
98%

ATK - 27.5%
Thief's Candy
Increases wearer's damage by 8% for 10s after performing a Critical Dodge, up to 3 stacks. Resets the duration when triggered again.
 Tears Beneath the Mask (M1)
96%

ATK - 27.5%
Nestbound Bird
Applies Warning Gaze on enemies hit by the wearer's Ultimate. Marked enemies deal 18% reduced damage for 20s. Effect does not stack.
 Cosmos Daze, Wild Reverie (M5)
97%

ATK - 25%
"Bopp"
Increases the wearer's damage dealt by 18% for 10s after casting Support Skill. Triggers at most once every 20s.

Best Console Setups for Sakiri
Sakiri's Console bonus is a 9% Incantation DMG bonus for every Type III Module
 Speedy Hedgehog

 +


2-piece: Epic (2): Charge Efficiency +12%.
4-piece: Legendary (4): Increases all allies' ATK by 15% for 20s after the wearer casts Ultimate. Effect does not stack.
Speedy Hedgehog is the best option for running Sakiri as a support Esper. She benefits from the increased charge efficiency, helping her use her Ultimate more often to suppress enemies for the team, while also granting a team-wide Attack buff. This is in addition to her own team-buffing capabilities. Keep in mind that running multiple characters with Speedy Hedgehog does not stack.
To get the 4-piece set bonus, this cartridge only needs Type III Modules, meaning there is no need to choose between getting the full effect or getting more of her Console bonus. She can fit a total of 6 Type III and one Type II into her console, giving a total of 54% increased Incantation DMG. Shown below is an example build setup for her maximum bonus.

Sakiri Module Bonus
+54% Incantation DMG (6 x Type III equipped)
+
Sakiri's Stat Priority
Sakiri's scales well off of both CRIT and ATK, with most of her Arc options not providing CRIT it is important to build for CRIT in the Cartridge if you want to maximize personal damage. if you don't want to focus her personal damage it is recommended to increase her Incantation damage and her Esper Cycle reaction damage through cycle Intensity. Esper reaction damage scales off of the character level and the highest Cycle Intensity of the two team members triggering the reaction.

Sakiri's Skill Priority
Sakiri's main source of damage, as well as her team-wide ATK buff, comes from her Ultimate, making it the highest priority to improve. Her Skill provides her next biggest damage contribution and should be the second priority before you upgrade her Basic Attack and Support Skill.

Sakiri's Awakening Priority
If you have one or multiple copies of a character, you will be able to select Awakenings of your choosing. The following is a recommended order of what Awakening to unlock first for Sakiri. Remember that you can switch them at any time to try out different ones, or tailor your choices for a specific fight or situation.
| Awakening Unlock Order | Explanation |
|---|---|
| Wishful Reliance (A4) |
The first recommended unlock is her A4, which doubles the benefits of her Ultimate's ATK buff. IF you're fully focusing on playing Sakiri as a support, this is hard to beat. |
| Sensory Collapse (A5) |
Her A5 is very good second choice. It restores Ultimate Energy when devouring enemies, which can provide quite high uptime on her ATK buff. however this Awakening is not useful for fights against enemies that can't be knocked airborne, which makes it quite situational and you will have to slowly figure out where it works, and where it doesn't. |
| Adhesive Grip (A3) |
Her A3 provides her with a large damage increase to her Skill and Ultimate damage, but you'll need to kill a lot of enemies in order to fully stack up the buff, and it expires once combat ends. This makes it very situational, but if you expect to fight a lot of smaller enemies before a big elite or boss, this Awakening adds quite a bit of personal damage. |
| Dextrous Separation (A2) |
Sakiri's fourth recommended Awakening is Dextrous Separation. While it provides a very strong damage bonus for her Ultimate, the requirement of the enemies being airborne makes it very restrictive. In addition, the damage scaling by enemy mass means most enemies are unlikely to be hit by the maximum damage possible. |
| Diffusive Haze (A1) |
Diffusive Haze is her fifth recommended Awaking. While it does greatly increase the time enemies are suppressed, the fact that this effect does not impact some bosses makes it not as useful as some of her other damage-increasing Awakening. |
| Gluttonous Dissolution (A6) |
Sakiri's last recommended Awakening is her A6. This Awakening increases the total number of enemies that Sakiri's eating mode can consume at once. While strong against groups of smaller enemies, it does nothing against enemies that are immune, and you tend to not struggle very much with smaller enemies to begin with. |

How to Play Sakiri
Sakiri is a buffing and crowd-controlling Esper that is primarily off-field. When playing her, you should prioritize switching to her to use her Skill and Ultimate, when available. This will group up enemies and provide her team with her Ultimate's ATK buff before switching off-field again.
Both Sakiri's Redirect Skill and Ultimate provide her with some form of crowd-control. Sakiri's Redirect Skill has two different forms depending on if you press or hold the skill. However, they function nearly identically. The only major distinction is that, against smaller enemies, the press knocks them down for a short period of time while the hold suspends them in the air for a longer duration. Her ultimate also provides a similar suppression effect against smaller enemies, though unlike either Skill use her Ultimate does not have the ability to group enemies.
In addition to her suppression, the major boon from her Ultimate is the team-wide ATK buff based on her base ATK (Character ATK + Arc Base ATK only). This ATK Buff is also a flat percentage regardless of her Ultimate skill level, meaning no real investment is needed to gain the maximum bonus.
With a team, her rotation really depends on the enemies you are fighting. If you are fighting elite or boss enemies, you don't need to bring her on-field very often, mainly focusing on bringing her on whenever her ultimate is ready to use. You can also switch on to use her skill whenever it is available as it does help generate ultimate energy, but is not really required. If fighting smaller enemies, however, you do want to try and switch to her whenever her skill is off cooldown to use its grouping and suppression to keep the enemies close enough for your team to be able to consistently hit all enemies at once. In these fights her Ultimate should also be used whenever it is available. Though it is best to use it immediately after grouping up enemies with her skill.

Sakiri's Best Teams
To learn all about Sakiri's synergies and best team compositions, check our dedicated Sakiri team page below:

Changelog
- 28 Sep. 2026: Updated for version 1.4
- 24 Sep. 2026: Updated with Playstyle recommendations.
- 08 Sep. 2026: Updated for Linko release
- 16 Aug. 2026: Updated for version 1.3
- 04 Aug. 2026: Updated with Arc Calculations.
- 28 Jul. 2026: Reviewed for Iroi release.
- 07 Jul. 2026: Reviewed for Version 1.2
- 24 Jun. 2026: Reviewed for Chaos release, no changes needed.
- 08 Jun. 2026: Updated for version 1.1.
- 27 Apr. 2026: Updated for Global Launch.
- 25 Apr. 2026: Console setup information added for Sakiri.
- 21 Apr. 2026: Initial build guide for Sakiri added.
- 24 Mar. 2026: Initial guide for Sakiri added.
- NTE Adds Over 150 Free Annuliths Hidden in Pukaland Safes
- Here’s How You Finish All NTE 1.4 New Anomaly Commissions ASAP
- Avoid This Mistake and Save Big in NTE’s New Theme Park
- Don’t Miss NTE’s Newest Membership Program
- Everything New Coming to NTE 1.4, Featuring Blackbird and Akane
- Here is How You Can Solve All Duskmoor Anomaly Commissions in NTE
- ATV or Jet Ski, Which Ride is Worth Your Fons in NTE?
- Don’t Miss These NTE 1.3 Maintenance Times!