
Alhaitham Guide and Best Builds
Alhaitham is a 5-Star Dendro on-field DPS character from Sumeru who uses his sword and Chisel-light Mirror to enable Hyperbloom, Bloom, and Burgeon. Read our Alhaitham guide to learn more about Alhaitham's kit, Alhaitham's best Builds and also his Ascension and Talent Materials.

Alhaitham Guide & Best Builds
Welcome to our Alhaitham build guide for Genshin Impact. Alhaitham is a 5-Star Dendro Main DPS Character who is focused around Dendro-related reactions. In our guide, we will cover everything you need to know to get the most out of your Alhaitham, from building the best Artifacts and Weapons to important stat priorities and rotations.

Best Weapons for Alhaitham
Listed below are Alhaitham's best weapons. While weapons are listed in a priority order, what is best to build on your Alhaitham can vary depending on the team composition and level of investment you want to put into Alhaitham.
 Light of Foliar Incision
Whitemoon Bristle
Base ATK: 542
CRIT DMG: 88.2%
CRIT Rate is increased by 4% / 5% / 6% / 7% / 8%. After Normal Attacks deal Elemental DMG, the Foliar Incision effect will be obtained, increasing DMG dealt by Normal Attacks and Elemental Skills by 120% / 150% / 180% / 210% / 240% of Elemental Mastery. This effect will disappear after 28 DMG instances or 12s. You can obtain Foliar Incision once every 12s.
 Primordial Jade Cutter
Protector's Virtue
Base ATK: 542
CRIT Rate: 44.1%
HP increased by 20% / 25% / 30% / 35% / 40%. Additionally, provides an ATK Bonus based on 1.2% / 1.5% / 1.8% / 2.1% / 2.4% of the wielder's Max HP.
 Uraku Misugiri
Brocade Bloom, Shrine Sword
Base ATK: 542
CRIT DMG: 88.2%
Normal Attack DMG is increased by 16% / 20% / 24% / 28% / 32% and Elemental Skill DMG is increased by 24% / 30% / 36% / 42% / 48%. After a nearby active character deals Geo DMG, the aforementioned effects increase by 100% for 15s. Additionally, the wielder's DEF is increased by 20% / 25% / 30% / 35% / 40%.
 Other 5-Star Sword Options
-
 Wolf-Fang
Northwind Wolf
Base ATK: 510
CRIT Rate: 27.6%
DMG dealt by Elemental Skill and Elemental Burst is increased by 16% / 20% / 24% / 28% / 32%. When an Elemental Skill hits an opponent, its CRIT Rate will be increased by 2% / 2.5% / 3% / 3.5% / 4%. When an Elemental Burst hits an opponent, its CRIT Rate will be increased by 2% / 2.5% / 3% / 3.5% / 4%. Both of these effects last 10s separately, have 4 max stacks, and can be triggered once every 0.1s.
 Iron Sting
Infusion Stinger
Base ATK: 510
Elemental Mastery: 165
Dealing Elemental DMG increases all DMG by 6% / 7.5% / 9% / 10.5% / 12% for 6s. Max 2 stacks. Can occur once every 1s.
 Other Sword Options
-

Best Artifacts for Alhaitham
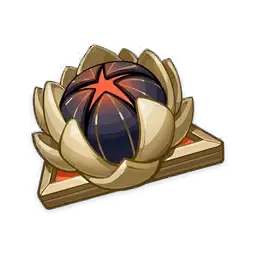 Gilded Dreams
Gilded Dreams
2-Piece Set: Increases Elemental Mastery by 80.
4-Piece Set: Within 8s of triggering an Elemental Reaction, the character equipping this will obtain buffs based on the Elemental Type of the other party members. ATK is increased by 14% for each party member whose Elemental Type is the same as the equipping character, and Elemental Mastery is increased by 50 for every party member with a different Elemental Type. Each of the aforementioned buffs will count up to 3 characters. This effect can be triggered once every 8s. The character who equips this can still trigger its effects when not on the field.
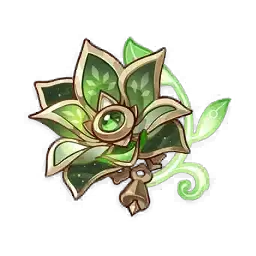 Deepwood Memories
Deepwood Memories
2-Piece Set: Dendro DMG Bonus +15%.
4-Piece Set: After Elemental Skills or Bursts hit opponents, the targets' Dendro RES will be decreased by 30% for 8s. This effect can be triggered even if the equipping character is not on the field.
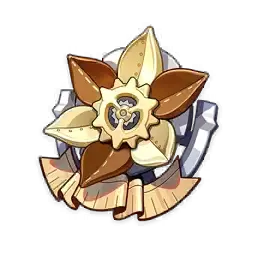 Marechaussee Hunter
Marechaussee Hunter
2-Piece Set: Normal and Charged Attack DMG +15%
4-Piece Set: When current HP increases or decreases, CRIT Rate will be increased by 12% for 5s. Max 3 stacks.
 Deepwood Memories
2PC
 Gilded Dreams
2PC
Deepwood Memories
2-Piece Set: Dendro DMG Bonus +15%.
4-Piece Set: After Elemental Skills or Bursts hit opponents, the targets' Dendro RES will be decreased by 30% for 8s. This effect can be triggered even if the equipping character is not on the field.
Gilded Dreams
2-Piece Set: Increases Elemental Mastery by 80.
4-Piece Set: Within 8s of triggering an Elemental Reaction, the character equipping this will obtain buffs based on the Elemental Type of the other party members. ATK is increased by 14% for each party member whose Elemental Type is the same as the equipping character, and Elemental Mastery is increased by 50 for every party member with a different Elemental Type. Each of the aforementioned buffs will count up to 3 characters. This effect can be triggered once every 8s. The character who equips this can still trigger its effects when not on the field.

Alhaitham's Stat Priority
Alhaitham's build should focus on Energy Recharge until you hit the requirement, and you should focus on getting at least 300 EM to be comfortable.

Recommended Stats for Alhaitham
Build recommendations assume a "decently built" level of artifact rolls alongside Alhaitham's best weapon. Using other weapons may increase or decrease certain stats relative to these recommendations.

Alhaitham's Talent Priority
Alhaitham's most important talents to level are his Elemental Skill since his Projection Attack DMG will scale with his Skill. His Normal Attack and Burst should also be leveled after that.

How to Play Alhaitham
Alhaitham's primary method of damage is his Dendro abilities, which are based upon stacking Chisel-Light Mirror. These Mirrors convert his damage to Dendro and are generated a multitude of ways:
- Four-Causal Correction: One of his passive, when Alhaitham's Charged or Plunging attacks hit
- Universality: An Elaboration on Form: Alhaitham's Elemental Skill
- Particular Field: Fetters of Phenomena: Alhaitham's Elemental Burst
Alhaitham can have up to 3 Mirrors on the field at the same time, and each has a 4s timer. If a fourth mirror is generated, it will just refresh the mirror with the shortest timer left. If Alhaitham is switched off-field, all mirrors will disappear.
When mirrors are active, Alhaitham's Normal, Charged, and Plunging Attacks are infused with Dendro. When you hit an enemy with one of those Dendro attacks, a projection attack will be triggered. These projection hit in the direction Alhaitham is facing, meaning that you have to face the enemies to make sure the projections hit.
The simple rotation for Alhaitham is the following:
- Use his teammates' abilities first before switching to Alhaitham.
- Create 3 Mirrors by holding his Elemental Skill and then directly using a Plunge Attack.
- Attack to proc as many Projections as possible.
Maximized Projection Attacks rotation:
- Particular Field: Fetters of Phenomena
- Wait for the Dendro Infusion
- 3x Abductive Reasoning for 3 Mirror Projections
- Universality: An Elaboration on Form
- 3x Abductive Reasoning for 3 more Projections
- Use a Charged Attack and Plunge Attack
- 3x Abductive Reasoning
The second rotation allows you to get more Projection Attacks, but it can be hard to master.

Alhaitham's Best Constellations
Alhaitham has very good constellations that will push him to become stronger, but he is good enough at C0 and will cause no issue. If you intend to invest, his C6 provides Alhaitham with a huge DPS boost, but if you only wish to put a little bit into him, getting his C1 and C2 are sufficient enough.

Alhaitham's Best Team Compositions
To learn all about Alhaitham's synergies and best team compositions, check our dedicated Alhaitham team page below:
Changelog
- 07 Apr. 2026: Updated build and teams.
- 20 Oct. 2025: Updated for Luna II.
- 30 Jul. 2025: Updated for 5.8.
- 17 Jun. 2025: Updated for 5.7.
- 06 May 2025: Updated for 5.6.
- 25 Mar. 2025: Updated for 5.5.
- 05 Feb. 2025: Build updated for 5.3.
- 18 Oct. 2024: Reviewed build for Updates 5.1.
- 04 Feb. 2024: Added Quick Bloom Team.
- 24 Jan. 2024: Fixed title of Hypercarry team section, which had been mistakenly renamed to Hyperbloom during a mass edit of our team comp titles.
- 29 Nov. 2023: Guide added.
In The Same Category

Written by Jaymo, a longtime gamer who spends way too many hours exploring open worlds, grinding in MMOs, and pulling for his favorite gacha characters. He covers news and guides for all kinds of games, and just likes helping people enjoy them more. You can find him hanging out on Twitch or chatting in Discord (jaym0).