Everbloom Dungeon Guide: Location, Boss Strategies, Trash, and Loot
Welcome to our guide to the Everbloom dungeon in Season 3 of the Dragonflight World of Warcraft expansion. This guide will cover everything you need to know about the dungeon, including how to get to it, its layout, the trash and boss mechanics within, and its loot.
Short Introduction
This guide will focus on an extensive overview of the dungeon, providing vital information to increase your chance of completing the key. We will cover all 4 boss fights supported by the most notable trash enemies in the dungeon and their important abilities. If you would like to learn about the rest of the dungeons in Mythic+, please see our overviews linked below.
Getting into The Everbloom
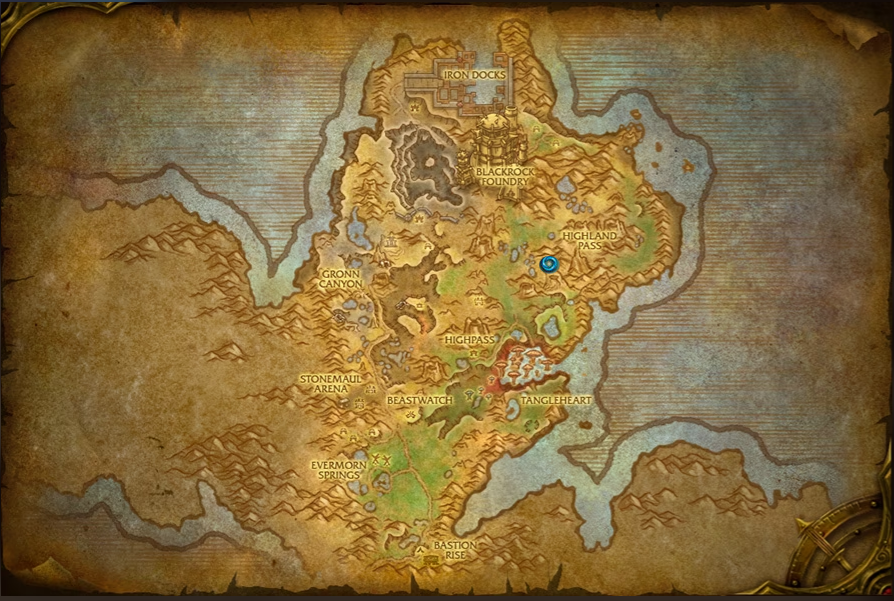
Everbloom is a max-level dungeon in Gorgrond, Draenor.
The dungeon is available in both ![]() Mythic and Mythic+ mode.
Mythic and Mythic+ mode.
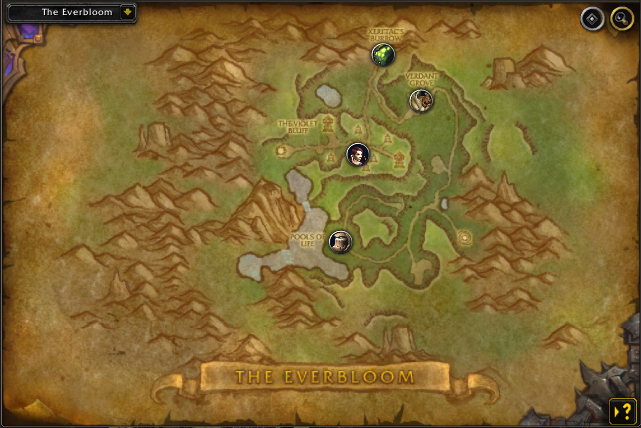
Everbloom Layout

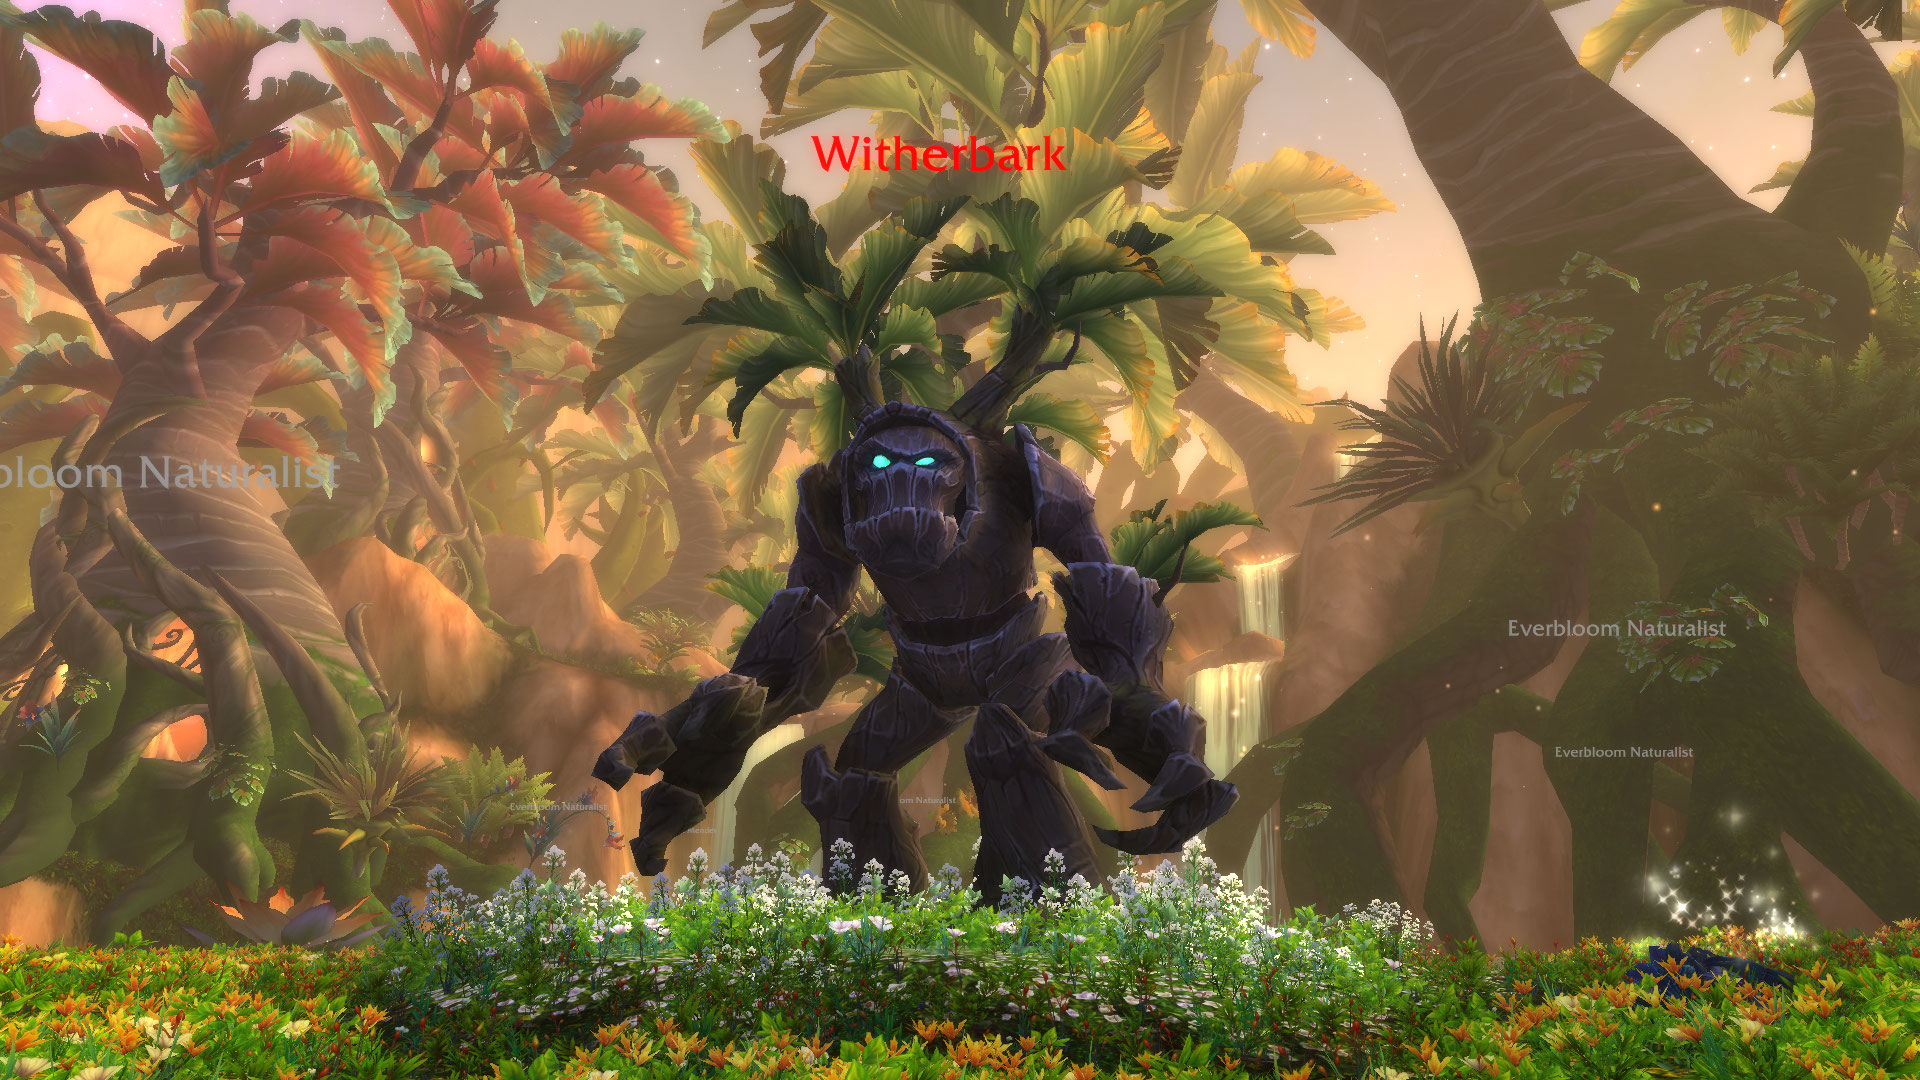
Witherbark
Notable Trash Before Witherbark
- Interrupt Everbloom Naturalist's
 Dancing Thorns
and stop the
Dancing Thorns
and stop the  Choking Vines channel at all costs.
 - Watch out for Rockspine Stinger's
 Venom Burst
 Poison effect. If you do have a Poison removal, here
is the perfect opportunity to use it.
Poison effect. If you do have a Poison removal, here
is the perfect opportunity to use it. - Any spare kicks should go towards Everbloom Tender's
 Enraged Growth buff. Alternatively, you can always use
Enrage dispel it.
Enraged Growth buff. Alternatively, you can always use
Enrage dispel it. - Dreadpetal will exclusive do tank damage with their
auto-attacks and
 Dreadpetal Pollen debuff effect.
Watch out if you are pulling several packs together; this can put the
life of your tank in danger.
Dreadpetal Pollen debuff effect.
Watch out if you are pulling several packs together; this can put the
life of your tank in danger. - When fighting Gnarlroot, make sure to focus and kill all Gnarled Roots in time before the mob casts Living Leaves , which will silence you. Alternatively, you can use any movement-speed immunity to get away from the root effect.
Witherbark Boss Guide
Witherbark has a minor intra-phase starting with ![]() Brittle Bark cast,
once the boss reaches a 100 Energy. During the intra-phase, the boss will
take a 100% more damage, until its energy is depleted by the Aqueous Globules
spheres (each of them takes 25 once it gets in contact with the boss). Your job
here is to maximize the
Brittle Bark cast,
once the boss reaches a 100 Energy. During the intra-phase, the boss will
take a 100% more damage, until its energy is depleted by the Aqueous Globules
spheres (each of them takes 25 once it gets in contact with the boss). Your job
here is to maximize the ![]() Brittle Bark phase by killing the incoming Aqueous Globules
or use the
Brittle Bark phase by killing the incoming Aqueous Globules
or use the ![]() Unchecked Growth and transform them into Unchecked Growth. More
information, down below:
Unchecked Growth and transform them into Unchecked Growth. More
information, down below:
All Roles
- Place any
 Unchecked Growth near the boss to prevent the Aqueous Globules
going into the Witherbark, so you can have longer
Unchecked Growth near the boss to prevent the Aqueous Globules
going into the Witherbark, so you can have longer  Brittle Bark.
 - Avoid getting hit by the
 Agitated Water ground animation.
Tank
- Position the boss near the room's edges to increase the travel time of each Aqueous Globules, which will give your group more time to kill them.
- Taunt any Unchecked Growth spawns to prevent them from meleeing your group.
Healer
- Beware of
 Aqueous Burst, which will trigger upon killing
Aqueous Globules.
Aqueous Burst, which will trigger upon killing
Aqueous Globules.
Ancient Protectors
Notable Trash Before Ancient Protectors
- Pay attention to Melded Berserker's
 Bounding Whirl
leap, since it will always target Ranged players and do instantanious
damage. In addition, they will instantaneously self-buff themselves with
Enrage, so if you do have Enrage dispel, here is the
perfect time to use it.
Bounding Whirl
leap, since it will always target Ranged players and do instantanious
damage. In addition, they will instantaneously self-buff themselves with
Enrage, so if you do have Enrage dispel, here is the
perfect time to use it. - Use defensive cooldowns during Twisted Abomination's
 Noxious Eruption
cast. The mob will also cast
Noxious Eruption
cast. The mob will also cast  Poisonous Claws to the highest threat
target (your tank).
Poisonous Claws to the highest threat
target (your tank). - Interrupt Everbloom Mender's
 Healing Waters. This is a priority-target
interrupt.
Healing Waters. This is a priority-target
interrupt.
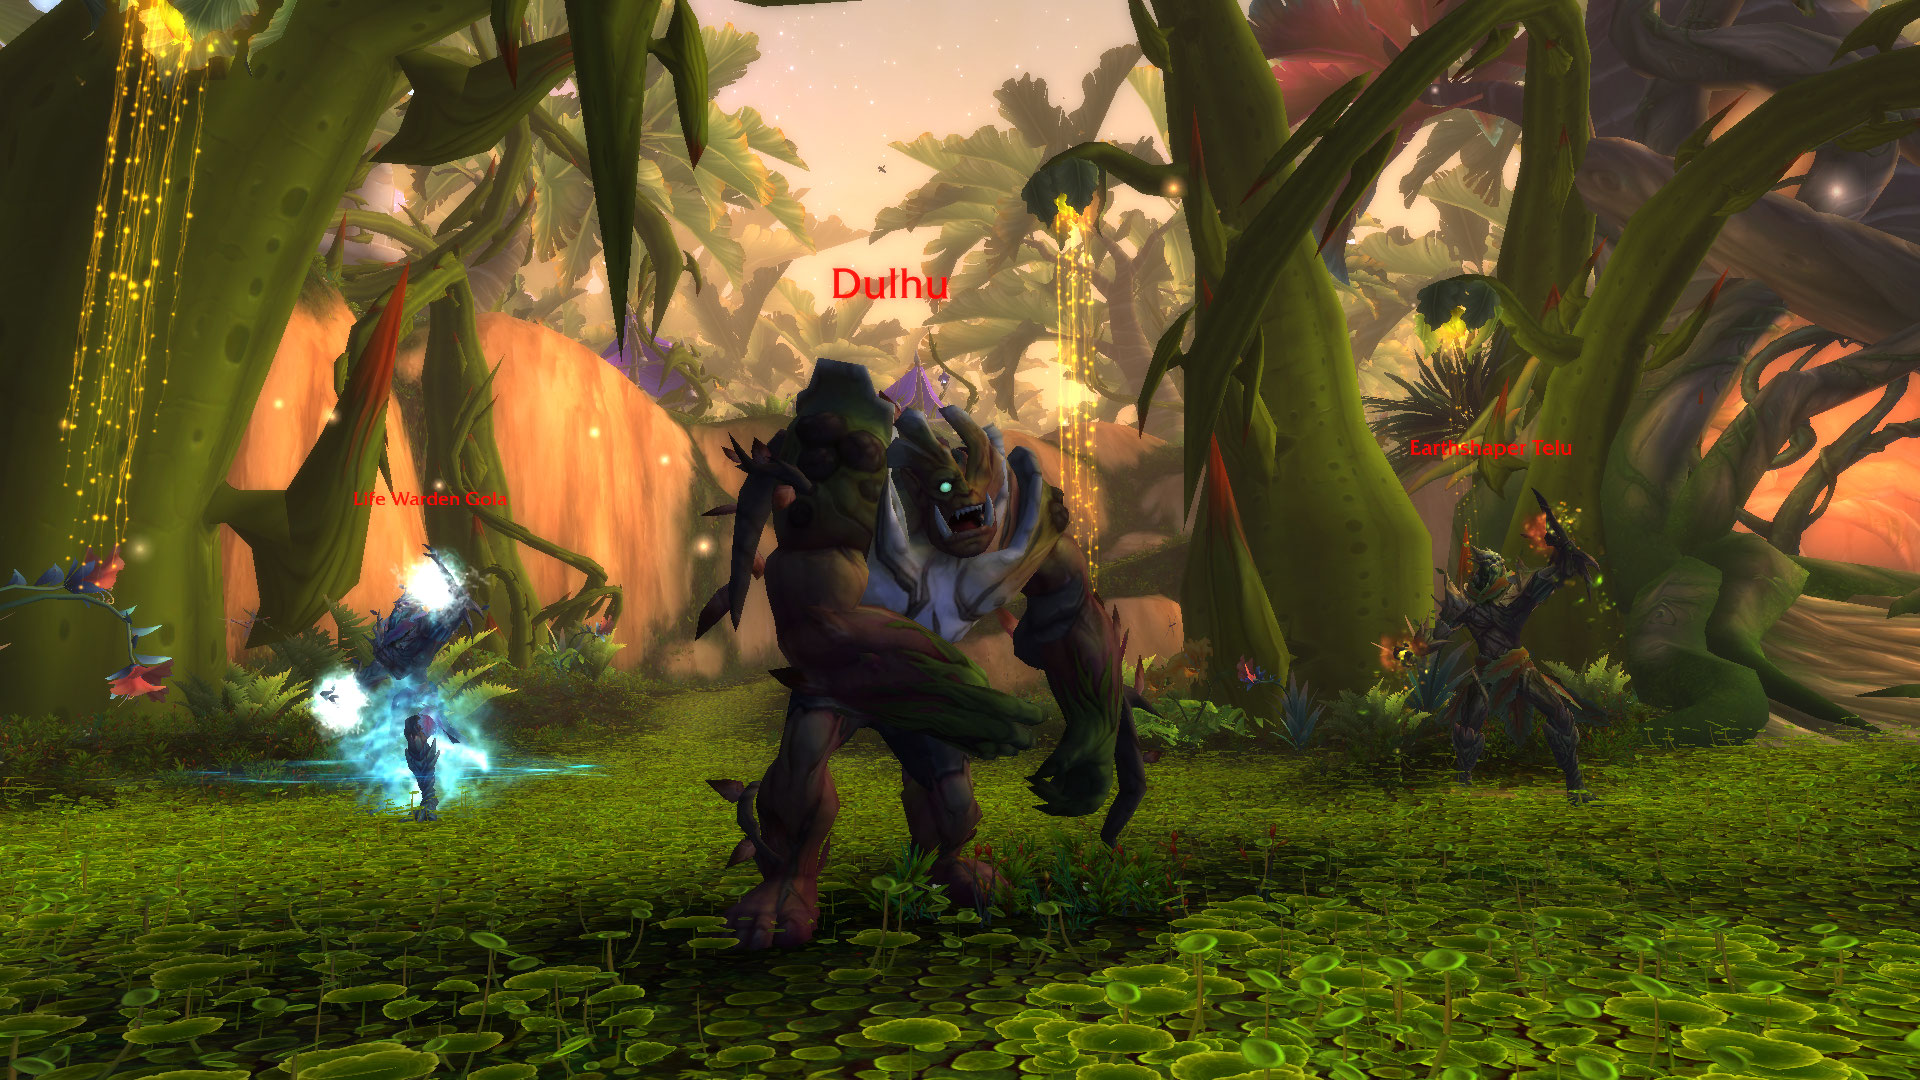
Ancient Protectors Boss Guide
Ancient Protectors is one of the triad bosses in Season 3, forcing you
to deal with 3 guardians simultaneously - Life Warden Gola, Earthshaper Telu
and Dulhu. The key point here is to swiftly nuke off the casters while
making sure to interrupt the 2 most important casts in the encounter
- ![]() Toxic Bloom /
Toxic Bloom / ![]() Revitalize (depending on which of the casters
is active) while dodging the incoming
Revitalize (depending on which of the casters
is active) while dodging the incoming ![]() Noxious Discharge ground pools
coming from Dulhu's
Noxious Discharge ground pools
coming from Dulhu's ![]() Noxious Charge. At last, use all of your
spare kicks on either
Noxious Charge. At last, use all of your
spare kicks on either ![]() Nature's Wrath /
Nature's Wrath / ![]() Water Bolt, depending
on which boss is active. More info, down below:
Water Bolt, depending
on which boss is active. More info, down below:
All Roles
- During the whole encounter, when one of the caster bosses is active, the
opposite one will enter
 Terrestrial Fury phase, dealing AoE damage
to everyone. Hence your goal is to kill one as quickly as possible.
Terrestrial Fury phase, dealing AoE damage
to everyone. Hence your goal is to kill one as quickly as possible. - Save your interrupts for important casts such as Earthshaper Telu/s
 Toxic Bloom (AoE stun the whole party) and Life Warden Gola's
 Revitalize (heals one of the bosses).
 - Any spare kicks should go for either
 Nature's Wrath or
  Water Bolt
casts.
Water Bolt
casts. - Dodge the
 Noxious Discharge after each of the Delhu's Noxious Charge
casts. Remember that those ground pools will stay on the ground, so you don't
want to let them be in melee (they spawn based on your location)
Noxious Discharge after each of the Delhu's Noxious Charge
casts. Remember that those ground pools will stay on the ground, so you don't
want to let them be in melee (they spawn based on your location)
Tank
Healer
Archmage Sol
Notable Trash Before Archmage Sol
- Hapless Assistant will exclusively do tank damage with
auto-attacks and
 Fungal Fist tank-buster ability.
 - Interrupt Addled Arcanomancer's
 Arcane Blast
and avoid getting hit by the
Arcane Blast
and avoid getting hit by the  Spatial Disruption.
 - Important mob: Interrupt Putrid Pyromancer's
 Pyroblast cast at all costs and use personal-defensive
cooldowns during
Pyroblast cast at all costs and use personal-defensive
cooldowns during  Cinderbolt Salvo.
 - Interrupt Infested Icecaller's
 Frostbolt
and avoid getting hit by the
Frostbolt
and avoid getting hit by the  Cold Fusion.
Archmage Sol Boss Guide
Archmage Sol is going to be the hardest boss in Everbloom, as
each of the 3 phases: Fire, Frost, and Arcane magic are extremely dangerous,
especially when paired together. The sequence of each phase is controlled by
![]() Unstable Affinity and
Unstable Affinity and ![]() Growing Infestation where you can at least
have a guarantee which phase will be in the next sequence (always the previous one)
but you have no idea which one is about to come. Fire Phase is the hardest
among all phases, and every time the boss casts
Growing Infestation where you can at least
have a guarantee which phase will be in the next sequence (always the previous one)
but you have no idea which one is about to come. Fire Phase is the hardest
among all phases, and every time the boss casts ![]() Cinderbolt Storm you must
use your personal defensives. During Frost Phase you must avoid the
Cinderbolt Storm you must
use your personal defensives. During Frost Phase you must avoid the
![]() Glacial Fusion and during Arcane Phase step away from the
incoming
Glacial Fusion and during Arcane Phase step away from the
incoming ![]() Spatial Compression arcane spiral and position the way that
you avoid any additional ground effects as the
Spatial Compression arcane spiral and position the way that
you avoid any additional ground effects as the ![]() Spatial Compression
will pull you towards it. More information down below:
Spatial Compression
will pull you towards it. More information down below:

All Roles
- Use personal-defensives during the Cinderbolt Storm in the Fire Phase
and move away from any
 Blazing Cinders located on the ground.
 - Avoid the incoming Glacial Fusion spheres as upon
contact they will stun you for 4 sec.
- Step as far away as possible from the incoming Spatial Compression
sphere as at the end of the cast, it will pull you towards it. The "pull-in"
Arcane effect can be especially punishing if there is Glacial Fusion or
Blazing Cinders are present.
Tank
- Relocate the boss if there are tons of Blazing Cinders around.
Healer
- Use your healing cooldowns during the Cinderbolt Storm in the
Fire Phase.
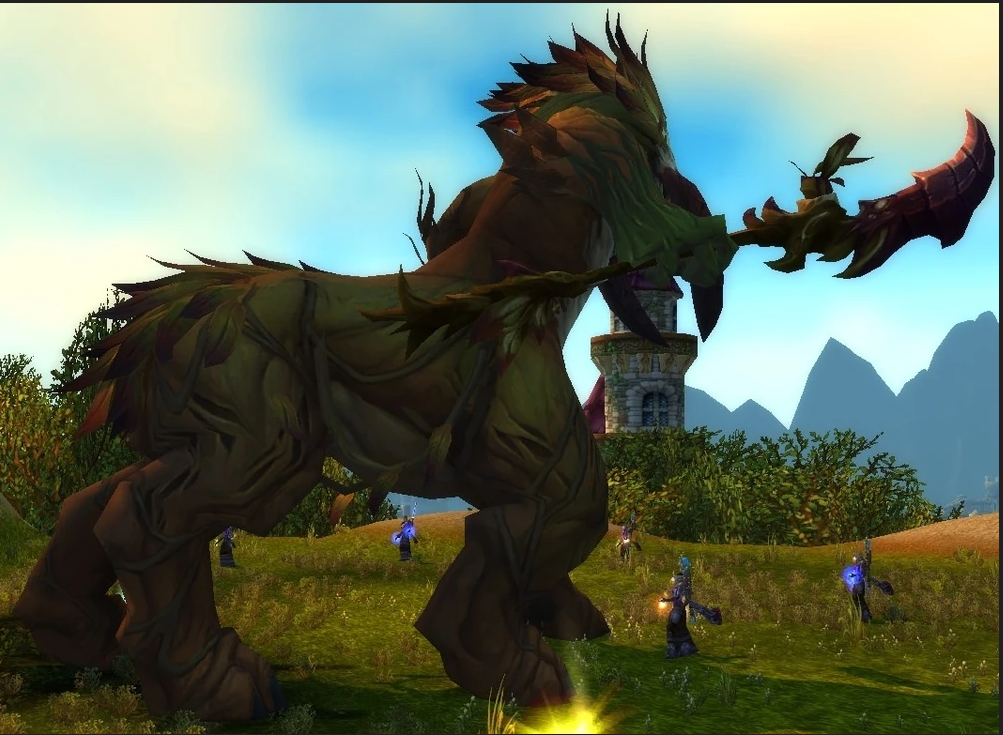
Yalnu Boss Guide
Yalnu boss fight is one of the easier fights in this dungeon if done correctly.
The boss consists of a main phase and inter-phase, which happens every time he casts
![]() Verdant Eruption spawning Flourishing Ancient. During that phase, it is
important to kill Flourishing Ancient as quickly as you can due to its
Verdant Eruption spawning Flourishing Ancient. During that phase, it is
important to kill Flourishing Ancient as quickly as you can due to its
![]() Vibrant Flourish pulsating AoE group-wide damage. Although Brushfire
will be present the entire fight, the Flourishing Ancient will cancel its
effect, hence why your focus should always be the add. At last, dodge the
incoming
Vibrant Flourish pulsating AoE group-wide damage. Although Brushfire
will be present the entire fight, the Flourishing Ancient will cancel its
effect, hence why your focus should always be the add. At last, dodge the
incoming ![]() Colossal Blow frontal (it goes on the tank) and walk over any
Feral Lasher seeds during
Colossal Blow frontal (it goes on the tank) and walk over any
Feral Lasher seeds during ![]() Genesis channel cast to prevent them
from spawning (if they spawn, they will cast
Genesis channel cast to prevent them
from spawning (if they spawn, they will cast ![]() Lasher Venom meaning you have to
allocate interrupts, stack and kill them. More information, down below:
Lasher Venom meaning you have to
allocate interrupts, stack and kill them. More information, down below:
All Roles
- Focus the Flourishing Ancient add coming from
 Verdant Eruption
cast at all costs. The quicker you defeat it, the quicker Brushfire
debuff will be present.
Verdant Eruption
cast at all costs. The quicker you defeat it, the quicker Brushfire
debuff will be present. - Sidestep the
 Colossal Blow if its aimed at your direction.
 - During Genesis channel, walk over any Feral Lasher's seeds
to prevent them from spawning.
Tank
- Aim the Colossal Blow away from your group.
- If any Feral Lashers at the end of the Genesis
channel, group them up under the boss so can allow your group
to effectively cleave.
Healer
- Use your major healing cooldowns during the Flourishing Ancient
add, as they will pulsate a group-wide AoE damage -
 Vibrant Flourish.
The Everbloom Loot Table
Witherbark
| Type | Item | Stats |
|---|---|---|
| Crossbow | Mastery/Vers | |
| Leather Hands | Crit/Vers | |
| Trinket | Agi |
Ancient Protectors
| Type | Item | Stats |
|---|---|---|
| Off-Hand | Haste/Mastery | |
| Cloth Waist | Crit/Haste | |
| Plate Waist | Crit/Mastery | |
| Cloth Legs | Crit/Mastery | |
| Mail Legs | Haste/Mastery | |
| Trinket | Mastery |
Archmage Sol
| Type | Item | Stats |
|---|---|---|
| Staff | Haste/Vers | |
| Leather Head | Vers/Haste | |
| Mail Head | Haste/Mastery | |
| Plate Head | Crit/Mastery | |
| Cloth Wrist | Mastery/Vers | |
| Plate Wrist | Crit/Haste | |
| Trinket | Str |
Yalnu
| Type | Item | Stats |
|---|---|---|
| 1H Mace | Mastery/Vers | |
| Shield | Haste/Crit | |
| Cloth Shoulder | Crit/Mastery | |
| Leather Shoulder | Mastery/Vers | |
| Mail Shoulder | Crit/Haste | |
| Leather Chest | Haste/Mastery | |
| Plate Boots | Haste/Vers | |
| Trinket | Int | |
| Trinket | Stamina |
The Everbloom Achievements
There are 6 total achievements to obtain in The Everbloom:
| Achievement | Criteria |
|---|---|
| Defeat Yalnu in The Everbloom. | |
| Defeat Yalnu in The Everbloom on
|
|
| Defeat Yalnu in The Everbloom on
|
|
| Complete The Everbloom at |
|
| Defeat Witherbark without allowing him to replenish any
of his Aqueous Energy in The Everbloom on
|
|
| Defeat Yalnu without any Kirin Tor Battle-Mages
dying in The Everbloom on |
Changelog
- 19 Mar. 2024: No further changes required for 10.2.6 Patch.
- 15 Jan. 2024: No further changes required for 10.2.5 Patch.
- 06 Nov. 2023: Guide added.
This guide has been written by Petko, one of the top M+ players of all time. He has accomplished several Europe and World #1 Team and Solo Seasonal rankings with multiple specialization and classes throughout the seasons. Moreover, he competes in MDI and streams his runs live on Twitch and and share his personal opinion on YouTube and Twitter.
- Mage Class Changes in War Within Alpha Build 54361
- Mythic+ Dungeon Adjustments: April 26th
- Savage Ebony Turtle Mount in Patch 10.2.7
- Earthen Allied Race Dances and Customization Options
- Warband Members in Follower Dungeons?
- Dragonflight 10.2.6 and SoD Hotfixes, April 25th
- Affliction Warlock Changes in War Within Alpha: April 25th
- Windwalker Monk Changes in War Within Alpha: April 25th