

Dragon Soul Trash Guide (WoD 6.1.2)

Introduction
This guide is meant to provide you with all the information required for defeating the various trash mobs that you will encounter in the Dragon Soul raid.
All of the trash packs are linked to a specific boss and your raid group will need to defeat them before being able to fight the boss. The last three encounters have no trash associated to them.
For the purpose of keeping this guide as a simple and dynamic reference, we will not go into too many details.
We highly recommend using 2 tanks for all the trash packs present in this raid instance. It may be possible to defeat some (or all) of them with a single tank, but this is needlessly difficult.
Trash Loot
All the items dropped by trash in Dragon Soul are Bind on Equip and have an item level of 397. Note that the trash drops no loot in LFR difficulty.
Armor
| Item Name | Armor | Slot | Main Stats |
|---|---|---|---|
| Sash of Relentless Truth | Cloth | Waist | Intellect |
| Nightblind Cinch | Leather | Waist | Agility |
| Girdle of Fungal Dreams | Leather | Waist | Intellect/Spirit |
| Dragoncarver Belt | Waist | Agility | |
| Belt of Ghostly Graces | Waist | Intellect/Spirit | |
| Girdle of Soulful Mending | Plate | Waist | Intellect/Spirit |
| Waistguard of Bleeding Bone | Plate | Waist | Strength |
| Waistplate of the Desecrated Future | Plate | Waist | Strength/Parry |
Weapons
| Item Name | Type | Main Stats |
|---|---|---|
| Ruinblaster Shotgun | Gun | Agility |
| Dragonfire Orb | Off-hand Frill | Intellect |
| Spine of the Thousand Cuts | 2.6 Main Hand Sword | Agility |
Morchok Trash
The trash before Morchok is comprised of three packs of elementals. For simplicity, we will treat each pack separately.
First Pack
- 1 Ancient Water Lord:
- deals frontal cone damage with
 Flood; this should be avoided (sometimes, they face a random
raid member when channeling the spell);
Flood; this should be avoided (sometimes, they face a random
raid member when channeling the spell); - casts
 Pure Water, which places beneficial void on the ground.
- deals frontal cone damage with
- 1 Earthen Destroyer:
- deals proximity damage with
 Dust Storm that can be avoided by standing in
Pure Water (see above);
Dust Storm that can be avoided by standing in
Pure Water (see above); - casts
 Boulder Smash, which throws rocks at the location of random players, stunning everyone
in the area where they land; this should be avoided and the stun can be
dispelled.
Boulder Smash, which throws rocks at the location of random players, stunning everyone
in the area where they land; this should be avoided and the stun can be
dispelled.
- deals proximity damage with
Kill the Earthen Destroyer first, then the Ancient Water Lord.
Second Pack
- 2 Earthen Soldiers: they have an energy bar that increases each time
they cast
 Twilight Corruption (interruptible). When the energy bar of an Earthen
Soldier reaches 100 energy, it empties and the Earthen Soldier is buffed with
a 25% increase to damage done, which stacks.
Twilight Corruption (interruptible). When the energy bar of an Earthen
Soldier reaches 100 energy, it empties and the Earthen Soldier is buffed with
a 25% increase to damage done, which stacks. - 1 Earthen Destroyer that behaves exactly as in the previous pack.
It appears currently that only one of the two Soldiers spams ![]() Twilight Corruption,
so that one should be killed first. After that, kill the other Soldier before
finally killing the Destroyer.
Twilight Corruption,
so that one should be killed first. After that, kill the other Soldier before
finally killing the Destroyer.
Third Pack
Deal with this pack in the same way you did with the first trash pack.
Yor'sahj Trash
Yor'sahj's trash consists of a number of patrolling packs of globules or oozes. These adds carry many of the same characteristics as the oozes during the Yor'sahj encounter do. Below, we present you with a kill priority as well as a few tips.
The most damaging/annoying oozes, in order, are:
- Cobalt Globule (Mana leech);
- Shadowed Globule (
 Deep Corruption);
 - Glowing Globule (raid damage).
Past this point, it does not really matter which of the globules you kill, as their abilities are not very dangerous.
While it was not the case on the PTR, it is possible that the Acidic Globule may deal AoE damage to players if they are within 6 yards of each other, requiring your raid to spread out (in which case, this ooze gains a higher priority).
Zon'ozz Trash
The encounter with Warlord Zon'ozz is preceded by several identical packs of Old God tentacles comprised of 1 Claw of Go'rath, 1 Eye of Go'rath, and 3 Flails of Go'rath. This trash can easily wipe a group within seconds if not dealt with properly. Follow these steps:
- Have both tanks on the Claw of Go'rath. This add deals melee damage to
its current target and needs to always be melee attacked, as otherwise it
will quickly wipe your raid with
 Ooze Spit. Both tanks are required on
this add as it often knocks its current target 50 yards back with
Ooze Spit. Both tanks are required on
this add as it often knocks its current target 50 yards back with
 Tentacle Toss.
 - Kill the Flails of Go'rath first, as they deal proximity damage
with
 Wild Flail and heavy single-target damage with Sludge Spew.
 - Kill the Eye of Go'rath and finish off the Claw of Go'rath.
Hagara Trash
The trash before Hagara the Stormbinder is comprised of 4 waves of mobs and an elite mob. None of the waves are overly difficult, as long as you keep a few things in mind.
First Wave
The first wave is made up of 2 Twilight Frost Evokers and 2 Stormborn Myrmidons.
- Spread out to avoid the damage from
 Chain Lightning, cast by the
Stormborn Myrmidons.
Chain Lightning, cast by the
Stormborn Myrmidons. - Do not stand in
 Blizzard, the ground AoE cast by the Twilight Frost Evokers.
- Dispel
 Shackles of Ice, the root that Twilight Frost Evokers cast on players.
 - Kill the Twilight Frost Evokers first.
Second Wave
The second wave is made up of 6 Corrupted Fragments and 1 Stormbinder Adept.
- Kill the Stormbinder Adepts first.
- AoE down the Corrupted Fragments.
Third Wave
The third wave consists of 2 groups that spawn at the same time. Each group is made up of 1 Twilight Frost Evoker, 1 Stormbinder Adept, and 1 Stormborn Myrmidon.
- Kill the two Stormbinder Adepts;
- Kill the two Twilight Frost Evokers;
- Kill the two Stormborn Myrmidons.
Fourth Wave
The fourth wave is made up of 10 Corrupted Fragments that you need to AoE down.
Lieutenant Shara
Lieutenant Shara is the final mob you will have to face before reaching Hagara.
- She stacks
 Shatter on the tank. This debuff reduces armor.
 - She places
 Frost Corruption, a magic debuff, on random players. This
debuff deals Frost damage and can be dispelled.
Frost Corruption, a magic debuff, on random players. This
debuff deals Frost damage and can be dispelled. - She deals some random raid damage.
You should aim to pull this mob and kill her close to the edge of the platform (and have the entire raid move there), as Hagara the Stormbinder will spawn in the center of the platform as soon as Lieutenant Shara dies, and she can easily be pulled by mistake.
Ultraxion Trash
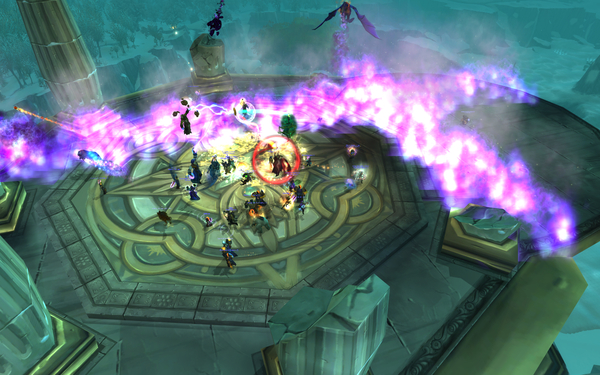 After reaching the Wyrmrest Temple summit and talking to Thrall, an event
will begin, which acts as the trash before Ultraxion,
the 5th boss of the instance.
After reaching the Wyrmrest Temple summit and talking to Thrall, an event
will begin, which acts as the trash before Ultraxion,
the 5th boss of the instance.
Essentially, the entire platform will come under siege from a swarm of Twilight Drakes. The following things are worth noting:
- Tanks should taunt the Drakes in order to have them come down in melee range and be attackable. Other classes with taunts can do the same, to speed up the process.
- The Drakes have breath attacks (not very damaging) and occasionally also leave very damaging lines of fire on the ground, that everyone should move out of immediately.
- The event takes a very long time to complete, so be prepared.
Blackhorn and Deathwing Trash
The encounter with Warmaster Blackhorn and the two encounters with Deathwing (Spine of Deathwing and Madness of Deathwing) are not preceded by trash.
Conclusions
This concludes the trash guide for the Dragon Soul raid instance. It is quite possible that the mechanics of a lot of these mobs will be updated or changed altogether for live release, and we will update this guide accordingly if this is the case.