Dire Maul East Dungeon Guide
Dire Maul is split into three wings, with all of them being recommended for players above Level 55.
The East wing of Dire Maul is full of satyrs and demons that have warped the natural inhabitants of the zone at the behest of their leader, Alzzin the Wildshaper.
Phase 4 Season of Discovery Loot in Dire Maul East
With Phase 4 of Season of Discovery, new loot has been added into Dire Maul East to help players prepare for raiding. Below you can find a full list of all of the new loot and each boss they drop from.
Lethtendris
| Item |
|---|
Hydrospawn
| Item |
|---|
Zevrim Thornhoof
| Item |
|---|
Alzzin the Wildshaper
| Item |
|---|
Entrance Location and Main Goals
You can enter Dire Maul East through the main Dire Maul entrance around 59,45 in Feralas. Watch this short video, by Bue to understand how to proceed from there.
There are three main reasons to do this dungeon:
- In order to get
 Crescent Key from Pusillin, which is required
to open the West, and
North wings, respectively.
Crescent Key from Pusillin, which is required
to open the West, and
North wings, respectively. - For quick boss and Rich Thorium Vein farming from the tunnel after the final boss, Alzzin the Wildshaper, through jump runs, which we will explain below.
- Solo farming Whip Lashers, for loot or experience.
Dire Maul East Quests
Make sure to get all the quests related to Dire Maul East before going in. To make this process easier, we have written a separate guide.
Layout of Dire Maul East
Dire Maul East is non-linear and there are several paths you can take, depending on what your goal is.
If you want to get ![]() Crescent Key from Pusillin, make sure to
talk to him at the very start of the dungeon, by taking a quick left turn. As he
will run (and keep running whenever you talk to him after that), just carefully
pull the enemies on your way to wherever he ran to, until you fight him after going
up a small ramp. You can quickly exit the dungeon from this point to turn Pusillin and the Elder Azj'Tordin,
if you wish.
Crescent Key from Pusillin, make sure to
talk to him at the very start of the dungeon, by taking a quick left turn. As he
will run (and keep running whenever you talk to him after that), just carefully
pull the enemies on your way to wherever he ran to, until you fight him after going
up a small ramp. You can quickly exit the dungeon from this point to turn Pusillin and the Elder Azj'Tordin,
if you wish.
By going back up the ramp you came from and entering the room you skipped while chasing Pusillin, you will find yourself in a new room with a ramp leading upwards, to Lethtendris.
Take her down, if you wish, and go down through a tunnel near the bottom of the ramp, which leads to Hydrospawn in the pool of water to your left in the new room, and to Zevrim Thornhoof if you head into the tunnel you can reach by only moving forward when you enter the room. Kill them both, and drop down into the pool area, where you can finally exit the room by taking a tunnel into a large, open area, with Ironbark the Redeemed (who is Old Ironbark instead, if you haven't killed Zevrim yet) in the middle.
At this point, if you killed Zevrim Thornhoof, you can ask Ironbark the Redeemed to open the door to the final boss for you. Simply head through, and move down carefully on top of the ledge surrounding the boss area, to avoid pulling any extra trash. At the bottom of it you will have plenty of space to pull all of the small plant packs around the boss, to avoid having them aggro later in the fight, and to finish off the boss, at which point you can exit the dungeon quickly through the tunnel he opens during the fight, which contains huge Mining goodies!
Notable Trash in Dire Maul East
The main thing to take into account in this dungeon are the stealthed Wildspawn Satyr, which can often catch your group at a bad time, so make sure to pull carefully.
Whip Lashers are notoriously easy enemies to kill, even for a solo or under leveled player, and they can grant decent gold and experience over a long farming period.
A lot of the Tree enemies later on can heal themselves and their allies so make sure to have your interrupts and crowd control abilities ready!
Finally, remember that trash can respawn in this dungeon, and there is a lot of ground to cover, so make sure to keep a good pulling pace.
Bosses in Dire Maul East
There are 6 bosses in Dire Maul East, with several being optional and one (Isalien) being part of the Tier 0.5 questline, which allows you to upgrade your blue dungeon set items.
Pusillin
-
 Blast Wave
 Fire Blast
 Fireball
 Spirit of Runn Tum
Pusillin, while unremarkable by himself, comes alongside four Wildspawn Imp bodyguards which could overwhelm your group if you are not expecting them. Make sure to keep him interrupted and use area of effect attacks to quickly take care of the imps.
Notable Loot from Pusillin
![]() Crescent Key and
Crescent Key and ![]() Recipe: Runn Tum Tuber Surprise are the only
notable loots from this boss. Make sure to do him at least once for the key!
Recipe: Runn Tum Tuber Surprise are the only
notable loots from this boss. Make sure to do him at least once for the key!
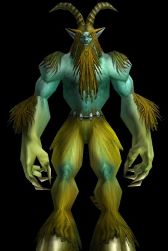
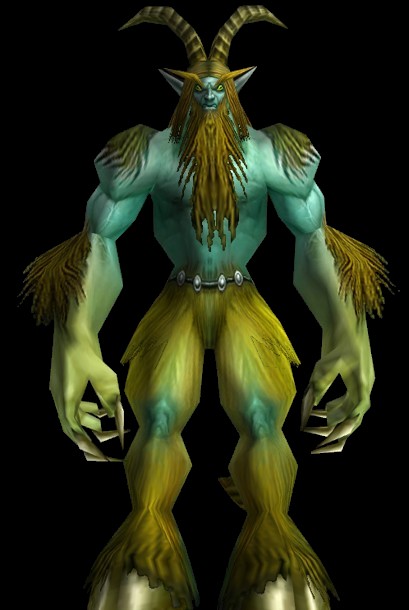
Lethtendris
-

 Curse of Thorns
 Curse of Tongues
 Enlarge
 Immolate
 Shadow Bolt Volley
- Void Bolt
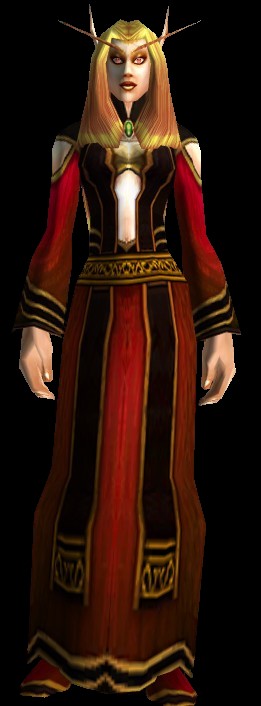
Lethtendris has an imp companion, Pimgib, which you will
want to either crowd control or kill first. Keep her interrupted and remove her
![]() Curse of Tongues, if you can.
Curse of Tongues, if you can.
Notable Loot from Lethtendris
| Item | Required Level | Slot |
|---|---|---|
| 53 | Ring | |
| 53 | Wand | |
| 53 | Head | |
| 53 | Staff |
Hydrospawn
-
 Hydrojet
 Massive Geyser
 Riptide
 Submersion
- Summon Hydroling
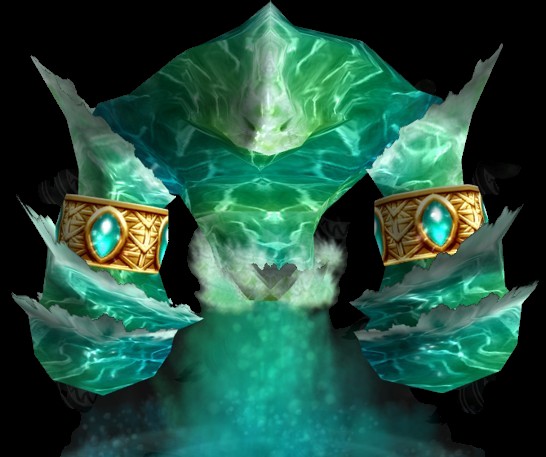
Hydrospawn patrols the water pool in the middle of the dungeon and spawns Hydroling adds once engaged. Deal with these swiftly (or quickly burn down Hydrospawn himself), and you will soon be looting his dried up corpse.
Notable Loot from Hydrospawn
| Item | Required Level | Slot |
|---|---|---|
| 53 | Legs | |
| 53 | Boots | |
| 53 | Boots | |
| 53 | Neck | |
| 53 | 2H Axe |
Zevrim Thornhoof
-

 Intense Pain
 Sacrifice
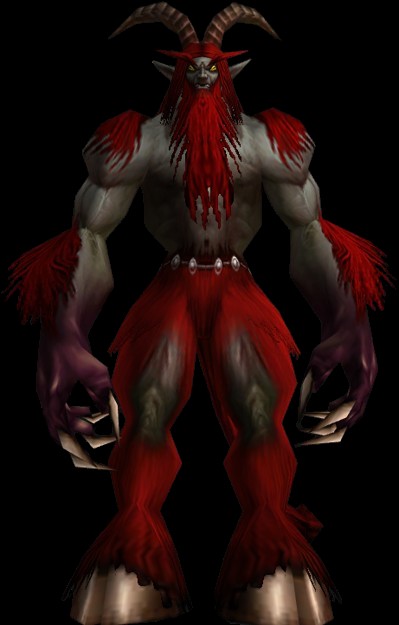
Zevrim Thornhoof has a very dangerous ability in ![]() Sacrifice,
which will both take one of your party members out of the fight, and deal heavy
damage over time, which should quickly be healed through.
Sacrifice,
which will both take one of your party members out of the fight, and deal heavy
damage over time, which should quickly be healed through.
Alongside ![]() Intense Pain, this can quickly become unhealable damage for
your healer, so make sure to stand at maximum range, if at all possible, in order
to dodge its damage over time effect.
Intense Pain, this can quickly become unhealable damage for
your healer, so make sure to stand at maximum range, if at all possible, in order
to dodge its damage over time effect.
Notable Loot from Zevrim Thornhoof
| Item | Required Level | Slot |
|---|---|---|
| 53 | Hands | |
| 53 | Head | |
| 53 | Head | |
| 53 | Head | |
| 53 | Bow |
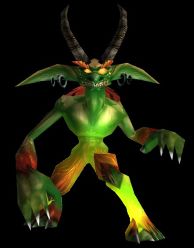
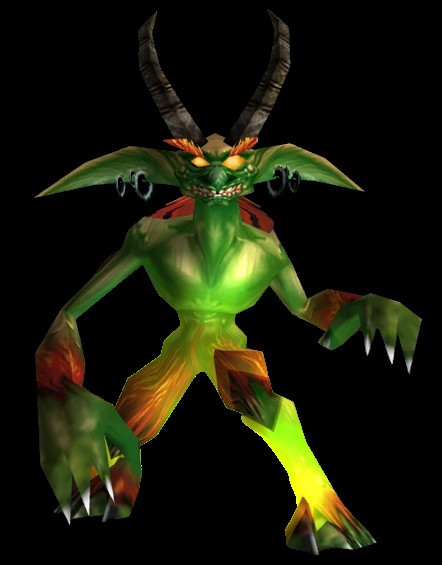
Alzzin the Wildshaper
-
 Satyr Form
 Enervate
 Thorns
 Wither
- Bear Form
- Disarm
 Knock Away
 Wild Regeneration
- Dire Wolf Form
 Dire Wolf Form
 Mangle
 Vicious Bite
Alzzin the Wildshaper is the final boss of Dire Maul East, and also the hardest. He can heal himself while in his Tree form, and will deal massive damage to the tank through his damage over time and bleed effects, so make sure to be ready with heals!
Finally, once he hits low health, waves of imps will come, which should be killed with area of effect attacks while finishing the boss. Go through the tunnel from where the imps came to find a shortcut out of the dungeon, and a lot of Thorium Veins!
Notable Loot from Alzzin the Wildshaper
| Item | Required Level | Slot |
|---|---|---|
| 54 | Back | |
| 54 | Chest | |
| 54 | Waist | |
| 54 | Boots | |
| 54 | Hands | |
| 54 | Hands | |
| 54 | Ring | |
| 54 | Ring | |
| 54 | 1H Sword | |
| 54 | 1H Mace |
Isalien
-

 Call Pet
 Multi-Shot
 Net
Net Regrowth
 Vengeance

Isalien is a boss that can be fought once you acquire the ![]() Brazier of Beckoning,
which is part of the Tier 0.5 questline. She can be summoned in the place Alzzin the Wildshaper
is usually standing, and is a relatively simple boss to fight.
Brazier of Beckoning,
which is part of the Tier 0.5 questline. She can be summoned in the place Alzzin the Wildshaper
is usually standing, and is a relatively simple boss to fight.
Take down the add she summons and kick as many of her casts as possible. Once she starts losing health she will start to try and heal herself. You must interrupt this, or she will heal to full. As long as her heals are disabled (you can also eventually win by wasting or burning away her Mana but it will take longer), she is not much of a threat.
You can get some of the new relic items for Shamans and Paladins from her.
Notable Loot from Isalien
| Item | Required Level | Slot |
|---|---|---|
| 57 | Relic | |
| 57 | Relic | |
| 56 | Boots | |
| 56 | Hands | |
| 56 | 1H Mace | |
| 56 | Polearm |
Dire Maul East Jump Runs (can be 2 manned)
Jump Runs are great for quickly killing Dire Maul bosses. This allows a coordinated
group to quickly farm librams and books, which a lot of classes need for their best
in slot enchants and trinkets, and for ![]() Quel'Serrar. It will also provide
for relatively quick access to the Rich Thorium Veins at the end of the dungeon,
further increasing your income.
Quel'Serrar. It will also provide
for relatively quick access to the Rich Thorium Veins at the end of the dungeon,
further increasing your income.
In order to perform this run, simply jump down to the open area with Old Ironbark right at the start of the dungeon. Proceed backwards through the dungeon to the water pool area with Hydrospawn and Zevrim Thornhoof and take both of them down in quick succession. If you are two manning the run, make sure to tank him in a position that allows your healer to line of the sight the boss while keeping sight of the tank player, as shown here by Holypalaswe.
Once Zevrim Thornhoof is down, you can simply back track to Old Ironbark, who will now be able to open the door to the last boss. Kill him and mine everything in the cave, and you will have completed your run successfully. Reset and repeat as many times as you wish!
Dire Maul East Mage Solo Farming
Mages can easily solo much of this dungeon quickly for gold, mostly in the form of many herb spawns and librams If you are not a herbalist, you will not benefit nearly as much from doing this farm, so beware!
The idea is simply to drop down at the start as if you were doing a jump run, and from then pull and kill all of the Whip Lasher packs around the area, while picking up any books on the ground and herb spawns, as displayed in this video by Timira.
Because you will likely do the runs too fast, and thus get locked out, you can also farm Hydrospawn and the Satyrs and Imps around his room, as displayed once again by Timira in this video.
The main thing to keep in mind with this farm is that you need quite a bit of Stamina and Intellect in order to make it through unscathed. Try to farm and / or buy pieces with these stats, such as Scholomance's Necropile Raiment and green gear of the Eagle. Check our Mage AoE Grinding best in slot list for all the details!
Once you have mastered the strategies detailed thus far, try out this more advanced strategy, by Arlaeus, which should increase your gold income, once you learn how to pull it off consistently.
Quick Dungeon Reset Method for WoW Classic
The quickest way to reset a dungeon in WoW Classic, for speed farming, is to convert the group to a raid, invite someone from outside the party and have them be the leader, so they can reset the dungeon while everyone who was inside is logged off of their characters (otherwise you will simply get an error and the dungeon will not be reset). Once reset, people who log back in to their characters will find themselves back at the entrance!
Recommended Classes for Dire Maul east
If you are going in before level 60, Warlocks / Hunters
are great for ![]() Banish /
Banish / ![]() Freezing Trap against the many Demons
and Elementals present in the dungeon.
Freezing Trap against the many Demons
and Elementals present in the dungeon.
Any class / group composition will do, otherwise, just make sure you have at
least one miner in your group, otherwise the juicy ![]() Arcane Crystals
potentially waiting for you at the end of the dungeon will end up wasted.
Arcane Crystals
potentially waiting for you at the end of the dungeon will end up wasted.
Changelog
- 18 Nov. 2024: Page updated for Classic Anniversary.
- 09 Jul. 2024: Added section for new loot in Phase 4 of Season of Discovery.
- 05 Apr. 2024: Added boss pictures and abilities.
- 24 Jul. 2020: Added Isalien, a new boss accessible through the Tier 0.5 questline.
- 04 Nov. 2019: Elaborated on Jump Runs with an example video and added information on solo Mage AoE Grinding.
- 15 Oct. 2019: Page added.
This guide has been written by Abide, TBC veteran for nearly a decade. Abide is a Warrior tank and multi-class expert currently playing on Faerlina as Horde. You can find him in the the Icy Veins Discord. You can also see him live on Twitch.
- Burning Crusade Classic Phase 2 Now Live: Here’s What to Expect
- Did Blizzard Just Quietly Invite Creators to Play WoW Classic’s Next Chapter?
- WoW Weekly Returns: Patch 12.0.5, Twitch Drops & Classic Updates
- WoW BCC Anniversary Edition: Overlords of Outland – Everything Coming May 14
- Battleground Honor Significantly Increased
- Limited-Time Mount Alert: Get the Voidfeather Dragonhawk for TBC Classic Servers Now!
- Could WoW Be Added to Xbox Game Pass Ultimate?
- MoP Classic Escalation PTR Update Details New Content