Zul'Farrak Dungeon Guide
Zul'Farrak is a Troll dungeon in Tanaris that has a linear layout early on, followed by an open circular hub which can be cleared in any order. If you are only doing Zul'Farrak Graveyard Zombie Runs for experience farm, you can start from level 41 the earliest, with Level 44 being recommended for a full quest run. You will gain great experience from this dungeon until level 49, at which point you should look to move on. Zombie runs take around 25 minutes each, while a full quest run should take about an hour.
This dungeon houses the Sandfury Troll tribe leaders and represents their seat of power in Tanaris. By fighting through, you will be able to rescue, and possibly also fight, a party of captured adventurers in one of WoW Classic's first scripted events. Finally, you can also find, summon and kill their sacred hydra, Gahz'rilla, by using the Mallet of Zul'farrak at a gong near its nesting pool.
Season of Discovery Loot in Zul'Farrak
With Phase 3 of Season of Discovery, new loot has been added to Zul'Farrak to help players better prepare for raiding. Below you can find a full list of all of the new loot and each boss they drop from.
Zerillis (Rare)
| Item | Required Level | Slot |
|---|---|---|
| 42 | Leather Boots |
Antu'sul
| Item | Required Level | Slot |
|---|---|---|
| 43 | Neck |
Witch Doctor Zum'rah
| Item | Required Level | Slot |
|---|---|---|
| 42 | Gloves |
Shadowpriest Sezz'ziz & Nekrum Gutchewer
| Item | Required Level | Slot |
|---|---|---|
| 44 | Legs | |
| 44 | Chest |
Chief Ukorz Sandscalp
| Item | Required Level | Slot |
|---|---|---|
| 45 | Head | |
| 45 | Shoulders |
Gahz'Rilla
| Item | Required Level | Slot |
|---|---|---|
| 43 | Chest | |
| 42 | Weapon |
Lastly, while ![]() Sang'thraze the Deflector and
Sang'thraze the Deflector and
![]() Jang'thraze the Protector have not been upgraded in Season of Discovery,
their combined weapon
Jang'thraze the Protector have not been upgraded in Season of Discovery,
their combined weapon ![]() Sul'thraze the Lasher has received a large
stat boost.
Sul'thraze the Lasher has received a large
stat boost.
Entrance Location
The entrance to Zul'Farrak is located in 39,18 Tanaris, to the west of Gadgetzan and in the northwest of the Tanaris map, overall.
Quests in Zul'Farrak
It is important that you pick up the dungeon quests for this instance before heading inside, as you can get a variety of loot from them, as well as a solid chunk of experience.
The quests are all outlined in our separate dungeon quest guide for this instance.
Layout of Zul'Farrak
Zul'Farrak begins as a very linear dungeon and you will be forced to follow the path laid out for you until you reach a plaza, where the circular part of the dungeon begins.
Whether you go left or right, you will eventually arrive at this plaza once you complete the circular path of the dungeon. From here on, paths fork:
- Heading through the left side of the plaza will allow you to quickly
reach Gahz'rilla, which can be summoned if
you have the
 Mallet of Zul'Farrak, and Hydromancer Velratha.
 - Heading through the right side of the plaza will allow you to quickly reach Theka the Martyr, Antu'sul and Witch Doctor Zum'rah.
Whichever way you follow, you will eventually arrive at a Pyramid, where a party of captured adventurers, led by Sergeant Bly, awaits their execution. Free them in an epic event, and make sure to NOT go too far down the Pyramid to avoid aggroing 50+ mobs at once and wiping.
Once his party is saved, you should first talk to Weegli Blastfuse, the goblin of Bly's party, and ask him to open the doors to the Sandfury Leader, Chief Ukorz Sandscalp.
Afterwards, you can ask Bly for the ![]() Divino-matic Rod, if you need
it for the quest, upon which he and any remaining members of his party will aggro.
If you are not confident on being able to tackle them on, wait until they start
Hearthstoning out before talking with Bly, upon which only he will attack.
Divino-matic Rod, if you need
it for the quest, upon which he and any remaining members of his party will aggro.
If you are not confident on being able to tackle them on, wait until they start
Hearthstoning out before talking with Bly, upon which only he will attack.
Finish up the dungeon by killing any remaining bosses / trash you wish, before zoning out.
Notable Trash in Zul'Farrak
Before you reach the central plaza section, try to pull 3 or less enemies at a time, unless you have a well leveled and geared group. There are two especially nasty elites to watch out for in this phase:
- Sandfury Blood Drinkers are very dangerous, as they have high health, armor and melee damage. Also, their only ability steals life from nearby players, which makes them harder to kill, especially if your DPS is low or spread out among a pack full of Blood Drinkers!
- Sandfury Witch Doctors should be focused down first, as they are squishier than Blood Drinkers and heal their allies with their own version of Flash Heal and healing totems. They can also place a lava totem that deals pulsing damage to nearby players until destroyed.
In the plaza itself, watch out for the many patrols that cross it. Because the fountain in the center of the plaza has 4 spell casters around it, pull them from afar, and run behind one of the objects so that they will run to you due to the lack of line of sight to cast their usual Shadow Bolt attack, allowing your group to easily deal with them.
The most dangerous trash mobs in the later parts of the dungeon are the basilisks, such as Sul'lithuz Abomination, which have a lot of health / armor / damage and an ability that stuns their target. Make sure to CC them if your party is having trouble. Watch out for Sandfury Shadowhunter as well, as they are likely to CC your tank, making them drop aggro, which can be dangerous if the rest of the party is unprepared. This effect can be dispelled if you have a Priest or Paladin in the group.
Also, while not particularly dangerous on their own, the huge packs of Scarabs near Theka the Martyr are extremely dangerous if you recklessly pull many of them at once, so be careful when using AoE abilities on this boss. You can avoid this problem altogether by pulling him well away from his scarabs before using AoE abilities.
Remember that trash can respawn in this dungeon, so make sure to keep a good pulling pace.
Bosses in Zul'Farrak
Zerillis (Rare)
-
 Frost Shot
 Net
Net

Zerillis is a rare spawn troll towards the start of the dungeon with a fairly high spawn rate, making it likely that you will come across him.
Loot from Zerillis
| Item | Required Level | Slot |
|---|---|---|
| 42 | Leather Boots |
Antu'sul
-
 Antu'sul's Minion
 Earthgrab Totem
 Healing Ward
 Healing Wave of Antu'sul
Ironically, although he is the first major boss most players will face in Zul'Farrak, Antu'sul is also by far the most dangerous. For starters, he is an elite Level 48 Troll who can heal himself just like the Sandfury Witch Doctors you had the opportunity to face on the way to him.
Secondly, if you had any group members who did not read this guide, it is likely that they will accidentally pull him before everyone is ready, as this is one of the few bosses in WoW Classic that immediately pulls (and spawns adds!) as soon as you get anywhere near his cave, well before you are actually in range to cast any spell at him, so beware!
Finally, and the most important thing of all, is that he will constantly summon Servant of Antu'sul, which are level 48 elite basilisks, throughout the fight. And these are almost as tough as himself, plus they do not despawn when he dies so try to keep them under control, or else you will probably kill him but end up wiping in the process.
Loot from Antu'Sul
| Item | Required Level | Slot |
|---|---|---|
| 43 | Neck | |
| 43 | Gloves | |
| 43 | Weapon | |
| 44 | Weapon |
![]() Sang'thraze the Deflector is a rare drop, and when combined with
Sang'thraze the Deflector is a rare drop, and when combined with
![]() Jang'thraze the Protector, they form the epic, 2-handed sword
Jang'thraze the Protector, they form the epic, 2-handed sword
![]() Sul'thraze the Lasher.
Sul'thraze the Lasher.
Witch Doctor Zum'rah
-

 Healing Wave
 Shadow Bolt
- Shadow Bolt Volley
 Ward of Zum'rah

Witch Doctor Zum'rah is a very easy boss, as long as you clear the graveyard, or at least the camps near his spawn point, first. He can heal himself and deal some spell damage, but his casts are so long that they are very easy to interrupt, and his health and armor are not high at all. If you have not cleared the nearby graveyard, he will periodically summon zombies from the graves to attack your group, which will cause the encounter to be much more difficult.
Loot from Witch Doctor Zum'rah
| Item | Required Level | Slot |
|---|---|---|
| 42 | Gloves | |
| 42 | Weapon |
Shadowpriest Sezz'ziz & Nekrum Gutchewer
-

 Heal
Heal
 Psychic Scream
 Renew
Renew- Shadow Bolt

Shadowpriest Sezz'ziz is also a very easy boss, so long as you clear the 98 Trolls in the pyramid event before pulling him and Nekrum Gutchewer at the end to finish off exactly 100 trolls!
Loot from Shadowpriest Sezz'ziz
| Item | Required Level | Slot |
|---|---|---|
| 44 | Head | |
| 44 | Legs | |
| 44 | Chest | |
| 44 | Weapon |
Chief Ukorz Sandscalp
-

 Cleave
 Enrage
- Wide Slash

Chief Ukorz Sandscalp is the boss of the Sandfury Trolls you found along the way, and a relatively easy boss. Just make sure to have him turned away from the rest of your group during the fight, as he has several cleave attacks that hit everything in front of him. Also, you will need to deal with Ruuzlu at the same time, but this should not be too hard to handle at this level.
Loot from Chief Ukorz Sandscalp
| Item | Required Level | Slot |
|---|---|---|
| 45 | Head | |
| 45 | Shoulders | |
| 45 | Weapon | |
| 45 | Weapon | |
| 45 | Weapon |
![]() Jang'thraze the Protector is a rare drop, and when combined with
Jang'thraze the Protector is a rare drop, and when combined with
![]() Sang'thraze the Deflector, they form the epic, 2-handed sword
Sang'thraze the Deflector, they form the epic, 2-handed sword
![]() Sul'thraze the Lasher.
Sul'thraze the Lasher.
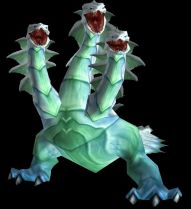
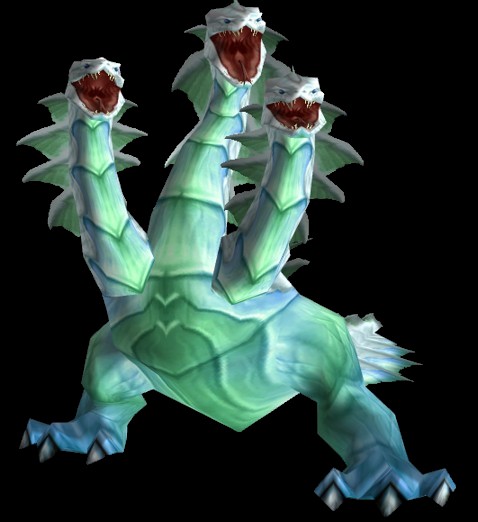
Gahz'Rilla
-
 Freeze Solid
 Gahz'rilla Slam
 Icicle
In order to summon Gahz'rilla, you need to first go to 49, 69 in The
Hinterlands and kill Qiaga the Keeper at the top of the Altar of Zul for
![]() Sacred Mallet.
Sacred Mallet.
This item can then be used at the altar on the top of Jintha'Alor (around 58,76 in
The Hinterlands), which is an area full of high level elites, in order to create
the ![]() Mallet of Zul'Farrak, which can be used to summon Gahz'rilla
in Zul'Farrak.
Mallet of Zul'Farrak, which can be used to summon Gahz'rilla
in Zul'Farrak.
You are not required to have this item yourself, as long as at least one party member has it and rings the gong with it.
Gahz'rilla itself is a Level 46 elite Hydra, whose most dangerous attack is a knockback that can send unaware players into uncleared packs or out of range of healing. As long as the area is reasonably clear and you stand against a wall or other movement-blocking object, you will have nothing to fear from this mechanic.
Loot from Gahz'Rilla
| Item | Required Level | Slot |
|---|---|---|
| 43 | Chest | |
| 42 | Weapon |
Zul'Farrak Graveyard / Zombie Grinding for Experience
This dungeon is one of the very best places in WoW Classic to level from 43 to 48 (or even earlier!), as long as you focus on clearing up to the plaza and / or the Graveyard where Witch Doctor Zum'rah resides, which are both very easy areas to clear, especially when compared to the high difficulty of Antu'sul and the pyramid event.
In order to maximize your experience gains, clear packs of 3 mobs up to the plaza area, then go right and try to avoid Theka the Martyr, his beetles, and most of the trash, until you get to the Graveyard, upon which you open camps until you have 3+ mobs, kill them, and repeat the process until all camps are gone. You can also kill Witch Doctor Zum'rah before resetting the dungeon, for his chest and guaranteed item.
Quick Dungeon Reset Method for WoW Classic
The fastest way to reset a dungeon in WoW Classic, typically used for speed farming, is to convert the group to a raid, invite a person from outside the party, grant them leader status, and have everyone who was inside the dungeon log off their characters. If the person who is outside resets the dungeon in this state, the persons who were inside will find themselves teleported to a fully reset dungeon instance once they log back in.
Recommended Classes for Zul'Farrak
If you are going in underleveled, Rogues and Mages
are excellent choices due to their CC abilities against the many humanoid Trolls
present in the dungeon. You can ![]() Sap /
Sap / ![]() Polymorph one or more
enemies in almost every single pull.
Polymorph one or more
enemies in almost every single pull.
For optimal speed when experience grinding you will want to run either a melee cleave setup (4 Warriors / Rogues + 1 Shaman) or a spell cleave setup (mostly as many Mages as possible for their AoE damage and CC abilities).
Regardless, you should be able to clear the dungeon with any group setup.
Changelog
- 18 Nov. 2024: Page updated for Classic Anniversary.
- 05 Apr. 2024: Added boss pictures and abilities.
- 04 Apr. 2024: Guide updated for Phase 3 of Season of Discovery.
- 16 Sep. 2019: Split the quests into a different page.
- 15 Sep. 2019: Added a quick dungeon reset method.
- 11 Sep. 2019: Guide added.
Classic Leveling Guides
Classic Dungeon Guides
Classic Profession Guides
Classic Reputation Guides
This guide has been written by Abide, TBC veteran for nearly a decade. Abide is a Warrior tank and multi-class expert currently playing on Faerlina as Horde. You can find him in the the Icy Veins Discord. You can also see him live on Twitch.
- Burning Crusade Classic Phase 2 Now Live: Here’s What to Expect
- Did Blizzard Just Quietly Invite Creators to Play WoW Classic’s Next Chapter?
- WoW Weekly Returns: Patch 12.0.5, Twitch Drops & Classic Updates
- WoW BCC Anniversary Edition: Overlords of Outland – Everything Coming May 14
- Battleground Honor Significantly Increased
- Limited-Time Mount Alert: Get the Voidfeather Dragonhawk for TBC Classic Servers Now!
- Could WoW Be Added to Xbox Game Pass Ultimate?
- MoP Classic Escalation PTR Update Details New Content