Upper Blackrock Spire Guide
Deep in the heard of Blackrock Mountain lies one of the most challenging and rewarding dungeons for fresh max level players. Upper Blackrock Spire is a 10-man dungeon where you can delve through the waves of powerful Blackrock Orcs and make your way through their stronghold to find Warchief Rend Blackhand and General Drakkisath. This dungeon is integral both for getting some of the best pre-raid gear in the game and for getting attuned for Onyxia's Lair.
Phase 4 Season of Discovery Loot in Upper Blackrock Spire
With Phase 4 of Season of Discovery, new loot has been added into Upper Blackrock Spire to help players prepare for raiding. Below you can find a full list of all of the new loot and each boss they drop from.
Pyroguard Emberseer
| Item |
|---|
Solakar Flamewreath
| Item |
|---|
Jed Runewatcher (Rare)
| Item |
|---|
Goraluk Anvilcrack
| Item |
|---|
Warchief Rend Blackhand
| Item |
|---|
The Beast
| Item |
|---|
General Drakkisath
| Item |
|---|
Upper Blackrock Spire Entrance Location
Upper Blackrock Spire is actually a dungeon within a dungeon. The entrance is
inside the entrance to Lower Blackrock Spire, which can be found inside
Blackrock Mountain. Once you enter Lower Blackrock Spire, the first door on your left
is the entrance to Upper Blackrock Spire. The door is locked by default however,
and at least one person in your group will need to have the ![]() Seal of Ascension
to open it.
Seal of Ascension
to open it.
Seal of Ascension
At least one person in your group will need the ![]() Seal of Ascension to open
the door of the dungeon. To acquire the seal, you first will need to get a
Seal of Ascension to open
the door of the dungeon. To acquire the seal, you first will need to get a
![]() Unadorned Seal of Ascension from the trash mobs in Lower Blackrock Spire.
Once you have it, find Vaelan inside LBRS. Once you have his quest, you
will need to pick up three gemstones from killing three bosses in the dungeon.
Unadorned Seal of Ascension from the trash mobs in Lower Blackrock Spire.
Once you have it, find Vaelan inside LBRS. Once you have his quest, you
will need to pick up three gemstones from killing three bosses in the dungeon.
 Gemstone of Spirestone from Highlord Omokk
 Gemstone of Smolderthorn from War Master Voone
 Gemstone of Bloodaxe from Overlord Wyrmthalak
Once you have all three stones, you can turn in the quest to Vaelan.
He will give you a chest containing some items that you will need for the next quest.
You then will need to go to Dustwallow Marsh and find Emberstrife
in his cave. You will need to fight him, so bring along a group to help you. Fight
Emberstrife, and once he is at 25% health you will use your ![]() Unforged Seal of Ascension.
At 10% health, stop attacking and use your
Unforged Seal of Ascension.
At 10% health, stop attacking and use your ![]() Orb of Draconic Energy. This will
mind control Emberstrife. Once you have him under control, use his Flames of the Black Flight
spell to forge the seal. Now that you have the seal, you can enter UBRS.
Orb of Draconic Energy. This will
mind control Emberstrife. Once you have him under control, use his Flames of the Black Flight
spell to forge the seal. Now that you have the seal, you can enter UBRS.
Quests in Upper Blackrock Spire
There are not tons of dungeon quests to pick up, but the ones available involving UBRS are extremely important, so it is worth making sure you keep up with when you might want to do them.
The quests are all outlined in our separate dungeon quest guide for this instance.
Layout of Upper Blackrock Spire

Upper Blackrock Spire has a relatively linear path. However, there are a few parts that are not intuitive. In the first room of the instance, you will need to clear out all of the trash before the next door will open. In the hatchery with all the eggs, you will want to run to the back right of the room from the door you came in to climb the debris up to the second floor. On that second floor, go around to the doorway, and clear out the trash that is necessary. Through that door, you will want to hug the right wall all the way to the big pit that Warchief Rend Blackhand is standing in front of. Jump into that pit to start the event that leads to the next boss fight.
Notable Trash in Upper Blackrock Spire
The trash in UBRS can be overwhelming if you are not careful. Most of the trash
consists of groups of orcs, meaning they are susceptible to spells like ![]() Sap
and
Sap
and ![]() Polymorph. If your group is newer and less geared, use more control
spells to fight less of each pack at a time. UBRS also has lots of pats and groups
that are quite close to each other within rooms, so always pull back and be very careful
about where and how you are pulling groups.
Polymorph. If your group is newer and less geared, use more control
spells to fight less of each pack at a time. UBRS also has lots of pats and groups
that are quite close to each other within rooms, so always pull back and be very careful
about where and how you are pulling groups.
In particular, you should watch out for the first pulls that you do leading to the next room after the hatchery. Several of the melee orcs that you will pull can charge and knock back, so make sure that ranged are positioned well to not get knocked back into the hatchery below. If you do, you might break some of the eggs and pull extra mobs, which could result in a wipe.
Lastly, watch out for the Blackhand Summoners in the first room of UBRS. Interrupt their summons so that they do not summon additional enemies.
Bosses in Upper Blackrock Spire
There are 7 main bosses in Upper Blackrock Spire, all of which have a high chance to drop a blue item once killed. There is also a very valuable rare boss that occasionally spawns, Jed Runewatcher. Due to some items from specific bosses being quite valuable, groups occasionally will form to target specific bosses, such as casters only wanting Jed Runewatcher or melee only wanting Warchief Rend Blackhand.
Pyroguard Emberseer
-

 Fire Nova
 Flame Buffet
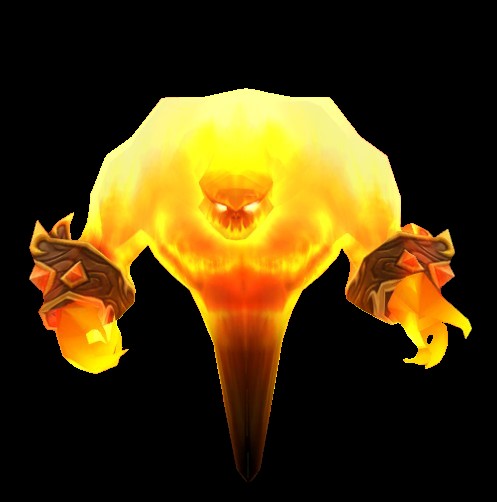
Pyroguard Emberseer will spawn at the end of the encounter. To start the encounter, several players will need to click and channel the Altar in the room. The even starts with several enemies spawning and running towards you, but these can be easily AoE'ed down without much trouble. After they all are dead, Pyroguard Emberseer will spawn. Pyroguard himself is quite easy, and just needs to be tanked where he spawns facing away from the group. The melee can hit him from behind while the ranged and healers stand away from the platform.
Loot from Pyroguard Emberseer
| Item | Required Level | Slot |
|---|---|---|
| 56 | Cloak | |
| 56 | Ring | |
| 56 | Leather Shoulders | |
| 56 | Neck | |
| 54 | Mail Gloves |
Solakar Flamewreath
-
 War Stomp

Solakar Flamewreath is also part of a longer encounter. To start the encounter,
have your group hug the far wall upon entering the hatchery and run to the left.
Clear out all of the dragons that are there to start, but do not bother breaking the eggs
since they will just respawn. Once the adds are dead, start the event by clicking
on ![]() Father Flame and looting the item from it. The event consists of multiple
waves of adds that will come at you before the boss eventually spawns. The key to
surviving the waves is to not break eggs and to kill Rookery Hatchers since
they will break eggs themselves. Besides that, just kill the enemies as they come,
making sure to AoE the weaker whelplings if they spawn. After making it through the
waves, Solakar Flamewreath will spawn. He just needs to be tanked away from the
group so that everyone can avoid his stomp while the group finishes killing adds before
killing him.
Father Flame and looting the item from it. The event consists of multiple
waves of adds that will come at you before the boss eventually spawns. The key to
surviving the waves is to not break eggs and to kill Rookery Hatchers since
they will break eggs themselves. Besides that, just kill the enemies as they come,
making sure to AoE the weaker whelplings if they spawn. After making it through the
waves, Solakar Flamewreath will spawn. He just needs to be tanked away from the
group so that everyone can avoid his stomp while the group finishes killing adds before
killing him.
It is worth noting that many groups choose to skip this boss since it is one of the harder encounters in LBRS and does not have many valuable gear drops.
Loot from Solakar Flamewreath
| Item | Required Level | Slot |
|---|---|---|
| 56 | Leather Belt | |
| 56 | Cloth Belt | |
| 56 | LeatherChest | |
| 56 | Cloth Chest | |
| 55 | Cloth Shoulders |
Goraluk Anvilcrack
-
 Backhand
 Head Crack
 Strike

Goraluk Anvilcrack can be found at the western end of the room that you enter after the hatchery. As long as you clear out the trash before engaging him, it should be a simple fight. Just tank him facing away from the group and burn him.
Loot from Goraluk Anvilcrack
| Item | Required Level | Slot |
|---|---|---|
| 55 | Plate Leggings | |
| 58 | Plate Waist | |
| 57 | Mail Feet | |
| 55 | Main Hand Mace |
Jed Runewatcher
-

 Charge
- Heroic Strike
 Shield Bash
Jed Runewatcher can be found at the east end of the same room as Goraluk Anvilcrack, but is a rare spawn, meaning he will only be there sometimes. Jed is a very easy fight, and as long as you kill all the surrounding trash first, should pose no threat.
Loot from Jed Runewatcher
| Item | Required Level | Slot |
|---|---|---|
| 55 | Trinket | |
| 51 | Trinket | |
| 55 | Cloth Helmet |
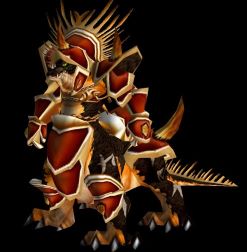
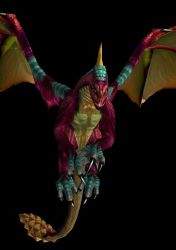
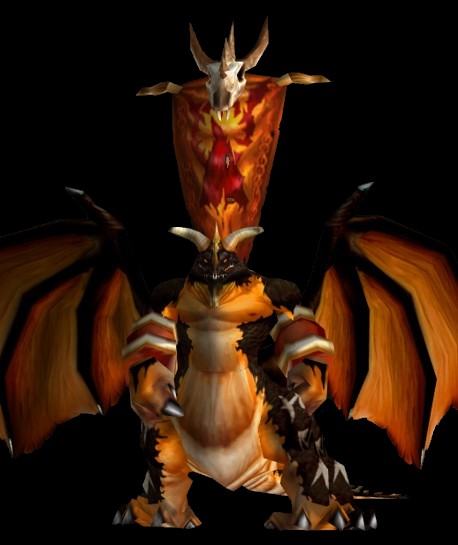
Warchief Rend Blackhand & Gyth
- Gyth
 Corrosive Acid Breath
 Flame Breath
 Freeze
- Knock Away

Warchief Rend Blackhand will appear riding his dragon Gyth after the event. To start the event, your group just needs to jump down into the pit that Rend is standing in front of.
The event itself is quite easy. Just kill the enemies as they spawn and you should be fine. If you feel like you are getting overwhelmed at any point, you can always control some of the orcs out of each wave, but you most likely will not need to. The only thing to look out for is to make sure you focus Rage Talon Fire Tongues when they spawn since they can cast a large fire nova.
- Warchief Rend Blackhand
 Cleave
 Mortal Strike
 Thunderclap
 Whirlwind
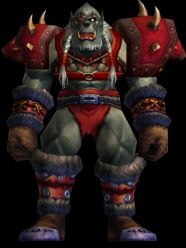
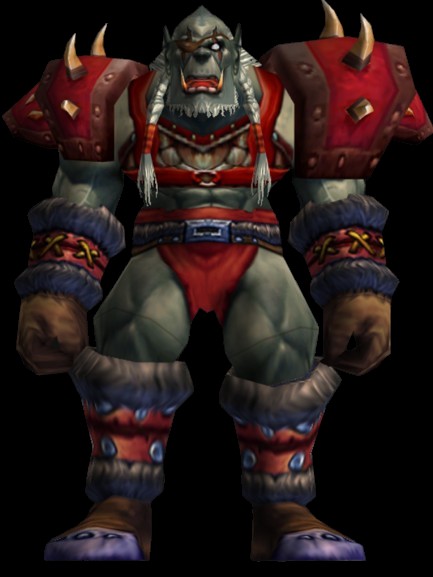
After killing several waves, Rend will fly down on his dragon. The dragon Gyth needs to be faced away from the raid to avoid his breath, and he should be focused down first. Rend will ride on Gyth's back until 20% health, when he will hop off and fight himself. Kill Gyth first before switching to Rend. Rend casts a whirlwind occasionally, so melee need to make sure to look out for it. If you have cooldowns, Warchief Rend is a great boss to use them on.
Loot from Gyth
| Item | Required Level | Slot |
|---|---|---|
| 55 | Plate Helmet | |
| 55 | Mail Helmet | |
| 55 | Leather Helmet | |
| 55 | Mail Shoulders | |
| 55 | Cloth Helm |
Loot from Warchief Rend Blackhand
| Item | Required Level | Slot |
|---|---|---|
| 58 | MH Sword | |
| 58 | OH Sword | |
| 58 | Dagger | |
| 58 | Leather Helmet | |
| 58 | Plate Leggings | |
| 58 | Cloth Boots | |
| 58 | Ring | |
| 58 | Plate Bracers | |
| 55 | Plate Shoulders | |
| 58 | Mail Belt | |
| 58 | Polearm | |
| 58 | Cloth Boots |
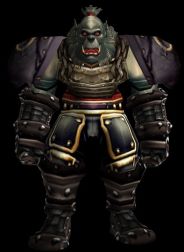
The Beast
-
 Berserker Charge
 Fireball
 Flamebreak
 Immolate
 Terrifying Roar
The Beast has more mechanics than most other bosses in the instance, which makes it more difficult. The main things to watch out for are the charge and fear. The Beast will sometimes charge a random target before returning to attack the tank again, and will also sometimes fear nearby players. Ranged and healers just need to be spread out at max range away from the boss to avoid getting feared as much as possible. He also will use a fire nova that knocks back, so the tank should tank with their back against a wall to avoid the knock back.
Loot from The Beast
| Item | Required Level | Slot |
|---|---|---|
| 58 | Dagger | |
| 58 | Leather Leggings | |
| 58 | Mail Leggings | |
| 58 | Cloth Leggings | |
| 58 | Leather Bracers | |
| 58 | Cloak | |
| 58 | Cloak | |
| 58 | 2H Mace | |
| 55 | Plate Shoulders | |
| 56 | Cloth Boots |
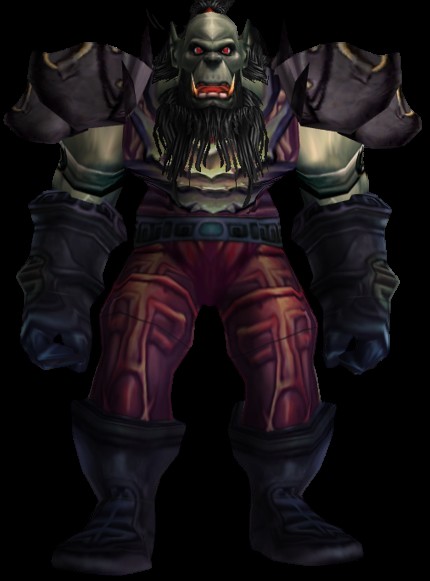
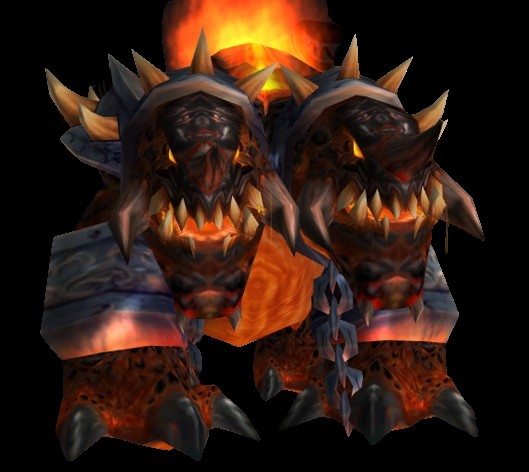
General Drakkisath
-
 Cleave
 Conflagration
- Flame Breath
 Flamestrike
 Pierce Armor
 Rage
Rage- Thunderclap
General Drakkisath is by far the most difficult fight in the instance.
General Drakkisath starts with two Chromatic Elite Guards, which are hard
hitting elite mobs. There are two main strategies used for this encounter. The easiest
strategy requires a Hunter, and is the kiting strategy. You start the pull by having your
Hunter attack General Drakkisath, kiting him out of the room and back through the
instance. The Hunter can keep ![]() Aspect of the Cheetah up, tagging General Drakkisath
with
Aspect of the Cheetah up, tagging General Drakkisath
with ![]() Arcane Shot on cooldown to make sure he does not reset. While the Hunter
is kiting, the rest of the group just kills the two adds with each tank picking up
a separate add. Once they are dead, the Hunter uses
Arcane Shot on cooldown to make sure he does not reset. While the Hunter
is kiting, the rest of the group just kills the two adds with each tank picking up
a separate add. Once they are dead, the Hunter uses ![]() Feign Death to drop
aggro, and Drakkisath will return to the room where the group can kill him. Once
the General is back, just tank him facing away from the raid and burn him down.
Feign Death to drop
aggro, and Drakkisath will return to the room where the group can kill him. Once
the General is back, just tank him facing away from the raid and burn him down.
The other option without a Hunter is to just kill everything together. You can
tank everything together, cleaving down the guards, and blowing all of your cooldowns
at the start of the fight. If needed you can have a Warlock use ![]() Fear on
one of the guards while the group kills the remaining guard and Drakkisath. This
is doable, but much more dangerous than the kiting strategy. If you choose to do
this, make sure to focus and kill the adds before killing Drakkisath.
Fear on
one of the guards while the group kills the remaining guard and Drakkisath. This
is doable, but much more dangerous than the kiting strategy. If you choose to do
this, make sure to focus and kill the adds before killing Drakkisath.
Loot from General Drakkisath
| Item | Required Level | Slot |
|---|---|---|
| 58 | Shield | |
| 58 | Ring | |
| 58 | Neck | |
| 58 | Plate Belt | |
| 58 | 2H Sword | |
| 60 | Cloth Helm | |
| 58 | Cloak | |
| 58 | Trinket | |
| 58 | Off-hand |
Additionally, General Drakkisath can drop all of the Tier 0 chest pieces.
Recommended Classes for Upper Blackrock Spire
If you are going in underleveled, Rogues and Mages
are excellent choices due to their CC abilities against the many humanoid Orcs
present in the dungeon. You can ![]() Sap /
Sap / ![]() Polymorph one or more
enemies in almost every single pull. This is primarily meant to be a level 60
instance, but 58+ is viable.
Polymorph one or more
enemies in almost every single pull. This is primarily meant to be a level 60
instance, but 58+ is viable.
Upper Blackrock Spire is designed to be a 10-man instance. For your 10, you will want 2 tanks, 3 healers, and 5 DPS. Depending on how geared and confident you are, you can +1/-1 to those numbers as needed. At minimum you will want 1 tank and 2 healers, but 2 and 3 is a safer setup.
Once of the more important things to consider is gear. UBRS drops several high
value items that many people will farm for. Specifically, Rogues and Warriors are
after the ![]() Dal'Rend's Sacred Charge and
Dal'Rend's Sacred Charge and ![]() Dal'Rend's Tribal Guardian combo
while casters are all after the
Dal'Rend's Tribal Guardian combo
while casters are all after the ![]() Briarwood Reed from the rare spawn Jed Runewatcher.
If you are after one of these high value items, check with your group to make sure
they are not reserved, or make your own group if you want to reserve one.
Briarwood Reed from the rare spawn Jed Runewatcher.
If you are after one of these high value items, check with your group to make sure
they are not reserved, or make your own group if you want to reserve one.
Changelog
- 18 Nov. 2024: Page updated for Classic Anniversary.
- 09 Jul. 2024: Added section for new loot in Phase 4 of Season of Discovery.
- 05 Apr. 2024: Added boss pictures and abilities.
- 26 Jul. 2020: Updated with Phase 5 drops.
- 30 Jan. 2020: Guide added.
This guide has been written by Abide, TBC veteran for nearly a decade. Abide is a Warrior tank and multi-class expert currently playing on Faerlina as Horde. You can find him in the the Icy Veins Discord. You can also see him live on Twitch.
- Burning Crusade Classic Phase 2 Now Live: Here’s What to Expect
- Did Blizzard Just Quietly Invite Creators to Play WoW Classic’s Next Chapter?
- WoW Weekly Returns: Patch 12.0.5, Twitch Drops & Classic Updates
- WoW BCC Anniversary Edition: Overlords of Outland – Everything Coming May 14
- Battleground Honor Significantly Increased
- Limited-Time Mount Alert: Get the Voidfeather Dragonhawk for TBC Classic Servers Now!
- Could WoW Be Added to Xbox Game Pass Ultimate?
- MoP Classic Escalation PTR Update Details New Content