Lower Blackrock Spire Guide
Deep in the heart of Blackrock Mountain lies the stronghold of the Blackrock Orcs. Here you can fight your way through waves of Blackrock Orcs, Ogres, and other dark creatures to find and defeat Overlord Wyrmthalak atop his throne. This is one of the first "end-game" dungeons, in that it rewards several pieces of gear that are considered pre-raid BiS for multiple classes. Additionally, this is one of the most efficient dungeons to do for experience if you are 55+ and trying to push that last bit to 60.
Phase 4 Season of Discovery Loot in Lower Blackrock Spire
With Phase 4 of Season of Discovery, new loot has been added into Lower Blackrock Spire to help players prepare for raiding. Below you can find a full list of all of the new loot and each boss they drop from.
Highlord Omokk
| Item |
|---|
Shadow Hunter Vosh'gajin
| Item |
|---|
War Master Voone
| Item |
|---|
Mother Smolderweb
| Item |
|---|
Urok Doomhowl
| Item |
|---|
Gizrul the Slavener
| Item |
|---|
Halycon
| Item |
|---|
Overlord Wyrmthalak
| Item |
|---|
Lower Blackrock Spire Entrance Location
The entrance to Lower Blackrock Spire is located inside Blackrock Mountain. There are two entrances to get inside Blackrock Mountain itself, one located in southern Searing Gorge and the other located in north-western Burning Steppes. Once inside Blackrock Mountain, you will need to make your way to the second floor ledge, which can be done by climbing the chains from the middle platform and jumping off the end onto the ledge. Once on the ledge, run along the wall until you see the only available balcony, and jump onto it. The Blackrock Spire portal is right there.
Quests in Lower Blackrock Spire
It is important that you pick up the dungeon quests for this instance before heading inside, as you can get a variety of loot from them, as well as a solid chunk of experience.
The quests are all outlined in our separate dungeon quest guide for this instance.
Layout of Lower Blackrock Spire
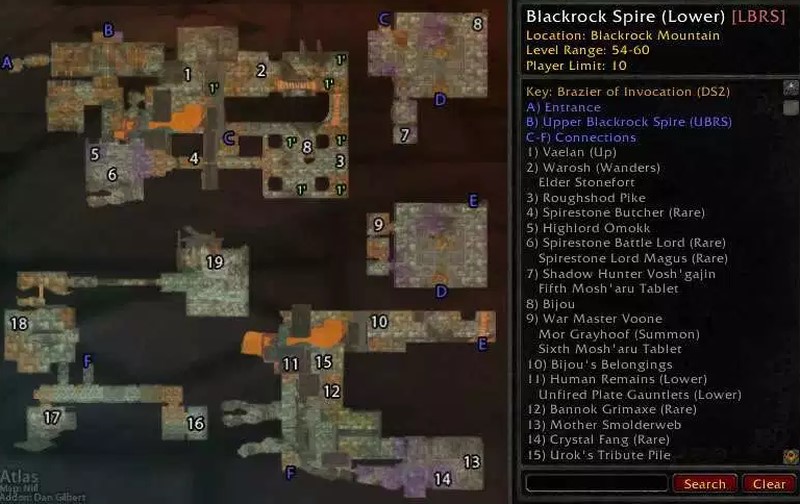
Lower Blackrock Spire has many bosses and paths, which can be quite confusing if it is your firs time in the instance. The best advice would be to try to have someone in your group who has done the instance before and can show you where to go, or to look up a video of a clear if you get lost.
Notable Trash in Lower Blackrock Spire
The initial trash packs at the start of the instance are going to be some of the most
difficult, mostly due to the high number of groups in a small area. Just be careful about
pulling groups one at a time, and try to focus casters down first whenever you pull
trash throughout the dungeon. If you find pulls to be too difficult, use more control
spells like ![]() Sap to only fight 1-2 enemies at a time.
Sap to only fight 1-2 enemies at a time.
Bosses in Lower Blackrock Spire
There are 9 main bosses in Lower Blackrock Spire, all of which have a high chance to drop a blue item once killed. Additionally, there are several possible rare spawns throughout the dungeon, but generally award less desired gear.
Spirestone Butcher (Rare)
 If Spirestone Butcher is up, you will find him on the bridge on the
way to Highlord Omokk.
If Spirestone Butcher is up, you will find him on the bridge on the
way to Highlord Omokk.
Loot from Spirestone Butcher
| Item | Required Level | Slot |
|---|---|---|
| 53 | Cloak | |
| 53 | One-Hand Axe |
Spirestone Battle Lord (Rare)
If Spirestone Battle Lord is up, you will find him on the mound on the
left in the same room as Highlord Omokk.
Loot from Spirestone Battle Lord
| Item | Required Level | Slot |
|---|---|---|
| 53 | Mail Boots | |
| 53 | Two-Hand Axe |
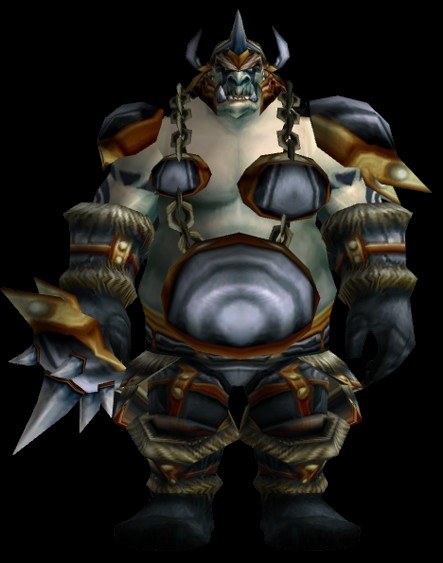
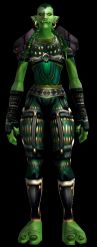
Highlord Omokk
-
 Cleave
 Enrage
 Knock Away
Highlord Omokk has two ogre guards with him, which if left uncontrolled, can be quite dangerous. Omokk himself is quite easy, but the combination of three enemies at once can be tricky. The best option is to either control both adds while killing the boss, or control 1 add and quickly burn down the other at the start of the fight. The best option is always to fight only one target at a time, so definitely make use of CC abilities if you have them available. Omokk also does a knock-back ability and a cleave ability, so make sure the tank is facing him away from the group.
Loot from Highlord Omokk
| Item | Required Level | Slot |
|---|---|---|
| 55 | 2H Mace | |
| 55 | Plate Chest | |
| 55 | Cloth Legs | |
| 55 | Plate Shoulders | |
| 55 | Leather Legs | |
| 54 | Mail Boots |
Shadow Hunter Vosh'gajin
-
 Curse of Blood
 Hex
Hex
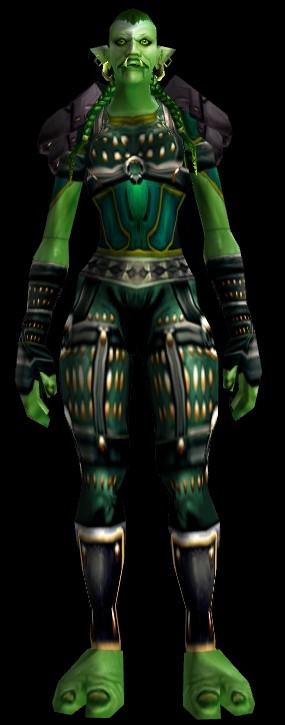
Shadow Hunter Vosh'gajin also has two guards with him, but is not as dangerous
as Omokk. Vosh'gajin has two Smolderthorn Shadow Priests with him that need
to be either killed immediately or controlled until after the boss dies. Vosh'gajin
herself will cast ![]() Hex, which will turn a group member into a frog for 8
seconds at a time. She also has a curse that she will place on people, but it is not
particularly dangerous, but should still be removed by a Mage or Druid if possible.
Hex, which will turn a group member into a frog for 8
seconds at a time. She also has a curse that she will place on people, but it is not
particularly dangerous, but should still be removed by a Mage or Druid if possible.
Loot from Shadow Hunter Vosh'gajin
| Item | Required Level | Slot |
|---|---|---|
| 54 | Mail Gloves | |
| 54 | Arrows | |
| 54 | Cloth Bracers | |
| 54 | Leather Gloves | |
| 54 | Crossbow | |
| 54 | Leather Shoulders | |
| 54 | Bow |
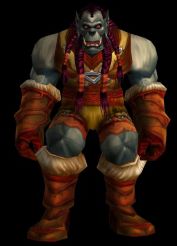
War Master Voone
-
 Cleave
 Snap Kick
 Thrash
 Throw Axe
- Uppercut
War Master Voone does not have any adds or real abilities, but does hit harder than normal. Make sure your tank has time to generate threat, and point him away from the group to avoid his cleave.
Loot from War Master Voone
| Item | Required Level | Slot |
|---|---|---|
| 54 | Mail Gloves | |
| 54 | Mail Bracers | |
| 54 | Throwing Weapon | |
| 54 | Ring | |
| 54 | Dagger | |
| 54 | Neck |
Bannok Grimaxe (Rare)
 If Bannok Grimaxe is up, you will find him in the Firebrand Legion
camp when you start finding orcs.
If Bannok Grimaxe is up, you will find him in the Firebrand Legion
camp when you start finding orcs.
Loot from Bannok Grimaxe
| Item | Required Level | Slot |
|---|---|---|
| 55 | Plate Gloves | |
| 55 | Mail Waist | |
| 54 | Main-Hand Axe | |
| 300 | Blacksmithing Pattern |
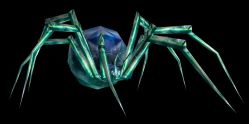
Mother Smolderweb
-
 Crystallize
 Mother's Milk
 Summon Spire Spiderling
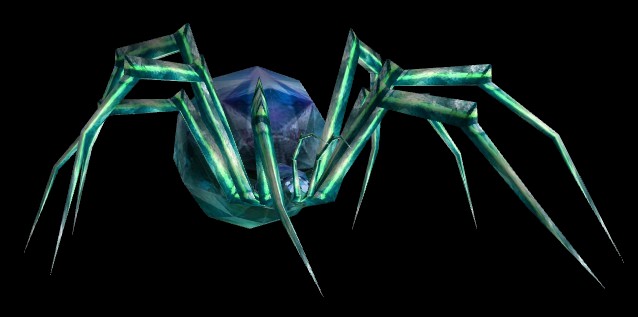
Mother Smolderweb has an AoE stun that fires as a cone in front of her, meaning the tank should keep her pointed away from the group. She also will sometimes use Mother's Milk which poisons players, occasionally incapacitating them. There is not much strategy needed here, just kill her while paying attention to the poison and boss facing.
Loot from Mother Smolderweb
| Item | Required Level | Slot |
|---|---|---|
| 55 | Mail Gloves | |
| 55 | Trinket | |
| 55 | 1H Mace | |
| 54 | Leather Boots |
Crystal Fang (Rare)
-
Summon Spire Spiderling
If Crystal Fang is up, you will find him in one of the next few pulls directly after Mother Smolderweb.
Loot from Crystal Fang
| Item | Required Level | Slot |
|---|---|---|
| 56 | Leather Gloves | |
| 56 | One-Hand Dagger | |
| 56 | Cloth Shoulders |
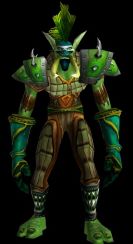
Urok Doomhowl
-
 Intimidating Roar
 Rend
Rend Strike
Urok Doomhowl is a summoned boss. In one of the rooms with a pack of Ogres,
you will come across a "tribute pile" of ogre heads on the ground. If you combine
![]() Omokk's Head from Highlord Omokk and
Omokk's Head from Highlord Omokk and ![]() Roughshod Pike, which
can be picked up in the first room of the dungeon, you can place them on the tribute
pile to summon Urok.
Roughshod Pike, which
can be picked up in the first room of the dungeon, you can place them on the tribute
pile to summon Urok.
Urok himself will not appear initially when summoned. Instead, you will need to defeat several waves of Ogres. This can be quite difficult if you are not prepared, so be ready to use any control spells you have to limit your mana usage when fighting through the waves. You will have limited recovery time and will not want to waste it. You can also use the pike that is now placed on the tribute pile, instantly killing a single ogre every 30 seconds. Eventually Urok will spawn, and needs to be tanked away from the group so that the ranged and healer can avoid his fear ability.
Loot from Urok Doomhowl
| Item | Required Level | Slot |
|---|---|---|
| 56 | Mail Belt | |
| 56 | Plate Boots | |
| 56 | Leather Gloves | |
| 54 | Mail Boots |
Quartermaster Zigris
-
 Drink Healing Potion
 Hooked Net
 Stun Bomb

Quartermaster Zigris is in a hall with many packs of orcs. As long as you carefully pull the trash before pulling him, he should not pose a problem. He himself does no noteworthy abilities.
Loot from Quartermaster Zigris
| Item | Required Level | Slot |
|---|---|---|
| 55 | Leather Belt | |
| 55 | Cloth Gloves |
Quartermaster Zigris also can drop several of the Tier 0 pieces, both belts and bracers since he shares with the trash loot table.
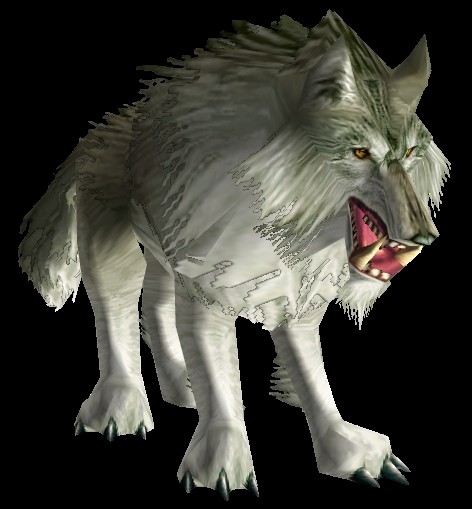
Halycon
-
 Rend
Rend
- Thrash

Halycon only has some melee abilities, so just have your tank hold her while the group kills the smaller worg adds that come out with her. They do not hit very hard and should die quickly. After they are dead, just turn and finish the boss.
Loot from Halycon
| Item | Required Level | Slot |
|---|---|---|
| 55 | Neck | |
| 55 | Leather Boots | |
| 55 | Mail Bracers | |
| 56 | Cloth Bracers |
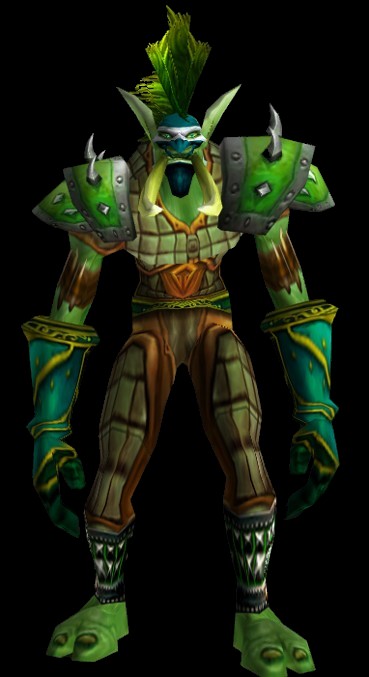
Gizrul the Slavener
-
 Enrage
 Fatal Bite
 Infected Bite
Gizrul the Slavener hits relatively hard, but has no special abilities that need dealt with. Just make sure your tank holds him and burn him down quickly, preferably with DPS cooldowns if available.
Loot from Gizrul the Slavener
| Item | Required Level | Slot |
|---|---|---|
| 56 | Leather Bracers | |
| 56 | Shield | |
| 55 | Leather Shoulders | |
| 56 | Cloth Pants |
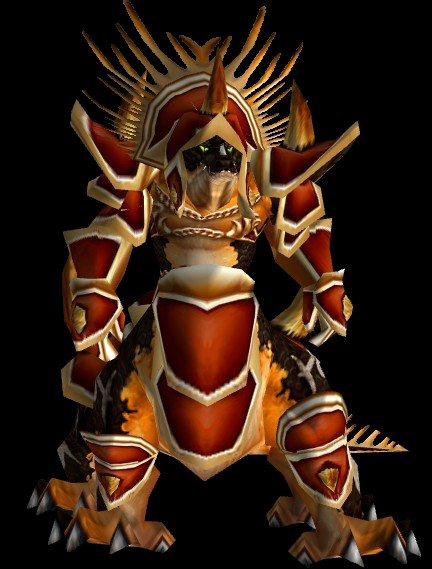
Overlord Wyrmthalak
-
 Cleave
 Demoralizing Shout
 Sweeping Slam
Overlord Wyrmthalak needs to be tanked facing away from the group, with
your tank backed up against the wall to avoid getting knocked back. At 50% health,
the boss will summon a wave of elites to help him, which can be problematic if left alone.
The best strategy is to control all of the adds with whatever spells you have such
as ![]() Polymorph,
Polymorph, ![]() Frost Nova, or
Frost Nova, or ![]() Entangling Roots to keep
them out of the fight until the boss is dead. After the boss dies you can turn and clean
up the adds.
Entangling Roots to keep
them out of the fight until the boss is dead. After the boss dies you can turn and clean
up the adds.
Loot from Overlord Wyrmthalak
| Item | Required Level | Slot |
|---|---|---|
| 56 | Ring | |
| 55 | Mail Shoulders | |
| 56 | Polearm | |
| 56 | Trinket | |
| 56 | Plate Gloves | |
| 57 | 2H Sword | |
| 56 | Staff | |
| 56 | Trinket |
Recommended Classes for Lower Blackrock Spire
If you are going in underleveled, Rogues and Mages
are excellent choices due to their CC abilities against the many humanoid Orcs
present in the dungeon. You can ![]() Sap /
Sap / ![]() Polymorph one or more
enemies in almost every single pull.
Polymorph one or more
enemies in almost every single pull.
For optimal speed when experience grinding you will want to run either a melee cleave setup (4 Warriors / Rogues + 1 Shaman) or a spell cleave setup (mostly as many Mages as possible for their AoE damage and CC abilities).
Regardless, you should be able to clear the dungeon with any group setup. It is worth noting that you can do this dungeon with up to 10 people, but using more than 5 people will be much more inefficient for experience gain if you are not level 60 yet.
Changelog
- 18 Nov. 2024: Page updated for Classic Anniversary.
- 09 Jul. 2024: Added section for new loot in Phase 4 of Season of Discovery.
- 05 Apr. 2024: Added boss pictures and abilities.
- 26 Jul. 2020: Updated with Phase 5 drops.
- 30 Jan. 2020: Guide added.
This guide has been written by Abide, TBC veteran for nearly a decade. Abide is a Warrior tank and multi-class expert currently playing on Faerlina as Horde. You can find him in the the Icy Veins Discord. You can also see him live on Twitch.
- Burning Crusade Classic Phase 2 Now Live: Here’s What to Expect
- Did Blizzard Just Quietly Invite Creators to Play WoW Classic’s Next Chapter?
- WoW Weekly Returns: Patch 12.0.5, Twitch Drops & Classic Updates
- WoW BCC Anniversary Edition: Overlords of Outland – Everything Coming May 14
- Battleground Honor Significantly Increased
- Limited-Time Mount Alert: Get the Voidfeather Dragonhawk for TBC Classic Servers Now!
- Could WoW Be Added to Xbox Game Pass Ultimate?
- MoP Classic Escalation PTR Update Details New Content