

Zero Guide & Best Builds
Welcome to our Zero build guide for Neverness to Everness. Zero is an S-Rank Solid Character available in Neverness to Everness who utilizes the Cosmos element.
In our Zero guide, we'll cover everything you need to know to get the most out of your Zero, from building the best gear and weapons, to important skill priorities and combos.

Zero's Best Arcs
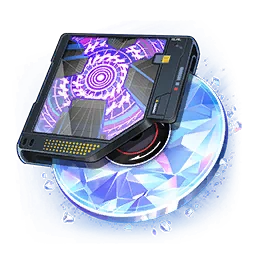
 Marching Beyond Time M1
CRIT Rate - 24%
Time Beyond Time
Increases ATK by 16%.
Enters Wastelab and clears current Wastetime when the wearer casts a Redirect Skill. While in Wastelab, allies gain 1 stack of Wastetime each time they use a Redirect or Support Skill, up to 3 stacks. When the wearer uses their Ultimate in Wastelab, they exit Wastelab and consume all Wastetime, increasing Ultimate Crit DMG by 24%, plus an additional 8% per Wastetime consumed. Consuming 3 Wastetime stacks at once grants an extra 12% DEF Ignore for 70s.
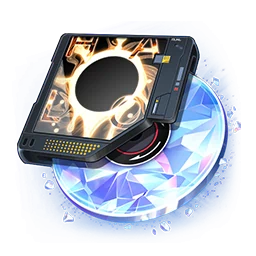
 The Rain That Shook the World M1
CRIT Rate - 22%
Hypervortex
Deals 30% increased Cosmos DMG with the wearer's Redirect Skill and Ultimate.
Increases the wearer's Cycle Intensity by 36 for 15s after casting a Redirect Skill. Resets the duration when triggered again.
 Fluff of Fearlessness M1
CRIT Rate - 22%
Popping Candy
Increases ATK by 25% for 10s after the wearer casts an Ultimate. Effect does not stack.
 Day Off M1
Charge Efficiency - 33%
Eclipse
Increases wearer's ATK by 30%. Unlocks Arc: Eclipse.
Arc: Eclipse — The wearer creates a 40s Eclipse. During the Eclipse, each enemy defeated restores 6 Ultimate Energy, up to 5 times. (cooldown: 300s).
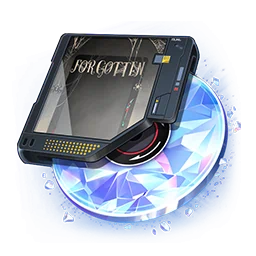 The Forgotten M5
HP - 25%
Picture Frame
Increases ATK by 20% when the wearer’s HP is above 50%; increases DEF by 20% when HP is below 50%.

Best Console Setups for Zero
 Lost Radiance
2-piece: Epic (2): Cosmos DMG +10%.
4-piece: Legendary (4): Ignores 25% of enemies' DEF for 20s after the wearer casts Ultimate. Effect does not stack.

Zero Module Bonus
+40% ATK (4 x Type III equipped)
Lost Radiance
2-piece: Epic (2): Cosmos DMG +10%.
4-piece: Legendary (4): Ignores 25% of enemies' DEF for 20s after the wearer casts Ultimate. Effect does not stack.
Zero Module Bonus
+60% ATK (6 x Type III equipped)

Zero's Stat Priority
Zero is an attack scaling Esper that benefits largely from both CRIT and Attack. Their main source of damage is their Ultimate ability, and it is recommended to focus on ensuring that they can CRIT on their Ultimate consistently to allow for the most damage.

Zero's Skill Priority
When you are playing Zero a large portion of their damage comes from their strong Ultimate attack. Therefore, their Ultimate should be your top priority over any of the other three options. Zero's skill is their next biggest damage contribution and should be prioritized before the Basic Attack or Support Skill.

Zero's Awakening Priority
If you have one or multiple copies of a character, you will be able to select Awakenings of your choosing. The following is a recommendation of what order to generally select for Zero's Awakenings. Remember that you can switch them at any time to try out different ones, or tailor your choices for a specific fight or situation.
| Awakening Unlock Order | Explanation |
|---|---|
| Finding the Calling (A2) |
Your First choice should be Zero's A2, which generates extra Ultimate energy and helps Zero use their Ultimate more often within any given battle. |
| Anomalies Record (A3) |
Anomalies Record should be your next priority, as it helps tremendously in guaranteeing 100% CRIT Rate on Zero's Ultimate. |
| Undecided Factors (A4) |
The third recommended Awakening unlock is Undecided Factors as it provides Zero with an Ultimate damage increase. To get the full bonus Zero needs to have at least 250 base ATK, which you can already reach before even hitting max level. |
| Theopneustos (A5) |
Zero's 4th recommended Awakening unlock is Theopneustos, providing Zero with a decent attack bonus. You will want to time this in a way that ensures that the ATK bonus is active when using Zero's Ultimate. |
| Blooming Gaze (A1) |
Blooming Gaze should be next as it provides Zero with a large damage bonus to a first hit on an enemy, which is a helpful boost at the start of a fight, especially when fighting random enemies in the City. However, as it requires the enemy to be a lower level than zero and it is a one-time bonus per enemy, it is only situationally useful. If this ends up allowing you to almost one-shot enemies while exploring, you can pick this as one of your first Awakenings instead. |
| Deceptive Liberation (A6) |
Lastly, Zero's A6 should be the last one prioritized. This Awakening increases the additional damage that Zero does to a single lower level enemy hit by the skill. While the damage increase is substantial, the level advantage needed and the fact that it is only once per skill use, makes this a very situational Awakening. |
Both Zero's A1 and A6 are designed to help with regular combat instead of bosses, so if you want to have an easier time while exploring Hethereau, you may slot in these 2 Awakenings, as long as you don't forget to switch back once you engage with more difficult combat.

How to Play Zero
Zero is a Burst DPS Esper specializing in switching onto the field to do a large amount of Ultimate damage. In addition, when in a Charge Esper Cycle team, Zero can function as a healer thanks to their "Appraiser" passive support skill.
Once the game has launched, and we had an opportunity to play around with all the characters, we will be updating this section with more specific rotational advice and how to set up specific combos for Esper Cycles or burst windows!

Zero's Best Teams
To learn all about Zero's synergies and best team compositions, check our dedicated Zero team page below:
Changelog
- 08 Jun. 2026: Reviewed for Version 1.1, no changes were necessary.
- 27 Apr. 2026: Updated for Global Launch.
- 25 Apr. 2026: Updated to include new console setup for Zero.
- 09 Apr. 2026: Initial build setup for Zero added.
- 24 Mar. 2026: Initial guide for Zero added.
- This Neverness to Everness ARC Can Open Every Safe in a Heist at Once
- Neverness to Everness Reveals Chaos Banner Rewards
- Here’s How to Solve Every Sunward Island Strange Tale in NTE
- Do Not Spend Your Stamina on This Activity During NTE’s Fons Rush Event
- Players Found All 8 Long Dream Locations Before NTE Revealed Them
- Check Your Mailbox: Neverness to Everness Compensation Is Rolling Out!
- You Don Not Need Viral Posts to Finish NTE’s Bagel Event
- Neverness to Everness Players Have a Lot to Claim in Version 1.1