Scarlet Monastery Armory Dungeon Guide
Scarlet Monastery is a dungeon with 4 wings that each require different levels and setups depending on which one you are attempting. For the Armory wing, we recommend only attempting this with a group from Level 36 to 38 for the smoothest possible run. This wing can be completed in under 30 minutes.
The other wings are Scarlet Monastery: Cathedral, Scarlet Monastery: Graveyard, and Scarlet Monastery: Library.
You can find out more about the instance and all of its wings in our Scarlet Monastery.
Scarlet Monastery Entrance Location
The entrance to Scarlet Monastery is located in Tirisfal Glades, to the northeast of Undercity. Once you go in to the monastery, there are 4 doors, with each one leading into a different wing of the dungeon.
For the Armory wing, enter the locked door on the right. In order to unlock it,
you need ![]() The Scarlet Key, which drops from a chest in the Library wing.
You can learn more about this in our Scarlet Monastery.
The Scarlet Key, which drops from a chest in the Library wing.
You can learn more about this in our Scarlet Monastery.
Scarlet Monastery Quests
Before setting foot in Scarlet Monastery, we strongly advise you to get all the dungeon quests related to it. To make this process easier, we have written a separate guide.
Layout of Scarlet Monastery Armory
The layout of this dungeon is completely linear. Follow the natural progression of the dungeon and you will get to Herod with no issues.
Notable Trash in Scarlet Monastery Armory
There are a huge amount of patrols throughout this dungeon, so you need to be very careful how you pull each pack. When they reach low health, almost every trash mob will run away, so be ready to slow or snare them until they die.
When fighting the trash, make sure to focus down any casters in the pack first, as they deal by far the most damage. If the pack you are fighting has no casters, then be wary of the Scarlet Myrmidons, as they will enrage at low health and deal much more damage.
Remember that trash can respawn in this dungeon, so make sure you do not pull too slowly.
Bosses in Scarlet Monastery Armory
Herod
-

 Cleave
 Enrage
 Rushing Charge
 Whirlwind
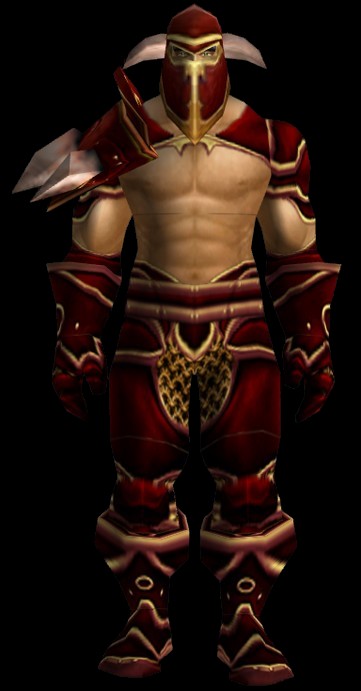
Herod is a Level 40 elite humanoid and is the only boss of the dungeon.
Herod's fight essentially takes part in two phases: the damage phase and the
whirlwind phase. When you engage him, leave any ranged DPS on the first platform
and have your tank and melee jump down. Tank him facing away from the melee, to
avoid damage from ![]() Cleave, and DPS him until he casts Whirlwind.
Cleave, and DPS him until he casts Whirlwind.
When he casts this, your melee and tank need to run away to avoid any damage from it. It hits very hard and will kill anyone too slow to move away. It is also important to note that he is magic immune during this spell.
Once he stops spinning, the fight continues as it started. Alternate between these two phases until he is dead. The only difference at low HP is that he will enrage at 20% HP, dealing more damage and attacking faster.
Before Herod dies, any ranged on the platform need to jump down to avoid the incoming swarm of Scarlet Trainees that will enter the room. AoE these down as fast as you can, but allow your tank enough time to get aggro on them.
Loot from Herod
| Item | Required Level | Slot |
|---|---|---|
| 37 | Shoulder | |
| 37 | Head | |
| 37 | Weapon | |
| 38 | Legs |
Changelog
- 18 Nov. 2024: Page updated for Classic Anniversary.
- 05 Apr. 2024: Added boss pictures and abilities.
- 18 Oct. 2019: Added note about the Scarlet Key, moved quests section.
- 16 Aug. 2019: Guide added.
Classic Leveling Guides
Classic Dungeon Guides
Classic Profession Guides
Classic Reputation Guides
This guide has been written by Abide, TBC veteran for nearly a decade. Abide is a Warrior tank and multi-class expert currently playing on Faerlina as Horde. You can find him in the the Icy Veins Discord. You can also see him live on Twitch.
- WoW Classic on a Phone?! This Player Shows It Actually Works
- Blizzard Confirms No Fresh Season of Discovery Servers, Fueling Classic+ Rumors
- XP Blocker Moves: Season of Discovery Hotfixes, June 25th
- Players Think a Leaked Blizzard Timeline Just Revealed Classic+ Release Window
- Guardian Mounts and Mog, Sa’bak: WoW Summer Sale, Up To 50% Off on Mounts, Pets, Toys, Transmog!
- Classic+ Fans, This ‘Camelot’ Datamine Is the Lead You’ve Waited For
- Darkmoon Faire Fixes, Extra One for Compensation: Burning Crusade Classic Hotfixes, June 12th
- Burning Crusade Classic Hotfixes, June 2nd