Razorfen Kraul Dungeon Guide
Razorfen Kraul is an easy dungeon for both Alliance and Horde players between Levels 26 and 31. It is located in The Barrens and will normally take a group an hour to clear it.
The dungeon itself is a stronghold for the Quilboar, an aggressive race that have caused issues all over the Barrens. They kill any adventurers that enter the stronghold, but it seems there may be some secret they are hiding inside.
Razorfen Kraul Entrance Location
Razorfen Kraul is located at the southern most tip of the Barrens, just northwest of the Great Lift that leads to the Thousand Needles.
If you are an Alliance player, it can be tough to get to this dungeon and you will likely have to move through Horde territory. It is advisable to group up before making your way through Dustwallow Marsh from Theramore and into the Barrens. Once there, try to stay off the main path south as you are less likely to encounter Horde players.
Razorfen Kraul Quests
Before setting foot in Razorfen Kraul, we strongly advise you to get all the dungeon quests related to it. To make this process easier, we have written a separate guide.
Layout of Razorfen Kraul
Razorfen Kraul is a surprisingly easy dungeon to navigate, despite looking fairly imposing to begin with. Make sure to stay on the top level of the dungeon and do not drop off the side until you have killed Charlga Razorflank.
The only notable deviations from following the layout of the dungeons are:
- If you want to complete the Warrior-only quest that is inside this dungeon, you should take a left at the first intersection, rather than proceeding straight ahead to Aggem Thorncurse.
- After killing Charlga Razorflank, you will want to drop off the side so that you can complete the escort quest down below.
Notable Trash in Razorfen Kraul
The trash in this instance is known for having a large number of CC abilities that can quickly lead to a group wipe if they are not dealt with.
The most important of these is ![]() Enveloping Winds, which is used by
Razorfen Dustweaver. If this is cast on your healer, your tank needs to
be careful about aggroing more mobs. If a DPS can heal, this is a good time to
do so to help your tank survive.
Enveloping Winds, which is used by
Razorfen Dustweaver. If this is cast on your healer, your tank needs to
be careful about aggroing more mobs. If a DPS can heal, this is a good time to
do so to help your tank survive.
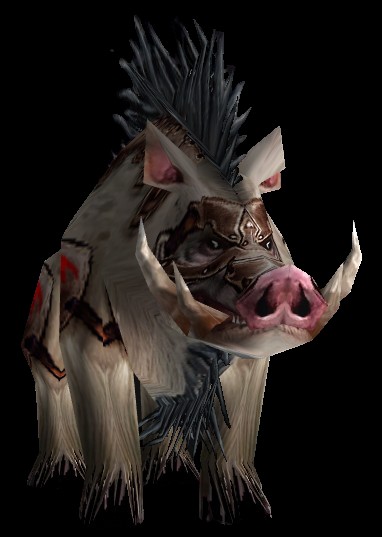
This instance has multiple rare mobs throughout; all of them have a chance to drop very good loot.
Razorfen Spearhides have a chance to spawn alongside the boss
Overlord Ramtusk. They have a high chance to drop ![]() Armor Piercer.
Armor Piercer.
Bosses in Razorfen Kraul
Roogug
-

 Lightning Bolt
 Summon Earth Rumbler
Roogug is a Level 28 elite humanoid and is an optional boss that is only required for a Warrior-only quest.
There are no mechanics worth mentioning on this boss, but you should clear the trash around it before engaging.
Loot from Roogug
Roogug drops no loot beyond the item ![]() Vial of Phlogiston, which is
required for the Warrior-only quests Fire Hardened Mail (Alliance)
and Brutal Armor (Horde).
Vial of Phlogiston, which is
required for the Warrior-only quests Fire Hardened Mail (Alliance)
and Brutal Armor (Horde).
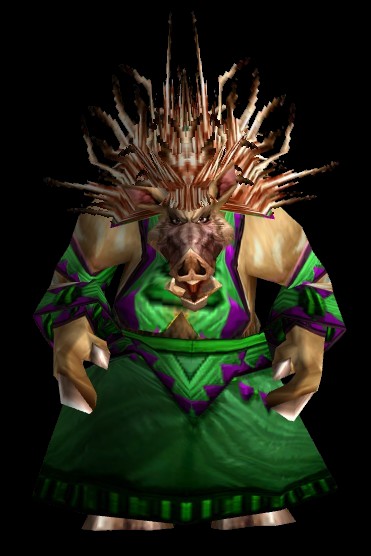
Aggem Thorncurse
-

 Chain Heal
 Summon Boar Spirit
Aggem Thorncurse is a Level 30 elite humanoid and is the first boss of the instance.
There are no mechanics that are worth mentioning on this boss.
Loot from Aggem Thorncurse
This boss drops no loot worth mentioning.
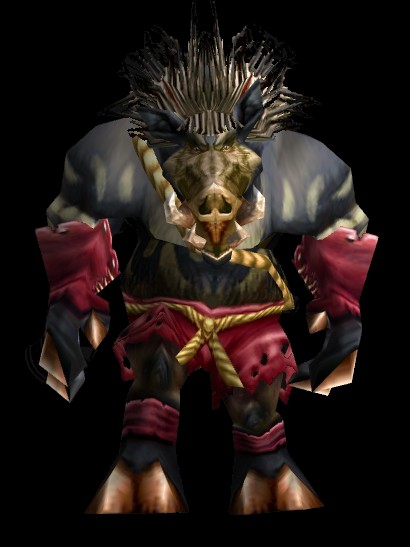
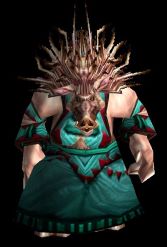
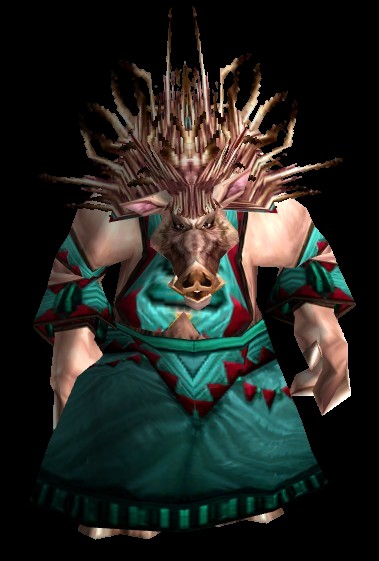
Death Speaker Jargba
-
 Dominate Mind
 Shadow Bolt

Death Speaker Jargba is a Level 30 elite humanoid and is the second boss of the instance.
Jargba can be a very tough fight if your group is not prepared for him. As soon as you engage any mob in his group, all of them will aggro as well. You should try to CC as many of them as you can before pulling.
During the fight, Jargba will use ![]() Dominate Mind on players and mind
control them. Having a Mage on this fight is extremely useful, as they can CC
the mind controlled player instantly with
Dominate Mind on players and mind
control them. Having a Mage on this fight is extremely useful, as they can CC
the mind controlled player instantly with ![]() Polymorph.
Polymorph.
Loot from Death Speaker Jargba
| Item | Required Level | Slot |
|---|---|---|
| 25 | Shoulder | |
| 26 | Chest | |
| 28 | Weapon |
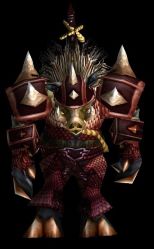
Overlord Ramtusk
-
 Battle Shout
 Thunderclap

Overlord Ramtusk is a Level 32 elite humanoid and is the third boss of the instance.
There are no mechanics worth mentioning on this boss, but you should CC the adds if you can to make the fight easier for your group.
Loot from Overlord Ramtusk
| Item | Required Level | Slot |
|---|---|---|
| 28 | Helm | |
| 29 | Weapon |
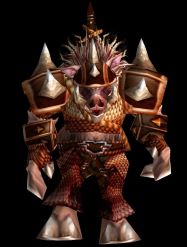
Agathelos the Raging
-

 Enrage
 Left for Dead
 Rampage
 Rushing Charge
Agathelos the Raging is a Level 33 elite beast and is the fourth boss of the instance.
There are no mechanics that are worth mentioning on this boss.
Loot from Agathelos the Raging
| Item | Required Level | Slot |
|---|---|---|
| 29 | Legs | |
| 30 | Weapon |
Blind Hunter
-
 Sonic Burst
 Ravage

Blind Hunter is a Level 32 elite beast and has a chance to spawn after Agathelos the Raging.
Be careful of this mob's AoE silence ability. Your healer should stand at range to avoid getting hit by it.
Loot from Blind Hunter
| Item | Required Level | Slot |
|---|---|---|
| 27 | Shoulder | |
| 27 | Bow | |
| 27 | Neck |
Earthcaller Halmgar
-

 Earthbind Totem
- Lightning Bolt
- Summon Earth Rumbler

Earthcaller Halmgar is a Level 32 elite humanoid and has a chance to spawn on the platforms after Overlord Ramtusk.
There are no mechanics worth mentioning on this boss, but you should CC the adds if you can to make the fight easier for your group.
Loot from Earthcaller Halmgar
| Item | Required Level | Slot |
|---|---|---|
| 27 | Head | |
| 27 | Weapon |
Charlga Razorflank
-
 Chain Bolt
 Mana Spike
 Purity
 Renew
Renew
Charlga Razorflank is a Level 33 elite humanoid and is the final boss of the instance.
Interrupt Charlga's spells as often as possible and just burn her down.
Loot from Charlga Razorflank
| Item | Required Level | Slot |
|---|---|---|
| 31 | Ring | |
| 31 | Shield | |
| 31 | Weapon |
Recommended Classes for Razorfen Kraul
A Mage can be extremely useful here for both their ![]() Counterspell and
their
Counterspell and
their ![]() Polymorph. Polymorph essentially trivialises the mind control
mechanic of Death Speaker Jargba, which is extremely useful.
Polymorph. Polymorph essentially trivialises the mind control
mechanic of Death Speaker Jargba, which is extremely useful.
Horde groups can also bring a Shaman, as their ![]() Earth Shock can be
very useful for grouping up the numerous caster mobs in this dungeon.
Earth Shock can be
very useful for grouping up the numerous caster mobs in this dungeon.
Changelog
- 18 Nov. 2024: Page updated for Classic Anniversary.
- 05 Apr. 2024: Added boss pictures and abilities.
- 09 Oct. 2019: Moved quests to dedicated page.
- 21 Aug. 2019: Guide added.
Classic Leveling Guides
Classic Dungeon Guides
Classic Profession Guides
This guide has been written by Abide, TBC veteran for nearly a decade. Abide is a Warrior tank and multi-class expert currently playing on Faerlina as Horde. You can find him in the the Icy Veins Discord. You can also see him live on Twitch.
- Burning Crusade Classic Phase 2 Now Live: Here’s What to Expect
- Did Blizzard Just Quietly Invite Creators to Play WoW Classic’s Next Chapter?
- WoW Weekly Returns: Patch 12.0.5, Twitch Drops & Classic Updates
- WoW BCC Anniversary Edition: Overlords of Outland – Everything Coming May 14
- Battleground Honor Significantly Increased
- Limited-Time Mount Alert: Get the Voidfeather Dragonhawk for TBC Classic Servers Now!
- Could WoW Be Added to Xbox Game Pass Ultimate?
- MoP Classic Escalation PTR Update Details New Content