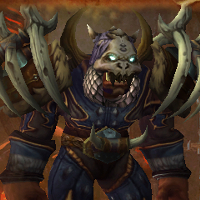
Beastlord Darmac Detailed Strategy Guide (Heroic+Mythic Modes included)
Table of Contents
Introduction
This guide is intended to provide a comprehensive description of the encounter with Beastlord Darmac in Blackrock Foundry. It is targeted at anyone who desires to understand the fight mechanics.
This guide is updated for World of Warcraft WoD 6.1.2.
Beastlord Darmac is the first boss in the Iron Assemble wing of the Blackrock Foundry raid instance. The encounter is comprised of many phases. Throughout the fight, the boss will mount different beasts and use them against your raid, retaining abilities from each defeated beast as the fight goes on. This results in an encounter which increases in difficulty, and which will truly strain your raid towards the end.
General Information
Normal, Heroic, and Mythic Difficulty
This main part of this guide covers both the Normal and Heroic versions of the encounter, as far as mechanics and general strategy is concerned. The only difference between these two modes is found in the tuning, with Heroic being more difficult.
When we speak of extreme situations (such as the difficulty of a soft enrage timer, or damage from a certain source being too high to survive), we mostly refer to Heroic mode.
In addition to this, we have a specific Mythic mode section, where we present all the differences between Normal/Heroic and Mythic, as well as the strategy to defeat the Mythic encounter.
Enrage Timer
We do not currently know what the hard enrage timer for this encounter is. There do not seem to be any soft enrage mechanics in the fight.
Summing Things Up
In this section, we will very briefly summarise what the players belonging to each of the three roles have to do during this fight. This is by no means meant to provide sufficient information to master the encounter, and it is only supposed to give you a very rough idea of what to watch out for.
Tanks
- Perform a tank switch throughout the fight (except for the first 15% of
the boss' health), to deal with
 Rend and Tear,
 Crush Armor, and
  Seared Flesh, respectively.
 - Tank the boss near the place where the Pack Beasts enter the fight, and make sure to pick up and tank all the Pack Beasts.
- In Mythic mode
- Move Darmac out of the
 Epicenter void zone created by
Faultline (and later on, after Faultline's death, by Darmac
himself).
Epicenter void zone created by
Faultline (and later on, after Faultline's death, by Darmac
himself). - Whenever Faultline's next attack is empowered by
 Heavy Smash, both tanks must make sure to stand on top of one
another.
Heavy Smash, both tanks must make sure to stand on top of one
another.
- Move Darmac out of the
Healers
- Pay special attention to the raid-wide damage caused by
 Tantrum, while against Ironcrusher and from then onwards until
the end of the fight. Use healing cooldowns here if needed.
Tantrum, while against Ironcrusher and from then onwards until
the end of the fight. Use healing cooldowns here if needed. - Be prepared to dispel players affected by
 Conflagration or
by the DoT applied by
Conflagration or
by the DoT applied by  Inferno Breath and
Superheated Shrapnel.
Inferno Breath and
Superheated Shrapnel. - Make sure to provide ample healing to the tanks, who will be subjected to many debuffs.
- In Mythic mode, be prepared for the very high damage from all
sources, but particularly:
- from the Pack Beasts, when they have stacks of
 Blood Scent;
 - from Faultline, once a few stacks of
 Unstoppable have
accumulated.
Unstoppable have
accumulated. - from Darmac himself, particularly during the Final On Foot Phase.
- from the Pack Beasts, when they have stacks of
DPS
- AoE down Pack Beasts whenever they are alive.
- Focus DPS on Heavy Spears that are pinning down raid members, and multi-DoT Heavy Spears that are not.
- Against Cruelfang, remove the enrage effects from the boss and the Pack Beasts.
- In Mythic Mode, whenever Darmac dismounts a Prime Beast, focus DPS on that beast and kill it as quickly as possible.
Everyone
- Ranged raid members must be spread out at all times except for the first 15% of the boss' health.
- Melee players should spread out temporarily when Rend and Tear
is being cast.
- Make sure to avoid
 Pin Down, the affected areas of which are clearly marked on the
floor;
Pin Down, the affected areas of which are clearly marked on the
floor;- Inferno Breath and Superheated Shrapnel, both of which one
can easily predict given the facing of the boss;
- standing in void zones left behind by Superheated Shrapnel during the Final On Foot Phase.
- In Mythic mode
- Whenever Faultline (and later on, Darmac himself) casts
Epicenter, move out of the void zone.
- Whenever Faultline casts
 Cannonball Barrage, avoid the impact
locations of the projectiles.
Cannonball Barrage, avoid the impact
locations of the projectiles.
- Whenever Faultline (and later on, Darmac himself) casts
Overview of the Fight
The encounter against Beastlord Darmac is a multiple-phase fight, during which you will fight Darmac himself, as well as a number of different adds. We count the number of phases as 7, but this is debatable given the nature of the phases, as you will see.
Darmac has a default phase, which we will call the On Foot Phase. He starts the fight in this phase, and returns to it several times throughout the encounter. In addition to this, there are three large beasts located in the room, and throughout the fight, Darmac will mount each one of them, gaining new abilities as he does so. After each beast dies (Darmac cannot be attacked while he is mounted on a beast, so your raid has no choice but to kill them), Darmac will gain an ability from that beast which he will use throughout the rest of the fight. We will explain exactly how this happens, below.
- The fight starts with Darmac On Foot, and this lasts until he reaches 85% health.
- At 85% health, Darmac will mount the nearest beast to him. When the first beast is dead, Darmac will dismount and he will once again be in the On Foot Phase. This lasts until he reaches 65% health.
- At 65% health, Darmac will mount the nearest beast to him. When this second beast is dead, Darmac will once again be on Foot, until he reaches 45% health.
- At 45% health, Darmac will mount the final beast.
- After the final beast dies, Darmac will remain in an intense, final On Foot Phase until the end of the fight.
As Darmac retains an ability from each of the three beasts that he mounts, the encounter becomes more difficult as you progress.
We have released a video preview of the encounter against Beastlord Darmac, based on our (Heroic) Beta testing. You can watch this video to get a good idea of how the fight works, but keep in mind that some things can still change before the fight goes live.
A Note on Beast Order
Your raid can directly decide which order Darmac mounts his beasts in. This is because Darmac will always mount the closest beast to him when the time to mount a beast happens (at 85%, 65%, and 45% health, respectively). As we have mentioned, Darmac retains an ability from each beast mount that he uses (after that mount is killed), so the order matters a lot. It matters because he will use the ability retained from the first mount for a far longer period of time than the one retained from the last mount. Therefore, it is in your raid's best interest to make sure that Darmac mounts the most problematic beasts second and third, and the easiest beast first.
The order that we recommend is Cruelfang > Ironcrusher > Dreadwing, but we may revise this recommendation as we know more about the optimal strategy for the encounter.
We have chosen to present the fight in a linear way, assuming that you are having the boss choose his beast mounts in the above-mentioned order.
On Foot Phases
The On Foot Phase is the phase in which the fight starts, and also the phase to which Darmac will revert for 20% of his health, each time one of his beast mounts is killed, throughout the fight. When Darmac's final beast mount dies, the boss will remain in the On Foot Phase (which we refer to as the Final On Foot Phase) until he dies.
The initial On Foot Phase will last until Darmac reaches 85% health, at which point he will mount on the first beast.
Abilities
During the initial On Foot Phase, Darmac will only have two abilities, but he retains an ability from each defeated beast, so as the fight progresses, the number of On Foot abilities will increase.
It is essential to note that Darmac continues to use the On Foot abilities throughout the entire fight, even while mounted on his beasts. In this section we will look at two abilities that he starts out with in the initial On Foot Phase. We discuss how to deal with the additional abilities in the respective sections of the guide.
- Pin Down is an ability that Darmac uses regularly throughout the
fight. He targets the locations of a number of raid members (2 or 3,
depending on your raid's size), and throws spears at those locations. The
spears land about 2 seconds after being thrown, during which time the landing
locations are marked visually. When the spears land, they deal moderate
Physical damage to any players within 25 yards, and they pin down any players
within 3 yards, also dealing much higher damage to them. Pinned down players
are disabled until the spear is killed. The spears can be attacked and
killed normally, and their NPC name is Heavy Spear. Note that the
Heavy Spears (even those that do not pin down players) will remain alive and
active until they are killed.
 Call the Pack is an ability that Darmac uses roughly every 20
seconds. He summons a large number of adds called Pack Beasts, which
enter the room and begin attacking the raid.
Call the Pack is an ability that Darmac uses roughly every 20
seconds. He summons a large number of adds called Pack Beasts, which
enter the room and begin attacking the raid.- Pack Beasts always enter the room from the same location, a small grated gate that is located opposite to where Darmac is standing before he is pulled. The Pack Beasts can be tanked normally, and they can be damaged and killed. All they do is melee their target.
Strategy
The strategy for the initial On Foot Phase is not at all difficult. As you can see, the boss only has two abilities, and there is no requirement for your tanks to perform a switch. The way you deal with these two abilities remains the same throughout the fight, so it is important to understand it well and to master it.
Any players targeted by ![]() Pin Down should avoid getting hit by the
spears. Normally, if players react reasonably quickly, this should not be a
problem. If any players are pinned down, however, the Heavy Spears
should be focused down and killed. One of the mounts grants Darmac an ability
that causes existing Heavy Spears (even those who have not pinned down any
players) to deal damage to the raid, so your raid should slowly kill off all
the spears that Darmac throws, however they are a relatively low priority
(worthy of multi DoT techniques) compared to the spears that are actually
pinning down players.
Pin Down should avoid getting hit by the
spears. Normally, if players react reasonably quickly, this should not be a
problem. If any players are pinned down, however, the Heavy Spears
should be focused down and killed. One of the mounts grants Darmac an ability
that causes existing Heavy Spears (even those who have not pinned down any
players) to deal damage to the raid, so your raid should slowly kill off all
the spears that Darmac throws, however they are a relatively low priority
(worthy of multi DoT techniques) compared to the spears that are actually
pinning down players.
Dealing the with the Pack Beasts is fairly straightforward. The tank should always tank Darmac close to the gate from which the beasts enter the fight, and the tanks should pick up all of the beasts while the raid AoEs them down. If left alive for too long, the beasts' damage can overwhelm the tanks, so it is important that all raid members capable of AoE damage focus them down and kill them quickly.
Cruelfang
Cruelfang is one of the three beast mounts that Darmac uses during the fight, and the one we advise you to deal with first.
Abilities
While mounted on Cruelfang, Darmac uses the following two abilities, in addition to the abilities used during the On Foot Phase.
- Rend and Tear is an ability that Darmac regularly uses while
mounted on Cruelfang. The boss leaps to a random ranged raid member, and
applies a 30-second bleed on all players in a 7-yard radius, also debuffing
them to take 10% increased damage from Rend and Tear for the same duration.
Immediately after leaping to this location, the boss leaps back to the tank,
applying the same effect to all players in a 7-yard radius at that location.
Since this second part of the ability will always debuff the tank, the ability
requires a tank switch.
 Savage Howl is an ability that Darmac regularly uses while mounted
on Cruelfang. Savage Howl deals a moderate amount of Physical damage in a small
radius around the boss, and also buffs the boss and any other allies (in this
case, the Pack Beasts) to have 75% increased attack speed. The buff is
an enrage effect.
Savage Howl is an ability that Darmac regularly uses while mounted
on Cruelfang. Savage Howl deals a moderate amount of Physical damage in a small
radius around the boss, and also buffs the boss and any other allies (in this
case, the Pack Beasts) to have 75% increased attack speed. The buff is
an enrage effect.
When Cruelfang is defeated, the boss gains ![]() Cruelfang's Swiftness,
which he retains throughout the rest of the fight. This simply grants the boss
the
Cruelfang's Swiftness,
which he retains throughout the rest of the fight. This simply grants the boss
the ![]() Rend and Tear ability.
Rend and Tear ability.
Strategy
The strategy for dealing with Cruelfang is fairly simple. Your ranged raid
members should be spread out as much as possible throughout the room, so that
any time that the boss casts ![]() Rend and Tear, as few players as
possible will be affected by the bleed and by the debuff. Melee players should
also spread out (or even run away) from the tank when Darmac is casting this
ability, so that they do not get affected by it when he leaps back.
Rend and Tear, as few players as
possible will be affected by the bleed and by the debuff. Melee players should
also spread out (or even run away) from the tank when Darmac is casting this
ability, so that they do not get affected by it when he leaps back.
It is of particular importance that the tank currently not tanking Darmac does not get affected by Rend and Tear (by making sure that they are standing sufficiently away from the current tank), and the two tanks should perform a tank switch whenever the Rend and Tear damage gets too high.
The other new element during this phase of the fight is ![]() Savage Howl.
There are two ways to deal with this ability. The first is to try to move
Cruelfang away from any Pack Beasts when this ability is about to be
cast, so that they do not get buffed, but this can prove tricky in practice
(because the Pack Beasts will not always be tanked simply by the tank not
currently tanking Cruelfang). The second way of dealing with it is to simply
tank all the mobs together (while doing as much AoE damage as possible to the
Pack Beasts), and to have the enrage effect applied by Savage Howl removed as
quickly as possible. Hunters, Rogues, and Druids will have to be very diligent
in removing these enrages, not just from the boss but also from any Pack Beasts
that are not very low on health.
Savage Howl.
There are two ways to deal with this ability. The first is to try to move
Cruelfang away from any Pack Beasts when this ability is about to be
cast, so that they do not get buffed, but this can prove tricky in practice
(because the Pack Beasts will not always be tanked simply by the tank not
currently tanking Cruelfang). The second way of dealing with it is to simply
tank all the mobs together (while doing as much AoE damage as possible to the
Pack Beasts), and to have the enrage effect applied by Savage Howl removed as
quickly as possible. Hunters, Rogues, and Druids will have to be very diligent
in removing these enrages, not just from the boss but also from any Pack Beasts
that are not very low on health.
Your healers will be put under additional strain during this phase (as opposed to simply the On Foot Phase), since there will be considerably more damage to heal. This means that handling the two On Foot abilities correctly becomes even more important than before.
On Foot after Cruelfang
For roughly 20% of Darmac's health, the fight will be exactly as during the
Cruelfang phase, except that the boss will not be using ![]() Savage Howl
anymore. Simply execute the same strategy as above.
Savage Howl
anymore. Simply execute the same strategy as above.
Ironcrusher
Ironcrusher is one the three beast mounts that Darmac uses during the fight, and the one we advise you to deal with second.
Abilities
While mounted on Ironcrusher, Darmac uses the following three abilities, in addition to the abilities used during the On Foot Phase (to which you should add the abilities he retains from any previously defeated beasts, which in the current strategy should be Cruelfang).
- Crush Armor is a stacking debuff that is applied to the
current tank, which reduces their armor by 10% per stack for 15 seconds. This
ability requires a tank switch.
- Tantrum is an ability that the boss uses regularly while
mounted on Ironcrusher. The ability deals raid-wide Physical damage every 5
seconds for 20 seconds.
 Stampede is an ability that the boss uses regularly while
mounted on Ironcrusher. He charges to the location of a random ranged player,
dealing high Physical damage to any players located in a small radius, and
knocking them back.
Stampede is an ability that the boss uses regularly while
mounted on Ironcrusher. He charges to the location of a random ranged player,
dealing high Physical damage to any players located in a small radius, and
knocking them back.
When Ironcrusher is defeated, the boss gains ![]() Ironcrusher's Rage,
which he retains throughout the rest of the fight. This simply grants the boss
the
Ironcrusher's Rage,
which he retains throughout the rest of the fight. This simply grants the boss
the ![]() Tantrum ability.
Tantrum ability.
Strategy
Throughout this phase of the fight, the tanks will have to perform a tank
switch on the boss, to deal with the ![]() Crush Armor debuff. Since
your tanks are already most likely performing a tank switch for
Crush Armor debuff. Since
your tanks are already most likely performing a tank switch for
![]() Rend and Tear, nothing will really change in your strategy.
Rend and Tear, nothing will really change in your strategy.
Ranged raid members should be spread out to minimise the damage taken from
![]() Stampede. Again, since your ranged raid members are already
most likely spread out to avoid being needlessly affected by
Stampede. Again, since your ranged raid members are already
most likely spread out to avoid being needlessly affected by
![]() Rend and Tear, nothing will really change.
Rend and Tear, nothing will really change.
Finally, your healers will have to be prepared for the high raid-wide damage
inflicted by ![]() Tantrum. We recommend rotating healing cooldowns
for this ability, since there are no other instances of dangerous raid damage
in the encounter.
Tantrum. We recommend rotating healing cooldowns
for this ability, since there are no other instances of dangerous raid damage
in the encounter.
In addition to these abilities, your raid will have to keep killing the Pack Beasts, and you will also have to avoid and kill the Heavy Spears.
On Foot After Cruelfang and Ironcrusher
For roughly 20% of Darmac's health, the fight will be exactly as before,
but you will no longer have to deal with ![]() Crush Armor or
Crush Armor or
![]() Stampede. This period of the fight will act as a respite before
the most difficult and intense phases.
Stampede. This period of the fight will act as a respite before
the most difficult and intense phases.
Dreadwing
Dreadwing is one the three beast mounts that Darmac uses during the fight.
Abilities
While mounted on Dreadwing, Darmac uses the following three abilities, in addition to the abilities used during the On Foot Phase (to which you should add the abilities he retains from any previously defeated beasts, which in the current strategy should be Cruelfang and Ironcrusher).
 Searing Fangs is an ability that the boss uses against his tank
while mounted on Dreadwing. This deals a small amount of Fire damage to the
target, and applies a stacking debuff called Seared Flesh to them which
causes them to take 20% increased Fire damage per stack. This ability requires
a tank switch.
Searing Fangs is an ability that the boss uses against his tank
while mounted on Dreadwing. This deals a small amount of Fire damage to the
target, and applies a stacking debuff called Seared Flesh to them which
causes them to take 20% increased Fire damage per stack. This ability requires
a tank switch.- Inferno Breath is a frontal cone breath attack that the boss uses
regularly while mounted on Dreadwing. Players hit by this attack take a large
amount of Fire damage, and they also have a stacking Fire damage DoT applied
to them for every second that they are being hit by the breath attack. The
DoT can be dispelled, and the breath attack can generally be avoided since the
boss turns to face the direction in which he will breathe a few seconds in
advance, and there is also an emote that indicates this.
- Conflagration is an ability that the boss regularly uses
while mounted on Dreadwing. This applies a dispellable 6-second Fire damage
DoT on random raid members, which also causes them to move around erratically.
While affected by Conflagration, players will spread the effect to any allies
within 8 yards.
When Dreadwing is defeated, the boss gains ![]() Dreadwing's Flame,
which he retains throughout the rest of the fight. This grants the boss several
abilities.
Dreadwing's Flame,
which he retains throughout the rest of the fight. This grants the boss several
abilities.
- Superheated Shrapnel is essentially identical to the
Inferno Breath ability used earlier. The only change is that the
breath also leaves some fiery void zones on the ground.
 Flame Infusion causes the corpses of Pack Beasts to deal
Fire damage every second to anyone standing on top of them.
Flame Infusion causes the corpses of Pack Beasts to deal
Fire damage every second to anyone standing on top of them.- Seeking Embers causes Heavy Spears to deal small amounts
of Fire damage to random raid members.
Strategy
To begin with, your two tanks will have to perform a tank switch throughout
this phase, in order to handle the ![]() Seared Flesh debuff. As we noted
above for
Seared Flesh debuff. As we noted
above for ![]() Crush Armor, your tanks are most likely already
performing a tank switch, so this should not be an issue.
Crush Armor, your tanks are most likely already
performing a tank switch, so this should not be an issue.
Ranged raid members will have to stay spread out, so that the
![]() Conflagration effect does not spread to too many targets.
Additionally, it is best if the Conflagrations are dispelled as quickly as
possible.
Conflagration effect does not spread to too many targets.
Additionally, it is best if the Conflagrations are dispelled as quickly as
possible.
Finally, all raid members must pay special attention to avoid being hit by
![]() Inferno Breath. Normally, this should not be very difficult, but any
players who are hit by it and who receive the Fire damage DoT should be
dispelled.
Inferno Breath. Normally, this should not be very difficult, but any
players who are hit by it and who receive the Fire damage DoT should be
dispelled.
In addition to these abilities, you will still have to kill the
Pack Beasts, avoid and kill the Heavy Spears, stay spread out
to avoid ![]() Rend and Tear. The healers will also have to be prepared
for the damage caused by
Rend and Tear. The healers will also have to be prepared
for the damage caused by ![]() Tantrum.
Tantrum.
Final On Foot Phase
After Dreadwing is defeated, the boss will remain on foot until he is killed. During this part of the fight, he will use all the abilities from the On Foot Phase and all the abilities he has retained from his beasts. In addition to this (as mentioned above), the Heavy Spears will deal damage to random players, and the corpses of the Pack Beasts will be harmful.
If your raid follows our suggestion to kill off all the Heavy Spears, even when no one is pinned down by them, then these should not cause any problems at this stage of the fight.
Your raid's strategy at this point will be the final test of all the tasks you have been performing in previous phases. This is a typical burn phase during which you will race to defeat the boss before your healers are overwhelmed. You should make use of any cooldowns left in your arsenal at this point.
When to Use Heroism/Bloodlust/Time Warp
We recommend using ![]() Heroism/
Heroism/![]() Bloodlust/
Bloodlust/![]() Time Warp
during the Final On Foot Phase, because this is when the fight is at its
most difficult. Darmac is using the most abilities that he has ever used
throughout the fight, and your raid will be in a race to kill him off before
the damage becomes overwhelming.
Time Warp
during the Final On Foot Phase, because this is when the fight is at its
most difficult. Darmac is using the most abilities that he has ever used
throughout the fight, and your raid will be in a race to kill him off before
the damage becomes overwhelming.
Mythic Mode
The Mythic mode of the Beastlord Darmac encounter is similar to the Normal/Heroic mode in terms of strategy and mechanics, but there are several new elements to the fight.
Differences From Normal/Heroic Mode
As is the case with every Mythic mode, the mobs deal more damage and have more health than their Heroic mode counterparts. In addition to this, there is a change to the way the fight works, and there are several new additions.
Change to Existing Mechanics
In Mythic mode, Beastlord Darmac dismounts his current beast when it reaches 40% health. At this point, your raid will have to fight both Darmac and the beast at the same time. During this time, the beast will use the same abilities it had been using up to that point. The best can be attacked and killed normally.
As in Normal and Heroic mode, Darmac will retain an ability from the defeated beasts, but it is worth noting that this only happens once the respective beast is dead (and not simply when Darmac has dismounted it).
New Mechanics
Firstly, it should be mentioned that the abilities that Darmac gains when Cruelfang and Ironcrusher are defeated have an additional effect, each.
- Upon defeating Cruelfang, Darmac also empowers all allies within 30 yards to gain 25% additional attack speed. This includes both Pack Beasts and other Prime Beasts.
- Upon defeating Ironcrusher, Darmac gains a 15% increase to his damage done.
Secondly, the Pack Beasts gain a new ability, called ![]() Blood Scent.
This is a stacking self-buff that they apply to themselves regularly. Each stack
increases their movement speed by 10% and their attack speed by 5%.
Blood Scent.
This is a stacking self-buff that they apply to themselves regularly. Each stack
increases their movement speed by 10% and their attack speed by 5%.
Finally, there is a fourth Prime Beast, called Faultline, which Darmac mounts when he reaches 25% health. Unlike with the other Prime Beasts, Darmac does not dismount Faultline when it reaches 40% health, and instead your raid must kill Faultline directly.
Faultline uses the following abilities.
- Epicenter creates a void zone under the boss, which damages
and slows any raid members who come in contact with it. The Epicenter void
zones last for 60 seconds.
- Cannonball Barrage fires projectiles at the locations of random
raid members, dealing damage in a 3-yard radius when they land. There is ample
visual warning provided for players to be able to avoid the impact
locations.
- Unstoppable is a stacking self-buff that increases Faultline's
damage done by 10% per stack.
 Unsteady is an ability that Faultline regularly uses to deal a
high amount of raid-wide Physical damage. This also reduces all affected
targets' movement speed by 50% for 3 seconds.
Unsteady is an ability that Faultline regularly uses to deal a
high amount of raid-wide Physical damage. This also reduces all affected
targets' movement speed by 50% for 3 seconds.- Heavy Smash is an ability that Faultline uses to empower its
next attack, dealing double damage split between the tank and the closest
raid members to them.
Upon Faultline's death, Darmac retains the Epicenter and Unstoppable abilities. He is also healed up to around 50% of his health.
Strategy
Despite a relatively large number of changes and additions compared to the Heroic mode version of the fight, the strategy does not change much. Your raid will have to perform mostly the same tasks as before, but the difficulty becomes much greater.
As far as changes go, the most apparent one is that when Cruelfang, Ironcrusher, and Dreadwing each reaches 40% health, they dismount and engage the raid alongside Darmac. Whenever this happens, we advise your raid to focus entirely on finishing off the Prime Beast. Normally, this will not be very difficult, given the relatively low health that the beasts have. The beasts will continue to use their abilities, which you will have to continue handling as before.
The next greatest difference you will notice is, of course, the addition of the fourth Prime Beast, Faultline. While Darmac is mounted on this beast, your raid will have to handle all of its abilities, as follows.
- Whenever Faultline is empowered by Heavy Smash (a buff appears on
Faultline to indicate this), the two tanks should stand on top of each other
to split the damage.
- Whenever Faultline casts Epicenter, all raid members should
immediately move out of the void zone (this is particularly relevant for
melee players), and the tanks should move the boss out of the void zone as
well, to allow melee players to continue their DPS.
- Whenever Faultline casts Cannonball Barrage, all raid members
should be careful to avoid the landing projectiles.
- The raid will simply have to endure the effects of
Unstoppable (Faultline's stacking damage done increase) and
Unsteady (the raid-wide damage and slow). As you can tell, the raid's
healers play an important role here.
In addition to all of this, the raid will have to contend with the
Pack Beasts ![]() Blood Scent, but all this involves is making
sure that the Pack Beasts are killed quickly, before this buff has a chance
to stack.
Blood Scent, but all this involves is making
sure that the Pack Beasts are killed quickly, before this buff has a chance
to stack.
Regarding Darmac himself, there are two things of note. First of
all, the added abilities he gains after the deaths of Cruelfang and Ironcrusher
increase the difficulty of the encounter, but there is not much that the raid
has to do to handle them specifically. Secondly, the Final On Foot Phase is
even more difficult than in Heroic mode, with the boss having the two
additional abilities that he retains from Faultline. This leads to a brutal
final phase. Our advice to use
![]() Heroism/
Heroism/![]() Bloodlust/
Bloodlust/![]() Time Warp at this time still
stands.
Time Warp at this time still
stands.
Learning the Fight
While it might seem like this fight has an overwhelming number of abilities, in reality, learning to handle most of them is easy, because they all require the same general tasks of your raid (spread out, perform tank switches, etc.), and you will only have to focus on a select few important tasks.
The most important things, in our opinion, are to make sure that your raid's AoE/multiple target damage is properly distributed throughout the fight. This means that the Pack Beasts should be a top priority for your raid at all times, and that the Heavy Spears should always be focused down whenever they are pinning players. Heavy Spears that are not pinning anyone should be killed through multi DoTs and incidental AoE damage, so that they are never allowed to accumulate.
Another very important aspect that your raid has to master is avoiding the
![]() Inferno Breath (and the subsequent
Inferno Breath (and the subsequent ![]() Superheated Shrapnel),
because these come into play at a time in the fight where you cannot really
afford to take any additional damage.
Superheated Shrapnel),
because these come into play at a time in the fight where you cannot really
afford to take any additional damage.
Lastly, we emphasise the importance of removing the enrage effects applied
by ![]() Savage Howl.
Savage Howl.
Loot
In this section, you will find the loot table for Beastlord Darmac. The section is divided in 3 subsections: armor, weapons, and the rest (neck, back, finger, and trinket items).
Armor
| Item Name | Armor | Slot | Secondary Stats |
|---|---|---|---|
| Cloth | Chest |
|
|
| Cloth | Waist |
|
|
| Cloth | Feet |
|
|
| Cloth | Feet |
|
|
| Leather | Chest |
|
|
| Leather | Hands |
|
|
| Leather | Legs |
|
|
| Leather | Feet |
|
|
| Wrists |
|
||
| Wrists |
|
||
| Legs |
|
||
| Legs |
|
||
| Plate | Chest |
|
|
| Plate | Waist |
|
|
| Plate | Waist |
|
Weapons
| Item Name | Type | Main Stats | Secondary Stats |
|---|---|---|---|
| 1H Sword | Intellect |
|
|
| 1H Sword | Agility |
|
Amulets, Cloaks, Rings, and Trinkets
| Item Name | Type | Main Stats | Secondary Stats |
|---|---|---|---|
| Amulet |
|
|
|
| Cloak | Intellect |
|
|
| Cloak | Intellect |
|
|
| Ring | Intellect |
|
|
| Ring | Strength |
|
|
| Ring | Strength |
|
|
| Trinket | Intellect | Haste on proc | |
| Trinket | Intellect | Spirit on proc |
Concluding Remarks
This concludes our raid guide for Beastlord Darmac. We hope you have found it helpful. Please do not hesitate to post any feedback you may have on our forums.
Changelog
- 28 Apr. 2015: Added Mythic mode strategy.
- Mage Class Changes in War Within Alpha Build 54361
- Mythic+ Dungeon Adjustments: April 26th
- Savage Ebony Turtle Mount in Patch 10.2.7
- Earthen Allied Race Dances and Customization Options
- Warband Members in Follower Dungeons?
- Dragonflight 10.2.6 and SoD Hotfixes, April 25th
- Affliction Warlock Changes in War Within Alpha: April 25th
- Windwalker Monk Changes in War Within Alpha: April 25th