Kromog Detailed Strategy Guide (Heroic+Mythic Modes included)
Table of Contents
Introduction
This guide is intended to provide a comprehensive description of the encounter with Kromog in Blackrock Foundry. It is targeted at anyone who desires to understand the fight mechanics.
This guide is updated for World of Warcraft WoD 6.1.2.
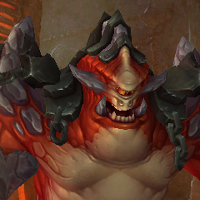
Kromog is a boss in the Black Forge wing of the Blackrock Foundry raid instance. This is a simple, single-target, single-phase encounter against a stationary boss. It will mostly test your raid's ability to avoid ground effects.
General Information
Normal, Heroic, and Mythic Difficulty
This main part of this guide covers both the Normal and Heroic versions of the encounter, as far as mechanics and general strategy is concerned. The only difference between these two modes is found in the tuning, with Heroic being more difficult.
When we speak of extreme situations (such as the difficulty of a soft enrage timer, or damage from a certain source being too high to survive), we mostly refer to Heroic mode.
In addition to this, we have a specific Mythic mode section, where we present all the differences between Normal/Heroic and Mythic, as well as the strategy to defeat the Mythic encounter.
Enrage Timer
We do not currently know what the hard enrage timer for this encounter is. There do not seem to be any soft enrage mechanics in the fight.
Summing Things Up
In this section, we will very briefly summarise what the players belonging to each of the three roles have to do during this fight. This is by no means meant to provide sufficient information to master the encounter, and it is only supposed to give you a very rough idea of what to watch out for.
Tanks
- Stand on top of each other (to split the damage of
 Fists of Stone),
and perform a tank switch to handle
Fists of Stone),
and perform a tank switch to handle  Warped Armor.
 - Make sure to always be in melee range of Kromog, except when
 Slam or
  Rune of Grasping Earth is being cast, in which
cases you should act as the rest of the raid. In both cases, make sure to
return to melee range immediately when the abilities are over.
Rune of Grasping Earth is being cast, in which
cases you should act as the rest of the raid. In both cases, make sure to
return to melee range immediately when the abilities are over.
Healers
- Be prepared to heal the damage coming in from the various avoidable and
unavoidable sources. Particularly, be ready to heal the raid-wide damage
caused by Slam and
 Stone Breath.
DPS
- When Rune of Grasping Earth is cast, begin DPSing the
Grasping Earth hands, but do not kill them off until the boss finishes
casting
 Thundering Blows.
 - In Mythic mode, make sure to kill off all 3 Stone Pillars before the end of the Rune of Trembling Earth cast.
Everyone
- When the boss casts Rune of Grasping Earth, move so that each raid
member is located on top of a small orange rune, with no rune having more than
one player on top of it. Players with damage immunities can stay out to give
the rest of the players more runes to work with.
- Avoid the sonic discs from
 Reverberations, the cone attack from
 Rippling Smash, the giant stone hands from
 Rune of Crushing Earth, and move away from the boss when
Slam is being cast.
Rune of Crushing Earth, and move away from the boss when
Slam is being cast. - In Mythic mode
- When Kromog is casting
 Rune of Trembling Earth, move to avoid being
hit by the small spikes.
Rune of Trembling Earth, move to avoid being
hit by the small spikes. - When Kromog casts
 Call of the Mountain, line of sight the boss behind
one of the Stone Pillars.
Call of the Mountain, line of sight the boss behind
one of the Stone Pillars. - Move away from the Stone Pillar that is targeted by
Rippling Smash.
- When Kromog is casting
Overview of the Fight
The encounter against Kromog is a single-target, single-phase fight. The boss is stationary throughout the encounter.
The fight is very straightforward, and your raid will mainly have to avoid various ground effects. The only unusual element of the fight is that at certain moments in the encounter, raid members will have to willingly move into a damaging ground effect, because doing so protects them from the lethal damage dealt by another one of Kromog's abilities.
We have released a video preview of the encounter against Kromog, based on our (Heroic) Beta testing. You can watch this video to get a good idea of how the fight works, but keep in mind that some things can still change before the fight goes live.
Abilities
Kromog is stationary throughout the fight. Whenever there are no targets in
his melee range, Kromog will channel ![]() Stone Breath, which deals a
moderate amount of Physical damage to all raid members every second. In
addition to this, he uses the following abilities against the raid.
Stone Breath, which deals a
moderate amount of Physical damage to all raid members every second. In
addition to this, he uses the following abilities against the raid.
- Warped Armor is a stacking debuff that Kromog applies to his tank.
This reduces the target's movement speed by 15% and increases their Physical
damage taken by 20% per stack. This ability requires a tank switch.
- Stone Breath is a channeled ability that deals a moderate amount
of raid-wide Physical damage every second. In addition to using this ability
when there are no players in his melee range (as explained above), Kromog
also uses it roughly every 30 seconds.
- Fists of Stone is an ability that Kromog often uses. He deals a
massive amount of Physical damage to his main target, which is split between
that target and the nearest target to them within 15 yards.
- Slam is an ability that Kromog uses to deal a massive amount
of Physical damage to the entire raid. The damage that this ability does is
reduced the farther away the target is from Kromog.
- Rippling Smash is a sort of cone attack that Kromog regularly uses
throughout the fight against random raid members. He will target a random
player and cause a wave of rumbling earth to travel towards them, dealing a
very high amount of Nature damage to any players who come in contact with
it.
- Rune of Grasping Earth is an ability that Kromog uses regularly
throughout the fight. He summons a large number of orange runes on the
ground. A few seconds later, a hand will spawn on each rune, and if there is
a player standing on that rune, it will grab the player and hold them in place,
dealing a very small amount of Nature damage to them every second. There are a
few important mentions regarding this ability.
- Only one player per rune can be grabbed by the hand. If there are multiple players on a rune, only one will be grabbed.
- The hands are actually attackable and killable NPCs called Grasping Earth. They will continue to hold their target in place and damage them until they are killed.
- While players are being held by a Grasping Earth, they are immune to Physical damage and they cannot be knocked up.
- This ability has a crucial interaction with Thundering Blows,
explained below.
- Thundering Blows is an ability that Kromog always uses shortly
after using Rune of Grasping Earth. The boss will deal a massive amount
of raid-wide Physical damage over 5 seconds, and any players who are damaged
by Thundering Blows will also be knocked up very high into the air, and they
will take a lot of fall damage. This ability will effectively kill any players
who are not held in place by a Grasping Earth throughout the entire
cast of Thundering Blows.
- Rune of Crushing Earth is an ability that Kromog uses regularly
throughout the fight. He creates two large stone hands on the floor of the
room, some distance apart. After a short amount of time, the two hands will
come together, dealing a very high amount of Nature damage to any players come
in contact with them, also stunning these players for 5 seconds.
- Reverberations is an ability that Kromog uses regularly
throughout the fight. He creates a number of sonic discs that move throughout
the room, dealing damage to enemies that they come in contact with. The
discs disappear after a short time.
 Shattered Earth is an ability that Kromog uses regularly throughout
the fight. It deals a moderate amount of Nature damage to 4 random
players.
Shattered Earth is an ability that Kromog uses regularly throughout
the fight. It deals a moderate amount of Nature damage to 4 random
players.- When reaching 30% health, Kromog will go into a
 Frenzy. This
increases his damage done and attack speed by 20%, and it causes his abilities
to be used more frequently.
Frenzy. This
increases his damage done and attack speed by 20%, and it causes his abilities
to be used more frequently.
Strategy
The strategy for the encounter against Kromog revolves largely around
avoiding the damage caused by the various ground effects of his abilities.
In addition to this, an important part of the fight is correct management of
the ![]() Rune of Grasping Earth/
Rune of Grasping Earth/![]() Thundering Blows combination.
Thundering Blows combination.
Tanking Concerns
There are several abilities in this encounter that are of great importance
to the tanks. To begin with, the tanks will have to regularly perform a tank
switch to handle the ![]() Warped Armor debuff. Additionally, both tanks
will have to stand on top of each other in order to split the damage caused
by
Warped Armor debuff. Additionally, both tanks
will have to stand on top of each other in order to split the damage caused
by ![]() Fists of Stone.
Fists of Stone.
In addition to these two tank-only mechanics, the tanks have to keep three other abilities in mind.
- The tanks have to always be in melee range of Kromog, as otherwise the
boss will cast Stone Breath against the raid, which must avoided.
- There is an exception here, namely that when the boss begins casting
Slam, the tanks should also run away from the boss. This is
because standing too close to him when Slam is cast will cause them to take
extreme amounts of damage. The tanks simply have to make sure to run back into
melee range as soon as the Slam cast is over. Alternatively, the tank can
remain in melee in range for Slam, provided that they use strong defensive
cooldowns to survive.
- There is an exception here, namely that when the boss begins casting
- Like the rest of the raid, the tanks will have to move out of melee range
to correctly handle the Rune of Grasping Earth/ Thundering Blows
combination. We explain this in the following sub-section.
Rune of Grasping Earth and Thundering Blows
The central element of the fight is correct handling of the
![]() Rune of Grasping Earth/
Rune of Grasping Earth/![]() Thundering Blows combination. As soon as
the boss casts Rune of Grasping Hand, all raid members must move into the
orange runes that the boss creates. This exact locations of the runes are not
determined, so players will have to adapt on the spot so that each player
has their own rune. Generally, if players are not too clumped together in
one part of the area, it is possible for everyone to get in their own rune,
even if they have to take a few seconds getting to a free one.
Thundering Blows combination. As soon as
the boss casts Rune of Grasping Hand, all raid members must move into the
orange runes that the boss creates. This exact locations of the runes are not
determined, so players will have to adapt on the spot so that each player
has their own rune. Generally, if players are not too clumped together in
one part of the area, it is possible for everyone to get in their own rune,
even if they have to take a few seconds getting to a free one.
A few seconds after this, the Grasping Earth hands will pick up one player located on each rune, trapping them and protecting them from the effects of Thundering Blows. As we mentioned, however, these hands deal damage to players and keep them trapped indefinitely. So, as soon as the hands spawn, all DPS players must switch to them and begin attacking them. The goal is to kill all the Grasping Earth hands after the Thundering Blows cast has ended.
It is important that DPS players do not get carried away damaging the hands, because killing them prematurely will probably cause the players held by those hands to die to Thundering Blows.
Finally, players who have damage immunities can stay away from any of the orange runes of Rune of Grasping Hand and use their immunities to survive Thundering Blows, thus making it easier for other players to find a rune of their own.
Other Abilities
The rest of the fight is really just a constant effort from your raid to avoid taking damage from the boss' other abilities, and to survive the sources of unavoidable raid damage.
Avoiding Damage
There are three abilities that simply have to be avoided throughout the fight.
![]() Rippling Smash is the cone attack that the boss uses against a
random raid member. While it is difficult to tell exactly where the boss is
facing, the ground effect moves progressively like a wave towards the location
of the target, meaning that players have ample time to move out of its way.
Rippling Smash is the cone attack that the boss uses against a
random raid member. While it is difficult to tell exactly where the boss is
facing, the ground effect moves progressively like a wave towards the location
of the target, meaning that players have ample time to move out of its way.
![]() Rune of Crushing Earth gives players several seconds to make sure that
they are not located in between the two giant stone hands, and there really is
no complexity to avoiding the damage from this ability.
Rune of Crushing Earth gives players several seconds to make sure that
they are not located in between the two giant stone hands, and there really is
no complexity to avoiding the damage from this ability.
Finally, the sonic discs created by ![]() Reverberations will just have
to be avoided. This is more difficult than avoiding the previous two abilities,
because there are many discs, and they move quite quickly, so depending on
what else is happening in the fight, they can cause problems. Still, they do
not deal very high damage, so having a few raid members hit is not a big
problem.
Reverberations will just have
to be avoided. This is more difficult than avoiding the previous two abilities,
because there are many discs, and they move quite quickly, so depending on
what else is happening in the fight, they can cause problems. Still, they do
not deal very high damage, so having a few raid members hit is not a big
problem.
Unavoidable Damage
There are three sources of unavoidable damage that the healers will have to be prepared for.
![]() Shattered Earth deals single target damage to random raid members,
and there is literally nothing that can be done about this ability except to
heal the damage.
Shattered Earth deals single target damage to random raid members,
and there is literally nothing that can be done about this ability except to
heal the damage.
![]() Stone Breath is cast several times throughout the fight, even when
there are players in melee range of the boss. When this happens, the entire
raid will take damage over a few seconds, so the healers should be prepared
for it. We recommend alternating healing cooldowns for these casts.
Stone Breath is cast several times throughout the fight, even when
there are players in melee range of the boss. When this happens, the entire
raid will take damage over a few seconds, so the healers should be prepared
for it. We recommend alternating healing cooldowns for these casts.
Finally, the entire raid will take damage from ![]() Slam. However,
unlike with the other two abilities, players have an active role in dealing
with Slam. When Slam is cast, all players should move as far away as possible
(within reason) from the boss. Casters and healers will usually be fine if
they are at maximum range, but melee players and tanks in particular will have
to make an effort to run away from the boss.
Slam. However,
unlike with the other two abilities, players have an active role in dealing
with Slam. When Slam is cast, all players should move as far away as possible
(within reason) from the boss. Casters and healers will usually be fine if
they are at maximum range, but melee players and tanks in particular will have
to make an effort to run away from the boss.
When to Use Heroism/Bloodlust/Time Warp
We recommend using ![]() Heroism/
Heroism/![]() Bloodlust/
Bloodlust/![]() Time Warp
when Kromog reaches 30%, since at this point he goes into a
Time Warp
when Kromog reaches 30%, since at this point he goes into a
![]() Frenzy, becoming much more dangerous.
Frenzy, becoming much more dangerous.
Mythic Mode
The Mythic mode of the Kromog encounter is very similar to the Normal/Heroic mode, but there is a new ability that adds a new layer of complexity, and which requires a very high amount of raid DPS.
Differences From Normal/Heroic Mode
Kromog has more health and deals more damage, as is to be expected with any Mythic mode encounter. In addition to this, there are two new abilities that Kromog uses in a combination.
About 1 minute into the fight, and every 3 minutes after that, Kromog
will cast ![]() Rune of Trembling Earth. This is a channeled ability that
lasts for 25 seconds. Several things happen during this cast.
Rune of Trembling Earth. This is a channeled ability that
lasts for 25 seconds. Several things happen during this cast.
- During the cast, Kromog stops using any of his usual abilities, and he also ceases any melee attacks.
- Throughout the cast, earth spikes will erupt at players' locations, with a visual announcement about 2 seconds prior to their eruption. Players hit by these spikes take a moderate amount of Physical damage, and are knocked back slightly.
- During the first 12 seconds of the cast, 3 large Stone Pillars
will spawn at 3 fixed locations. The timing of the spawns seems to be at 5,
9, and 12 seconds into the cast, but the order in which the 3 pillars spawn is
random. The spawn locations are left, center, and right, as you are facing
Kromog.
- Stone Pillars are attackable stationary NPCs that do not do anything. When a Stone Pillar is killed, it will crumble slightly, but remain in place, blocking line of sight.
- At the end of the Rune of Trembling Earth cast, any Stone Pillars that have not been killed will retreat back into the earth.
Immediately after the Rune of Trembling Earth cast finishes, Kromog will
begin casting ![]() Call of the Mountain 3 times. Each cast deals a lethal
amount of damage to any players within Kromog's line of sight, but standing
behind one of the crumbled Stone Pillars prevents this. After each
Call of the Mountain cast, Kromog will target one of the 3 pillars with a
Call of the Mountain 3 times. Each cast deals a lethal
amount of damage to any players within Kromog's line of sight, but standing
behind one of the crumbled Stone Pillars prevents this. After each
Call of the Mountain cast, Kromog will target one of the 3 pillars with a
![]() Rippling Smash, destroying it.
Rippling Smash, destroying it.
Strategy
Outside of the ![]() Rune of Trembling Earth/
Rune of Trembling Earth/![]() Call of the Mountain
phases, the fight plays out identically to Normal and Heroic mode, and nothing
in your raid's strategy changes.
Call of the Mountain
phases, the fight plays out identically to Normal and Heroic mode, and nothing
in your raid's strategy changes.
However, to properly handle Rune of Trembling Earth and Call of the Mountain, your raid will have to perform some very specific tasks, which we detail below.
- When Kromog begins casting Rune of Trembling Earth, all players will have to constantly move to avoid being hit by the small stone spikes.
- Your raid's DPS players will have to be prepared to kill all 3
Stone Pillars before the end of the Rune of Trembling Earth cast.
- For this purpose, your raid leader will have to split the raid's DPS into 3 groups, and organise the cooldowns of these players in such a way as to optimise DPS to allow for all 3 Stone Pillars to be killed. This task is quite difficult, as the required amount of DPS is high, so at least some players will have to save their cooldowns specifically for this event.
- When Kromog casts Call of the Mountain, everyone should take cover behind the Stone Pillars to avoid being hit by it.
- Players who are standing behind the Stone Pillar targeted by Kromog's
Rippling Smash will have to move away from it, and move to one of
the remaining two Pillars.
- Repeat the same process until the final Call of the Mountain has been cast.
Aside from this, there is really nothing else to this encounter.
Learning the Fight
By far the most important part of the fight to master is correct handling of
the ![]() Rune of Grasping Earth/
Rune of Grasping Earth/![]() Thundering Blows combination. Your raid
members will have to get used to quickly being able to settle into a pattern of
one player per orange rune. This is, unfortunately, not something that you can
direct as a raid leader, because it happens too quickly, and you should be
prepared that it might take several attempts for all raid members to master
this task.
Thundering Blows combination. Your raid
members will have to get used to quickly being able to settle into a pattern of
one player per orange rune. This is, unfortunately, not something that you can
direct as a raid leader, because it happens too quickly, and you should be
prepared that it might take several attempts for all raid members to master
this task.
Loot
In this section, you will find the loot table for Kromog. The section is divided in 3 subsections: armor, weapons, and the rest (neck, back, finger, and trinket items).
In addition, Kromog can drop tokens needed for the Head items of the Tier 17 set:
 Helm of the Iron Vanquisher (Heroic, Mythic);
- Helm of the Iron Protector (Heroic, Mythic);
- Helm of the Iron Conqueror (Heroic, Mythic).
Armor
| Item Name | Armor | Slot | Secondary Stats |
|---|---|---|---|
| Cloth | Shoulders |
|
|
| Cloth | Chest |
|
|
| Cloth | Hands |
|
|
| Cloth | Hands |
|
|
| Leather | Chest |
|
|
| Leather | Wrists |
|
|
| Leather | Feet |
|
|
| Head |
|
||
| Shoulders |
|
||
| Waist |
|
||
| Plate | Chest |
|
|
| Plate | Wrists |
|
|
| Plate | Feet |
|
Weapons
| Item Name | Type | Main Stats | Secondary Stats |
|---|---|---|---|
| 1H Sword | Strength |
|
|
| 1H Sword | Strength |
|
|
| 1H Sword | Strength |
|
|
| 1H Sword | Strength |
|
Amulets, Cloaks, Rings, and Trinkets
| Item Name | Type | Main Stats | Secondary Stats |
|---|---|---|---|
| Amulet | Intellect |
|
|
| Cloak | Intellect |
|
|
| Cloak | Agility |
|
|
| Ring | Intellect |
|
|
| Ring |
|
|
|
| Trinket | Agility | Multistrike on use | |
| Trinket | Bonus Armor | Crit on proc |
Concluding Remarks
This concludes our raid guide for Kromog. We hope you have found it helpful. Please do not hesitate to post any feedback you may have on our forums.
Changelog
- 10 Apr. 2015: Added Mythic mode strategy.
- Mage Class Changes in War Within Alpha Build 54361
- Mythic+ Dungeon Adjustments: April 26th
- Savage Ebony Turtle Mount in Patch 10.2.7
- Earthen Allied Race Dances and Customization Options
- Warband Members in Follower Dungeons?
- Dragonflight 10.2.6 and SoD Hotfixes, April 25th
- Affliction Warlock Changes in War Within Alpha: April 25th
- Windwalker Monk Changes in War Within Alpha: April 25th