Razorfen Downs Dungeon Guide
Razorfen Downs is the higher level counterpart dungeon to Razorfen Kraul and is also located in the Barrens. The recommended group level for this dungeon is 36 to 40. It will take approximately an hour to clear.
While the Kraul is a stronghold for the Quilboar, Razorfen Downs is their resting place. It serves as an ancient burial ground for their race, but it has since been taken over by agents of the Scourge, who have begun to reanimate their dead.
Razorfen Downs Entrance Location
Razorfen Downs is located at the southern most tip of the Barrens, just northeast of the Great Lift that leads to the Thousand Needles.
If you are an Alliance player, it can be tough to get to this dungeon and you will likely have to move through Horde territory. It is advisable to group up before making your way through Dustwallow Marsh from Theramore and into the Barrens. Once there, try to stay off the main path south as you are less likely to encounter Horde players.
Razorfen Downs Quests
Before setting foot in Razorfen Downs, we strongly advise you to get all the dungeon quests related to it. To make this process easier, we have written a separate guide.
Layout of Razorfen Downs
The dungeon itself is fairly linear, with a clear path laid out already by the natural progression of the instance. The only time that this progression is broken is when players attempt the Extinguishing the Idol escort quest. This will take you back to the first boss, but you should be able to easily find your way back.
Bosses in Razorfen Downs
Tuten'kash
-
 Curse of Tuten'kash
 Virulent Poison
 Web Spray
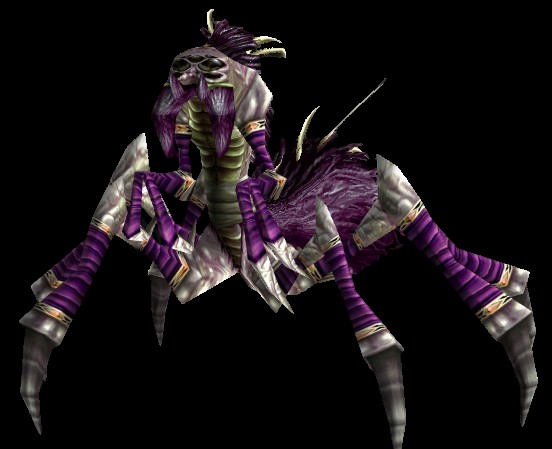
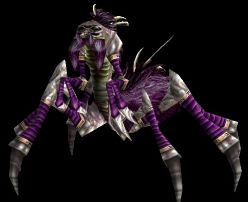
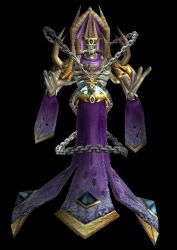
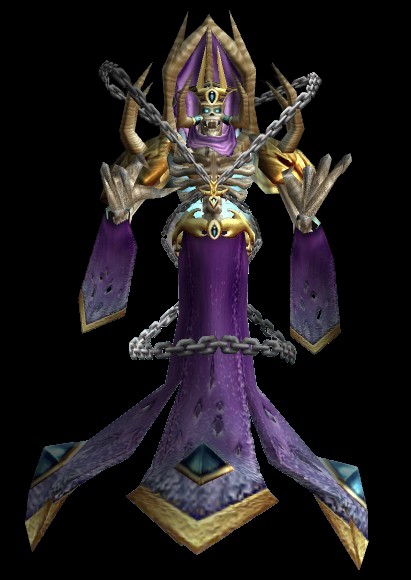
Tuten'kash is a Level 36 elite undead and the first boss of the instance.
This boss is summoned by clicking on a gong and clearing the waves of adds
until he joins the fight. The ![]() Curse of Tuten'kash can be a mild
inconvenience, as it lowers your casting and melee speed, but it should not cause
enough issues to wipe your party.
Curse of Tuten'kash can be a mild
inconvenience, as it lowers your casting and melee speed, but it should not cause
enough issues to wipe your party.
Loot from Tuten'kash
| Item | Required Level | Slot |
|---|---|---|
| 37 | Hands | |
| 40 | Chest | |
| 35 | Back |
Mordresh Fire Eye
-

 Fire Nova
 Fireball

Mordresh Fire Eye is a Level 39 elite undead and is the second boss of the instance.
Interrupt ![]() Fireball whenever possible to minimize damage taken.
Fireball whenever possible to minimize damage taken.
Loot from Mordresh Fire Eye
| Item | Required Level | Slot |
|---|---|---|
| 36 | Waist | |
| 36 | Neck | |
| 36 | Off Hand |
Glutton
-

 Disease Cloud
 Enrage
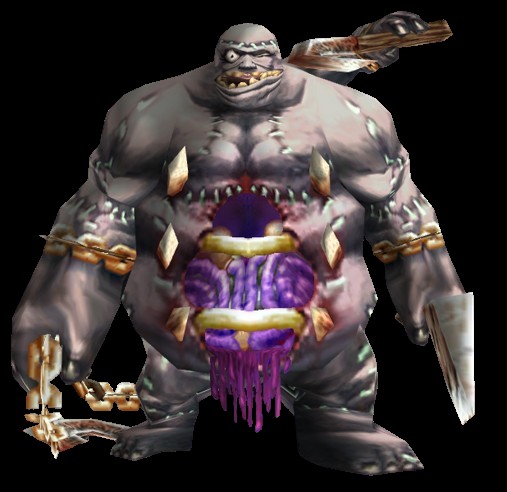
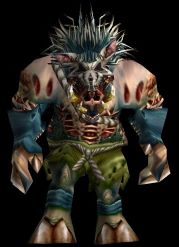
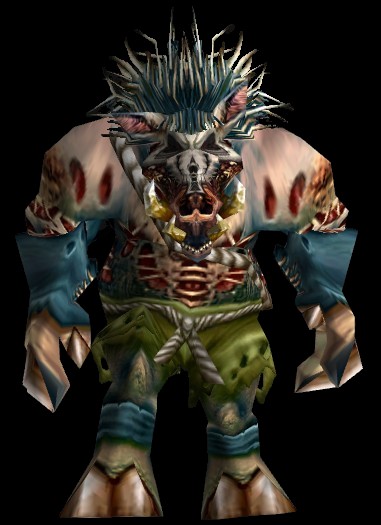
Glutton is a Level 40 elite undead and is the third boss of the instance.
There are no mechanics that are worth mentioning on this boss.
Loot from Glutton
| Item | Required Level | Slot |
|---|---|---|
| 36 | Weapon | |
| 37 | Shoulder |
Ragglesnout
-

 Dominate Mind
 Heal
Heal Shadow Bolt
 Shadow Word: Pain
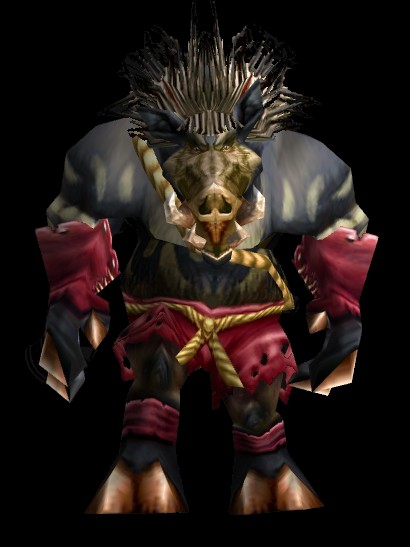
Ragglesnout is the only rare mob of the instance. He is a Level 40 elite
humanoid, with a fairly challenging set of abilities. He is a Priest-type mob
that can use ![]() Dominate Mind to mind control players. Be mindful of which
player is currently controlled and interrupt his heal.
Dominate Mind to mind control players. Be mindful of which
player is currently controlled and interrupt his heal.
Loot from Ragglesnout
| Item | Required Level | Slot |
|---|---|---|
| 37 | Waist | |
| 37 | Shield | |
| 35 | Weapon |
Amnennar the Coldbringer
-
 Amnennar's Wrath
 Frost Nova
 Frostbolt
 Summon Frost Spectres
Amnennar the Coldbringer is a Level 41 elite undead and the final boss of the instance.
Make sure to tank him near the centre of the platform or, preferably, with the tent behind your tank, as he will frequently knock his target back and could knock the tank off the side.
When he spawns Frost Spectres, your tank can try to pick up aggro on them, but you can essentially just ignore them.
Loot from Amnennar the Coldbringer
| Item | Required Level | Slot |
|---|---|---|
| 38 | Hands | |
| 39 | Weapon | |
| 39 | Chest | |
| 40 | Head | |
| 39 | Chest |
Plaguemaw the Rotting
-
 Putrid Stench
 Withered Touch
Plaguemaw the Rotting is a Level 40 elite undead that is fought as part of a questline that starts by freeing Belnistrasz in the instance. This questline is started just before fighting Mordresh Fire Eye and will take you back to where you fought Tuten'kash.
Loot from Plaguemaw the Rotting
| Item | Required Level | Slot |
|---|---|---|
| 34 | Hands | |
| 35 | Wand |
Recommended Classes for Razorfen Downs
This dungeon features a large number of trash mobs that put diseases on your party. It is a good idea to bring a Paladin, Priest, or Shaman, as they can all cure them.
Priests are especially useful due to their ![]() Shackle Undead ability,
as there are a huge number of undead enemies here.
Shackle Undead ability,
as there are a huge number of undead enemies here.
Changelog
- 18 Nov. 2024: Page updated for Classic Anniversary.
- 05 Apr. 2024: Added boss pictures and abilities.
- 18 Oct. 2019: Moved quest section.
- 21 Aug. 2019: Guide added.
Classic Leveling Guides
Classic Dungeon Guides
This guide has been written by Abide, TBC veteran for nearly a decade. Abide is a Warrior tank and multi-class expert currently playing on Faerlina as Horde. You can find him in the the Icy Veins Discord. You can also see him live on Twitch.
- Burning Crusade Classic Phase 2 Now Live: Here’s What to Expect
- Did Blizzard Just Quietly Invite Creators to Play WoW Classic’s Next Chapter?
- WoW Weekly Returns: Patch 12.0.5, Twitch Drops & Classic Updates
- WoW BCC Anniversary Edition: Overlords of Outland – Everything Coming May 14
- Battleground Honor Significantly Increased
- Limited-Time Mount Alert: Get the Voidfeather Dragonhawk for TBC Classic Servers Now!
- Could WoW Be Added to Xbox Game Pass Ultimate?
- MoP Classic Escalation PTR Update Details New Content