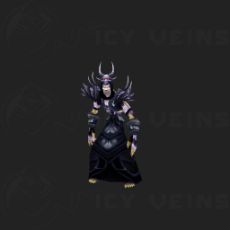
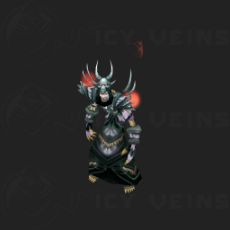
Priest Healer PvP BiS Gear, Trinkets, and Switch Items
This page lists the best healing gear you can currently get in WoW Classic for your Healer Priest. Also very important, we list the best switch items you can use, including Engineering trinkets.
For our more information about Priest talents for PvP as well as consumables, please refer to our Classic Priest PvP Guide. For the general best in slot (BiS) list for Healer Priests, please refer to our Classic Healer Priest BiS Gear Guide.
PvP Best in Slot List for Healing Priests
This is our recommended gear for PvPing as a Healing Priest. This gear will make you tougher in World PvP and Battlegrounds, but not invincible. In the end, it will be your skill and that of your team that dictates the result!
Stats wise, Stamina, Intellect and Healing Power / Spell Critical Strike
(for ![]() Inspiration) are what you want from your PvP gear. Because you
will mostly rely on instant casts and the quick casting
Inspiration) are what you want from your PvP gear. Because you
will mostly rely on instant casts and the quick casting ![]() Flash Heal,
Healing Power will have much lowered effects. Also, taking a lot of damage is
inevitable in PvP, and as such you need enough Stamina to survive in crowd
control / while interrupted, until you can heal yourself.
Flash Heal,
Healing Power will have much lowered effects. Also, taking a lot of damage is
inevitable in PvP, and as such you need enough Stamina to survive in crowd
control / while interrupted, until you can heal yourself.
It can also be useful to get some Mp5 and Spirit, in order to sustain your
Mana pool through the fights, especially when also using Mana intensive support
spells, such as ![]() Dispel Magic. You will also benefit from Spell Hit
gear, to ensure Dispel does not get resisted.
Dispel Magic. You will also benefit from Spell Hit
gear, to ensure Dispel does not get resisted.
The Priest PvP sets have a blue-quality version and an epic-quality version, both of which are good options for Healing Priests in PvP due to the high amount of useful stats, including Stamina, and the set bonuses.
Our best in slot list will be focused on non-situational items that always have value based on their stats alone. If you are looking for the best situational items you can use / switch to, check the Switch Items section further below!
In case you want to compare this list with the Healing Priest PvE Best in Slot, feel free to check out the link below!
While we are only listing the Horde versions of the PvP set, equivalent versions can be found on the Alliance side, with the same requirements, cost and stats.
*![]() Will of Arlokk is a special case in that, while it is also a relatively
good healing weapon, it is mostly used for its extremely high Spirit value. This
allows you to swap to it in situations where you are not in combat and thus can
get a free boost to your Mana regeneration.
Will of Arlokk is a special case in that, while it is also a relatively
good healing weapon, it is mostly used for its extremely high Spirit value. This
allows you to swap to it in situations where you are not in combat and thus can
get a free boost to your Mana regeneration.
Healing Priest PvP Switch On Use Items
Switch Items are items that you do not normally wear since they do not give very good stats, but offer an on-use effect that is very good for certain scenarios. So, you switch to them for their effect.
 Defiler's Talisman (or its Alliance counterpart, Talisman of Arathor)
can be used to grant you a powerful personal absorb effect for 15 seconds. It can
be obtained through Arathi Basin Friendly reputation.
Defiler's Talisman (or its Alliance counterpart, Talisman of Arathor)
can be used to grant you a powerful personal absorb effect for 15 seconds. It can
be obtained through Arathi Basin Friendly reputation. Skull of Impending Doom is one of the most powerful item switches you can
have. This can be used to break many different CC abilities such as
Skull of Impending Doom is one of the most powerful item switches you can
have. This can be used to break many different CC abilities such as  Polymorph,
 Freezing Trap,
  Sap, Seduce, and many more. It also has a niche
use by helping you suicide which causes no item durability loss which can save you outside
of PvP situations. In Battlegrounds this is only truly useful in Warsong Gulch since it
is a battleground with a flag mechanic. This can be used to catch a flag carrier or
run a flag since movement speed as a flag carrier is incredibly important (if you are
attempting to use this in a battleground it is a good idea to have a healer put a HoT
on you to negate the DoT effect ESPECIALLY if you are using it as a flag carrier).
This is a reward from the level 40 quest Forbidden Knowledge in the Badlands.
Sap, Seduce, and many more. It also has a niche
use by helping you suicide which causes no item durability loss which can save you outside
of PvP situations. In Battlegrounds this is only truly useful in Warsong Gulch since it
is a battleground with a flag mechanic. This can be used to catch a flag carrier or
run a flag since movement speed as a flag carrier is incredibly important (if you are
attempting to use this in a battleground it is a good idea to have a healer put a HoT
on you to negate the DoT effect ESPECIALLY if you are using it as a flag carrier).
This is a reward from the level 40 quest Forbidden Knowledge in the Badlands. Furbolg Medicine Pouch is sold by Gorn One Eye when you reach
Honored status with Timbermaw Hold. This is a great item that you can
swap during combat to provide you with a significant 1000 heal over 10 seconds.
For comparison's sake,
Furbolg Medicine Pouch is sold by Gorn One Eye when you reach
Honored status with Timbermaw Hold. This is a great item that you can
swap during combat to provide you with a significant 1000 heal over 10 seconds.
For comparison's sake,  Heavy Runecloth Bandage heals you for 2000 over 8
seconds, but requires you to channel it, and you cannot take any sort of damage
in the channel duration.
Heavy Runecloth Bandage heals you for 2000 over 8
seconds, but requires you to channel it, and you cannot take any sort of damage
in the channel duration. Tidal Charm is one of the strongest PvP trinkets in the game. It is very
annoying to farm for so do not be discouraged if it takes you a while to obtain one.
Tidal Charm has an estimated 30-yard range, making it very strong for stopping mounted
people in world PvP. This trinket
has a cooldown of 15 minutes though so make sure to use it wisely. Tidal Charm is a drop from
Prince Nazjak in Arathi Highlands.
Tidal Charm is one of the strongest PvP trinkets in the game. It is very
annoying to farm for so do not be discouraged if it takes you a while to obtain one.
Tidal Charm has an estimated 30-yard range, making it very strong for stopping mounted
people in world PvP. This trinket
has a cooldown of 15 minutes though so make sure to use it wisely. Tidal Charm is a drop from
Prince Nazjak in Arathi Highlands. Nifty Stopwatch provides a 40% run speed increase for 10 seconds when
used, which can be invaluable for escaping or running someone down in PvP. This is
a reward from the quest This Is Going to Be Hard in the Badlands.
Nifty Stopwatch provides a 40% run speed increase for 10 seconds when
used, which can be invaluable for escaping or running someone down in PvP. This is
a reward from the quest This Is Going to Be Hard in the Badlands. Barov Peasant Caller is a reward from a questline in Scholomance
that summons 3 servants to deal damage for you. The duration is unclear but seems to be
very short. This trinket is incredible against casters since the 3 servants attacking will
continually push back the cast time of enemy casters' spells. These peasants can also break a
Rogue's
Vanish if the Rogue attempts to vanish while the servants are fixated on them. They also do a good
amount of damage putting extra pressure on your target. All in all, this is a very easy trinket to obtain that
has many good uses in PvP. This item is a reward from The Last Barov in Western
Plaguelands.
Barov Peasant Caller is a reward from a questline in Scholomance
that summons 3 servants to deal damage for you. The duration is unclear but seems to be
very short. This trinket is incredible against casters since the 3 servants attacking will
continually push back the cast time of enemy casters' spells. These peasants can also break a
Rogue's
Vanish if the Rogue attempts to vanish while the servants are fixated on them. They also do a good
amount of damage putting extra pressure on your target. All in all, this is a very easy trinket to obtain that
has many good uses in PvP. This item is a reward from The Last Barov in Western
Plaguelands. Glimmering Mithril Insignia does not break fear, it prevents you from being feared.
So, you must use it before being feared. This trinket is fantastic for engaging either a
Shadow Priest or Warlock
to negate their major CC mechanic. Using this in conjunction with
your Insignia trinket to break fear to prevent a chain fear is a great combination that allows
you to easily pressure Shadow Priests and Warlocks.
Glimmering Mithril Insignia does not break fear, it prevents you from being feared.
So, you must use it before being feared. This trinket is fantastic for engaging either a
Shadow Priest or Warlock
to negate their major CC mechanic. Using this in conjunction with
your Insignia trinket to break fear to prevent a chain fear is a great combination that allows
you to easily pressure Shadow Priests and Warlocks. Ancient Cornerstone Grimoire is a more difficult trinket to obtain due to being
an Onyxia drop from Onyxia's Lair. The trinket does not have very great stats
on it, but just like Barov Peasant Caller it will attack Rogues through Vanish making it
very strong in mirror matchups to prevent your target from getting a restealth. The skeleton
does do a significant amount of damage (between 100 and 200 usually) and can critically hit, this
allows you to pressure any class with it from just the damage that it does. This item is dropped
from Onyxia in Onyxia's Lair.
Ancient Cornerstone Grimoire is a more difficult trinket to obtain due to being
an Onyxia drop from Onyxia's Lair. The trinket does not have very great stats
on it, but just like Barov Peasant Caller it will attack Rogues through Vanish making it
very strong in mirror matchups to prevent your target from getting a restealth. The skeleton
does do a significant amount of damage (between 100 and 200 usually) and can critically hit, this
allows you to pressure any class with it from just the damage that it does. This item is dropped
from Onyxia in Onyxia's Lair. Arena Grand Master is difficult to acquire, but has an excellent on-use
effect that gives you a roughly 1000 shield for 20 seconds. To get it, you must open
the chest at the center of the Gurabashi Arena in Stranglethorn Vale
12 separate times to get 12 of
Arena Grand Master is difficult to acquire, but has an excellent on-use
effect that gives you a roughly 1000 shield for 20 seconds. To get it, you must open
the chest at the center of the Gurabashi Arena in Stranglethorn Vale
12 separate times to get 12 of  Arena Masters. You turn in those Arena Master
trinkets to Short John Mithril in the back of the arena for the reward.
Arena Masters. You turn in those Arena Master
trinkets to Short John Mithril in the back of the arena for the reward. Insignia of the Alliance/
 Insignia of the Horde are both very easy to obtain
trinkets simply requiring you to be Honor Rank 2 and then to purchase one in your major city. These
are required in PvP since they break fears and stuns and are the only active way to break one of these
effects while they are already on you. The only other way would be to use an item such as
Skull of Impending Doom before being feared or stunned but being able to break free from these
effects is more powerful in our opinion.
Insignia of the Horde are both very easy to obtain
trinkets simply requiring you to be Honor Rank 2 and then to purchase one in your major city. These
are required in PvP since they break fears and stuns and are the only active way to break one of these
effects while they are already on you. The only other way would be to use an item such as
Skull of Impending Doom before being feared or stunned but being able to break free from these
effects is more powerful in our opinion.
Engineering Trinkets for Classic Healing Priests
Engineering is considered to be an almost required profession in PvP due to the exceptional trinkets and other on-use items that you can use in various situations. The strongest of those trinkets are listed below. For more information on Engineering, check out our Engineering profession guide linked below.
 Arcanite Dragonling is an interesting trinket since the level of the Dragonling
is your Engineering skill divided by 5 meaning as a Level 39 twink you can potentially have a Level 60
Dragonling (even higher if you are a gnome). This trinket has an absurd cooldown time of 1 hour
so be very careful when using it. The Dragonling attacks normally but has a fire breath attack
that deals much more damage (between 250-350 a hit) however this is pretty rare and only usually
happens once during the uptime. If you are using Fire attacks (such as a
Fire Mage or Destruction
Warlock would) then this trinket's Fire Breath ability puts a debuff on the target that makes
Fire spells against the target deal extra damage. This item is an Engineering
item that requires 300 Engineering.
Arcanite Dragonling is an interesting trinket since the level of the Dragonling
is your Engineering skill divided by 5 meaning as a Level 39 twink you can potentially have a Level 60
Dragonling (even higher if you are a gnome). This trinket has an absurd cooldown time of 1 hour
so be very careful when using it. The Dragonling attacks normally but has a fire breath attack
that deals much more damage (between 250-350 a hit) however this is pretty rare and only usually
happens once during the uptime. If you are using Fire attacks (such as a
Fire Mage or Destruction
Warlock would) then this trinket's Fire Breath ability puts a debuff on the target that makes
Fire spells against the target deal extra damage. This item is an Engineering
item that requires 300 Engineering. Gnomish Battle Chicken is similar to the Arcanite Dragonling. The level
of the summoned chicken is your Engineering skill divided by 5,
meaning that this is very powerful for twink brackets and gnomes. The Battle Chicken
occasionally squawks which gives 5% more attack speed for 4 minutes. This trinket, just like
the Arcanite Dragonling, can see Rogues in stealth. If you use both the
Battle Chicken and Arcanite Dragonling, it is recommended to alternate them, given that they
both have very long cooldowns. This item is an Engineering that requires
Gnomish Engineering and 230 Engineering to make.
Gnomish Battle Chicken is similar to the Arcanite Dragonling. The level
of the summoned chicken is your Engineering skill divided by 5,
meaning that this is very powerful for twink brackets and gnomes. The Battle Chicken
occasionally squawks which gives 5% more attack speed for 4 minutes. This trinket, just like
the Arcanite Dragonling, can see Rogues in stealth. If you use both the
Battle Chicken and Arcanite Dragonling, it is recommended to alternate them, given that they
both have very long cooldowns. This item is an Engineering that requires
Gnomish Engineering and 230 Engineering to make. Ultra-Flash Shadow Reflector reflects any shadow spell cast on you for
5 seconds when used. The plans to craft this drop from Crimson Inquisitors
in Stratholme.
Ultra-Flash Shadow Reflector reflects any shadow spell cast on you for
5 seconds when used. The plans to craft this drop from Crimson Inquisitors
in Stratholme. Gyrofreeze Ice Reflector reflects any frost spell cast on you for
5 seconds when used. The plans to craft this are sold by Xizzer Fizzbolt
in Winterspring.
Gyrofreeze Ice Reflector reflects any frost spell cast on you for
5 seconds when used. The plans to craft this are sold by Xizzer Fizzbolt
in Winterspring. Hyper-Radiant Flame Reflector reflects any fire spell cast on you for
5 seconds when used. The plans to craft this drop from Solakar Flamewreath
in Upper Blackrock Spire.
Hyper-Radiant Flame Reflector reflects any fire spell cast on you for
5 seconds when used. The plans to craft this drop from Solakar Flamewreath
in Upper Blackrock Spire. Gnomish Net-o-Matic Projector will root your target in a net for 10 seconds,
which will not be broken by damage. However, it occasionally backfires and will net
you instead. The plans can be learned from Gnomish Engineering trainers.
Gnomish Net-o-Matic Projector will root your target in a net for 10 seconds,
which will not be broken by damage. However, it occasionally backfires and will net
you instead. The plans can be learned from Gnomish Engineering trainers. Goblin Mortar will do some fire damage
and stun all targets in a small radius for 5 seconds. The plans can be learned from
Goblin Engineering trainers.
Goblin Mortar will do some fire damage
and stun all targets in a small radius for 5 seconds. The plans can be learned from
Goblin Engineering trainers. Gnomish Cloaking Device will make you invisible for 10 seconds. The plans
drop from Mekgineer Thermaplugg in Gnomeregan.
Gnomish Cloaking Device will make you invisible for 10 seconds. The plans
drop from Mekgineer Thermaplugg in Gnomeregan. Gnomish Death Ray can be channeled for a few seconds, draining your
health some, to deal a huge burst of damage to your opponent at the end of the channel.
The plans can be learned from Gnomish Engineering trainers.
Gnomish Death Ray can be channeled for a few seconds, draining your
health some, to deal a huge burst of damage to your opponent at the end of the channel.
The plans can be learned from Gnomish Engineering trainers. Goblin Rocket Helmet allows you to rapidly charge and disable an enemy
for 30 seconds, which is a huge amount of time in most PvP situations. Although this
disabling effect will only hold if the enemy is not attacked during this period,
you can sneak attacks in before / while using it without it breaking and it is of
great usefulness when against multiple enemies.
Goblin Rocket Helmet allows you to rapidly charge and disable an enemy
for 30 seconds, which is a huge amount of time in most PvP situations. Although this
disabling effect will only hold if the enemy is not attacked during this period,
you can sneak attacks in before / while using it without it breaking and it is of
great usefulness when against multiple enemies.- Gnomish Mind Control Cap is similar to the Rocket Helmet in that it,
usually, instantly takes an enemy out of the fight for a long period of time. However,
instead of simply stunning the enemy, it converts him into your minion for 20 seconds!
 Gnomish Rocket Boots and
  Goblin Rocket Boots serve similar purposes:
to make you run much faster for a short period of time. The main difference
between them is that, when they fail, Gnomish boots make you run around as if you
were Feared for a bit, while Goblin boots occasionally (30% unless you cancel the
effect early, which makes it less likely) explode, causing you to have to make more
of them to keep using their effect.
Goblin Rocket Boots serve similar purposes:
to make you run much faster for a short period of time. The main difference
between them is that, when they fail, Gnomish boots make you run around as if you
were Feared for a bit, while Goblin boots occasionally (30% unless you cancel the
effect early, which makes it less likely) explode, causing you to have to make more
of them to keep using their effect.
Healing Priest PvP Guide
We hope this guide was helpful for your PvP exploits! Feel free to check out the general PvP Talent and Consumables guide as well in the link down below.
Changelog
- 18 Nov. 2024: Page updated for Classic Anniversary.
- 07 Dec. 2020: Updated with Phase 6 (Naxxramas) gear.
- 23 Jul. 2020: Updated with Phase 5 (Ahn'Qiraj) gear.
- 15 May 2020: Added Silithus Twilight boss summonings gear.
- 16 Apr. 2020: Updated with Zul'Gurub and Dragons of Nightmare gear.
- 13 Mar. 2020: Reworked the weapon section.
- 11 Mar. 2020: Updated with Arathi Basin gear.
- 28 Feb. 2020: Added Flarecore Leggings.
- 25 Feb. 2020: Updated for Phase 3.
- 10 Dec. 2019: Page added.
In The Same Category
This guide has been written by Abide, TBC veteran for nearly a decade. Abide is a Warrior tank and multi-class expert currently playing on Faerlina as Horde. You can find him in the the Icy Veins Discord. You can also see him live on Twitch.
- Burning Crusade Classic Phase 2 Now Live: Here’s What to Expect
- Did Blizzard Just Quietly Invite Creators to Play WoW Classic’s Next Chapter?
- WoW Weekly Returns: Patch 12.0.5, Twitch Drops & Classic Updates
- WoW BCC Anniversary Edition: Overlords of Outland – Everything Coming May 14
- Battleground Honor Significantly Increased
- Limited-Time Mount Alert: Get the Voidfeather Dragonhawk for TBC Classic Servers Now!
- Could WoW Be Added to Xbox Game Pass Ultimate?
- MoP Classic Escalation PTR Update Details New Content