Demon Hunter Embodiment of the Marauder Set Dungeon Guide
Welcome to our guide to complete the Marauder set dungeon for Demon Hunters, a required step to complete the Masters of the Universe Conquest.
Overview of the Embodiment of the Marauder Set Dungeon
The Embodiment of the Marauder Set Dungeon is located in Act III, the Fields of Slaughter. Teleport to The Bridge of Korsikk waypoint and head upwards through this giant open area. Head to the center of the map, where the Trebuchet is located in the campaign (the device hanging above the massive fiery chasm). In adventure mode, it should be replaced by the portal for the set dungeon if you have the Marauder 6-piece bonus active.
The Embodiment of the Marauder Set Dungeon's two unique Primary Objectives are to: 1) Kill 140 enemies with 3 or more Sentries active; and 2) Do not allow any enemies into melee range.
The Embodiment of the Marauder Set Dungeon is an Act 5 Cavern tileset of three interconnected rings, one larger and two smaller. A suggested path would be to take an immediate right after the starting area and clear the two smaller rings on the right, leaving the larger left cavern ring for last.
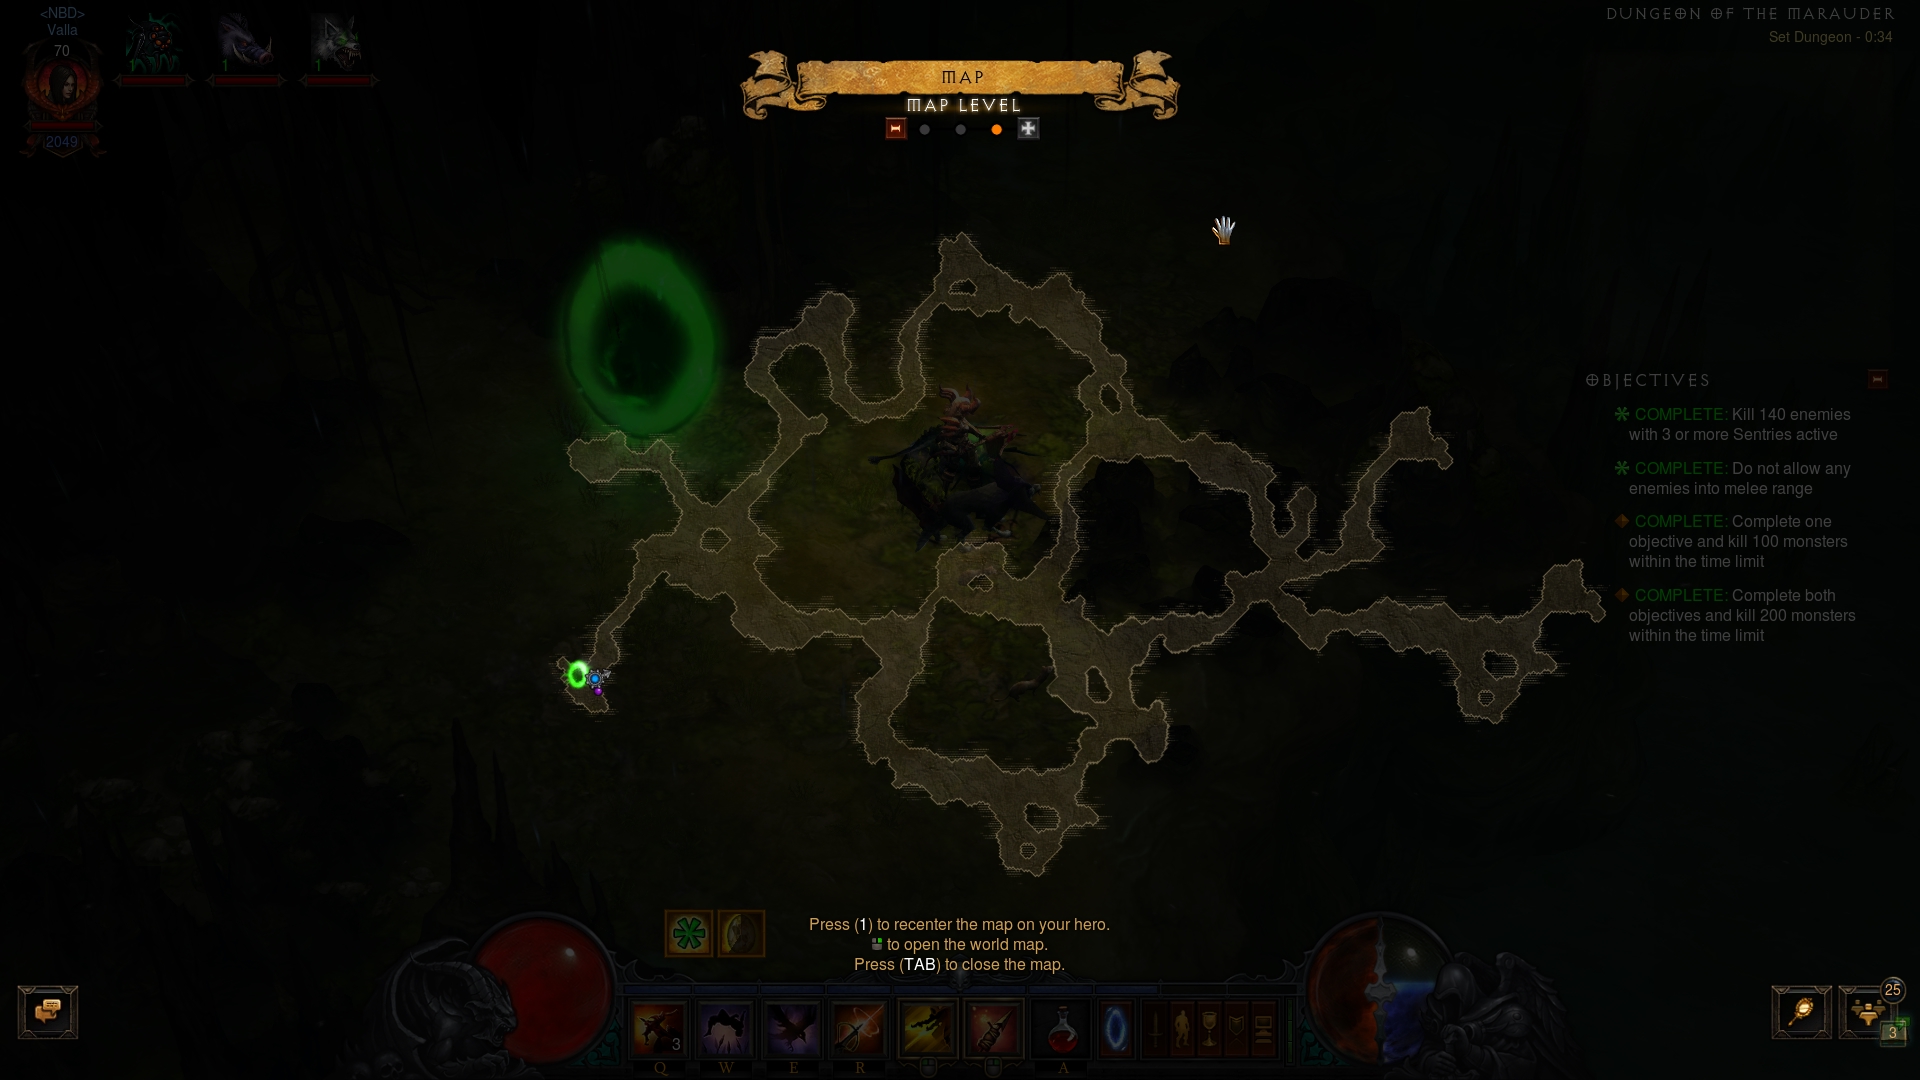
The Embodiment of the Marauder Set Dungeon is populated by several kinds of enemies:
- Spine Lashers, Quill Fiends and Golgors — swarms of trash that populate the majority of this dungeon. Harmless, but will close in on you relatively quick and fail the melee range Objective if you are not careful.
- Rockworms — the single biggest threat to the melee range objective, these burrowing monsters will tunnel right beneath your feet.
- Malevolent Marauders — the unique enemies of the map. They resemble Act 3's Golgor trash, but also have a Desecrator and Frozen affixes. Like their trash brethren, these elites should pose no threat if you play out the build correctly.
Tips for the Embodiment of the Marauder Set Dungeon
The Marauder Set Dungeon is rather easy to complete, with no finicky
requirements and failure conditions. We do recommend that you play the
Rocket-based variation of our Marauder ![]() Cluster Arrow build on Icy Veins,
since the Grenade-based GR variant will come dangerously close to failing the
melee Objective.
Cluster Arrow build on Icy Veins,
since the Grenade-based GR variant will come dangerously close to failing the
melee Objective.
If you are new to the Marauder playstyle, simply know that it revolves around
placing ![]() Sentry turrets continuously as you advance through a level. Make
a point to place a
Sentry turrets continuously as you advance through a level. Make
a point to place a ![]() Sentry as soon as it comes off cooldown, since you
will be moving fast and can easily and understandably lose track of their current
active number. The default skill will allow you 2 charges, so you will need at
least the relevant
Sentry as soon as it comes off cooldown, since you
will be moving fast and can easily and understandably lose track of their current
active number. The default skill will allow you 2 charges, so you will need at
least the relevant ![]() Custom Engineering passive, but ideally the dedicated
Custom Engineering passive, but ideally the dedicated
![]() Bombardier's Rucksack quiver as well.
Bombardier's Rucksack quiver as well.
As mentioned before, the Rockworms are the only real threat in this dungeon,
aside from ![]() Vaulting carelessly into unseen trash and failing the 2nd
Objective yourself. Pay attention to the minimap for the Rockworm's appearance,
and make use of their momentary delay as they prepare to spring up from beneath
you to
Vaulting carelessly into unseen trash and failing the 2nd
Objective yourself. Pay attention to the minimap for the Rockworm's appearance,
and make use of their momentary delay as they prepare to spring up from beneath
you to ![]() Vault away into safety.
Vault away into safety.
Build for the Embodiment of the Marauder Set Dungeon
| Active Skills |
|---|


|
| Passive Skills |
| Slot | Pieces | Stat Priority |
|---|---|---|
| Head |
|
|
| Shoulders |
|
|
| Torso |
|
|
| Wrists |
|
|
| Hands |
|
|
| Waist |
|
|
| Legs |
|
|
| Feet |
|
|
| Amulet |
|
|
| Ring #1 |
|
|
| Ring #2 |
|
|
| Weapon |
|
|
| Off-hand |
|
To help you with farming the gear you need for your builds, we have two very useful guides that you can access by clicking the links below: a Salvage Guide to help you quickly check whether or not you can safely salvage a piece of gear and a Legendary Farming Guide to help you efficiently farm legendaries and set items.
| Slot | Gems |
|---|---|
| Jewelry | |
| Helm | |
| Torso and Pants |
|
| Weapon |
Kanai's Cube
- Weapon Slot:
 Dawn
Dawn - Armor Slot:
 Visage of Gunes
 - Jewelry Slot:
 Convention of Elements
Changelog
- 02 Mar. 2018: Added guide.
This build is presented to you by Deadset, one of the very few professional Diablo 3 players. Deadset regularly publishes video guides on Youtube and streams on Twitch, where you can see how this and other builds play out in practice.
- Diablo 3 Season 38 Preview
- Diablo 3 Season 37 (Official Preview)
- What's Coming in Diablo 3 Season 36?
- Diablo 3 Season 35: Official Preview
- All Diablo 3 Season 34 Class Guides and Compendium
- Diablo 3 Season 34 Delayed a Week
- Season 34 Official Preview
- Diablo 3 Season 33 Unintentionally Prematurely Ended