Necromancer Pestilence Set Dungeon Guide
Welcome to our guide to complete the Pestilence set dungeon for Necromancers, a required step to complete the Masters of the Universe Conquest.
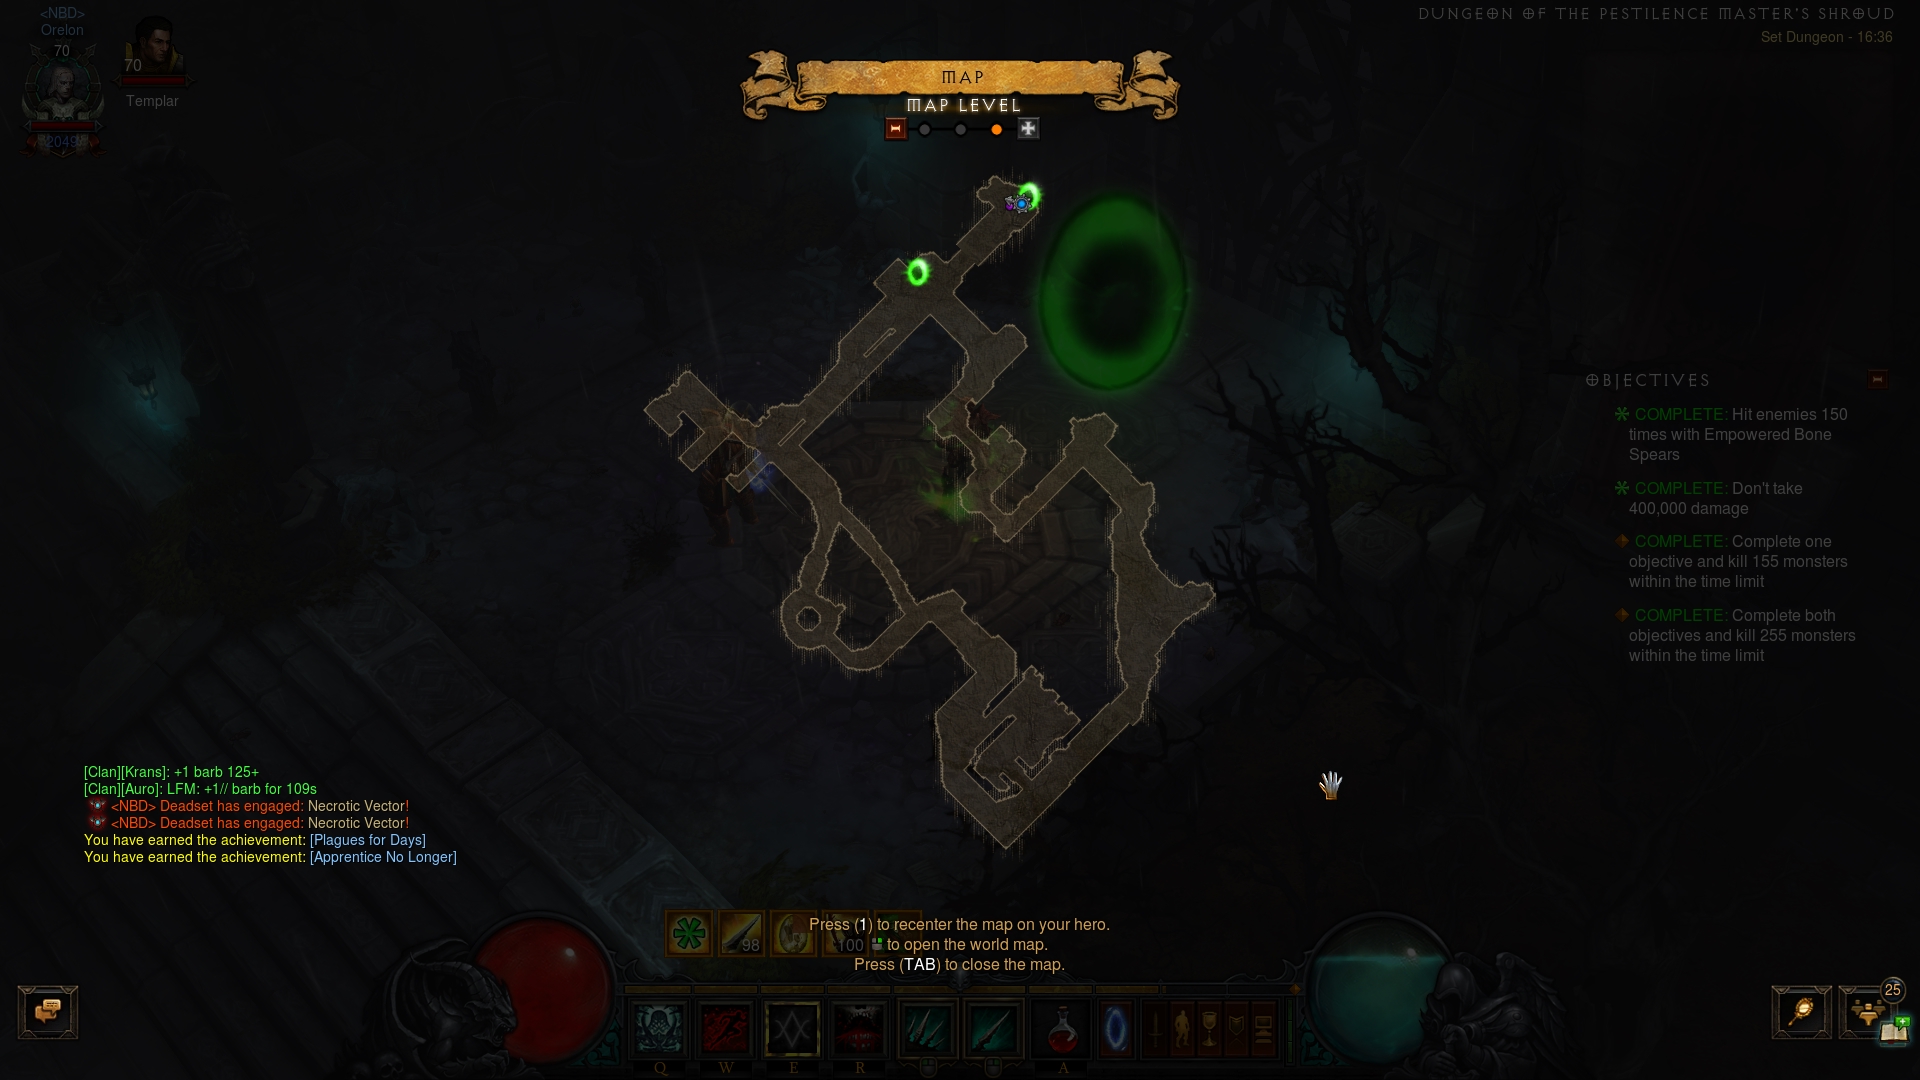
Overview of the Pestilence Master's Shroud Set Dungeon
The Pestilence Master's Shroud Set Dungeon is located in Act III, The Keep Depths Level 3. Take the waypoint there, and navigate the dungeon until you find the entrance to The Larder (the place you fight Ghom). The entrance to the Set Dungeon should be to its right, and will open up if you have the Pestilence 6-piece bonus equipped.
The Pestilence Master's Shroud Set Dungeon's two unique Primary Objectives are
to: 1) Hit enemies 150 times with empowered ![]() Bone Spears; and 2) Do not take
400,000 damage.
Bone Spears; and 2) Do not take
400,000 damage.
The Pestilence Master's Shroud Set Dungeon is a Westmarch streets tileset of a relatively small size. There is no predetermined path required to clear this challenge — a simple counter- or clockwise round trip of the map as you kill everything in your path should suffice.
The Pestilence Master's Shroud Set Dungeon is populated by just a few kinds of enemies:
- Voracious Zombies, Bloated Corpses and Ratlings — swarms of these near-harmless monsters populate the majority of this dungeon, making themselves prime target for the first Objective.
- Necrotic Vectors — the unique enemies of the map. They resemble Act III's Rat King trash, but also have the Poison Enchanted affix. There is nothing noteworthy about these elites, but you will do well to dodge their poisonous attacks and affix considering the 2nd Objective.
Tips for the Pestilence Master's Shroud Set Dungeon
This Set Dungeon is incredibly easy to complete, even moreso because it works
in unison with the basics of the Pestilence set — ranged gameplay and
Corpse consumption-related mechanics. Most notably, make a point to either delay
![]() Devouring corpses a bit, or to finish nearby monsters off before the
Devouring corpses a bit, or to finish nearby monsters off before the
![]() Corpse Lances spawned by the Pestilence 2-piece bonus have cleaned up
the area. This is easily done by a reliable AoE
Corpse Lances spawned by the Pestilence 2-piece bonus have cleaned up
the area. This is easily done by a reliable AoE ![]() Bone Spear rune like
Bone Spear rune like
![]() Teeth. The 2nd Objective, not taking 400,000 damage, should be trivial
to accomplish as long as you maintain sufficient range from the swarming enemies
and do not neglect incoming elite affixes. All in all, this is a trivial Set
Dungeon to master.
Teeth. The 2nd Objective, not taking 400,000 damage, should be trivial
to accomplish as long as you maintain sufficient range from the swarming enemies
and do not neglect incoming elite affixes. All in all, this is a trivial Set
Dungeon to master.
Build for the Pestilence Master's Shroud Set Dungeon
| Active Skills |
|---|


|
| Passive Skills |
| Slot | Pieces | Stat Priority |
|---|---|---|
| Head |
|
|
| Shoulders |
|
|
| Torso |
|
|
| Wrists |
|
|
| Hands |
|
|
| Waist |
|
|
| Legs |
|
|
| Feet |
|
|
| Amulet |
|
|
| Ring #1 |
|
|
| Ring #2 |
|
|
| Weapon |
|
To help you with farming the gear you need for your builds, we have two very useful guides that you can access by clicking the links below: a Salvage Guide to help you quickly check whether or not you can safely salvage a piece of gear and a Legendary Farming Guide to help you efficiently farm legendaries and set items.
Kanai's Cube
- Weapon Slot:
 In-geom
 - Armor Slot:
 Steuart's Greaves
 - Jewelry Slot:
 Unity
Unity
Changelog
- 04 Mar. 2018: Added guide.
This build is presented to you by Deadset, one of the very few professional Diablo 3 players. Deadset regularly publishes video guides on Youtube and streams on Twitch, where you can see how this and other builds play out in practice.
- Diablo 3 Season 38 Preview
- Diablo 3 Season 37 (Official Preview)
- What's Coming in Diablo 3 Season 36?
- Diablo 3 Season 35: Official Preview
- All Diablo 3 Season 34 Class Guides and Compendium
- Diablo 3 Season 34 Delayed a Week
- Season 34 Official Preview
- Diablo 3 Season 33 Unintentionally Prematurely Ended