Monk Sunwuko Set Dungeon Guide
Welcome to our guide to complete the Sunwuko set dungeon for Monks, a required step to complete the Masters of the Universe Conquest.
Overview of the Monkey King's Garb (Sunwuko) Set Dungeon
The Monkey King's Garb (Sunwuko) Set Dungeon is located in Act IV, The Pinnacle of Heaven. This is the short area directly preceding the Diablo fight, so you will have to take The Silver Spire Level 2 waypoint and reach its end. Once inside The Pinnacle of Heaven, walk slightly to the left of the entrance and the Sunwuko Set Dungeon will appear if you have the Sunwuko 6-piece set bonus active.
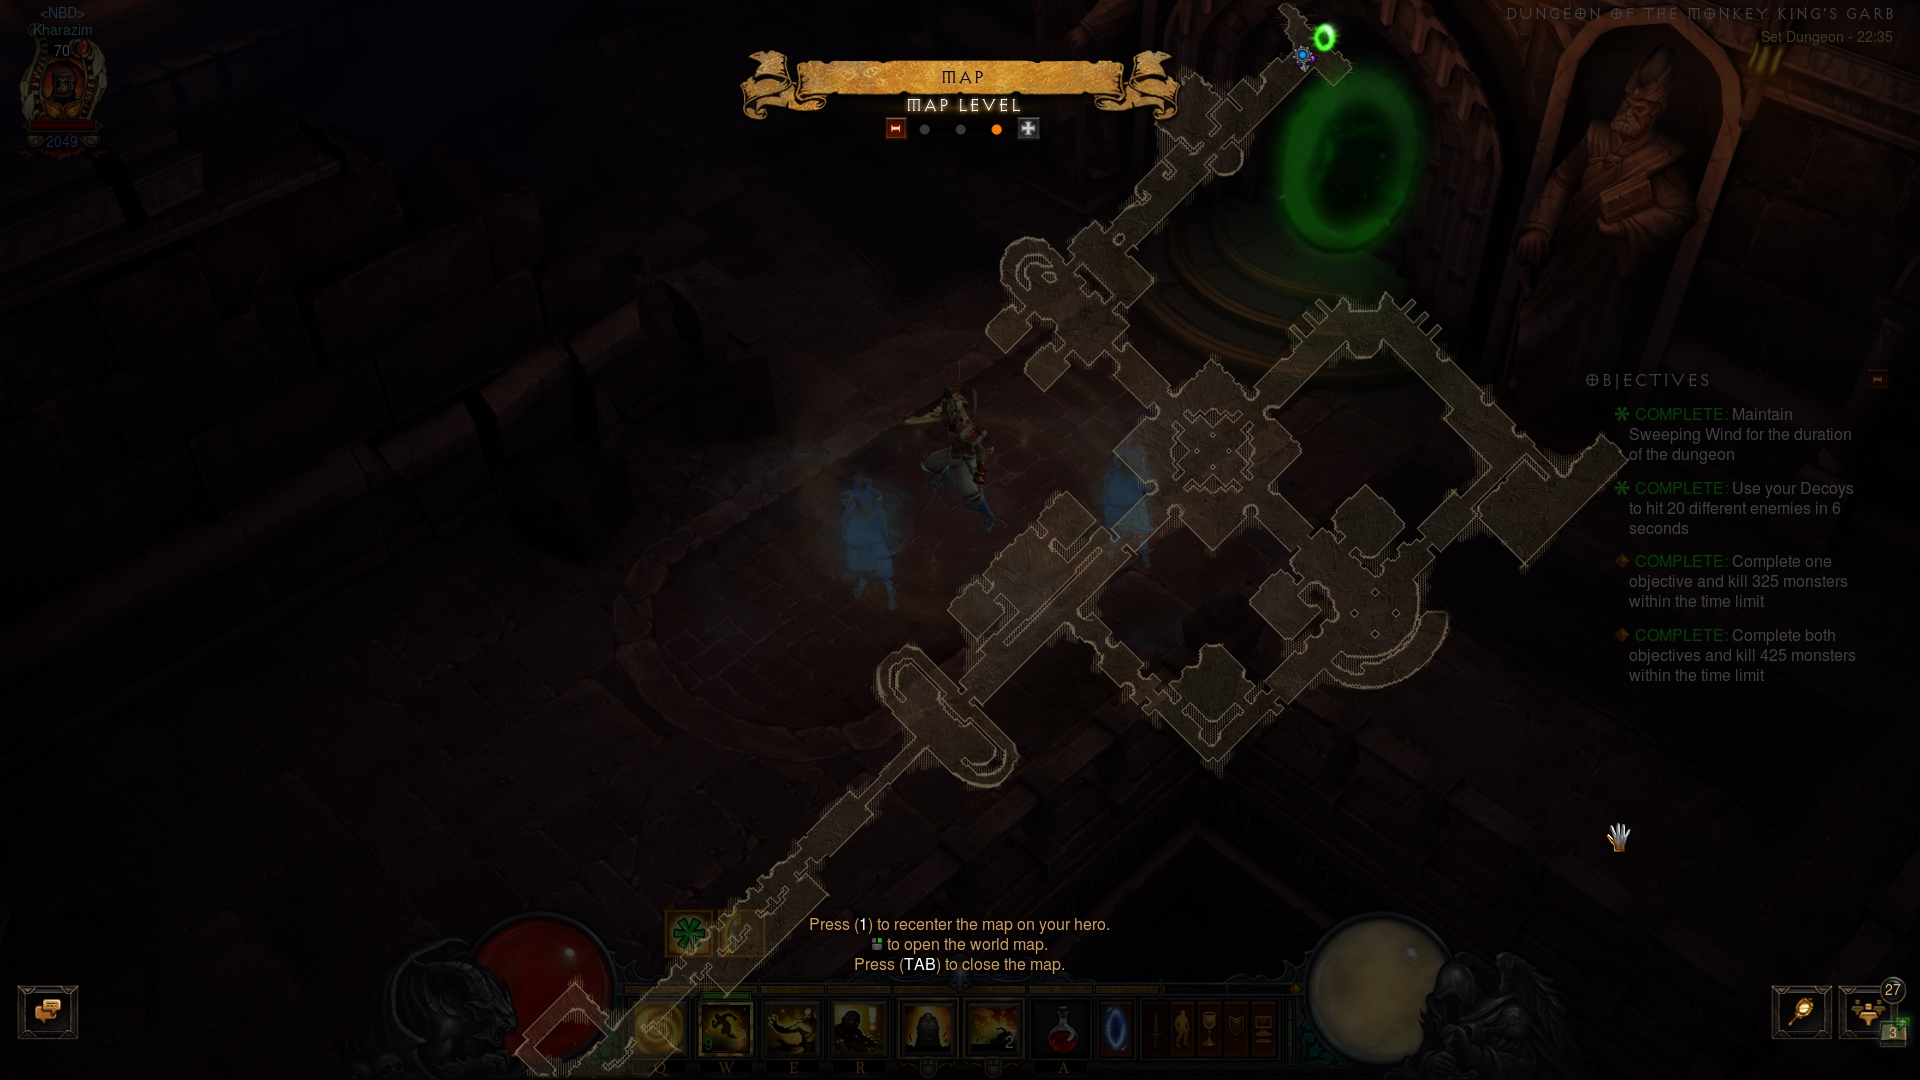
The Sunwuko Set Dungeon's two unique Primary Objectives are to: 1) Maintain
![]() Sweeping Wind for the duration of the dungeon; and 2) Use your decoys to
hit 20 different enemies in 6 seconds.
Sweeping Wind for the duration of the dungeon; and 2) Use your decoys to
hit 20 different enemies in 6 seconds.
The Sunwuko Set Dungeon is a cathedral tileset with considerable length (its final dead end cannot be captured in a single screenshot, but is not much further); however it is a simple and straightforward layout. A proven attempt path is to clear the initial L-shaped section, then head north and make the trip through the rectangular section; finally, head down the southern corridor all the way to the end.
The Sunwuko Set Dungeon is populated by just a few kinds of enemies:
- Bile Crawlers and Spine Lashers — small-sized trash spread in large bulks throughout the dungeon. They will be key to the competion of the 2nd Objective, so try not to oneshot them ahead of time when you notice a pack.
- Corrupted Angels — stronger melee trash with a charging attack.
- Monkey Guardians — the unique enemies of the map. They resemble Act 5's Punisher trash, but also have the Mortar and Teleporter affixes.
Tips for the Sunwuko Set Dungeon
The Sunwuko Set Dungeon is arguably the simplest of the bunch, with simple to
execute objectives and no self-inflicted nerfing necessary. Theoretically, there
is a chance (due to the long distances covered) that you lose momentum between
fights and ![]() Sweeping Wind upkeep is threatened. To negate this, simply
equip a
Sweeping Wind upkeep is threatened. To negate this, simply
equip a ![]() Kyoshiro's Soul belt, which will maintain the stacks out of combat.
Also, in order not to jeopardize the 2nd objective with unwanted trash kills via
Kyoshiro's Soul belt, which will maintain the stacks out of combat.
Also, in order not to jeopardize the 2nd objective with unwanted trash kills via
![]() Sweeping Wind, you should not use the usual Sunwuko recommendation, the
Sweeping Wind, you should not use the usual Sunwuko recommendation, the
![]() Vengeful Wind fist. Just about any other weapon will do.
Vengeful Wind fist. Just about any other weapon will do.
You will have plenty of trash to do the 2nd Objective with, just practice
some restraint with ![]() Wave of Light and group enemies up with
Wave of Light and group enemies up with
![]() Cyclone Strike repeatedly. Since there is no requirement to hit the
enemies at once (instead, it's a generous 6-second period), you can chain a few
small fights with
Cyclone Strike repeatedly. Since there is no requirement to hit the
enemies at once (instead, it's a generous 6-second period), you can chain a few
small fights with ![]() Cyclone Strikes and get the Objective done easily.
Overall, this Set Dungeon should not take more than 1-2 attempts.
Cyclone Strikes and get the Objective done easily.
Overall, this Set Dungeon should not take more than 1-2 attempts.
Build for the Sunwuko Set Dungeon
| Active Skills |
|---|


|
| Passive Skills |
| Slot | Pieces | Stat Priority |
|---|---|---|
| Head |
|
|
| Shoulders |
|
|
| Torso |
|
|
| Wrists |
|
|
| Hands |
|
|
| Waist |
|
|
| Legs |
|
|
| Feet |
|
|
| Amulet |
|
|
| Ring #1 |
|
|
| Ring #2 |
|
|
| Weapon #1 |
|
|
| Weapon #2 |
|
|
To help you with farming the gear you need for your builds, we have two very useful guides that you can access by clicking the links below: a Salvage Guide to help you quickly check whether or not you can safely salvage a piece of gear and a Legendary Farming Guide to help you efficiently farm legendaries and set items.
| Slot | Gems |
|---|---|
| Jewelry | |
| Helm | |
| Torso and Pants |
|
| Weapon |
Kanai's Cube
- Weapon Slot:
 In-geom
 - Armor Slot:
 Leoric's Crown
 - Jewelry Slot:
 Ring of Royal Grandeur
Changelog
- 15 Jul. 2020: Removed recommendation of Vengeful Wind due to its Sweeping Wind damage buff.
- 03 Mar. 2018: Added guide.