Monk Uliana's Stratagem Set Dungeon Guide
Welcome to our guide to complete the Uliana's Stratagem set dungeon for Monks, a required step to complete the Masters of the Universe Conquest.
Overview of the Uliana's Stratagem Set Dungeon
The Uliana Set Dungeon is located in Act V, the Zakarum Cathedral. Take the Act V town waypoint, The Survivor's Enclave, and walk northeast. Past all the NPCs and up a flight of stairs, you will find the entrance to the Zakarum Cathedral. Enter, walk further in towards the altar. The Uliana Set Dungeon entrance will spawn near the stained glass windows on the left if you have the Uliana's Stratagem 6-piece set bonus equipped.
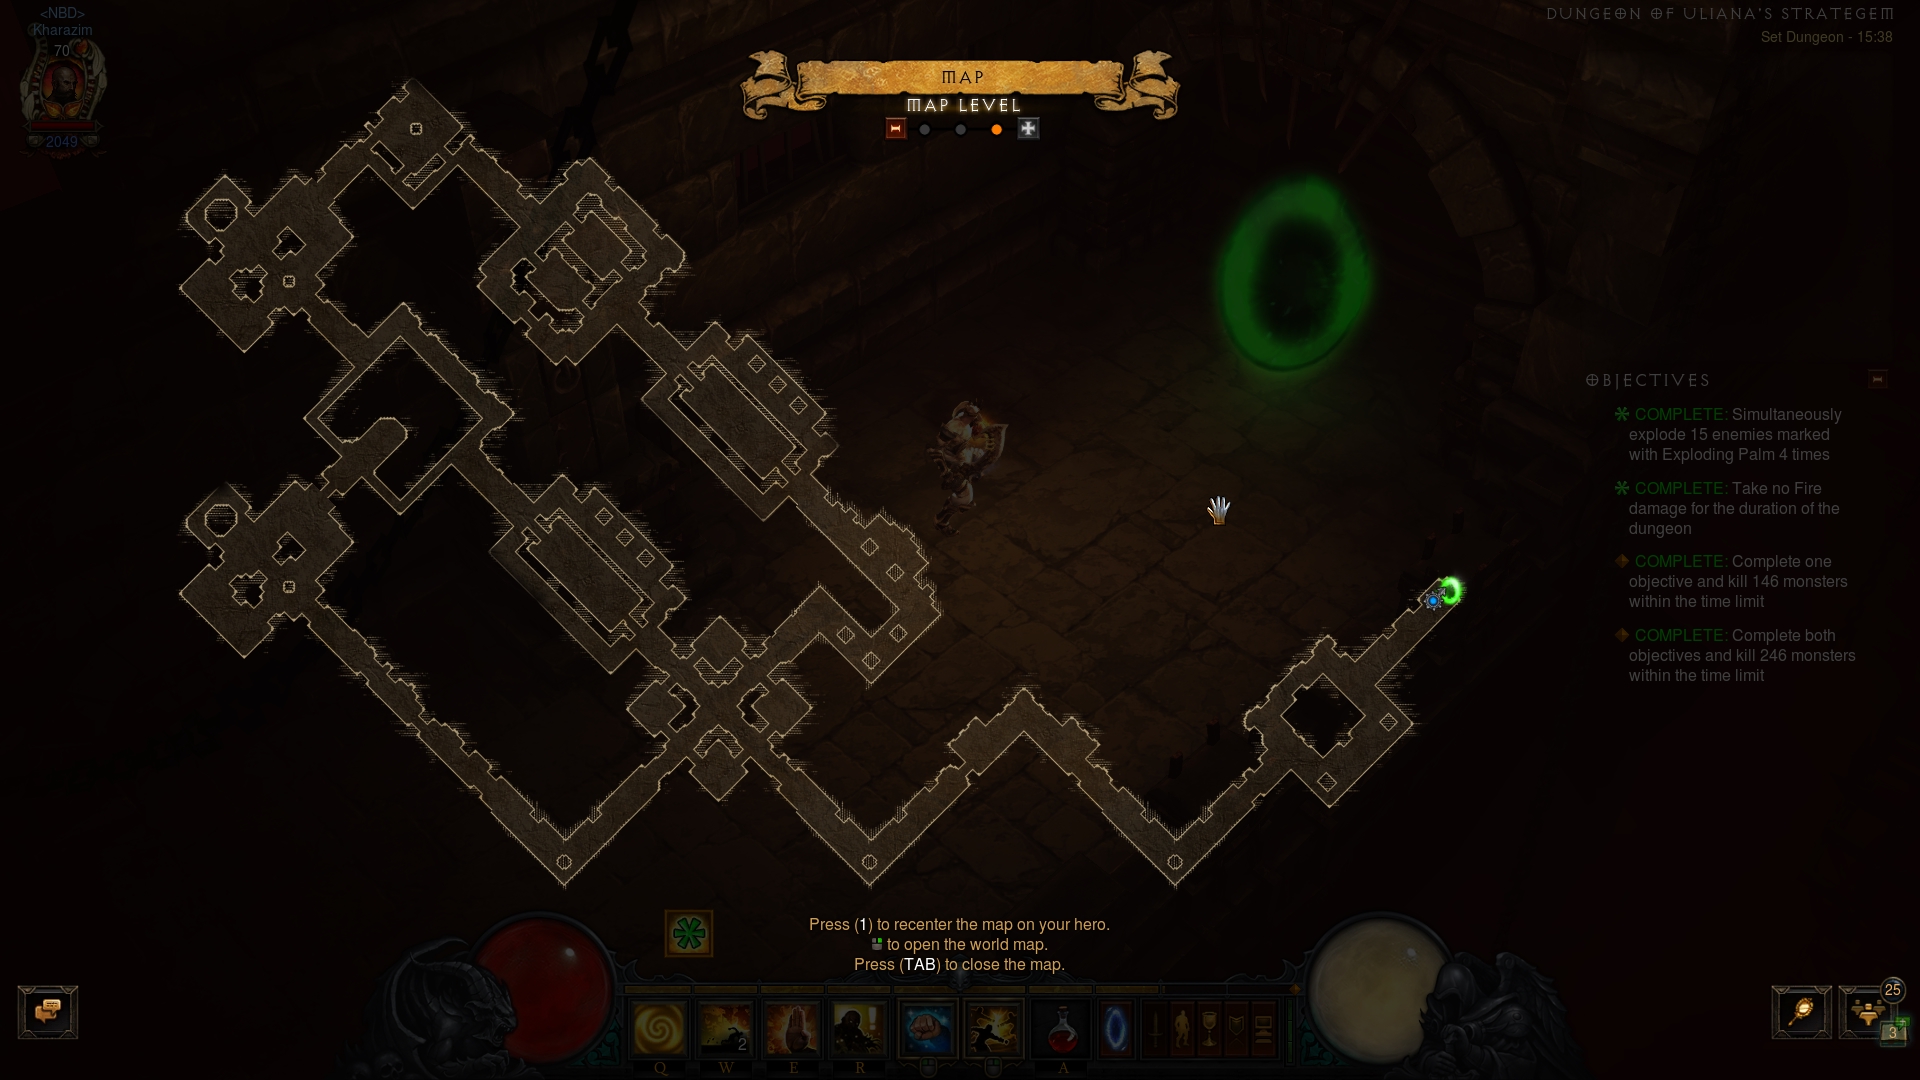
The Uliana's Stratagem Set Dungeon's two unique Primary Objectives are to: 1)
Simultaneously explode 15 enemies marked with ![]() Exploding Palm 4 times; and
2) Take no Fire damage for the duration of the dungeon.
Exploding Palm 4 times; and
2) Take no Fire damage for the duration of the dungeon.
The Uliana Set Dungeon is a relatively big Halls of Agony tileset, with three main "corridors" past its starting area. A successful attempt path is to finish off the initial section, then doing a S-shaped run through the three remaining paths — starting off with the northern corridor, then the middle, then southern.
The Uliana's Stratagem Set Dungeon is populated by several kinds of enemies:
- Bone Warriors — These meandering skeletal trash are meant to be pulled into large packs for the purposes of the 1st Objective.
- Blazing Swordwielders and Blazing Bone Axe Wielders — fewer in number and slow to react, these towering skeletons have a name and flaming graphic that gives away their ability to ruin your 2nd Objective. Eliminate on sight if they are solitary — do not try to drag them into a trash pull.
- Champion of Stratagems — the unique enemies of the map. They resemble Act 4's Oppressor trash, but also have a Frozen affix. Note that this enemy type alternates between melee and a fire breathing attack by default, endangering the 2nd Objective as well.
Tips for the Uliana's Stratagem Set Dungeon
The Uliana's Stratagem Set Dungeon is, unfortunately, of the type that benefits
from nerfing your build and toning down your damage. When geared out accordingly,
there is too high of a chance you will wipe out valuable trash with generator
attacks as you apply the ![]() Exploding Palms, or even by simply using
Exploding Palms, or even by simply using
![]() Cyclone Strike to clump enemies up. Take some simple steps to lower your
damage to the 300-400k point: drop Dexterity and Offense-section Paragons, drop
Crit Damage gems from weaponry, drop excess offense jewelry and legendary
gems.
Cyclone Strike to clump enemies up. Take some simple steps to lower your
damage to the 300-400k point: drop Dexterity and Offense-section Paragons, drop
Crit Damage gems from weaponry, drop excess offense jewelry and legendary
gems.
The 2nd Objective — taking no Fire damage for the duration of the dungeon
— can either be tricky or be completely eliminated, depending on your
available gear. There are numerous enemies with fire attacks, fiery grates, traps
and gauntlets spread across this dungeon to keep you on your toes, if you are up
for a challenge. However if you simply wear or cube ![]() The Star of Azkaranth,
this Objective is as good as done.
The Star of Azkaranth,
this Objective is as good as done.
Build for the Uliana's Stratagem Set Dungeon
| Active Skills |
|---|


|
| Passive Skills |
| Slot | Pieces | Stat Priority |
|---|---|---|
| Head |
|
|
| Shoulders |
|
|
| Torso |
|
|
| Wrists |
|
|
| Hands |
|
|
| Waist |
|
|
| Legs |
|
|
| Feet |
|
|
| Amulet |
|
|
| Ring #1 |
|
|
| Ring #2 |
|
|
| Weapon #1 |
|
|
| Weapon #2 |
|
To help you with farming the gear you need for your builds, we have two very useful guides that you can access by clicking the links below: a Salvage Guide to help you quickly check whether or not you can safely salvage a piece of gear and a Legendary Farming Guide to help you efficiently farm legendaries and set items.
| Slot | Gems |
|---|---|
| Jewelry | |
| Helm | |
| Torso and Pants |
|
| Weapon |
|
Kanai's Cube
- Weapon Slot:
 The Flow of Eternity
 - Armor Slot:
 Strongarm Bracers
 - Jewelry Slot:
 Ring of Royal Grandeur
Changelog
- 03 Mar. 2018: Added guide.