Crusader Seeker of the Light Set Dungeon Guide
Welcome to our guide to complete the Seeker of the Light set dungeon for Crusader, a required step to complete the Masters of the Universe Conquest.
Overview of the Seeker of the Light Set Dungeon
The Seeker of the Light Set Dungeon is located in Act II, the Waterlogged Passage. Teleport to the Ancient Waterway waypoint, and head downward to the middle entrance, the Waterlogged Passage. From there, simply walk up the short corridor and stop to the right of the Hidden Aqueducts door. The entrance will appear if you have the Seeker of the Light 6-piece bonus equipped.
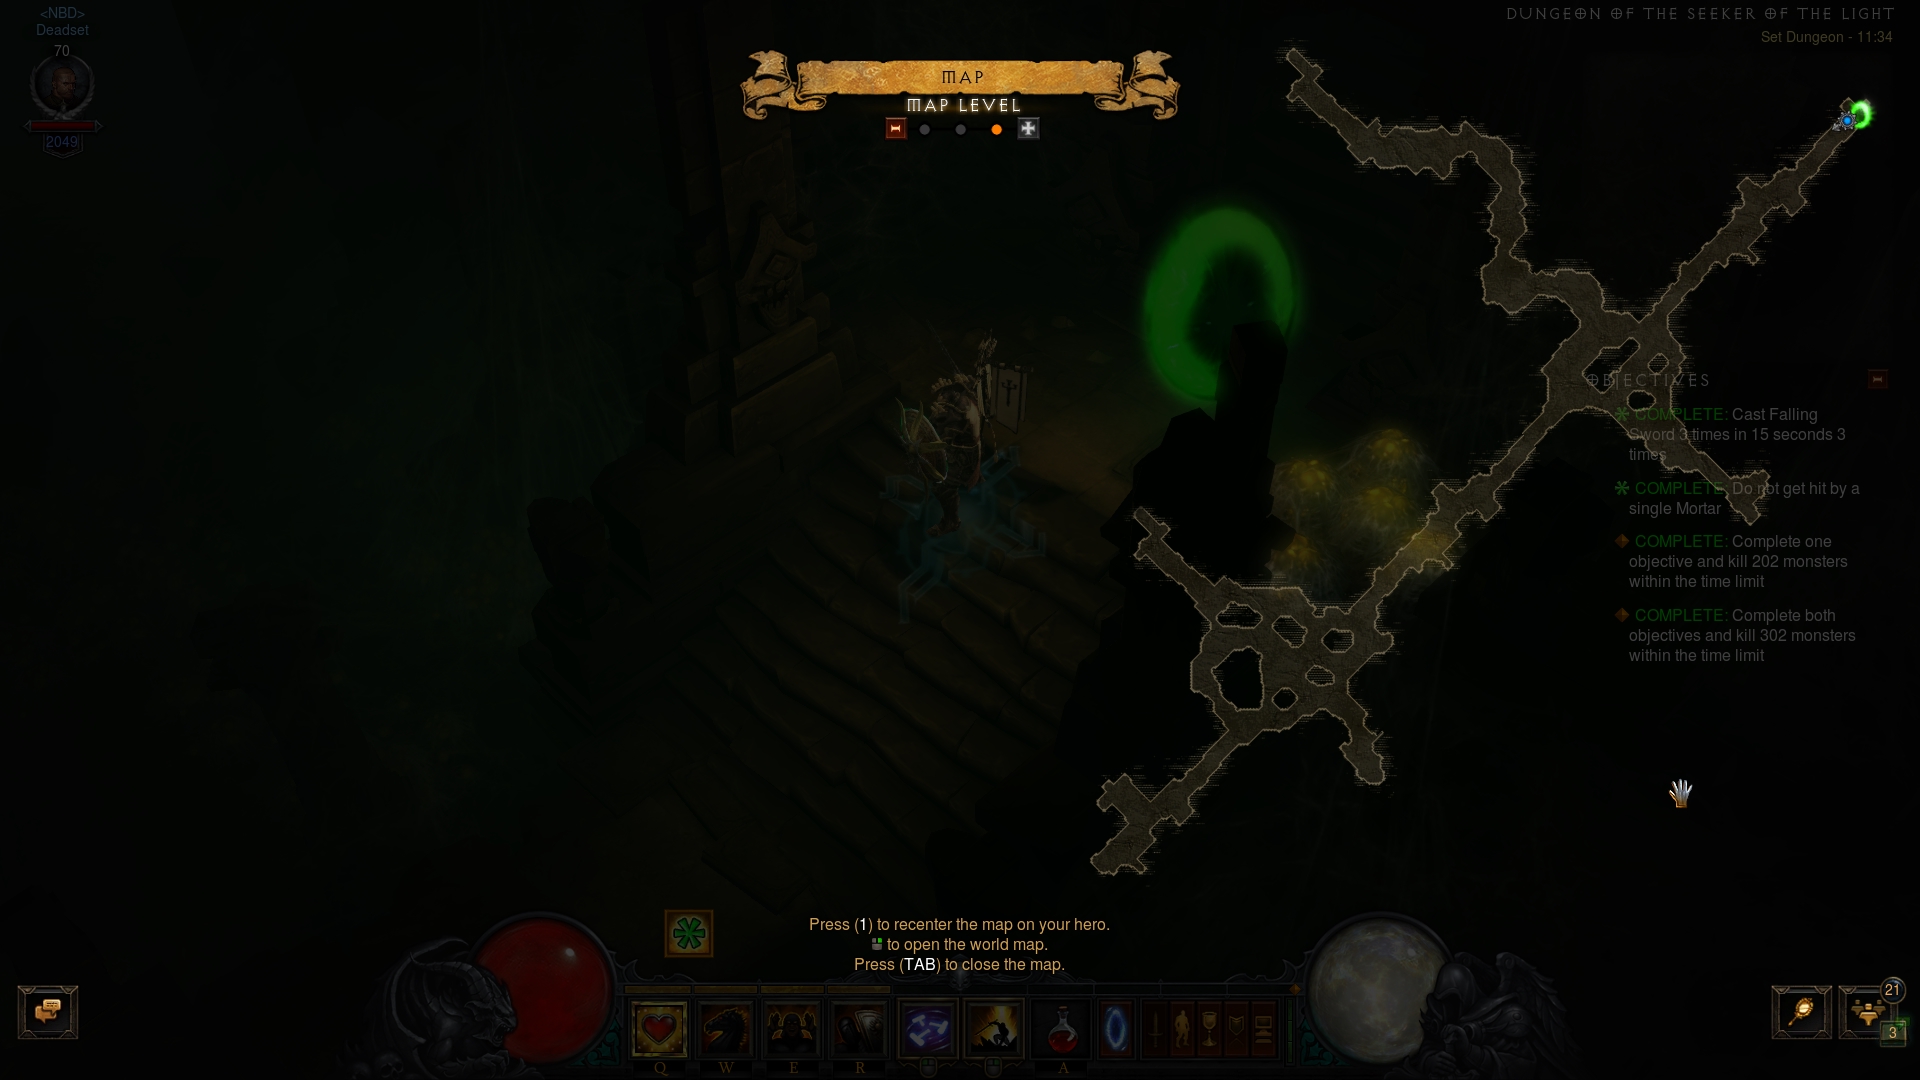
The Seeker of the Light Set Dungeon's two unique Primary Objectives are to: 1) Cast Falling Sword 3 times in 15 seconds (and repeat that 3 times); and 2) Not get hit by a single Mortar affix.
The Seeker of the Light Set Dungeon is a spider cavern tileset that has one prominent, straight corridor and two intersecting pathways, one longer and one shorter. A proven attempt path is to just follow each branch until its dead end, revealing the main corridor as you finish off the side paths.

The Seeker of the Light Set Dungeon is populated by four kinds of enemies:
- Vicious Ghouls — they come in great numbers and engage you in melee combat. They provide the main portion of the dungeon's kill count objective, and help out cooldown resets as they swarm.
- Blood Clan Warriors and Spearmen — similarly to the ghouls, these melee
and ranged trash are only there as filler for your
 Falling Sword
resets.
 - Protector of the Light — the unique enemies on the map. They resemble Act 3's Blood Clan Mauler trash, but have a Mortar affix that ties them to the second Objective of the dungeon.
Tips for the Seeker of the Light Set Dungeon
Using a ![]() Cam's Rebuttal either in hand or the weapon Cube slot all but
trivializes the first Objective, as it gives you 2
Cam's Rebuttal either in hand or the weapon Cube slot all but
trivializes the first Objective, as it gives you 2 ![]() Falling Sword
activations right out of the gate. Using the
Falling Sword
activations right out of the gate. Using the ![]() Rapid Descent rune and aiming
for large packs of enemies will grant you the third cast long before the 15
second deadline.
Rapid Descent rune and aiming
for large packs of enemies will grant you the third cast long before the 15
second deadline.
As you see the Elite enemies in the distance, prepare for their Mortar
barrage. You can wait out the first shot from a safe distance and then walk up
to it, or just jump on its head with ![]() Falling Sword — Mortar does
not work in melee range.
Falling Sword — Mortar does
not work in melee range.
Note that unlike other Set Dungeons where the type of damage taken dictates a
failure condition, the Seeker of the Light dungeon lists getting hit by a
Mortar. As such, elemental immunity amulets (like the theoretically applicable
![]() The Star of Azkaranth) will not work.
The Star of Azkaranth) will not work.
Build for the Seeker of the Light Set Dungeon
| Active Skills |
|---|


|
| Passive Skills |
| Slot | Pieces | Stat Priority |
|---|---|---|
| Head |
|
|
| Shoulders |
|
|
| Torso |
|
|
| Wrists |
|
|
| Hands |
|
|
| Waist |
|
|
| Legs |
|
|
| Feet |
|
|
| Amulet |
|
|
| Ring #1 |
|
|
| Ring #2 |
|
|
| Weapon |
|
|
| Off-hand |
|
To help you with farming the gear you need for your builds, we have two very useful guides that you can access by clicking the links below: a Salvage Guide to help you quickly check whether or not you can safely salvage a piece of gear and a Legendary Farming Guide to help you efficiently farm legendaries and set items.
| Slot | Gems |
|---|---|
| Jewelry | |
| Helm | |
| Torso and Pants |
|
| Weapon |
|
Kanai's Cube
- Weapon Slot:
 Cam's Rebuttal or
  In-geom
 - Armor Slot:
 Hammer Jammers
 - Jewelry Slot:
 Obsidian Ring of the Zodiac
Changelog
- 18 Feb. 2018: Added guide.
This build is presented to you by Deadset, one of the very few professional Diablo 3 players. Deadset regularly publishes video guides on Youtube and streams on Twitch, where you can see how this and other builds play out in practice.
- Diablo 3 Season 38 Preview
- Diablo 3 Season 37 (Official Preview)
- What's Coming in Diablo 3 Season 36?
- Diablo 3 Season 35: Official Preview
- All Diablo 3 Season 34 Class Guides and Compendium
- Diablo 3 Season 34 Delayed a Week
- Season 34 Official Preview
- Diablo 3 Season 33 Unintentionally Prematurely Ended