Wizard Tal Rasha Set Dungeon Guide
Welcome to our guide to complete the Tal Rasha's set dungeon for Wizards, a required step to complete the Masters of the Universe Conquest.
Overview of the Tal Rasha's Elements Set Dungeon
The Tal Rasha's Elements Set Dungeon is located in Act I, the Old Tristram Road. Teleport to The Old Ruins waypoint, then take the north road and progress through the zone a bit. Walk past Adria's Hut, and just shy of reaching the Cathedral (near a tree with hanging corpses), the entrance of the Tal Rasha Set Dungeon will open if you have the Tal Rasha 6-piece bonus active.
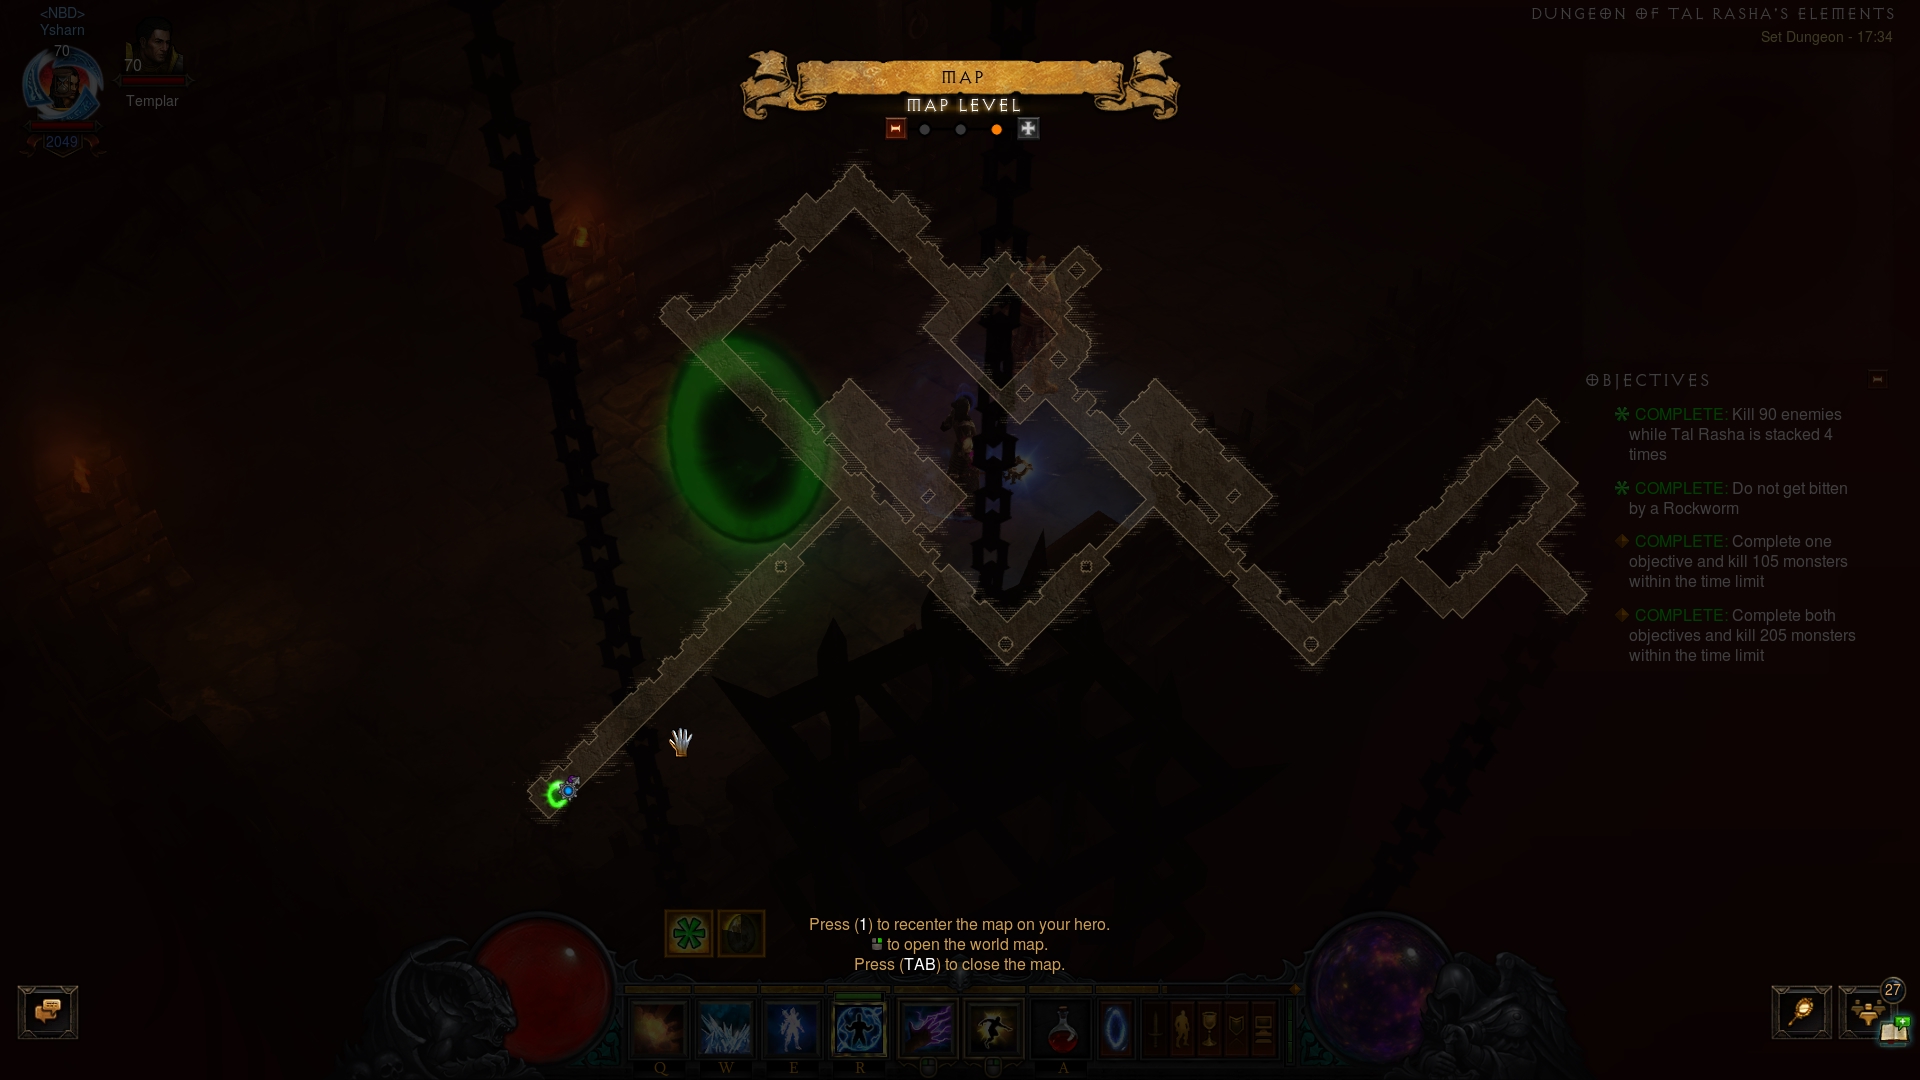
The Tal Rasha's Elements' two unique Primary Objectives are to: 1) Kill 90 enemies while Tal Rasha is stacked 4 times; and 2) Do not get bitten by a Rockworm.
The Tal Rasha's Elements Set Dungeon is a moderately sized Halls of Agony tileset that starts off with a linear tunnel, then splits into a rectangular shape, and ends into a final dead end into the northeast. A proven attempt path is to do the initial linear section, then making a full, clockwise clear of the rectangle, and finishing things off with the dead end.
The Tal Rasha's Elements Set Dungeon is populated by the following enemy types:
- Fallen and Demon Raiders — these swarming, melee trash types make up the majority of the Set Dungeon and will fuel the completion of the 1st Objective with their great numbers.
- Sand Dervishes — fewer in number, these large, hard-hitting melee monsters should not be given much of a chance to attack you.
- Rockworms — these burrowing monsters will tunnel right beneath your feet; the entire 2nd Objective revolves around not getting bitten by them.
- Elemental Heretic — the unique enemies of the map. They resemble Act III's Demonic Tremor trash, but also have the Arcane Enchanted affix. As long as your kill speed is decent, nothing about these elites should threaten the completion of the run.
Tips for the Tal Rasha's Elements Set Dungeon
Build-wise, there are no strict rules you have to follow in order to
master the Tal Rasha Set Dungeon. Any of the Tal-based guides on Icy Veins
can do the job, because regardless of the skill choices, the rotation is set in
stone by the set — one attack of each element on a regular basis to
maintain the Tal bonuses. Nevertheless, a slight variation of the popular
![]() Explosive Blast "Flashfire" Wizard is provided below as an effective
and proven build variant for this Set Dungeon.
Explosive Blast "Flashfire" Wizard is provided below as an effective
and proven build variant for this Set Dungeon.
The Objectives of this Set Dungeon are trivial in terms of difficulty, and
are not worth discussing at length. Spamming the four elemental skills regularly
as you maintain the set bonus and kill off the denizens of the dungeon will
complete the 1st Objective by itself. The Rockworm Objective can cause some
annoying restarts, as a single bite will ensure the failure of the attempt.
Pay attention to the minimap — if you notice an enemy remaining in the
area, but it is not in sight, then it is a Rockworm ready to unburrow. Lure it
undernath you and wait for a second, then ![]() Teleport away — when
executed correctly, the worm will surface at your previous location, and can
be easily finished off from a safe distance with
Teleport away — when
executed correctly, the worm will surface at your previous location, and can
be easily finished off from a safe distance with ![]() Electrocute.
Electrocute.
Build for the Tal Rasha's Elements Set Dungeon
| Active Skills |
|---|


|
| Passive Skills |
| Slot | Pieces | Stat Priority |
|---|---|---|
| Head |
|
|
| Shoulders |
|
|
| Torso |
|
|
| Wrists |
|
|
| Hands |
|
|
| Waist |
|
|
| Legs |
|
|
| Feet |
|
|
| Amulet |
|
|
| Ring #1 |
|
|
| Ring #2 |
|
|
| Weapon |
|
|
| Off-hand |
|
To help you with farming the gear you need for your builds, we have two very useful guides that you can access by clicking the links below: a Salvage Guide to help you quickly check whether or not you can safely salvage a piece of gear and a Legendary Farming Guide to help you efficiently farm legendaries and set items.
| Slot | Gems |
|---|---|
| Jewelry | |
| Helm |
|
| Torso and Pants |
|
| Weapon |
Kanai's Cube
- Weapon Slot:
 In-geom
 - Armor Slot:
 Krelm's Buff Belt
 - Jewelry Slot:
 Halo of Karini
Changelog
- 09 Mar. 2018: Added guide.
This build is presented to you by Deadset, one of the very few professional Diablo 3 players. Deadset regularly publishes video guides on Youtube and streams on Twitch, where you can see how this and other builds play out in practice.
- Diablo 3 Season 38 Preview
- Diablo 3 Season 37 (Official Preview)
- What's Coming in Diablo 3 Season 36?
- Diablo 3 Season 35: Official Preview
- All Diablo 3 Season 34 Class Guides and Compendium
- Diablo 3 Season 34 Delayed a Week
- Season 34 Official Preview
- Diablo 3 Season 33 Unintentionally Prematurely Ended