
 Free Hero Rotation

















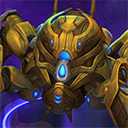










































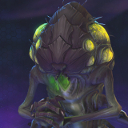


Abathur Build Guide “You. Enhanced. Improved.”
Welcome to our guide for Abathur, a Support in Heroes of the Storm. Within these pages, you will find everything required to understand how best to play this hero, in both different map styles and team compositions.

Abathur's Overview
Abathur plays differently from every other Hero in the game. With extremely
low health and negligible Basic Attack damage, he needs to avoid direct
confrontations with enemy Heroes. He instead applies pressure to
the map through use of his global Abilities, and participates in team fights by
empowering his allies with  Symbiote.
Abathur is very dependent on good strategy, and can greatly benefit from (or
suffer on) certain maps and team compositions.
Symbiote.
Abathur is very dependent on good strategy, and can greatly benefit from (or
suffer on) certain maps and team compositions.
Abathur's Strengths and Weaknesses
 Strengths
 Can soak multiple lanes at once, creating an XP lead
- Excellent synergy with specific Heroes
- One of the best split-pushing Heroes in the game
- Can teleport anywhere on the map (provided there is vision) using
 Deep Tunnel
  Toxic Nest is excellent at spotting and dismounting enemies attempting to gank allies or sneak objectives

 Weaknesses
 Weak early game
- Cannot solo a lane by himself
- Body is extremely vulnerable if found
- Requires very good multitasking and map awareness
- Team must adapt to Abathur's unique gameplay style in order to succeed
- Viability is very dependent on the map and team compositions

Abathur's Talent Build Cheatsheet
Symbiote Build
Recommended






The Symbiote Build maximises Abathur's team fight presence by taking Talents that improve Symbiote's damage dealing Abilities. This team fight presence comes at the cost of global pressure, as you will lack the huge lane pressure provided by other builds. Although this is not a build that focuses on pushing lanes, it is still important to soak as much experience as possible. Due to the short range of Symbiote's Abilities, this build is ideally paired with a melee assassin who benefits from increased attack speed.
Adrenal Overload will greatly increase the performance
of certain heroes, like Illidan, or Greymane. When the Symbiote
host is not reliant on Basic Attacks, you should get  Needlespine
instead. Even though
Needlespine
instead. Even though  Calldown: MULE will be useful in most games,
 Vile Nest is also an option in Dragon Shire and Cursed Hollow,
since it will provide much control for enemy rotation and objectives. At Level 16
Vile Nest is also an option in Dragon Shire and Cursed Hollow,
since it will provide much control for enemy rotation and objectives. At Level 16
 Adrenaline Boost is the standard Talent, but
 Envenomed Spikes is a great option against team compositions
with limited mobility, since the slow will affect all enemies, greatly disrupting
their movement. Together with a
Envenomed Spikes is a great option against team compositions
with limited mobility, since the slow will affect all enemies, greatly disrupting
their movement. Together with a  Dragonblade Genji or Maiev,
you can go for
Dragonblade Genji or Maiev,
you can go for  Evolutionary Link at Level 20, since the shield
and the extra duration will be incredibly good for those Heroes.
Evolutionary Link at Level 20, since the shield
and the extra duration will be incredibly good for those Heroes.
Toxic Nest Build
Situational Toxic Nest build can be a good choice in situations
where you do not have viable heroes to place Symbiote on. It excels in maps with
constant rotation, such as Dragon Shire, Blackheart's Bay,
Cursed Hollow, Garden of Terror and Towers of Doom.
Even though it sounds interesting to use all your Toxic Nest in the same point, this is not the
best way to abuse this build. We recommend using the Nests between the waves, while
making sure they are not very close between them. The main focus is to
abuse Vile Nest's slow to delay enemy rotations or to control
the way towards the objective. It is also very important to always have a Toxic Nest
on enemy's Mercenary camps, since it will give that information to your team, and
sometimes it will even stop their intention in capturing it.
Envenomed Nest is especially strong when your team has a good
ganker or roamer, as Toxic Nests can catch enemies during rotations.
Together with Vile Nest, affected Heroes are Slowed and have their
Armor reduced by 15, giving your ally time to secure the kill.
At level 13, Soma Transference is the default
pick as long as most of your simbiote hosts are frontline Heroes.
Therefore, it is better to go for Spatial Efficiency when
backliners are the hosts. Evolutionary Link can be a good
Talent as well, and you should use the Heroic Ability on your teammate that is having
more trouble staying alive, since the 35% shield will be applied to them, giving them
some much needed protection.
Locust Strain Build
Situational


The  Locust Strain Build is strong on large Maps, where
 Deep Tunnel and Locust Brood allow Abathur to create
split-push pressure far from the enemy team. Locusts can sustain themselves through
undefended Minion waves, making their pressure harder to answer after Bombard Strain
at Level 13 and Survival Instincts at Level 16. When enemies are visible elsewhere,
tunnel to an advanced position, use Locust Brood, and retreat. Ultimate Evolution
can then be used to assist your team while enemies respond to the Locusts.
Deep Tunnel and Locust Brood allow Abathur to create
split-push pressure far from the enemy team. Locusts can sustain themselves through
undefended Minion waves, making their pressure harder to answer after Bombard Strain
at Level 13 and Survival Instincts at Level 16. When enemies are visible elsewhere,
tunnel to an advanced position, use Locust Brood, and retreat. Ultimate Evolution
can then be used to assist your team while enemies respond to the Locusts.
At Level 4, Adrenal Overload is excellent when your team has a decent
Basic Attacker, such as Illidan or Greymane, who can take full advantage of its bonus
Attack Speed. Without such an ally, Prolific Dispersal provides more map control
and information through additional Toxic Nests, while  Slapathur
makes Abathur much harder to dive when facing Heroes such as Genji or Zeratul.
At Level 7, Networked Carapace greatly strengthens the
push of allied Minion waves, but Calldown: MULE is essential on
Sky Temple and Haunted Mines, where repairing Structures helps counter objective pressure.
Slapathur
makes Abathur much harder to dive when facing Heroes such as Genji or Zeratul.
At Level 7, Networked Carapace greatly strengthens the
push of allied Minion waves, but Calldown: MULE is essential on
Sky Temple and Haunted Mines, where repairing Structures helps counter objective pressure.
Abathur's Synergies and Counters
 Abathur synergizes with






Abathur is strong with Heroes who serve as ideal Symbiote hosts, or who are good targets for Ultimate Evolution. Ideal Symbiote hosts are Heroes that naturally position themselves in melee range, or with mobile assassins, that can easily abuse Symbiote to kill squishy targets.
 Abathur is countered by



Abathur's Symbiote and Locusts help him to deny the enemy team experience when objectives spawn, when most Heroes will need to vacate lanes in order to rotate. This tactic is directly countered by Heroes who can travel globally, and who waveclear very efficiently. He is also very weak against compositions that can join as four to push down a lane. Heroes like Sylvanas, Zarya or Sgt. Hammer are great for that purpose, and for this reason are a big threat for Abathur's team.
Abathur's Maps












Abathur's win condition is to be more places at once than his enemy, and
overwhelm the other team with a constant stream of subtle pressure. Abathur is
very strong on large maps that feature frequent objective spawns, which allow
him to be somewhat ignored for some of the match. These maps allow him to
either soak an advantage, or force the enemy team to split. His strength,
however, is also his weakness. Abathur gets very little value on small maps
that feature fewer lanes, team fights near lanes, or objectives that do not
require immediate rotations. Abathur is excellent on Sky Temple due
to Calldown: MULE denying most of objective's shots.
Abathur's Tips and Tricks
- Use
 Symbiote to soak Experience from distant lanes, making sure your team does not lose any Experience from lanes they are not present.
 - Place Toxic Nests around the battlefield to provide vision, deal damage, and dismount enemies who are rotating. Using them on enemy Mercenary Camps is a great way to spot enemies frequently, allowing your team to invade it or to push somewhere else.
- After getting
 Soma Transference it is better to only use Spike Burst when there are many enemies inside the area of effect, since you should be always trying to maximize sustain healing in your empowered ally.
  Ultimate Evolution should be used as team fights start.
- When using Ultimate Evolution, the Monstrosity can use Deep Tunnel on its own separate cooldown to move to an empty side lane, or to return to the Hall of Storms to heal.
- Use Deep Tunnel to quickly traverse the battlefield and get out of harm's way.
- Deep Tunnel should be used towards empty lanes when enemies cannot reach them, so you will be soaking Experience for your team with Abathur's body, while also assisting them with Symbiote.
 Calldown: MULE should be used when ready on any damaged lane to maximize its value.
- You should be careful about body position when playing against Heroes that can easily hunt you down, such as Zeratul, Medivh, or Genji. In those scenarios it might even be better to not be in lane at all while you do not know where they are.
Abathur's Role in the Current Meta
Abathur's biggest strength is being able to contest map objectives while
soaking experience. This is done by moving Abathur within
range of Minions and then using Symbiote or
Ultimate Evolution to assist your team. This creates
an experience advantage over the enemy team. If the enemy team has one of their
Heroes soak a lane to try to catch up, then your team is at a significant
advantage in any team fight that occurs during that time.
Due to the specific nature of his strengths and weaknesses, Abathur's place in the meta will likely remain situational. He can be extremely powerful with the right team composition, or can struggle to provide value because of a map's mechanics. Even in drafts where you have a good team composition and map for Abathur, you should make sure your team is comfortable with the pick. Abathur requires your team to play differently than normal, and you will have the most success when your teammates understand this.
Changelog
- 24 Aug. 2026 (talents page): Updated Talents and Builds after recent balance patch.
- 24 Aug. 2026 (abilities page): Updated Abilities after recent balance patch.
- 24 Aug. 2026 (this page): Guide updated after recent balance patch.
- 11 Mar. 2026 (talents page): Updated builds and Talents to reflect meta development.
- 11 Mar. 2026 (abilities page): Guide updated to reflect meta development.
- 11 Mar. 2026 (this page): Guide updated to reflect meta development.
- 31 May 2025 (talents page): Guide reviewed.
- 31 May 2025 (this page): Guide reviewed.
- 26 Mar. 2021 (talents page): Updated builds and Talents to better reflect Current Meta.
- 26 Mar. 2021 (this page): Updated builds to better reflect Current Meta.
- 17 May 2020 (this page): Updated guide to ensure meta relevance.
- 09 Apr. 2020 (talents page): Updated builds and Talents to better reflect Current Meta.
- 15 Feb. 2020 (talents page): Updated text for Prolific Dispersal to account for balance patch.
- 15 Feb. 2020 (this page): Guide reviewed and text updated for Prolific Dispersal to account for February 12 balance patch.
- 29 Jan. 2020 (talents page): Reviewed Talents section for relevance and fixed grammatical error.
- 29 Jan. 2020 (this page): Updated synergies to stress the strength of symbiote on high sustain melee Heroes.
- 15 Dec. 2019 (this page): Updated Role in the Current Meta to include information on current Nexus Anomaly.
- 18 Apr. 2019 (talents page): Updated Talents section to account for balance patch.
- 18 Apr. 2019 (this page): Updated Talents section to account for balance patch.
- 12 Feb. 2019 (talents page): Updated guide to reflect Hero rework in balance patch.
- 12 Feb. 2019 (this page): Updated guide to reflect Hero rework in balance patch.
- 12 Dec. 2017 (talents page): Edited Calldown: MULE to reflect 2018 game design changes.
- 16 Feb. 2017 (this page): Updated guide and moved it to the new format.
More Support Guides
Derenash has been playing Heroes of the Storm since 2015 and has achieved Grandmaster in multiple seasons, peaking at Top 1 in Season 3 and 4 of 2018. He participated in the HGC Copa America in 2018 where his team had a strong victory. He is passionate about teaching others about the game, and streams often on Twitch in Portuguese, and you can find him in Wind Striders' Discord as well where he is happy to answer any questions in English or Portuguese.
- Blizzard Delays Warcraft 3’s Visual Overhaul After Backlash Over Campaign Progress
- Heroes of the Storm Hotfix Patch Notes: October 5
- Heroes of the Storm Hotfix Patch Notes: September 29
- A New Era for Heroes of the Storm
- Heroes of the Storm Live Patch Notes: September 28
- Twitch Drops for Xal’atath Launch in Heroes of the Storm
- The Six Pillars of Heroes of the Storm
- Last Chance for Xal’atath’s Heartseeker Skin in Heroes of the Storm