

Ultraxion Detailed Strategy Guide (Heroic Mode included)

Introduction
This guide is intended to provide a comprehensive description of the encounter with Ultraxion in Dragon Soul. It is targeted at anyone who desires to understand the fight mechanics.
This guide is updated for World of Warcraft WoD 6.1.2.
Ultraxion is the 5th boss of the Dragon Soul raid. The mechanics of the encounter are simple, but the fight is extremely punishing and it will require special attention from all of your raid members.
It is the gear check of this tier, requiring both high amounts of DPS and high amounts of healing. While the fight is very straightforward, we believe that it is very refreshing in that it allows players to aim at maximising their output rather than having to deal with various complex mechanics.
General Information
| Difficulty | Ultraxion's Health | Enrage Timer | Raid Composition | |||
|---|---|---|---|---|---|---|
| Soft | Hard | Tanks | Healers | DPS | ||
| 10-man | 57M | Approx. 6 minutes | 6 minutes | 2 | 2-3 | 5-6 |
| 10-man heroic | 85M | Approx. 6 minutes | 6 minutes | 2 | 2 | 6 |
| 25-man | 184M | Approx. 6 minutes | 6 minutes | 2 | 5 | 18 |
| 25-man heroic | 276M | Approx. 6 minutes | 6 minutes | 2 | 5-6 | 17-18 |
| LFR | 111M | Approx. 6 minutes | 6 minutes | 2 | 6 | 17 |
Loot
Mount
In all difficulties, Ultraxion has a very low chance to drop Experiment 12-B.
Tier 13 Tokens
| Item Name | Slot | Classes |
|---|---|---|
| Chest of the Corrupted Conqueror (LFR, Heroic) | Chest | Paladin, Priest, Warlock |
| Chest of the Corrupted Protector (LFR, Heroic) | Chest | Warrior, Hunter, Shaman |
| Chest of the Corrupted Vanquisher (LFR, Heroic) | Chest | Rogue, Death Knight, Mage, Druid |
Armor
| Item Name | Armor | Slot | Main Stats |
|---|---|---|---|
| Treads of Sordid Screams (LFR, Heroic) | Leather | Feet | Intellect/Spirit |
| Imperfect Specimens 27 and 28 (LFR, Heroic) | Shoulders | Intellect | |
| Bracers of Looming Darkness (LFR, Heroic) | Wrists | Agility | |
| Dragonfracture Belt (LFR, Heroic) | Plate | Waist | Intellect/Spirit |
| Stillheart Warboots (LFR, Heroic) | Plate | Feet | Strength/Mastery |
Weapons
| Item Name | Type | Main Stats |
|---|---|---|
| Morningstar of Heroic Will (LFR, Heroic) | One-Hand Mace | Agility |
| Ledger of Revolting Rituals (LFR, Heroic) | Off-Hand Frill | Intellect/Spirit |
Rings and Trinkets
| Item Name | Type | Main Stats/Effect |
|---|---|---|
| Signet of Suturing (LFR, Heroic) | Ring | Intellect/Spirit |
| Infinite Loop (LFR, Heroic) | Ring | Intellect/Hit |
| Seal of Primordial Shadow (LFR, Heroic) | Ring | Agility |
| Curled Twilight Claw (LFR, Heroic) | Ring | Strength/Mastery |
| Breathstealer Band (LFR, Heroic) | Ring | Strength/Mastery |
| Hardheart Ring (LFR, Heroic) | Ring | Strength/Parry |
| Windward Heart (LFR, Heroic) | Trinket | Intellect/Additional Heal |
| Cunning of the Cruel (LFR, Heroic) | Trinket | Intellect/AoE Damage |
| Vial of Shadows (LFR, Heroic) | Trinket | Agility/Additional Damage |
| Creche of the Final Dragon (LFR, Heroic) | Trinket | Strength/Crit on Damage |
| Bone-Link Fetish (LFR, Heroic) | Trinket | Strength/AoE Damage |
| Indomitable Pride (LFR, Heroic) | Trinket | Stamina/Shield |
Overview of the Fight
 The encounter against Ultraxion is a single phase encounter, the difficulty
of which increases over time. The fight has both a hard and a soft enrage
timer, ensuring that close to or at the 6 minute mark, your raid will
unavoidably wipe.
The encounter against Ultraxion is a single phase encounter, the difficulty
of which increases over time. The fight has both a hard and a soft enrage
timer, ensuring that close to or at the 6 minute mark, your raid will
unavoidably wipe.
The encounter does not present any complicated mechanics, although it does contain two very punishing abilities, which must be dealt with perfectly each time. Additionally, the fight requires a tank switch as well as a strong amount of AoE healing. For the whole duration of the fight, the boss and the raid will remain stationary.
The five Aspects (Alexstrasza, Ysera, Kalecgos, Nozdormu and Thrall) offer various buffs to your raid, during the encounter. These buffs do not trivialise the fight, but rather make it possible to complete.
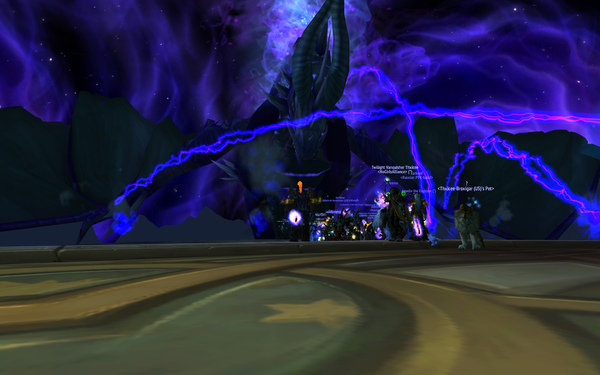
The encounter is triggered by talking to Thrall.
Preliminary Mentions: Twilight Realm and Heroic Will
The encounter takes place in two realms: the Twilight Realm and the Normal Realm. Both of these realms are just regular realms. They do not give particular buffs/debuffs or anything of that sort. For the vast majority of the encounter, the raid will be within the Twilight Realm. Raid members will only need to enter the Normal Realm when they have to avoid specific abilities that Ultraxion uses. This occurs several times during the fight.
| Twilight Realm | Normal Realm |
|---|---|
|
|
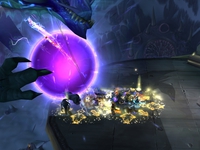
The only way to exit the Twilight Realm is by using the ![]() Heroic Will
ability. This is an encounter specific ability, that appears on your screen
in the form of a special action bar that looks like this:
Heroic Will
ability. This is an encounter specific ability, that appears on your screen
in the form of a special action bar that looks like this:
Heroic Will has a 5 second cooldown and has no resource cost. It is off the Global Cooldown and it can be used even while you are casting or channeling another spell. Using Heroic Will has no beneficial effects. It merely removes you from the Twilight Realm for 5 seconds (as we said, this is useful for avoiding certain mechanics). During those 5 seconds, you are unable to perform any action whatsoever (deal damage, heal or even move).
This ability can be keybound from the Key Bindings Menu (it is called ExtraActionButton1 and it is located in the Action Bar Functions section). The button may may not display properly (or at all) if you are using any action bar add-ons, although this does not affect the aforementioned key-binding's efficiency. Alternatively, you can use the following macro:
- /click ExtraActionButton1
Clicking this macro (which, of course, can be keybound), has the same effect as clicking the Heroic Will button.
Ultraxion's Abilities
Ultraxion has the following abilities:
-
 Hour of Twilight deals 300,000 unresistable Shadow damage to every
player in the Twilight Realm. Ultraxion casts this ability every 45 seconds.
There is an emote warning players about it in advance and giving them enough
time to react. Players will need to use
Hour of Twilight deals 300,000 unresistable Shadow damage to every
player in the Twilight Realm. Ultraxion casts this ability every 45 seconds.
There is an emote warning players about it in advance and giving them enough
time to react. Players will need to use  Heroic Will to exit the Twilight
Realm just as this ability is about to be cast. Right after Ultraxion has cast
this ability, players in the Normal Realm are automatically brought back to
the Twilight Realm. In 10-man difficulty, at least
1 player must remain within the Twilight Realm and take damage from this
ability, otherwise the raid will instantly wipe. In 25-man, 3 players must do
the same.
Heroic Will to exit the Twilight
Realm just as this ability is about to be cast. Right after Ultraxion has cast
this ability, players in the Normal Realm are automatically brought back to
the Twilight Realm. In 10-man difficulty, at least
1 player must remain within the Twilight Realm and take damage from this
ability, otherwise the raid will instantly wipe. In 25-man, 3 players must do
the same.

 Fading Light is a debuff that Ultraxion places on the current tank and
one random DPS player in 10-man difficulty and 3 random DPS players in 25-man
difficulty (in LFR difficulty, it only affects the current tank), that lasts
between 5 and 10 seconds (the exact duration is randomly chosen each time) and
instantly causes their death when it expires, if they are still
in the Twilight Realm. If the players are in the Normal Realm when the debuff
expires (thanks to Heroic Will), they will be returned to the Twilight
Realm, their threat will be reset and they will be unable to generate any
threat for 10 seconds. Ultraxion begins casting this ability after the first
Hour of Twilight, and he will always cast Fading Light twice in the 45 second
interval between two Hour of Twilight casts.
Fading Light is a debuff that Ultraxion places on the current tank and
one random DPS player in 10-man difficulty and 3 random DPS players in 25-man
difficulty (in LFR difficulty, it only affects the current tank), that lasts
between 5 and 10 seconds (the exact duration is randomly chosen each time) and
instantly causes their death when it expires, if they are still
in the Twilight Realm. If the players are in the Normal Realm when the debuff
expires (thanks to Heroic Will), they will be returned to the Twilight
Realm, their threat will be reset and they will be unable to generate any
threat for 10 seconds. Ultraxion begins casting this ability after the first
Hour of Twilight, and he will always cast Fading Light twice in the 45 second
interval between two Hour of Twilight casts. Unstable Monstrosity causes Ultraxion to deal a high amount of Shadow
damage (300,000 in 10-man difficulty, 700,000 in 25-man difficulty and 525,000
in LFR), split between all players within 30 yards who are in the Twilight
Realm. He initially casts this ability every 6 seconds, but every minute that
elapses in the encounter reduces the interval between casts by 1 second. Thus,
before the fight is over, Ultraxion will be casting Unstable Monstrosity every
second, constituting a soft enrage mechanics.
Unstable Monstrosity causes Ultraxion to deal a high amount of Shadow
damage (300,000 in 10-man difficulty, 700,000 in 25-man difficulty and 525,000
in LFR), split between all players within 30 yards who are in the Twilight
Realm. He initially casts this ability every 6 seconds, but every minute that
elapses in the encounter reduces the interval between casts by 1 second. Thus,
before the fight is over, Ultraxion will be casting Unstable Monstrosity every
second, constituting a soft enrage mechanics. Twilight Eruption is Ultraxion's hard enrage. After 6 minutes,
he will explode, killing not only himself in the process, but also wiping
the raid.
Twilight Eruption is Ultraxion's hard enrage. After 6 minutes,
he will explode, killing not only himself in the process, but also wiping
the raid. Twilight Burst causes Ultraxion to deal a huge amount of
Shadow damage each second to every player in the raid (56,000 in LFR difficulty and 75,000 in 10 and 25-man difficulty) if there is no player within his melee
range. Additionally, he will increase the amount of magic damage taken
by all players by 50% (stacking) with each tick, quickly causing a wipe.
Twilight Burst causes Ultraxion to deal a huge amount of
Shadow damage each second to every player in the raid (56,000 in LFR difficulty and 75,000 in 10 and 25-man difficulty) if there is no player within his melee
range. Additionally, he will increase the amount of magic damage taken
by all players by 50% (stacking) with each tick, quickly causing a wipe.

Buffs Provided by The Aspects
The five aspects provide various buffs to your raid. Thrall buffs your tanks, Alexstrasza, Ysera and Kalecgos buff your healers and Nozdormu buffs your entire raid. These buffs are given to your raid at different times during the fight, and we will present them in the order in which they appear.
Thrall's Buff
At the start of the fight, Thrall will permanently buff all tanks with
![]() Last Defender of Azeroth. This reduces the cooldown of all their defensive
cooldowns by 50% and increases their duration by 100%.
Last Defender of Azeroth. This reduces the cooldown of all their defensive
cooldowns by 50% and increases their duration by 100%.
Alexstrasza, Ysera and Kalecgos' Buffs
The healing buffs (technically speaking, they are debuffs) are given to the raid with the following timings:
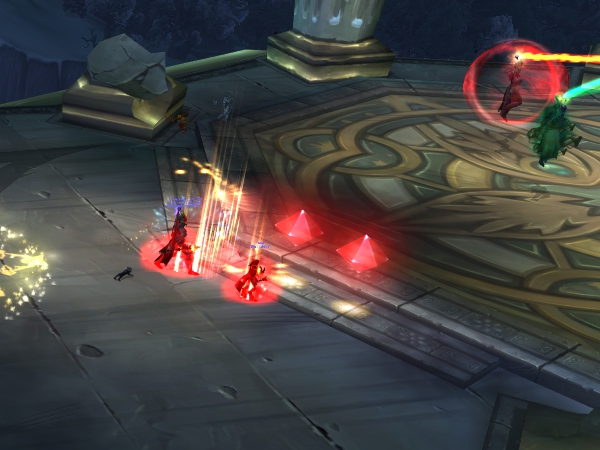
 Gift of Life (red) is provided by Alexstrasza, about 1 and a half
minutes into the encounter. It increases all healing done by 100%.
Gift of Life (red) is provided by Alexstrasza, about 1 and a half
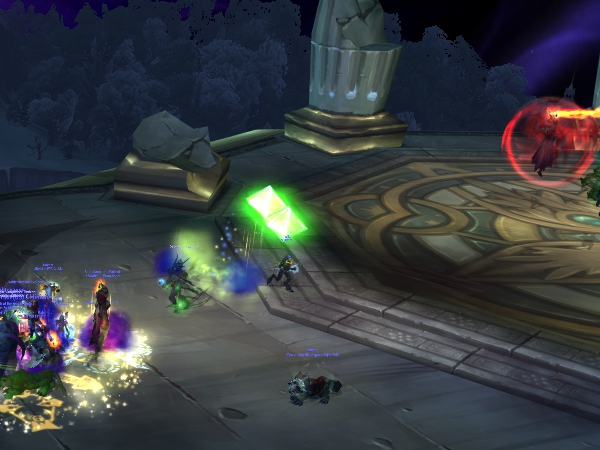
minutes into the encounter. It increases all healing done by 100%. Essence of Dreams (green) is provided by Ysera, about 2 and a half
minutes into the encounter. It causes each heal cast by the player to also
heal the entire raid for the same amount (the healing done to the raid is
split evenly among all raid members).
Essence of Dreams (green) is provided by Ysera, about 2 and a half
minutes into the encounter. It causes each heal cast by the player to also
heal the entire raid for the same amount (the healing done to the raid is
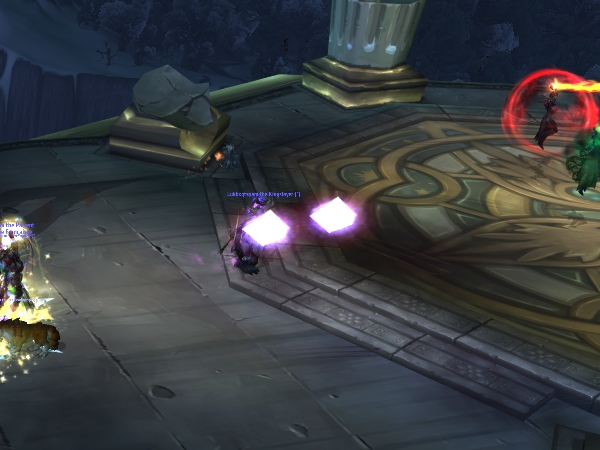
split evenly among all raid members). Source of Magic (blue) is provided by Kalecgos, about 3 and a half
minutes into the encounter. It reduces mana cost of all spells by 75% and
increases spell haste by 100%.
Source of Magic (blue) is provided by Kalecgos, about 3 and a half
minutes into the encounter. It reduces mana cost of all spells by 75% and
increases spell haste by 100%.
When an aspect provides the raid with one of these buffs, corresponding crystals (1 in 10-man difficulty and 2 in 25-man and LFR difficulties) are created on the platform at fixed locations. Healers, and only healers, have the ability to right-click a crystal and gain the corresponding buff.
| Gift of Life (red) | Essence of Dreams (green) | Source of Magic (blue) |
|---|---|---|
|
|
|
Each healer can only gain a single one of these buffs. Each buff lasts until the end of the encounter. If the healer dies, the buff is lost and it cannot be regained (if the healer is resurrected in combat, the buff will not persist). In either difficulty setting, all healers should be benefitting from one buff by the end of the encounter.
Nozdormu's Buff
5 minutes into the fight, Nozdormu buffs your raid with ![]() Timeloop.
This buff prevents players from dying, once. The first killing blow
that they receive will instead heal them to 100% of their health and remove
the Timeloop buff.
Timeloop.
This buff prevents players from dying, once. The first killing blow
that they receive will instead heal them to 100% of their health and remove
the Timeloop buff.
Strategy
The strategy for the Ultraxtion encounter is very simple, and can be summarised thus:
- Stack up and heal through the constant raid damage.
- Ensure that players affected by Fading Light use Heroic Will at
the right time.
- Ensure that everyone (except for the designated soakers) uses
Heroic Will when Hour of Twilight is being cast.
- Designate players (1 in 10-man and 3 in 25-man) to survive each
Hour of Twilight within the Twilight Realm (a topped off tank who is using
survival cooldowns or
 Guardian Spirit, Shadow Priests, etc.).
 - Ensure that your healers are maximising the buffs granted by the dragon Aspects.
The next sections provide more details about all of the points above.
Positioning
 Ultraxion is stationary for the entire duration of the encounter and cannot be
attacked from behind. To compensate for this, he cannot parry attacks.
At least one
player must always be in melee range of Ultraxion, otherwise he will unleash a
highly damaging, raid-wide AoE attack that will most likely wipe you.
Ultraxion is stationary for the entire duration of the encounter and cannot be
attacked from behind. To compensate for this, he cannot parry attacks.
At least one
player must always be in melee range of Ultraxion, otherwise he will unleash a
highly damaging, raid-wide AoE attack that will most likely wipe you.
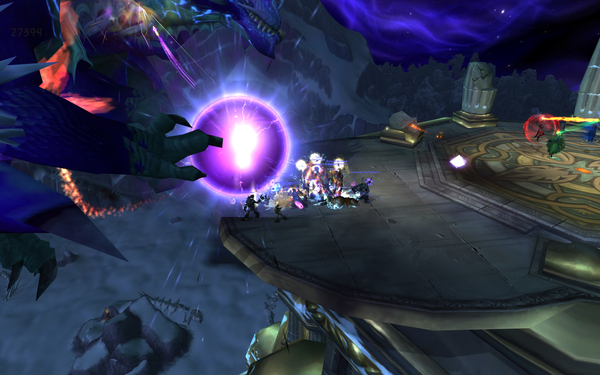
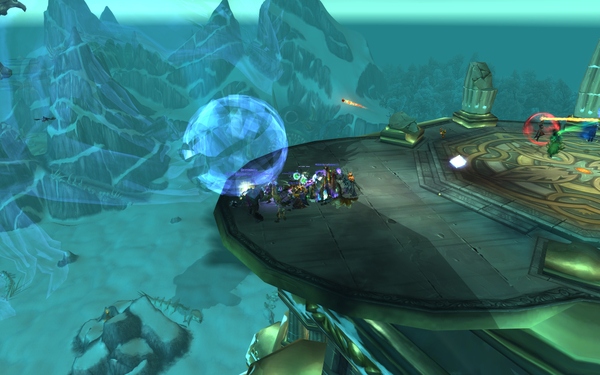
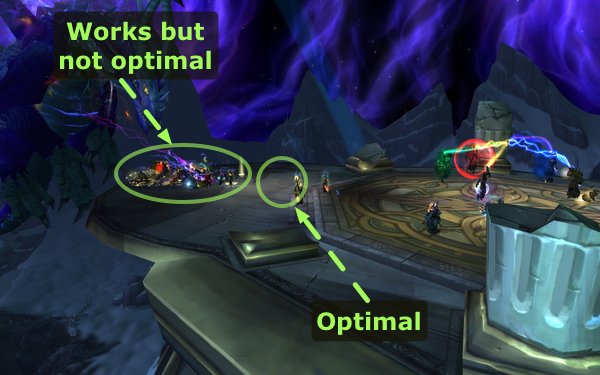
As shown on the screenshot on the left, your raid should stack close to the base of the stairs and
not next to the boss. This will not trigger ![]() Twilight Burst as
Ultraxion has a massive hitbox. Such a position will ensure that the healers
spend as little time as possible getting to the crystals for receiving their
buff. Stacking makes AoE healing most efficient and no one in the raid (except
the healers once per fight) should ever have to move.
Twilight Burst as
Ultraxion has a massive hitbox. Such a position will ensure that the healers
spend as little time as possible getting to the crystals for receiving their
buff. Stacking makes AoE healing most efficient and no one in the raid (except
the healers once per fight) should ever have to move.
In case one or more of your raid members are using Gurthalak, Voice of the Deeps, you should stack closer to the boss. This is because the tentacle spawned as part of Gurthalak's effect has a tendency to spawn behind the player, possibly being too far away from Ultraxion.
Dealing with Hour of Twilight
![]() Hour of Twilight is the most important ability of the encounter. It
happens roughly every 45 seconds and has the potential of instantly killing
your raid members each time. There are two components of this ability that your
raid needs to take into account:
Hour of Twilight is the most important ability of the encounter. It
happens roughly every 45 seconds and has the potential of instantly killing
your raid members each time. There are two components of this ability that your
raid needs to take into account:
- Having everyone exit the Twilight Realm before the ability is cast;
- Having the required number of players remain in the Twilight Realm.
Exiting the Twilight Realm
![]() Hour of Twilight is a 5 second cast, and
Hour of Twilight is a 5 second cast, and ![]() Heroic Will has a 5
second duration. Therefore, as long as players use Heroic Will after the cast
for Hour of Twilight has started, they should have no problem avoiding it.
Heroic Will has a 5
second duration. Therefore, as long as players use Heroic Will after the cast
for Hour of Twilight has started, they should have no problem avoiding it.
In addition to watching Ultraxion's cast bar, there is also a very clearly visible emote in the center of the screen. Additionally, boss mods will warn players further.

Soaking Hour of Twilight
At least 1 player in 10-man difficulty and 3 players in 25-man difficulty
must be inside the Twilight Realm when ![]() Hour of Twilight is cast, or else
the aspects are killed and your raid instantly wipes. In LFR difficulty,
this requirement does not exist and everyone can (and should) leave the
Twilight Realm.
Hour of Twilight is cast, or else
the aspects are killed and your raid instantly wipes. In LFR difficulty,
this requirement does not exist and everyone can (and should) leave the
Twilight Realm.
Players who remain in the Twilight Realm for Hour of Twilight will have to survive the 300,000 non-resistable Shadow damage that the ability deals. This will require a bit of planning.
In 10-man raids, it will generally be most efficient if one of the tanks handles this ability. They will need to be topped off in preparation for it and should use one or more defensive cooldowns to survive the damage.
In 25-man raids, 3 players will have to soak Hour of Twilight each
time. Below, for completion's sake, we will list every ability that can help
a player survive ![]() Hour of Twilight:
Hour of Twilight:
- Tanks using defensive cooldowns:
- Death Knights using a combination of
 Vampiric Blood,
 Anti-Magic Shell,
  Icebound Fortitude and
  Bone Shield;
 - Druids using a combination of
 Survival Instincts,
  Barkskin and
 Frenzied Regeneration;
 - Paladins using
 Ardent Defender or
 Divine Protection (possibly with Glyph of Divine Protection);
 - Warriors using
 Shield Wall or
  Last Stand.
- Death Knights using a combination of
- Plate DPS players who have
 Pain Suppression cast on them;
 - Non-tank Death Knights using Anti-Magic Shell and
Icebound Fortitude (or Anti-Magic Zone for Unholy), Druids using
Survival Instincts and Barkskin, Paladins using
Divine Protection (possibly with Glyph of Divine Protection)
or
 Divine Shield, and Warriors using
Shield Wall. Note that in the case of Death Knights, the absorption from
a
Divine Shield, and Warriors using
Shield Wall. Note that in the case of Death Knights, the absorption from
a  Power Word: Shield is recommended for survival;
 - Shadow Priests using
 Dispersion;
 - Mages using
 Ice Block and
  Cauterize;
 - Hunters using Deterrence;
- Rogues using
 Feint and
  Cloak of Shadows;
 - Holy Priests using Guardian Spirit on any player.
Dealing with Fading Light
![]() Fading Light is a debuff that Ultraxion places on the current tank and
a number of random DPS players (1 in 10-man and 3 in 25-man difficulty). In LFR
difficulty, only the current tank is affected.
Fading Light is a debuff that Ultraxion places on the current tank and
a number of random DPS players (1 in 10-man and 3 in 25-man difficulty). In LFR
difficulty, only the current tank is affected.
Ultraxion always casts Fading Light twice in the interval between two
successive
![]() Hour of Twilight casts. He does not cast Fading Light at all until after
the first Hour of Twilight has been cast.
Hour of Twilight casts. He does not cast Fading Light at all until after
the first Hour of Twilight has been cast.
The debuff has a random duration, between 5 and 10 seconds. At the end of this time, the affected player will either be instantly killed (if they are still in the Twilight Realm) or they will be brought back in the Twilight Realm (if they are in the Normal Realm).
Naturally, no one should ever die to this ability. Players should always be
aware of their debuffs, and when they are affected by Fading Light, they will
need to use ![]() Heroic Will when there are less than 5 seconds remaining on
the debuff.
Heroic Will when there are less than 5 seconds remaining on
the debuff.
Tank Swap
The second component of the ability is that, for 10 seconds after the debuff expires, the player will not generate any threat. This is important for the tank, who gets targeted by the ability each time. It means that the other tank will have to taunt and tank Ultraxion for the 10 second duration.
The best time to taunt is as soon as the debuff is applied to the current
tank. The alternative (taunting after the current tank has used
![]() Heroic Will) presents too high a risk that a DPS player will be meleed to
death.
Heroic Will) presents too high a risk that a DPS player will be meleed to
death.
Fading Light is cast twice, shortly before each ![]() Hour of Twilight cast
except the first one.
Hour of Twilight cast
except the first one.
How to Assign the Healing Buffs
You should be using 3 healers for this encounter in 10-man and 6 healers in 25-man and LFR. This means that all of your healers should be covered by one of the buffs available. Healing in the encounter is increasingly difficult, and quite brutal at the very end, so making use of these buffs is not optional.
We will give you various tips for distributing these buffs, but keep in mind that their usefulness will vary a lot depending on your healers' playstyles.
Red Buff
![]() Gift of Life provides a 100% increase to all the healing done by
the affected player(s). While this buff is excellent for any healer, we feel
that it should be taken by the following healing classes, in order:
Gift of Life provides a 100% increase to all the healing done by
the affected player(s). While this buff is excellent for any healer, we feel
that it should be taken by the following healing classes, in order:
- Restoration Druids;
- Discipline Priests;
- Restoration Shamans;
- Holy Priests.
It is worth noting that, while Discipline Priests' ![]() Power Word: Shield
does not benefit at all from the red buff, they can achieve good results
by spamming
Power Word: Shield
does not benefit at all from the red buff, they can achieve good results
by spamming ![]() Prayer of Healing on the raid, since any overhealing caused
by this spell applies Divine Aegis shields.
Prayer of Healing on the raid, since any overhealing caused
by this spell applies Divine Aegis shields.
Green Buff
![]() Essence of Dreams provides valuable AoE healing, which will prove
extremely useful, especially as the encounter progresses. Note that this buff
applies to most types of heals, including HoTs (such as
Essence of Dreams provides valuable AoE healing, which will prove
extremely useful, especially as the encounter progresses. Note that this buff
applies to most types of heals, including HoTs (such as ![]() Renew) and
AoE heals (such as
Renew) and
AoE heals (such as ![]() Healing Rain). Therefore, this buff should be taken
by the healers who heal for the highest amount (due to gear or ability), who
have not taken the red buff and who do not plan to take the blue buff.
Healing Rain). Therefore, this buff should be taken
by the healers who heal for the highest amount (due to gear or ability), who
have not taken the red buff and who do not plan to take the blue buff.
Note that, since this buff is arguably weaker than the other two buffs, it is viable to have healers who benefit greatly from the blue buff (such as Holy Paladins) taking this buff and then replacing it with the blue buff later on.
Blue Buff
![]() Source of Magic provides increased casting haste and reduced mana cost,
making it desirable to all healers. However, this buff is best taken by
Holy Paladins, who can practically spam Holy Radiance until the end of
the fight, generating a huge amount of AoE healing.
Source of Magic provides increased casting haste and reduced mana cost,
making it desirable to all healers. However, this buff is best taken by
Holy Paladins, who can practically spam Holy Radiance until the end of
the fight, generating a huge amount of AoE healing.
Tips
Using Heroic Will at the Right Time
![]() Heroic Will should always be used as late as possible. This enables
players to remain as little as possible in the Normal Realm, where they cannot
do anything.
Heroic Will should always be used as late as possible. This enables
players to remain as little as possible in the Normal Realm, where they cannot
do anything.
The idea is that
immediately after Ultraxion casts ![]() Hour of Twilight and
Hour of Twilight and ![]() Fading Light,
players in the Normal Realm are automatically brought back to the Twilight
Realm, without having to wait for the 5-second duration of Heroic Will to
finish. Therefore, the later a player uses Heroic Will, the less time
they will spend in the Normal Realm.
Fading Light,
players in the Normal Realm are automatically brought back to the Twilight
Realm, without having to wait for the 5-second duration of Heroic Will to
finish. Therefore, the later a player uses Heroic Will, the less time
they will spend in the Normal Realm.
When to Use Heroism/Bloodlust/Time Warp
It is important to keep in mind that players who are in a different realm
than the person who is casting ![]() Heroism/
Heroism/![]() Bloodlust/
Bloodlust/![]() Time Warp do
not benefit from it and do not get the Exhaustion/Sated debuff. This opens the
way for maximising your usage of heroism by doing the following:
Time Warp do
not benefit from it and do not get the Exhaustion/Sated debuff. This opens the
way for maximising your usage of heroism by doing the following:
- Use it at the start of the fight (this is most beneficial in terms of DPS for reasons that we state below).
- Have all of your healers use their Heroic Will just before
Heroism/Bloodlust/Time Warp is cast.
- Cast Heroism/Bloodlust/Time Warp again towards the end of the fight, to help the healers cover the increased raid damage.
In order to ensure that the tank is able to survive Ultraxion for the 5 seconds that the healers will spend outside of the Twilight Realm, you can choose to leave a healer inside the Twilight Realm to heal the tank.
You should designate a healer who will take the blue buff for this task, as Heroism/Bloodlust/Time Warp would not benefit them at the end of the fight (the haste from the blue buff will have capped them already).
Using Heroism/Bloodlust/Time Warp at the start of the encounter has two benefits:
- It ensures that all of your raid will be alive to benefit from it;
- It allows you to take a DPS player instead of a healer, as the fight will not last long enough for the damage to reach unbearable levels (right before the hard enrage timer is reached).
Discipline Priest Atonement Healing
A useful way for 10-man raids to maximise raid DPS, in case one of the 3 healers is a Discipline Priest with an Atonement healing talent build, is to have the priest take the Blue Buff (according to our tips above, this should be the case anyway).
As the Blue Buff is available only 3 minutes and 30 seconds into the fight,
and until that time the healing requirement is quite lax, the priest should
spend all of their time DPSing the boss with ![]() Smite and
Smite and ![]() Holy Fire.
This results in a decent contribution to the raid DPS, making the soft enrage
of the fight somewhat easier to deal with, while still ensuring that there are
three healers at the very end of the encounter, the most stressful time.
Holy Fire.
This results in a decent contribution to the raid DPS, making the soft enrage
of the fight somewhat easier to deal with, while still ensuring that there are
three healers at the very end of the encounter, the most stressful time.
Last Defender of Azeroth Trick
It is worth noting that, when Thrall casts ![]() Last Defender of Azeroth
on the tanks, the cooldowns of their defensive abilities are instantly
reset. This means that tanks can use their cooldowns right at the start of the
encounter and then have them available again shortly after.
Last Defender of Azeroth
on the tanks, the cooldowns of their defensive abilities are instantly
reset. This means that tanks can use their cooldowns right at the start of the
encounter and then have them available again shortly after.
Learning the Fight
The encounter against Ultraxion is not difficult to understand, nor is it complex in its execution. It is, however, very punishing if executed improperly.
The three most important things to keep in mind are:
- Make sure that the three healing buffs are properly and clearly assigned to your healers and that they understand how to make use of them.
- Make sure that every single person in the raid has the ability to use their
Heroic Will (through the macro listed above, if their action bar add-on
is preventing them otherwise).
- Make proper assignments for soaking Hour of Twilight (not necessary in LFR difficulty).
Once you have covered these three aspects, it is a simple question of practicing the encounter and overcoming the DPS and healing challenge.
Heroic Mode
The Heroic mode of Ultraxion is not very different from the normal mode, the biggest difference being the much higher DPS requirement. Additionally, the following things change:
- Fading Light now affects, in addition to the tank, 2 players in
10-man difficulty (up from 1) and 6 in 25-man difficulty (up from 3).
- For 5 seconds after the Fading Light debuff wears off, the player takes 100% increased physical damage (instead of generating no threat during this time).
- Hour of Twilight must damage at least 2 players in 10-man difficulty
(up from 1) and 5 in 25-man difficulty (up from 2) in order for the aspects to
survive.
- Being in the Twilight Realm when Hour of Twilight occurs applies
 Looming Darkness, a 2-minute debuff that causes the player to instantly die
if they takes any damage from another Hour of Twilight.
Looming Darkness, a 2-minute debuff that causes the player to instantly die
if they takes any damage from another Hour of Twilight.
Additionally, Ultraxion's health pool is much higher, and the damage from
his melee attacks as well as from ![]() Unstable Monstrosity is greatly
increased as well.
Unstable Monstrosity is greatly
increased as well.
Strategy
The strategy for this heroic mode is similar to its normal mode counterpart. The only differences are that you will have to set up a rotation of players to survive Hour of Twilight and that you will probably have to use fewer healers in order to beat the enrage timer.
Soaking Hour of Twilight
As stated above, each time a player is hit by ![]() Hour of Twilight, they
are debuffed with
Hour of Twilight, they
are debuffed with ![]() Looming Darkness, meaning that they cannot soak another
Hour of Twilight for 2 minutes. This forces the raid to establish a rotation
between 3 groups of players who will take turns soaking Hour of Twilight:
Looming Darkness, meaning that they cannot soak another
Hour of Twilight for 2 minutes. This forces the raid to establish a rotation
between 3 groups of players who will take turns soaking Hour of Twilight:
- in 10-man difficulty, 3 groups of 2 players are required, which means a total of 6 players who can survive Hour of Twilight;
- in 25-man difficulty, 3 groups of 5 players are required, which means a total of 15 players who can survive Hour of Twilight;
From a player's perspective, surviving Hour of Twilight is exactly the same as it is in Normal Mode.
It is important to keep in mind that Hour of Twilight will kill players if
they have the Looming Darkness debuff, even if they use a complete damage
immunity to try to survive it (such as using ![]() Ice Block or
Ice Block or
![]() Divine Shield while under the effects of Looming Darkness).
Divine Shield while under the effects of Looming Darkness).
Maximising DPS and Beating the Enrage
The most difficult aspect of this heroic mode is beating the enrage timer. With a bit of preparation, soaking Hour of Twilight and handling the other mechanics of the encounter will not be problematic. Most of your raid's wipes will, undoubtedly, come from insufficient DPS (and will most likely happen at agonizingly low percentages).
For this reason, you will want to bring the bare minimum amount of healers (2 in 10-man and 5 in 25-man), and have these healers contribute as much as possible to the raid DPS, at the start of the fight. Discipline Priests are especially useful here, as they can bring a solid amount of damage.
Other than this, your raid will simply have to utilise every possible advantage available to them, and may need to farm the previous bosses repeatedly to acquire enough gear.
Achievement: Minutes to Midnight
The ![]() Minutes to Midnight achievement is part of the
Minutes to Midnight achievement is part of the
![]() Glory of the Dragon Soul Raider achievement. It is not a complicated
achievement at all, requiring only that no raid member takes damage from
Glory of the Dragon Soul Raider achievement. It is not a complicated
achievement at all, requiring only that no raid member takes damage from
![]() Hour of Twilight more than once over the course of the fight.
Hour of Twilight more than once over the course of the fight.
The implication is that you cannot have the same players soaking Hour of Twilight each time, as you normally can. As Hour of Twilight is cast every 45 seconds, and the fight has a 6 minute enrage timer, it means that you will have to survive 7 casts. In 10-man difficulty, this means that 7 different players will have to survive Hour of Twilight, while in 25-man difficulty, 21 players must do the same.
Simply utilise the abilities that we have listed above in the guide. Additionally, you can have some players take damage from Hour of Twilight, die, and be resurrected afterwards (this should only ever be needed in 25-man difficulty).
Concluding Remarks
The gear check that Ultraxion represents will be a challenge to many guilds, especially towards the end of the fight when it gets very strenuous for the healers.
We believe that, from time to time, having a fight like this is a good thing as it forces players to play their character to their fullest.