

Warmaster Blackhorn Detailed Strategy Guide (Heroic Mode included)

Introduction
This guide is intended to provide a comprehensive description of the encounter with Warmaster Blackhorn in Dragon Soul. It is targeted at anyone who desires to understand the fight mechanics.
This guide is updated for World of Warcraft WoD 6.1.2.
Warmaster Blackhorn is the 6th boss encounter within the Dragon Soul raid. The encounter takes place on a flying gunship from which the players will parachute down onto Deathwing's back (for the next encounter), if they defeat Warmaster Blackhorn.
The encounter is comprised of two phases: one that requires the raid to deal with a variety of adds and one that is essentially a tank and spank burn phase.
General Information
Health Pool
Bosses
| Difficulty | Warmaster Blackhorn | Goriona |
|---|---|---|
| 10-man | 21M | 13M |
| 10-man heroic | 37M | 26M |
| 25-man | 51M | 40M |
| 25-man heroic | 90M | 80M |
| LFR | 39M | 35M |
Adds
| Difficulty | Twilight Elite Dreadblades | Twilight Elite Slayers | Twilight Assault Drakes | Twilight Sappers |
|---|---|---|---|---|
| 10-man | 2.8M | 2.8M | 890k | 340k |
| 10-man heroic | 4M | 4M | 1.5M | 475K |
| 25-man | 8.5M | 8.5M | 2.5M | 1.2M |
| 25-man heroic | 13.6M | 13.6M | 4.8 | 1.7M |
| LFR | 7.5M | 7.5M | 2.4M | n/a |
Enrage Timer
In 10 and 25-man difficulty, the encounter with Warmaster Blackhorn has a hard enrage timer of 4 minutes, counted from the moment when Phase Two begins. In LFR difficulty, there is no enrage timer.
Raid Composition
The following raid compositions are advised:
| Difficulty | Tanks | Healers | DPS |
|---|---|---|---|
| 10-man | 2 | 2-3 | 5-6 |
| 10-man heroic | 2 | 2 | 6 |
| 25-man | 2 | 5-6 | 17-18 |
| 25-man heroic | 2 | 6 | 17 |
| LFR | 2 | 5-6 | 17-18 |
Loot
Tier 13 Tokens
| Item Name | Slot | Classes |
|---|---|---|
| Crown of the Corrupted Conqueror (LFR, Heroic) | Head | Paladin, Priest, Warlock |
| Crown of the Corrupted Protector (LFR, Heroic) | Head | Warrior, Hunter, Shaman |
| Crown of the Corrupted Vanquisher (LFR, Heroic) | Head | Rogue, Death Knight, Mage, Druid |
Armor
| Item Name | Armor | Slot | Main Stats |
|---|---|---|---|
| Shadow Wing Armbands (LFR, Heroic) | Leather | Wrists | Agility |
| Belt of the Beloved Companion (LFR, Heroic) | Waist | Agility | |
| Goriona's Collar (LFR, Heroic) | Plate | Waist | Dodge/Parry |
| Janglespur Jackboots (LFR, Heroic) | Cloth | Feet | Intellect |
Weapons
| Item Name | Type | Main Stats |
|---|---|---|
| Visage of the Destroyer (LFR, Heroic) | Staff | Intellect/Spirit |
| Ataraxis, Cudgel of the Warmaster (LFR, Heroic) | Two-Hand Mace | Strength |
| Timepiece of the Bronze Flight (LFR, Heroic) | Shield | Intellect/Spirit |
| Blackhorn's Mighty Bulwark (LFR, Heroic) | Shield | Strength/Dodge |
Rings and Trinkets
| Item Name | Type | Main Stats/Effect |
|---|---|---|
| Signet of Suturing (LFR, Heroic) | Ring | Intellect/Spirit |
| Infinite Loop (LFR, Heroic) | Ring | Intellect/Hit |
| Seal of Primordial Shadow (LFR, Heroic) | Ring | Agility |
| Breathstealer Band (LFR, Heroic) | Ring | Strength/Mastery |
| Hardheart Ring (LFR, Heroic) | Ring | Strength/Parry |
| Windward Heart (LFR, Heroic) | Trinket | Intellect/Additional Heal |
| Cunning of the Cruel (LFR, Heroic) | Trinket | Intellect/AoE Damage |
| Vial of Shadows (LFR, Heroic) | Trinket | Agility/Additional Damage |
| Starcatcher Compass (LFR, Heroic) | Trinket | Agility/Haste on Damage |
| Bone-Link Fetish (LFR, Heroic) | Trinket | Strength/AoE Damage |
| Indomitable Pride (LFR, Heroic) | Trinket | Stamina/Shield |
Overview of the Fight
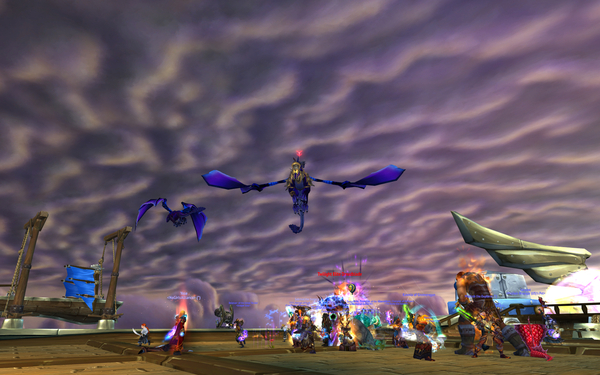 The Warmaster Blackhorn encounter takes place on a flying gunship called
Skyfire. The Skyfire has a health pool and can be damaged by various
abilities during the encounter. Aside from defeating Warmaster Blackhorn, you
will also have to ensure the survival of your ship, if you wish to succeed
in this encounter.
The Warmaster Blackhorn encounter takes place on a flying gunship called
Skyfire. The Skyfire has a health pool and can be damaged by various
abilities during the encounter. Aside from defeating Warmaster Blackhorn, you
will also have to ensure the survival of your ship, if you wish to succeed
in this encounter.
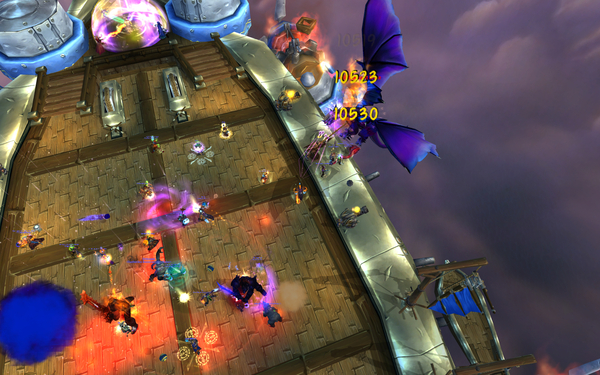
The encounter is a two phase fight. During the first phase, your raid will mainly have to deal with 4 different types of adds (3 types of adds in LFR). You will also have to watch out for many void zones in which you must stand in order to protect the gunship. If 3 waves of adds are dealt with successfully, the second phase will begin. During this phase, your raid will have to deal with Warmaster Blackhorn himself.
Phase One
 The encounter begins when you talk to Captain Swayze. During this phase,
you will not fight Warmaster Blackhorn (he is flying in the air, on his drake,
Goriona). Your raid will be under constant assault from Goriona as well
as from four types of adds:
The encounter begins when you talk to Captain Swayze. During this phase,
you will not fight Warmaster Blackhorn (he is flying in the air, on his drake,
Goriona). Your raid will be under constant assault from Goriona as well
as from four types of adds:
- Twilight Assault Drakes;
- Twilight Elite Dreadblades;
- Twilight Elite Slayers;
- Twilight Sappers (absent in LFR).
Below, we will list all of the abilities that Goriona and the Twilight adds will use during this phase. After that, we will provide you with the adequate strategy for completing the phase.
Abilities
Goriona
 Goriona uses a single ability during this phase:
 ![]() Twilight Onslaught.
This launches a large projectile at a random location on the gunship
(represented visually by a void zone), roughly every 35 seconds. Once the
(slow traveling) projectile lands there, it deals a large amount of damage
(1,500,000 in LFR difficulty, 800,000 in 10-man difficulty and 2,000,000
damage in 25-man difficulty), split between all players within its (10 yard)
area and the gunship.
Twilight Onslaught.
This launches a large projectile at a random location on the gunship
(represented visually by a void zone), roughly every 35 seconds. Once the
(slow traveling) projectile lands there, it deals a large amount of damage
(1,500,000 in LFR difficulty, 800,000 in 10-man difficulty and 2,000,000
damage in 25-man difficulty), split between all players within its (10 yard)
area and the gunship.
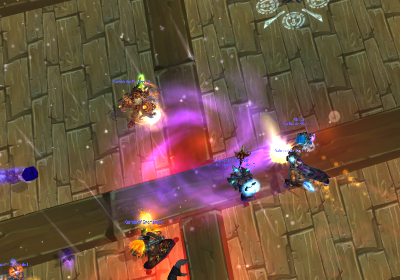
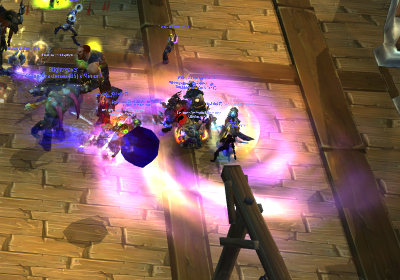
Simply put, most (if not all) of your raid members will need to stack in these void zones, in order to split the damage (making it healable) and to protect the gunship from taking too much damage.
Twilight Assault Drakes
 Twilight Assault Drakes initially drop off the other 3 types of adds. After
they drop off the adds, however, they remain around the gunship, firing
smaller and less harmful versions of Goriona's
Twilight Assault Drakes initially drop off the other 3 types of adds. After
they drop off the adds, however, they remain around the gunship, firing
smaller and less harmful versions of Goriona's ![]() Twilight Onslaught at
the ship. Their ability is called
Twilight Onslaught at
the ship. Their ability is called ![]() Twilight Barrage, and it should,
essentially, be dealt with in the same way as Twilight Onslaught.
Twilight Barrage, and it should,
essentially, be dealt with in the same way as Twilight Onslaught.
It is important to note that, unlike Twilight Onslaught, Twilight Barrage will not deal any damage to the Skybreaker as long as at least one player takes damage from it.
The number and frequency of Twilight Barrage will depend on how many Twilight Assault Drakes are alive at the time, but essentially, they happen only a few seconds apart.
Twilight Elite Dreadblades and Twilight Elite Slayers
Twilight Elite Dreadblades and Twilight Elite Slayers are adds with distinct Warrior characteristics. In addition to a dealing moderate damage with their melee attacks, they each perform two abilities (one is shared between them and the other leaves a stacking DoT).
 Blade Rush is performed by both Dreadblades and Slayers. Essentially,
the adds will charge a random raid member, dealing damage to every player in
their path to the target. The Blade Rush is easy to notice, and players who
are in the path towards the target should move away.
Blade Rush is performed by both Dreadblades and Slayers. Essentially,
the adds will charge a random raid member, dealing damage to every player in
their path to the target. The Blade Rush is easy to notice, and players who
are in the path towards the target should move away.- Twilight Elite Dreadblades cast
 Degeneration. This is a frontal cone
attack that deals a moderate amount of Shadow damage, and also places a DoT
on the affected players, which lasts for 1 minute and stacks with each new
application.
Degeneration. This is a frontal cone
attack that deals a moderate amount of Shadow damage, and also places a DoT
on the affected players, which lasts for 1 minute and stacks with each new
application. - Twilight Elite Slayers cast
 Brutal Strike. This ability is very
similar to Degeneration, with the only differences being that it deals
physical damage instead of Shadow damage and it does not have the
frontal cone component (it is purely single target).
Brutal Strike. This ability is very
similar to Degeneration, with the only differences being that it deals
physical damage instead of Shadow damage and it does not have the
frontal cone component (it is purely single target).
Neither Degeneration nor Brutal Strike appears to have a fixed frequency of application. Rather, the mobs seem to apply this every 7-20 seconds, and the application can be dodged or parried.
The only players affected by these cone attacks should be the tanks. In order to reset the stacks of the DoTs, tanks will need to switch the adds between them.
Twilight Sappers
Twilight Sappers are adds that focus entirely on damaging the gunship. Immediately after being dropped off by the drakes, these adds will go invisible, before reappearing a few seconds later.
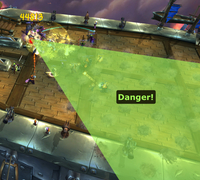
After reappearing, the adds will run towards the back of the ship, casting
![]() Detonate if they reach it. This deals 20% of the ship's maximum health
in damage, and also deals some damage to players within 8 yards of the
explosion.
Detonate if they reach it. This deals 20% of the ship's maximum health
in damage, and also deals some damage to players within 8 yards of the
explosion.
Strategy
Phase One is all about add control and raid damage. Your goal is to survive 3 waves of adds, while also keeping the gunship from being destroyed. Each wave of adds consists of 1 Twilight Elite Dreadblade, 1 Twilight Elite Slayer and 2 Twilight Assault Drakes. Twilight Sappers appear to spawn on a separate cooldown, not directly linked to the waves, and you will probably have to kill 5-6 of them before Phase Two starts.
Handling the Adds
Essentially, you will want your tanks to pick up the Twilight Elite Dreadblades and the Twilight Elite Slayers as soon as they land, and start DPSing them. It is ideal to kill one before damaging the other, so that there are fewer DoTs for your tanks to worry about.
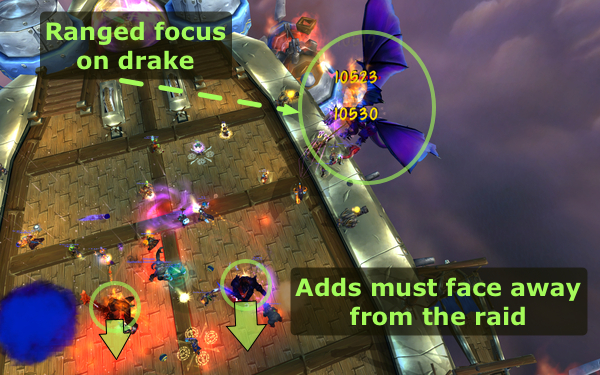 Tanks should face the Dreadblades away from the raid, so that no other players
are affected by the cleave. This is of special importance if the tanks are
moving into the void zones from
Tanks should face the Dreadblades away from the raid, so that no other players
are affected by the cleave. This is of special importance if the tanks are
moving into the void zones from ![]() Twilight Onslaught. It is imperative that
the adds do not face the location where the raid is stacked.
Twilight Onslaught. It is imperative that
the adds do not face the location where the raid is stacked.
The Dreadblades and Slayers should be tanked at one of the sides of the ship, where the harpooned Twilight Assault Drakes get reeled in. This allows melee DPS players to also cleave the drakes when they are in range.
Finally, tanks should alternate which add they tank, on a wave by wave basis, giving the debuffs a chance to drop off. For example, Tank A tanks the Dreadblade on the first wave, the Slayer on the second wave and the Dreadblade again on the third wave.
Whenever a Twilight Sapper lands, all your DPS players should focus
them down and kill them. They can be slowed, ![]() Death Gripped and stunned.
Death Gripped and stunned.
It is possible to ignore one or more Sappers, provided that the gunship has enough health to survive the end of the phase (there is no damage to the gunship in Phase Two) and you wish to make better use of that DPS time.
Friendly NPCs will regularly harpoon Twilight Assault Drakes, reeling them in, close to the ship, where they should be damaged by your ranged DPS players.
Therefore, the priority for add killing during Phase One is as follows:
- Twilight Assault Drakes (when they are close enough to the ship to be damaged by ranged DPS).
- Twilight Sappers (as soon as they land, unless your raid is opting to ignore them and let them through).
- Twilight Elite Dreadblades and Twilight Elite Slayers.
Special Mention Regarding the Drakes
Technically speaking, the Twilight Assault Drakes are not part of the
waves. They simply fly around the ship dropping ![]() Twilight Barrage.
The more Drakes alive, the more Twilight Barrage the raid has to deal with.
Twilight Barrage.
The more Drakes alive, the more Twilight Barrage the raid has to deal with.
Every time a new wave of Twilight Elite Dreadblade and Twilight Elite Slayer appears, the ship NPCs will reel in two Drakes randomly chosen from amongst the remaining Drakes. If you fail to kill a Drake before the next wave of adds, then it will be released and will go back to launching Twilight Barrage on your raid. This is especially bad because this already damaged Drake might be reeled in again by the NPCs for the next wave of adds, possibly leaving your ranged DPS to finish off any remaining drake before Phase Two begins.
Soaking the Void Zones
Simply dealing with the adds is not sufficient to complete this phase
successfully. Your raid members will need to constantly soak the damage from
the void zones: ![]() Twilight Barrage and
Twilight Barrage and ![]() Twilight Onslaught, in order to
keep the damage done to the gunship under control.
Twilight Onslaught, in order to
keep the damage done to the gunship under control.
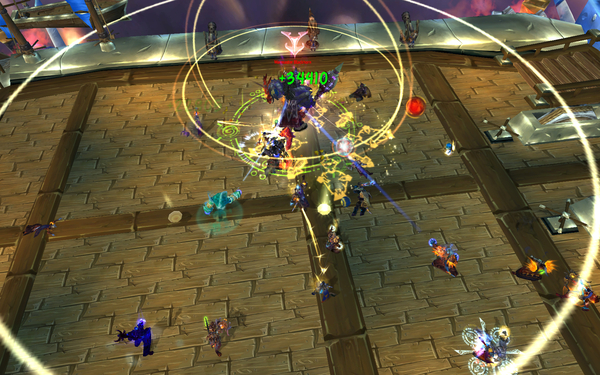
 Twilight Barrage is easy to soak. It deals a low amount of Shadow damage
(150,000 in LFR difficulty and 200,000 in 10 and 25-man difficulty). As a
result, it is enough if two players move into these void zones. If a player
is topped off (especially a tank), they can soak these alone.
Twilight Barrage is easy to soak. It deals a low amount of Shadow damage
(150,000 in LFR difficulty and 200,000 in 10 and 25-man difficulty). As a
result, it is enough if two players move into these void zones. If a player
is topped off (especially a tank), they can soak these alone.
 If the ship's health is dangerously low, for some reason, then you should
have more players soaking, in order to reduce the damage that the ship
takes. Ranged DPS players and healers should be preferred for this task, as they
can generally continue to perform their duties even while standing away from
the adds.
If the ship's health is dangerously low, for some reason, then you should
have more players soaking, in order to reduce the damage that the ship
takes. Ranged DPS players and healers should be preferred for this task, as they
can generally continue to perform their duties even while standing away from
the adds.
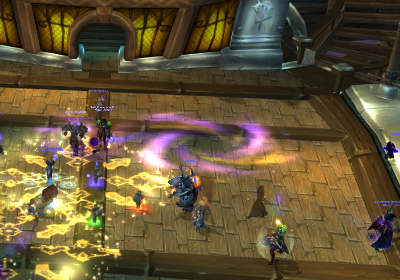
Twilight Onslaught will require a much larger number of your raid members to soak efficiently. You should always aim to have your entire raid soaking these, in order to keep the damage manageable and to avoid sudden deaths.
Phase Two
 After 3 waves of adds have been defeated (specifically, when all the
Twilight Assault Drakes are killed), Warmaster Blackhorn jumps on the
ship, marking the start of Phase Two.
After 3 waves of adds have been defeated (specifically, when all the
Twilight Assault Drakes are killed), Warmaster Blackhorn jumps on the
ship, marking the start of Phase Two.
During this phase, you will initially have to damage Goriona (who is still flying in the air, alongside the gunship), after which you will have to focus entirely on Blackhorn. Also, the gunship no longer takes damage, so the entire raid should focus on Goriona and Blackhorn while avoiding damaging abilities.
We will present you with the abilities of this phase before explaining the strategy.
Abilities
Goriona
 Goriona has a single ability that she uses during this phase:
![]() Twilight Flames. This launches a ball of flame at a random
player, dealing massive damage at the location where the ball lands. Additionally,
flames will persist on the ship for a short while, in that location, dealing
moderate damage every second to players standing there.
Twilight Flames. This launches a ball of flame at a random
player, dealing massive damage at the location where the ball lands. Additionally,
flames will persist on the ship for a short while, in that location, dealing
moderate damage every second to players standing there.
Goriona is in range of ranged DPS players who must attack her. Once she reaches 25% health, she will fly away, leaving the encounter.
Warmaster Blackhorn
Warmaster Blachorn uses the following abilities during Phase Two:
 Vengeance is an enrage that Warmaster Blackhorn gains
throughout the phase. He deals 1% increased damage for each 1% of his health
that is missing.
Vengeance is an enrage that Warmaster Blackhorn gains
throughout the phase. He deals 1% increased damage for each 1% of his health
that is missing. Devastate is a typical sunder armor effect, that
lowers the tank's armor by 20%, and deals a moderate amount of damage with
each application. The debuff lasts 30 seconds and stacks, requiring a tank
switch.
Devastate is a typical sunder armor effect, that
lowers the tank's armor by 20%, and deals a moderate amount of damage with
each application. The debuff lasts 30 seconds and stacks, requiring a tank
switch.-

 Disrupting Roar deals a moderate amount of damage
to all raid members, also interrupting and silencing any spell casting from
players within 10 yards for
8 seconds. Blackhorn casts this ability roughly every 20 seconds. It is
important that casters remain further than 10 yards away from the boss.
Disrupting Roar deals a moderate amount of damage
to all raid members, also interrupting and silencing any spell casting from
players within 10 yards for
8 seconds. Blackhorn casts this ability roughly every 20 seconds. It is
important that casters remain further than 10 yards away from the boss. -
 Shockwave is a frontal cone attack that deals a massive
amount of damage to anyone in front of Warmaster Blackhorn and stuns them for
4 seconds. Blackhorn casts this ability roughly every 25 seconds. It is
important to note that Warmaster Blackhorn will often face a random raid
member before casting this ability, so it may end up targeting the raid.
Shockwave is a frontal cone attack that deals a massive
amount of damage to anyone in front of Warmaster Blackhorn and stuns them for
4 seconds. Blackhorn casts this ability roughly every 25 seconds. It is
important to note that Warmaster Blackhorn will often face a random raid
member before casting this ability, so it may end up targeting the raid.

Strategy
This phase is much simpler and a lot less chaotic than Phase One. As soon as the phase begins, a tank should pick up Blackhorn and move him to the center of the ship.
Melee DPS players should attack Blackhorn, while ranged DPS players should aim at bringing Goriona to 25% health as soon as possible. Everyone will need to move out of the fire from Goriona.
Once Goriona leaves the fight (when she reaches 25% health), everyone can focus fully on Warmaster Blackhorn. Follow the steps below to ensure a smooth kill:
- Make sure that the raid is spread around Warmaster Blackhorn, so that
as few people as possible will need to move for each Shockwave
(it is marked by a visible graphical effect). Players should try to be
close to the boss, making it easier to move out of the conic area.
- Have your tanks taunt Warmaster Blackhorn off of each other at 2 stacks
of Devastate.
- If you are a caster, stand at least 10 yards away from the boss. This will
prevent Disrupting Roar from interrupting your casts and silencing you.
Healers should expect moderate to heavy tank and raid damage. The boss'
![]() Vengeance will cause him to deal increasing amounts of
damage.
Vengeance will cause him to deal increasing amounts of
damage.
As the fight progresses, tanks should work out a defensive cooldown rotation, and should coordinate with healers for a better result.
Learning the Fight
As the two phases of this encounter are quite distinct from one another, you will have to master each of them on its own.
For Phase One, your most important goal, to begin with, is to keep the Skyfire alive. So, focus on soaking the void zones and (if needed) killing the Sappers.
Once your DPS players are comfortable with the movement required, killing the Dreadblades and Slayers efficiently should not be a problem.
Phase Two's greatest challenges will be stabilising the raid's health while both Blackhorn and Goriona are active. At the same time, the raid will need to deal with increasing damage and, towards the very end of the fight, healers out of mana.
Heroic Mode
The Warmaster Blackhorn heroic encounter is a clear step-up in difficulty and complexity from other previous heroic encounters (only Ultraxion compares, although it is much simpler).
The difficulty does not come from a single ability in particular, but from the combination of the changes from normal mode. The fight is especially hard on the healers. Moreover, the DPS required to kill each wave of adds in time is quite high.
Differences from Normal Mode
The fight has a very similar feel to its normal mode version, and events occur in the same sequence. However, several changes exist, that make the encounter significantly more difficult:
- Parts of the ship's deck are regularly covered in damaging patches of fire. The fire is automatically put out by NPCs.
- Taking damage from
 Twilight Barrage places a 15 second debuff on
players that increases shadow damage taken by 50%. This debuff can stack.
Twilight Barrage places a 15 second debuff on
players that increases shadow damage taken by 50%. This debuff can stack. - During Phase Two, Warmaster Blackhorn gains a new ability called
 Siphon Vitality. This causes him to steal life from Goriona and
heal himself, when he reaches 20% health. Additionally, he deals damage to
the raid equal to the amount of healing he receives.
Siphon Vitality. This causes him to steal life from Goriona and
heal himself, when he reaches 20% health. Additionally, he deals damage to
the raid equal to the amount of healing he receives. - During Phase Two, when Goriona reaches 80% health, she lands and must be
tanked. She has two abilities during this phase:
 Twilight Breath, which is a standard frontal cone breath
attack;
Twilight Breath, which is a standard frontal cone breath
attack; Consuming Shroud, which is a debuff that Goriona regularly places on a
random (non-tank) raid member. The debuff absorbs a moderate amount of healing
(100,000 in 10-man and 150,000 in 25-man). Any healing done to players affected
by the debuff is also mirrored as damage to the entire raid (except for the
player affected by the debuff, who does not get damaged). For example, a
5,000 heal on the player will deal 5,000 damage to each raid member.
Consuming Shroud, which is a debuff that Goriona regularly places on a
random (non-tank) raid member. The debuff absorbs a moderate amount of healing
(100,000 in 10-man and 150,000 in 25-man). Any healing done to players affected
by the debuff is also mirrored as damage to the entire raid (except for the
player affected by the debuff, who does not get damaged). For example, a
5,000 heal on the player will deal 5,000 damage to each raid member.
In addition to this, all enemies have increased health pools and everything deals more damage.
Strategy
The strategy for the heroic mode is practically identical to that of the normal mode version of the fight. However, a few things must be kept in mind in order to properly deal with the different mechanics. We will detail all of these things below.
The Pull
There is a very useful tactic that your raid can utilise on the pull. Before engaging the boss, have your ranged DPS players positioned at the top of the ship (by climbing up the stairs next to the cabin), as close to the edge as possible. From there, they will be able to attack one of the Twilight Assault Drakes right as the encounter beings, as it is flying by.
Your ranged DPS players should nuke it as hard as they can and, if it is not dead, DoT it as well. With proper burst (especially if you have a ranged DPS heavy raid composition), you can kill this drake right away.
Additionally (or alternatively), you can also DoT Goriona, who will be in range for a few seconds. This will make Phase Two slightly easier.
Deckfires
All throughout Phase One, parts of the deck of the ship will catch fire. These fire patches act like any void zones, damaging players who stand in them. They will be put out, regularly, by friendly NPCs, and they are wholly out of the control of the raid.
From a tactical point of view, this does not change things very much; it merely limits positioning and can cause some problems in that regard.
Twilight Barrage
Dealing with the Shadow damage increasing debuff from Twilight Barrage is quite simple, due to the low duration of the debuff. Essentially, each Twilight Barrage must be soaked by 2 or 3 players, and each time a player is about to soak Twilight Barrage, they must make sure that they do not currently have the debuff on themselves.
This may require some active coordination among players, although it is not difficult.
Goriona in Phase Two
Goriona cannot be ignored during this phase because when Warmaster Blackhorn
reaches 20% health, he will start draining life from her (through
![]() Siphon Vitality) and healing himself. Additionally, every time he heals
himself, he damages the raid for the same amount.
Siphon Vitality) and healing himself. Additionally, every time he heals
himself, he damages the raid for the same amount.
At 80% health, Goriona will land on the ship and needs to be tanked. At 20% (like in Normal Mode), she will fly away. All the strategy changes for Phase Two revolve around the landing of Goriona, and the new strategy can be summarised as follows:
- Have your melee DPS on Warmaster Blackhorn and your ranged DPS on Goriona, until she lands.
- After Goriona lands, have all of your DPS focus on her until she flies away.
- Tank Goriona facing away from everyone (except her tank), as she has a damaging breath attack.
- Have the raid stack together and AoE heal through the
Consuming Shroud debuff.
- After Goriona flies off, your raid can spread out and should simply burn Blackhorn.
During the entire phase, your raid will still have to deal with Blackhorn's normal abilities (Shockwave, Disrupting Roar and Devastate), although this brings no new challenge.
It is best to have the entire raid stacked up and to make use of AoE
healing. This will provide a steady amount of healing on the players affected
by ![]() Consuming Shroud while also ensuring that the raid damage is
covered.
Consuming Shroud while also ensuring that the raid damage is
covered.
Finally, while Goriona is on the ground, the tanks will have to regularly
switch Warmaster Blackhorn and Goriona between themselves in order to allow for
the ![]() Devastate debuff to drop off.
Devastate debuff to drop off.
Other Concerns and Tips
Because of the increased damage dealt by all abilities in heroic mode,
special care must be taken when handling abilities such as
![]() Twilight Onslaught during Phase One and
Twilight Onslaught during Phase One and ![]() Disrupting Roar during
Phase Two. We strongly recommend using a defensive cooldown for as many of
these abilities as possible.
Disrupting Roar during
Phase Two. We strongly recommend using a defensive cooldown for as many of
these abilities as possible.
The top priority during Phase One is killing the
Twilight Assault Drakes, as this will reduce the frequency of
![]() Twilight Barrage, making it easier to handle the debuff.
Twilight Barrage, making it easier to handle the debuff.
Finally, while the fight is not, strictly speaking, a DPS race (not in the same way that Ultraxion is, for example), having higher DPS will make the fight considerably easier. For this reason, it is not advised that you use many (or any, if possible) melee DPS players.
Achievement: Deck Defender
The ![]() Deck Defender achievement is part of the
Deck Defender achievement is part of the
![]() Glory of the Dragon Soul Raider meta-achievement. The requirement is simple:
do not allow the Skyfire to ever take damage from
Glory of the Dragon Soul Raider meta-achievement. The requirement is simple:
do not allow the Skyfire to ever take damage from ![]() Twilight Barrage.
Twilight Barrage.
In simple terms, this means that every single one of the small void zones must be soaked by at least one player (2 or more players is safer, though). There is not special strategy for doing this, other than having your raid spread out and very aware of their surroundings.
One thing that will make the achievement easier to obtain is having all of your DPS players (melee included) focus on the Twilight Assault Drakes when they are harpooned, as the number of Twilight Barrages depends on the number of Drakes currently alive.
Concluding Remarks
The encounter with Warmaster Blackhorn is reminiscent of the Gunship Battle in Icecrown Citadel. Players will probably find this new fight to be more interesting than its previous incarnation. Also, parachuting on Deathwing's after defeating Blackhorn will be quite memorable.