

Welcome to our guide to the Neltharus dungeon in the Dragonflight World of Warcraft expansion. This guide will cover everything you need to know about the dungeon, including how to get to it, its layout, the trash and boss mechanics within, and its loot.
Getting into Neltharus
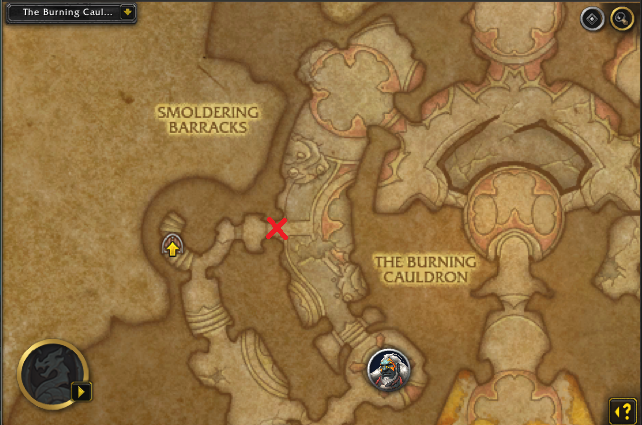
Neltharus is a level 70 dungeon located in the The Waking Shores on Dragon Isles. The nearest flight point for Alliance and Horde players is Obsidian Throne, The Waking Shore, just a few feet before the dungeon.
This guide will focus on an extensive overview of the dungeon, providing vital information
to complete it across all difficulties (Normal, ![]() Heroic,
and
Heroic,
and ![]() Mythic). We will cover all 4 boss fights supported by the most
notable trash enemies in the
dungeon and their important abilities. If you would like to learn about the other
Season 4 dungeons or the upcoming Mythic+ season instead, please see our
overviews linked below. Otherwise, without further ado, let us begin!
Mythic). We will cover all 4 boss fights supported by the most
notable trash enemies in the
dungeon and their important abilities. If you would like to learn about the other
Season 4 dungeons or the upcoming Mythic+ season instead, please see our
overviews linked below. Otherwise, without further ado, let us begin!
Neltharus Layout
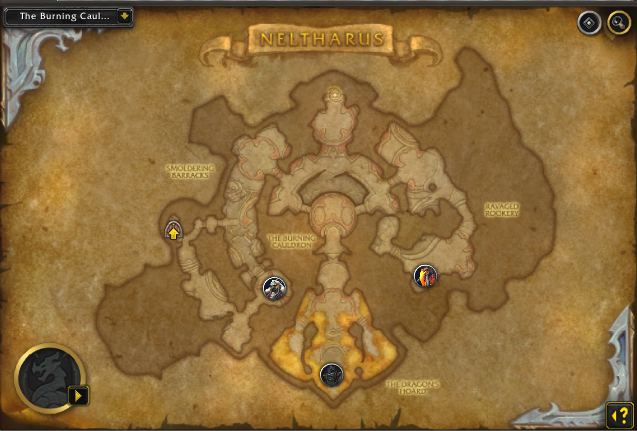
Boss Order in Neltharus
You will be able to choose which boss you want to approach first in Neltharus, as the dungeon gives you the full flexibility of doing so, with the only requirement being that Warlord Sargha unlocks once you defeat the previous 3 bosses — Chargath, Bane of Scales, Forgemaster Gorek and Magmatusk. Below, you will see our recommendation for the boss order.
Profession Bonuses in Neltharus
 Throughout the dungeon, there will be 2 Profession bonuses to obtain,
one from Cooking and one from Blacksmithing. These bonuses
and their uses are summarized below:
Throughout the dungeon, there will be 2 Profession bonuses to obtain,
one from Cooking and one from Blacksmithing. These bonuses
and their uses are summarized below:
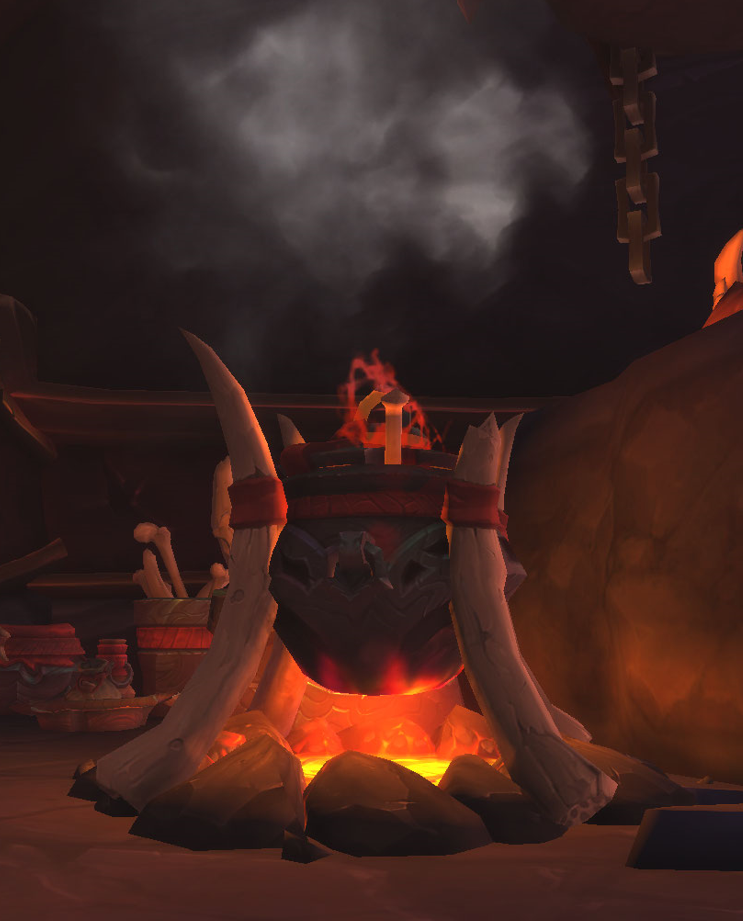
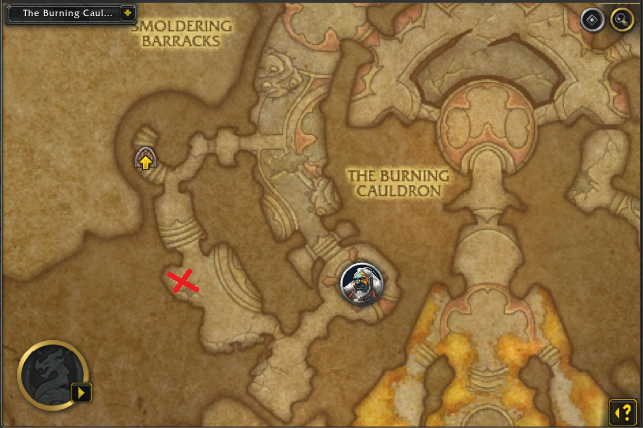
First, let us talk about the Cooking bonus. It is located in the Smoldering Barracks in the first room after defeating Chargath, Bane of Scales or going left after you have entered the "secret" passage room (shown in a screenshot below). In order to activate it, one of your party members must have at least 25 skill in Dragon Isles Cooking. Below you can find more details on how to make the best use of it:

- Once you interact with the Qalashi Goulash, it will give 3 charges to each member of your party.
- Using your Extra Action Button will trigger its effect, giving you 65% movement speed for 50 seconds.
- This buff is automatically canceled once you enter combat, so it is best to use it as you move from area to area to decrease travel time.
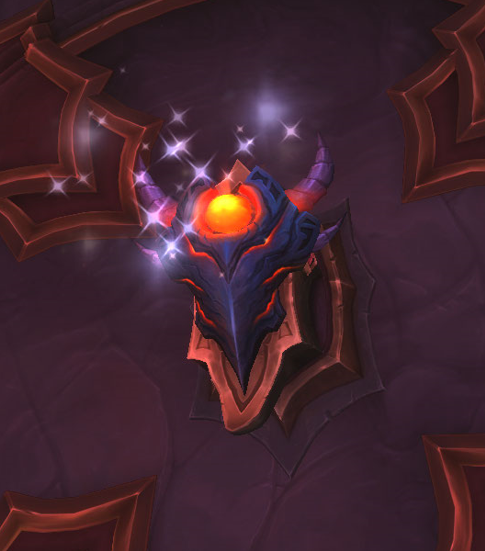 Finally, you can pick up the Blazing Aegis once you
defeat Forgemaster Gorek. To activate it, one of your party
members must have at least 25 skill in Dragon Isles Blacksmithing.
Below you can find more details on how to make the best use of it:
Finally, you can pick up the Blazing Aegis once you
defeat Forgemaster Gorek. To activate it, one of your party
members must have at least 25 skill in Dragon Isles Blacksmithing.
Below you can find more details on how to make the best use of it:
- Only one person can pick up the Blazing Aegis.
- Using your Extra Action Button will trigger its effect, dealing damage and applying an additional damage-over-time effect. In addition, it will also spawn eruptions in four directions.
- The Aegis may only be used once, which means it will immediately disappear upon usage, so it is best to use it on high-health targets.
- You can carry both Blazing Aegis and Qalashi Goulash simultaneously.
Ravaged Rookery and Magmatusk
Notable Trash Before Magmatusk
- Beware of Qalashi Warden's
 Volcanic Guard frontal cone;
it is a 3-second cast that always aims where the tank is. Watch out for
Volcanic Guard frontal cone;
it is a 3-second cast that always aims where the tank is. Watch out for
 Blazing Slash As a tank player, it will deal heavy damage to you.
 - Use Purge effects on Ore ELemental's
 Granite Shell.
The mob on its own is not dangerous, but paired with Qalashi Thaumaturge
becomes a foremost priority because of its interruptible
Granite Shell.
The mob on its own is not dangerous, but paired with Qalashi Thaumaturge
becomes a foremost priority because of its interruptible  Molten Core cast.
If an Ore Elemental gets "empowered," it will become a Molten Elemental,
radiating
Molten Core cast.
If an Ore Elemental gets "empowered," it will become a Molten Elemental,
radiating  Molten Explosions and applying
  Molten Vulnerability.
This is why the Molten Core cast should be stopped at all costs,
though a successful cast will only empower one Ore Elemental.
Molten Vulnerability.
This is why the Molten Core cast should be stopped at all costs,
though a successful cast will only empower one Ore Elemental. - Speaking about Qalashi Thaumaturge, outside of his
Molten Core cast, he will have a channeled
 Magma Conflagration
ability to any random member of your party. This must be a high-priority
interrupt as it deals heavy damage; you can also combat-reset abilities
to "cancel" the cast, such as a Rogue's
Magma Conflagration
ability to any random member of your party. This must be a high-priority
interrupt as it deals heavy damage; you can also combat-reset abilities
to "cancel" the cast, such as a Rogue's  Vanish,
a
Vanish,
a  Night Elf
  's
's  Shadowmeld, and the like.
 - Qalashi Spinecrusher will only concern your tank because of
his sole
 Brutal Strike ability.
 - Avoid the
 Explosive Concoction ground animation coming from
Qalashi Plunderer. Note that the cast is non-interruptible.
Explosive Concoction ground animation coming from
Qalashi Plunderer. Note that the cast is non-interruptible.
 Night Elf
  's
's Magmatusk Boss Guide
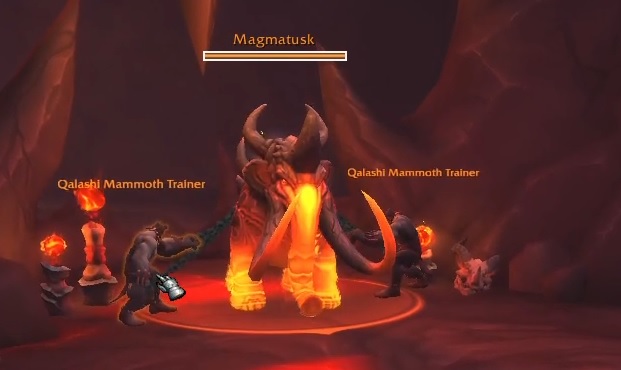
Magmatusk will begin with 2 stacks of ![]() Magma Tentacle at the
beginning of the fight. Each time it reaches 100 Energy it will cast
Magma Tentacle at the
beginning of the fight. Each time it reaches 100 Energy it will cast
![]() Volatile Mutation and gain a stack of Magma Tentacle at a maximum of 5.
Volatile Mutation and gain a stack of Magma Tentacle at a maximum of 5.
All Roles
- Beware of Lava Spray; it targets random player and it
has a long frontal cone effect. Sidestep it immediately.
-
 Periodically, the boss will cast
  Blazing Charge on a random
player, charging across the room until it hits a wall. It is best if you
are stacked near a wall and "bait" the charge, so it has less travel time.
Once Magmatusk has charged the wall, it will trigger Lava Wave, and the more
stacks of
Blazing Charge on a random
player, charging across the room until it hits a wall. It is best if you
are stacked near a wall and "bait" the charge, so it has less travel time.
Once Magmatusk has charged the wall, it will trigger Lava Wave, and the more
stacks of  Magma Tentacle it has, the more waves will spawn. At last,
Blazing Charge will also leave a
Magma Tentacle it has, the more waves will spawn. At last,
Blazing Charge will also leave a  Liquid Hot Magma trail,
do not step on it!
Liquid Hot Magma trail,
do not step on it! - Sidestep the
 Magma Lob initial cast on the ground, and be aware
that it leaves Liquid Hot Magma on the same spot. If the boss stays in
the Liquid Hot Magma puddles it will gain Lava Empowerment.
Magma Lob initial cast on the ground, and be aware
that it leaves Liquid Hot Magma on the same spot. If the boss stays in
the Liquid Hot Magma puddles it will gain Lava Empowerment.

Tank
- Move quickly toward the end location of the boss during its
Blazing Charge.
Healer
- Use healing cooldowns once Magmatusk is casting
 Volatile Mutation,
as it will leave a hard-hitting
Volatile Mutation,
as it will leave a hard-hitting  Magma Eruption damage-over-time effect.
Smoldering Barracks and Chargath, Bane of Scales
Notable Trash Before Chargath, Bane of Scales
Once you defeat Magmatusk, head towards the Smoldering Barracks,
where you will be facing the second boss of the dungeon, Chargath, Bane of Scales.
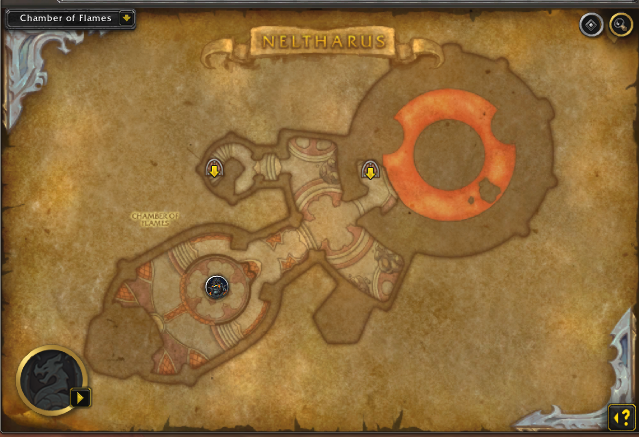
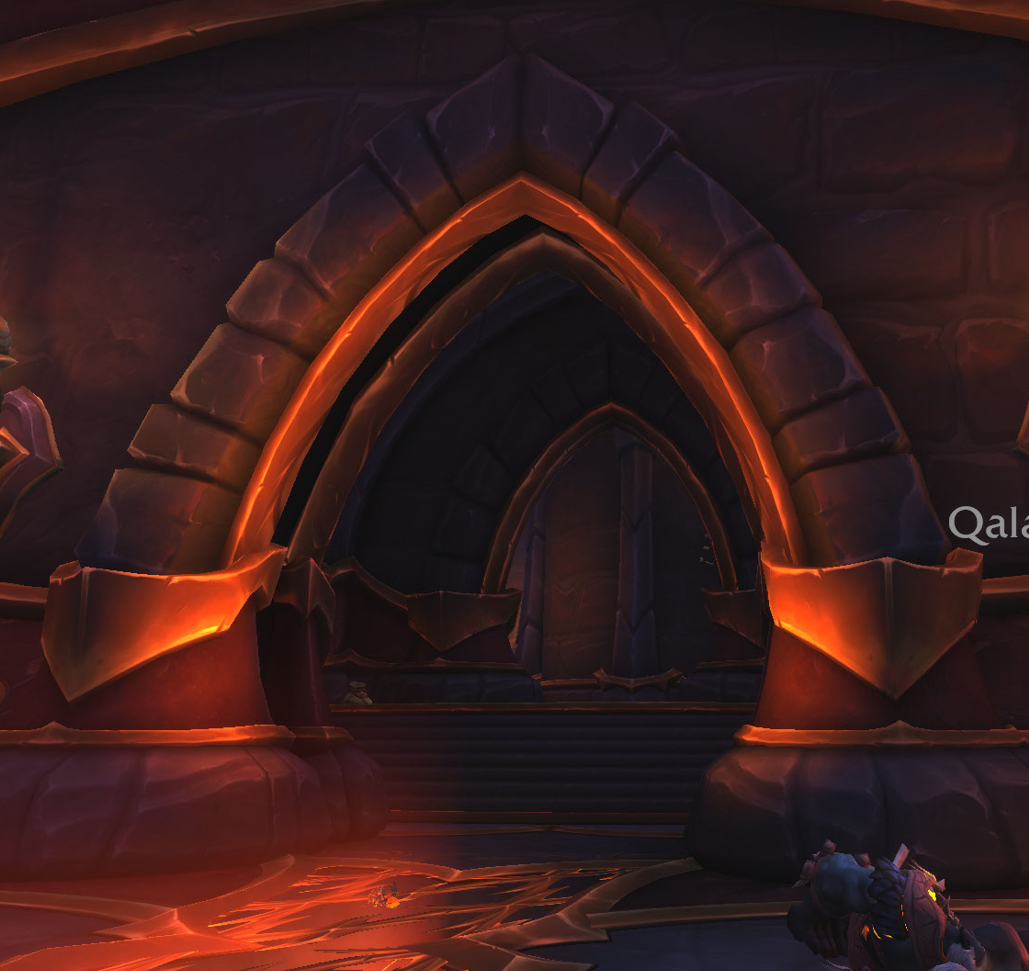
As a small side note, there is a hidden passage in the corridor
leading toward Chargath, Bane of Scales, just to the right (see the screenshots above)
that will lead you toward the Chamber of Flames where Forgemaster Gorek
is located. The gate is locked, so you need either a Rogue's ![]() Pick Lock or
a key to open it. This will allow you to choose which boss you want
to engage first and shorten the travel time in case of a wipe.
Pick Lock or
a key to open it. This will allow you to choose which boss you want
to engage first and shorten the travel time in case of a wipe.
Throughout the whole Smoldering Barracks area, you are also going to find several Burning Chains, which you can use to kill the trash in this area much faster. So how do they work?
- Anyone can pick them up, regardless of spec, class, or profession choice.
- Upon picking up, you will take minor damage every 2 seconds until you "trigger" the chain.
- To trigger the chain, let the mobs stand on it or just let
them cross it. This works similarly to Chargath, Bane of Scales's
own
 Grounding Chain ability. However, once you trigger the
Burning Chain, each mob that is within 10 yards of the impact will
take 50% more damage for 5 sec and also be stunned for the same
duration.
Grounding Chain ability. However, once you trigger the
Burning Chain, each mob that is within 10 yards of the impact will
take 50% more damage for 5 sec and also be stunned for the same
duration. - You will gain a 3-minute debuff, which will prevent you from using it again, so you can cycle people and speed up the trash in this area significantly. Keep in mind that once you use the chain, the same chain will be indefinitely unavailable, so plan your routes ahead!

Here are the most important non-boss-enemies you should pay attention to:
- Beware of Tamed Phoenix and its
 Ember Reach; use any spare interrupts
for this cast.
Ember Reach; use any spare interrupts
for this cast. - Periodically, Qalashi Hunter will cast
 Bold Ambush on a random
player from your party, inflicting initial damage and an additional
Bold Ambush on a random
player from your party, inflicting initial damage and an additional  Bleed
over time. In addition, they will place
Bleed
over time. In addition, they will place  Binding Spear
at a randon location on the ground, avoid it all costs.
Binding Spear
at a randon location on the ground, avoid it all costs. - You will also face Overseer Lahar. The most important ability to
watch out for is
 Burning Roar; this is a high-priority interrupt!
In addition, dodge any
Burning Roar; this is a high-priority interrupt!
In addition, dodge any  Eruptive Crush ground animations, as they do
great damage!
Eruptive Crush ground animations, as they do
great damage! - Sidestep the channeled
 Magma Fist frontal ability from Qalashi Trainee.
They will occasionally cast
Magma Fist frontal ability from Qalashi Trainee.
They will occasionally cast  Fired Up, increasing their Haste by 50%. You
cannot interrupt it, but you can Stun it or Dispel.
Fired Up, increasing their Haste by 50%. You
cannot interrupt it, but you can Stun it or Dispel. - Finally, we have Qalashi Bonetender, where it is extremely important to
interrupt their
 Mending Clay healing ability. In addition, the mob
will cast
Mending Clay healing ability. In addition, the mob
will cast  Bone Toss on a random target from your party; your
The healer must pay attention and top up any low-health team members.
Bone Toss on a random target from your party; your
The healer must pay attention and top up any low-health team members.
Chargath, Bane of Scales Boss Guide
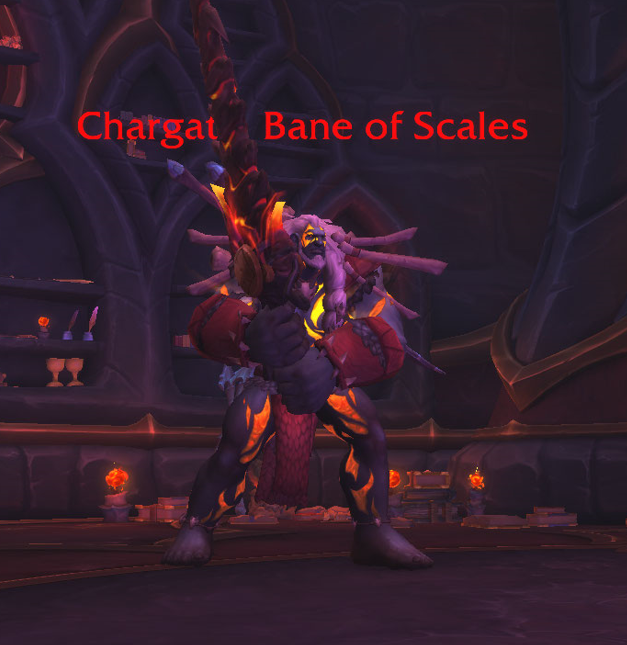
Chargath, Bane of Scales is a straightforward boss fight with one phase.
The boss will have Energy, and upon reaching 100 it will cast ![]() Fiery Focus
on your tank, dealing heavy damage to them. It will additionally
cast
Fiery Focus
on your tank, dealing heavy damage to them. It will additionally
cast ![]() Lava Splash on the ground for you to dodge. How to stop the effect?
Find out below:
Lava Splash on the ground for you to dodge. How to stop the effect?
Find out below:
All Roles
- Dodge the upcoming
 Magma Wave.
 - Occasionally, the boss will cast Grounding Spear on a 3
players from your party (usually the DPS players), inflicting initial damage
and applying Grounding Chain, slowing their movement speed by 40%.
- Avoid the a lingering magma pool of Erupted Ground during the
Grounding Spear intermission.
- Dodge Lava Splash ground pools.
Tank
- Upon reaching maximum Energy, Chargath will cast
 Fiery Focus on you
for 25 seconds, dealing heavy damage to you, here will be a great place to use
your defensive cooldowns.
Fiery Focus on you
for 25 seconds, dealing heavy damage to you, here will be a great place to use
your defensive cooldowns. - You want to kite the boss toward the Grounding Chain to let them
trip over it times and trigger
 Fetter, stunning them and increasing the
damage they take by 50% for 12 sec. It takes 3 Grounding Chains
to trigger the Fetter effect.
Fetter, stunning them and increasing the
damage they take by 50% for 12 sec. It takes 3 Grounding Chains
to trigger the Fetter effect. - Failing to break the Grounding Chain will trigger Slag Eruption;
this fight requires top-notch team coordination!
Healer
- Periodically, Chargath, Bane of Scales will cast Dragon Strike
on a random player, inflicting initial damage and leaving a Bleed
effect on them. This is a good place to use healing cooldowns or ask your
party members to use their defenses.
Chamber of Flames and Forgemaster Gorek
Notable Trash Before Forgemaster Gorek
Once you defeat Chargath, Bane of Scales, head up the stairs toward the Chamber of Flames where Forgemaster Gorek is located. On your way there, you will meet the most challenging non-boss enemies in this dungeon and the only "mini-boss," Irontorch Commander. Here is more information on what to expect:
- The first enemy you should pay attention to is Qalashi Lavabearer.
Its auto-attacks will leave
 Lava Drip on the ground, with the occasional
 Throw Lava cast at a random member of your party. Do your best
to sidestep it swiftly!
Throw Lava cast at a random member of your party. Do your best
to sidestep it swiftly! - Beware of Qalashi Irontorch's frontal Scorching Breath ability;
the non-interruptible cast is highly dangerous, so avoid staying in front of the mob.
Interrupt the
 Mote of Combustion at all costs; you do not want that cast to
go through.
Mote of Combustion at all costs; you do not want that cast to
go through. - Qalashi Blacksmith will be one the most dangerous non-boss-enemy,
simply because of its Forgestomp being unavoidable AoE will hurt your team
the most. You cannot stop the
 Reverberating Slam either, which will add additional
pressure to your tank and healer; beware!
Reverberating Slam either, which will add additional
pressure to your tank and healer; beware! - Qalashi Bonesplitter is another high-threat enemy. It's
 Dragonbone Axe
will target a random target from your party, dealing serious initial damage and leaving a
tough Bleed effect on them. Even if you stop it with an interrupt, it will
re-cast, so best use your defensives.
Dragonbone Axe
will target a random target from your party, dealing serious initial damage and leaving a
tough Bleed effect on them. Even if you stop it with an interrupt, it will
re-cast, so best use your defensives. - Last but not least, we have Forgewrought Monstrosity, passively inflicting
AoE damage from Forgewrought Fury, with a deadly cast of
 Blazing Detonation.
This is the one you should watch out for!
Blazing Detonation.
This is the one you should watch out for!
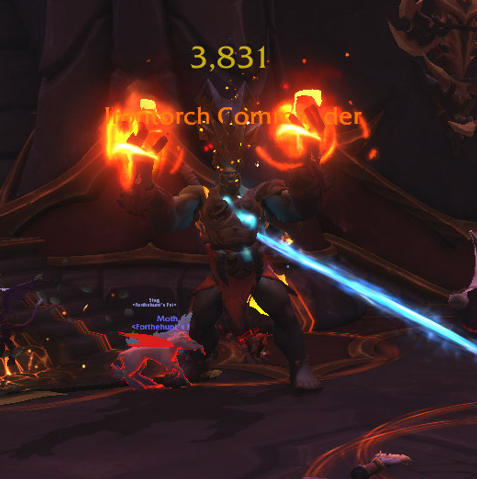 Now, for the mini-boss, Irontorch Commander. You do NOT have to
engage it, as you can easily walk on the side of the stairs and ignore it entirely
it. However, if you decide to fight them, here is what you should know:
Now, for the mini-boss, Irontorch Commander. You do NOT have to
engage it, as you can easily walk on the side of the stairs and ignore it entirely
it. However, if you decide to fight them, here is what you should know:
 Scorching Fusillade will go on every single member of your
party. This will deal great damage, so your healer must be ready to top you off.
This is inevitable to avoid it, and it is best not to stack so you avoid being
double "clipped."
Scorching Fusillade will go on every single member of your
party. This will deal great damage, so your healer must be ready to top you off.
This is inevitable to avoid it, and it is best not to stack so you avoid being
double "clipped." - The mob will also periodically cast
 Conflagrant Battery; avoid
the fire circles on the ground as they deal serious damage.
Conflagrant Battery; avoid
the fire circles on the ground as they deal serious damage.
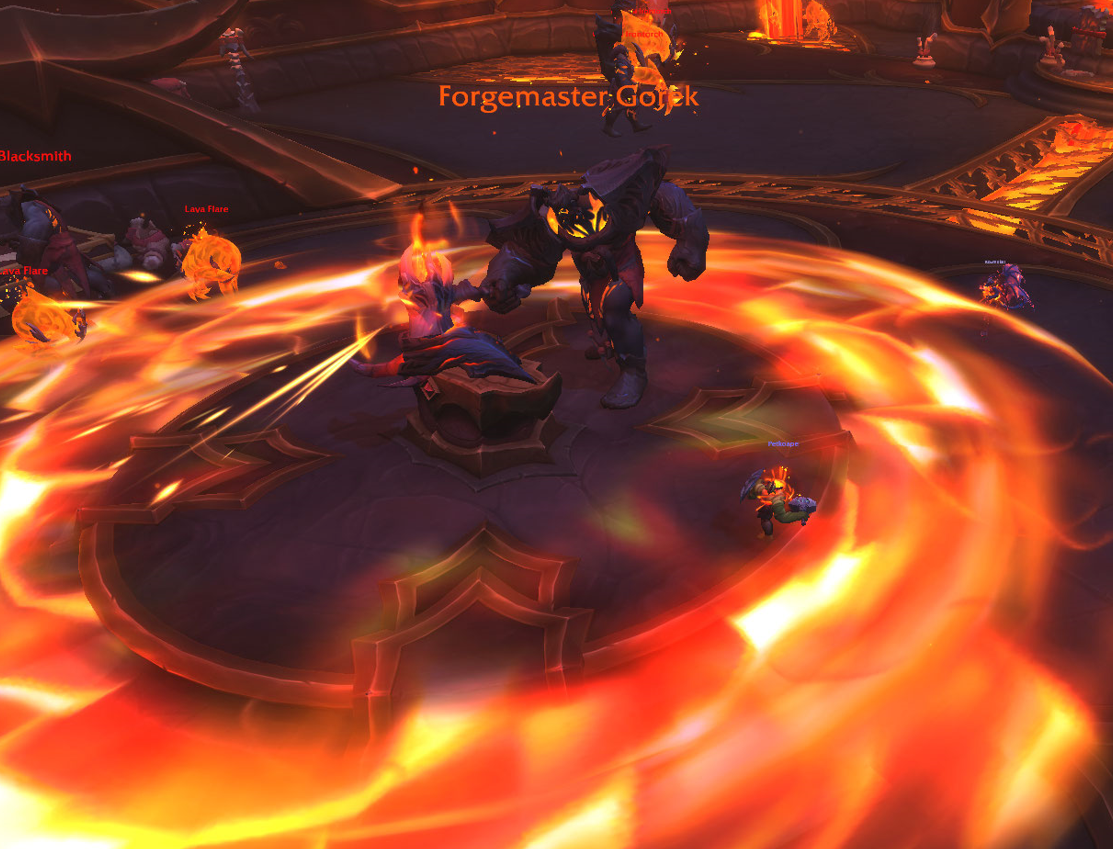
Forgemaster Gorek Boss Guide

All Roles
- Dodge the
 Blazing Eruption coming from the Blazing Aegis.
 - Use personal defensives if you get targeted by Blazing Aegis.
- Avoid the Forgestorm ground puddles at all costs, as they do
heavy damage.
Tank
- Use activate mitigation when Forgemaster Gorek in casting
Heated Swings. Once you get knocked back, sidestep the following
leap effect from the boss. The final slam of Heated Swings creates a pool
of Forgefire on the ground that inflicts damage every second to players
standing in it and reduces their movement speed by 30%. Position the boss
the way that the pool is easy to avoid.
Healer
-
 Be prepared to heal the damage from
  Might of the Forge. The
follow-up ability of
Might of the Forge. The
follow-up ability of  Blazing Hammer will deal damage everyone
in your party. This will be a good time to use your cooldowns!
Blazing Hammer will deal damage everyone
in your party. This will be a good time to use your cooldowns! - Immediately after the last swing of Blazing Hammer, the boss
will cast Blazing Aegis on a 3 random players, inflicting initial
damage and leaving a damage-over-time effect on them. Be ready to spot-heal
them in case they do not have a personal defense.

The Dragon's Hoard and Warlord Sargha
Notable Trash Before Warlord Sargha
Once you defeat Forgemaster Gorek, head back where you came from, but this time, instead of going down the stairs, continue straight. You can jump down to cut the travel time toward the dungeon's last boss: Warlord Sargha. There is not much trash count to collect on the way there, so it should take only a short time until you pull the boss.
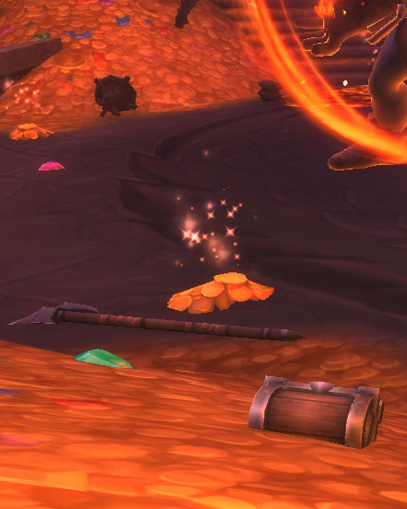
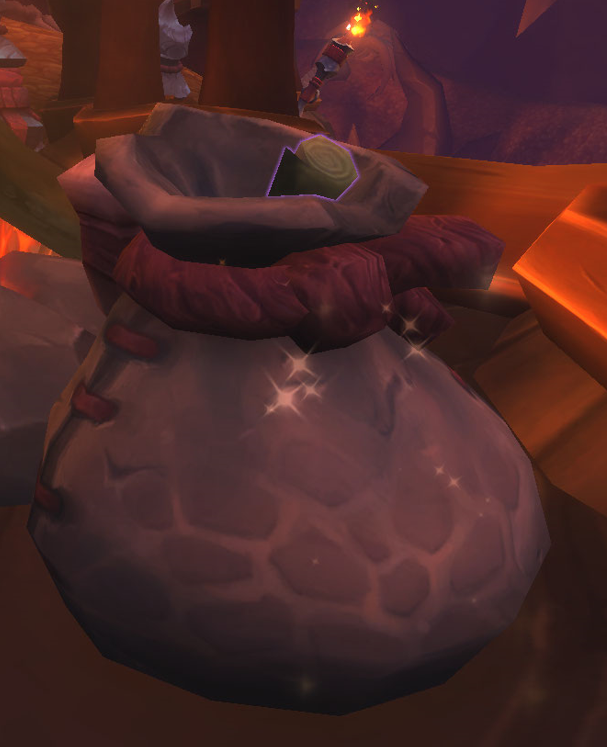 However, immediately after you have dealt with the initial few
packs of mobs, just to the left (shown in the screenshots above), you will find
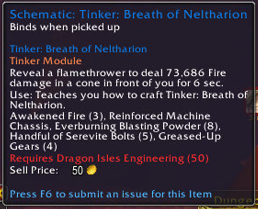
a Crumpled Schematic for Engineering on top of a full sack of gems.
More information on this schematic is below:
However, immediately after you have dealt with the initial few
packs of mobs, just to the left (shown in the screenshots above), you will find
a Crumpled Schematic for Engineering on top of a full sack of gems.
More information on this schematic is below:
- Anyone can pick up Crumpled Schematic, regardless of if they have Engineering or not.
- Only one person can take it; it disappears once you pick it up.
- It binds when picked up, so you cannot profit from it. Leave it to the people who can make the best use .
After dealing with this Crumpled Schematic, these are the remaining trash enemies to be aware of:
- Qalashi Warden is one of the few "tank-buster" non-boss-enemies
in this dungeon. This mob will put a tremendous amount of pressure on your tank.
Use mitigation once the Warden is casting Blazing Slash and
face the mob away from the party when it is casting its Volcanic Guard frontal.
- The most dangerous caster mob of the dungeon, Qalashi Lavamancer, will
have two major abilities to watch out for:
 Lava Bolt, which always goes
on the tank, and Molten Army. Interrupt both of them at all costs.
The mob additionally has
Lava Bolt, which always goes
on the tank, and Molten Army. Interrupt both of them at all costs.
The mob additionally has  Molten Barrier,
making it extremely tough to deal with it as it shields them while making them unable
to be interrupted while the barrier holds. Once the shield is destroyed, it
will deal massive AoE damage to everyone within 50 yards.
Molten Barrier,
making it extremely tough to deal with it as it shields them while making them unable
to be interrupted while the barrier holds. Once the shield is destroyed, it
will deal massive AoE damage to everyone within 50 yards. - Finally, watch out for Apex Blazewing; the bird does a
healthy amount of tank damage with their
 Scalding Chomp's
initial damage plus an additional damage-over-time effect. Occasionally,
it will also cast an AoE wave that pushes you backward. You cannot interrupt
it, so it is best to watch out not to be caught in any avoidable ground projectile.
Scalding Chomp's
initial damage plus an additional damage-over-time effect. Occasionally,
it will also cast an AoE wave that pushes you backward. You cannot interrupt
it, so it is best to watch out not to be caught in any avoidable ground projectile.
Warlord Sargha Boss Guide

This boss has an intermission phase once it reaches a maximum
of 100 Energy. At this time, Warlord Sargha will cast ![]() Magma Shield
(lasting 45 sec) on herself and pulse
Magma Shield
(lasting 45 sec) on herself and pulse ![]() Flame Eruption every 3 seconds,
applying
Flame Eruption every 3 seconds,
applying ![]() Flame Vulnerability to everyone. At last, the boss
will additionally cast
Flame Vulnerability to everyone. At last, the boss
will additionally cast ![]() The Dragon's Eruption, which you should avoid at all cost.
The Dragon's Eruption, which you should avoid at all cost.
 However, there are several ways to break the
 ![]() Magma Shield. Outside of
pure brute-force damage or waiting until the shield expires, there will be different
objects on the ground that can be used to break the shield faster. Here is what you should
know about them:
Magma Shield. Outside of
pure brute-force damage or waiting until the shield expires, there will be different
objects on the ground that can be used to break the shield faster. Here is what you should
know about them:
 Wand of Negation will damage the
  Magma Shield from a far distance;
simply pick up the item and use it on the boss.
Magma Shield from a far distance;
simply pick up the item and use it on the boss. Anti-Magic Bomb is a ground effect that must be aimed toward
the boss in order to utilize its effect, dealing 1/3 of the absorption
of the Magma Shield.
Anti-Magic Bomb is a ground effect that must be aimed toward
the boss in order to utilize its effect, dealing 1/3 of the absorption
of the Magma Shield. Rose of the Vale requires you to aim at the target dealing
massive damage to all enemies, including Warlord Sargha, within
12 yards of the impact.
Rose of the Vale requires you to aim at the target dealing
massive damage to all enemies, including Warlord Sargha, within
12 yards of the impact.
All Roles
- Once you pick up a weapon, you will gain the
 Curse of Dragon Hoard effect, inflicting Shadow damage. You can
 Curse dispel it.
 - Avoid the
 The Dragon's Kiln frontal cone of fire.
 - Avoid the initial fire projectile from Burning Ember and
its follow-up
 Burning Ground effect. In addition,
it will spawn Raging Ember, which will trigger
Burning Ground effect. In addition,
it will spawn Raging Ember, which will trigger  Burning Pursuit
on a random member from your party; focus it immediately and nuke it quickly.
Burning Pursuit
on a random member from your party; focus it immediately and nuke it quickly.
Tank
- Move Warlord Sargha closer to Raging Ember to allow your DPS to effectively "cleave".
Healer
- Spot-heal the incoming damage of
 Molten Gold. It will always
go on one random party member; here is a good place to remind
them to use their defenses.
Molten Gold. It will always
go on one random party member; here is a good place to remind
them to use their defenses. - Prepare to use your offensive cooldowns during intermission
due to
 Flame Eruption. The longer the intermission lasts, the more
damage your party will take, so watch out!
Flame Eruption. The longer the intermission lasts, the more
damage your party will take, so watch out!
Neltharus Loot Table
Magmatusk
| Type | Item | Stats |
|---|---|---|
| Plate Legs | Mastery/Haste | |
| Back | Mastery/Crit | |
| Cloth Shoulder | Haste/Crit | |
| Trinket | Agi/Str | |
| Dagger | Int, Mastery/Vers |
Chargath, Bane of Scales
| Type | Item | Stats |
|---|---|---|
| Fist Weapon | Crit/Vers | |
| Trinket | Agi/Int | |
| Mail Wrist | Vers/Crit | |
| Plate Feet | Crit/Haste | |
| Ring | Mastery/Crit |
Forgemaster Gorek
| Type | Item | Stats |
|---|---|---|
| Mail Chest | Haste/Mastery | |
| Cloth Waist | Vers/Crit | |
| Plate Hands | Haste/Vers | |
| 1H Mace | Haste/Crit | |
| Off-Hand | Crit/Haste | |
| Leather Legs | Mastery/Vers |
Warlord Sargha
| Type | Item | Stats |
|---|---|---|
| Leather Chest | Vers/Haste | |
| Mail Head | Haste/Crit | |
| Shield | Crit/Mastery | |
| 2H Mace | Haste/Crit | |
| Trinket | Int | |
| Cloth Hands | Mastery/Haste |
Neltharus Achievements
There are 8 total achievements to obtain in Neltharus:
| Achievement | Criteria |
|---|---|
| Defeat Warlord Sargha in Neltharus. | |
| Defeat Warlord Sargha in Neltharus
on |
|
| Defeat Warlord Sargha in Neltharus
on |
|
| Defeat Warlord Sargha in Neltharus
on |
|
| Complete Neltharus at |
|
| Defeat Chargath, Bane of Scales while
burning less than 15 books in Neltharus on
|
|
| Defeat Magmatusk after it has been
mutated with Draconic Tincture in Neltharus on
|
|
| Defeat Forgemaster Gorek without being
struck by |
Changelog
- 23 Apr. 2024: Guide updated for Season 4.
- 04 Sep. 2023: No further changes required for 10.1.7 Patch.
- 10 Jul. 2023: No further changes required for the 10.1.5 Patch.
- 18 Apr. 2023: Guide updated for Season 2.
- 25 Nov. 2022: Guide added.