The Azure Vault is a new Dragonflight Dungeon, available on all difficulties from Normal, Heroic, Mythic, and Mythic+.
In this dungeon you will face 4 bosses with unique mechanics inspired by The Blue Dragonflight, and challenging trash mobs.
In this guide we will go into detail on every encounter, mob, and ability in this dungeon, and how to best execute them for success.
Getting into The Azure Vault
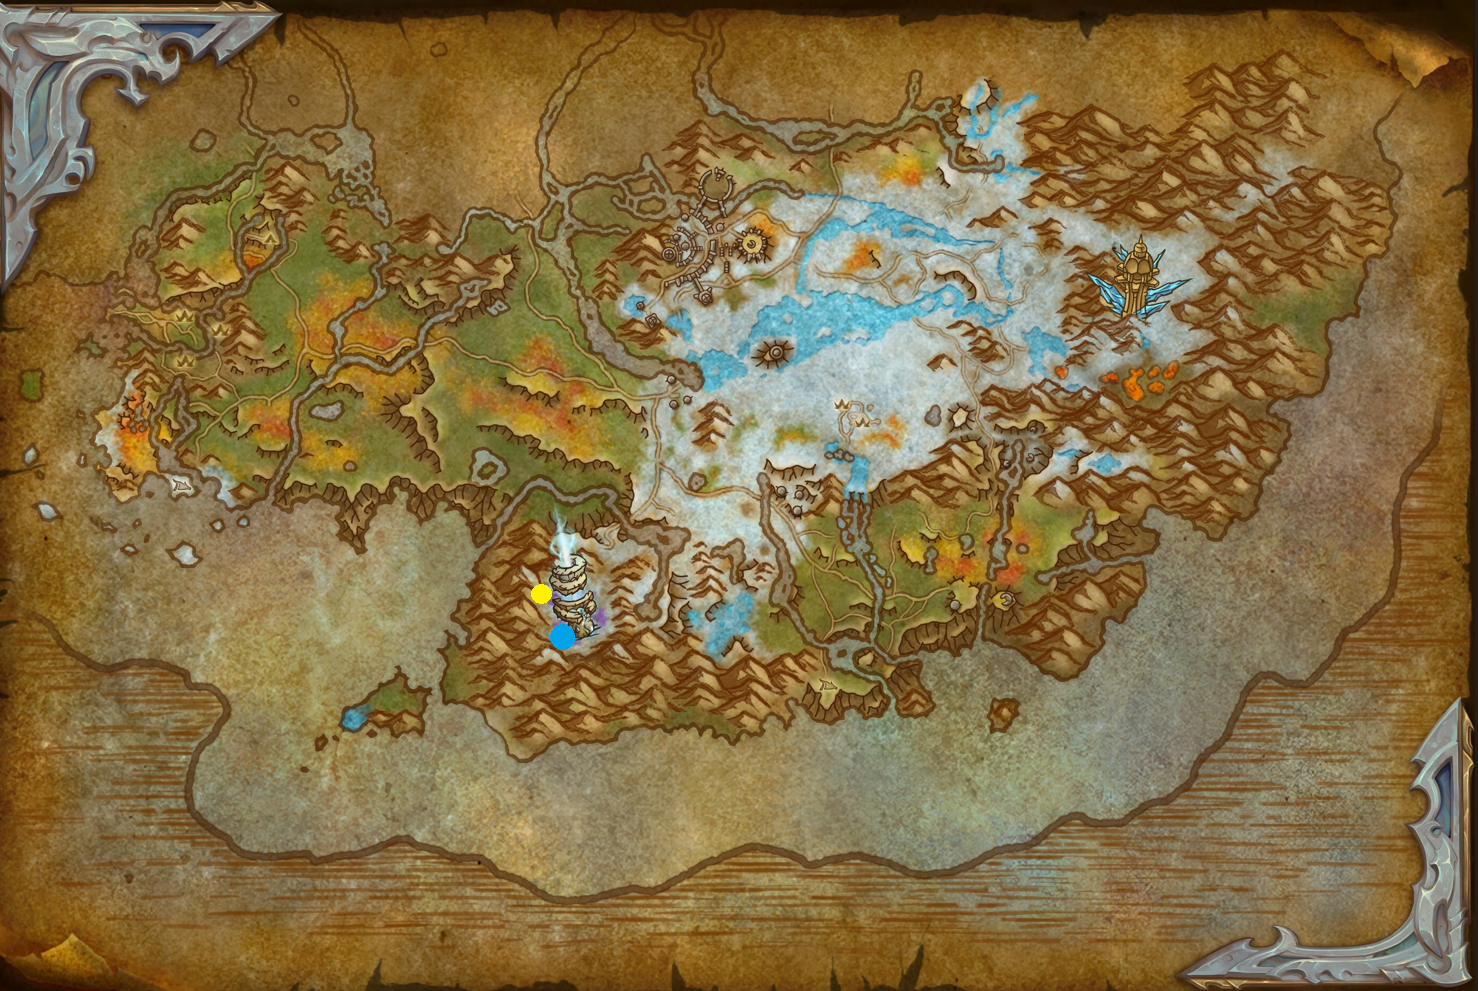
The Azure Vault is a Level 70 dungeon located in the newly introduced zone of The Azure Span in the Dragon Isles. The nearest flight point for both Alliance and Horde players is the Azure Archives. Upon arriving, move a few steps down until you see the dungeon's entrance.
This guide will focus on an extensive overview of the dungeon, providing vital information
to complete it across all difficulties (Normal, ![]() Heroic,
and
Heroic,
and ![]() Mythic). We will cover all 3 boss fights supported by the most
notable trash enemies in the
dungeon and their important abilities. If you would like to learn about the other
Season 4 dungeons in the upcoming Mythic+ season instead, please see our
overviews linked below. Otherwise without further ado, let us begin!
Mythic). We will cover all 3 boss fights supported by the most
notable trash enemies in the
dungeon and their important abilities. If you would like to learn about the other
Season 4 dungeons in the upcoming Mythic+ season instead, please see our
overviews linked below. Otherwise without further ado, let us begin!
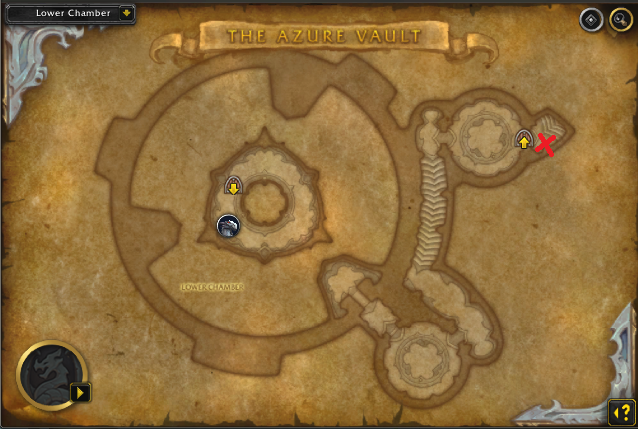
The Azure Vault Layout
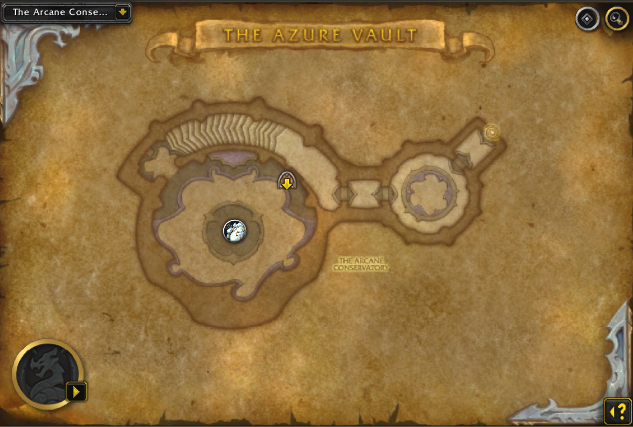
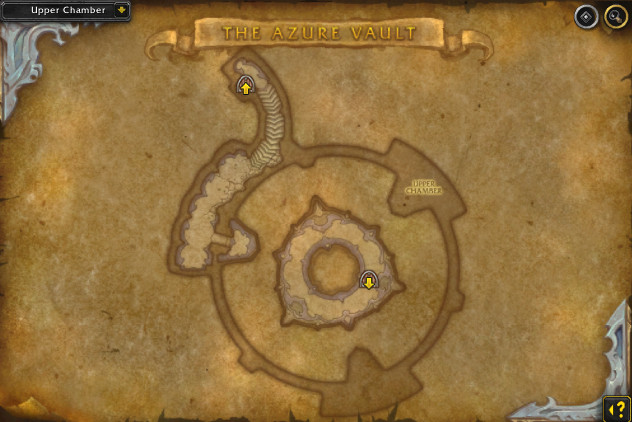

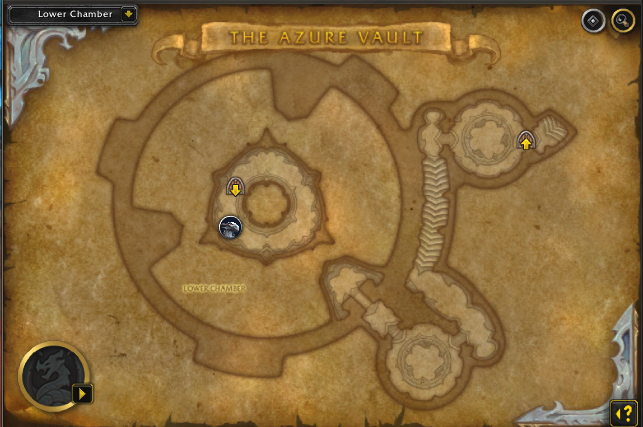
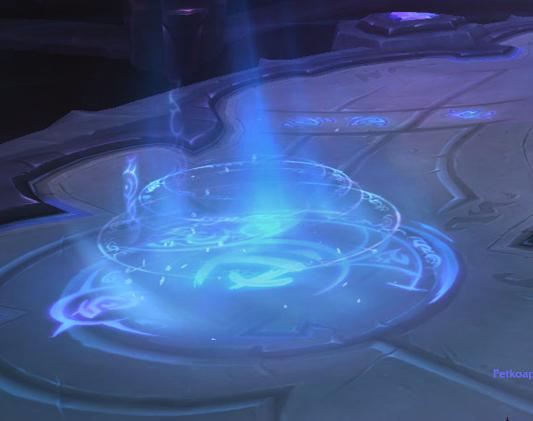
Teleports in the Dungeon
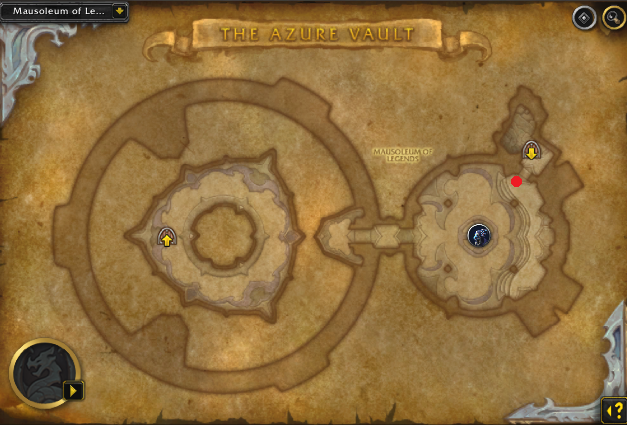
As soon as you defeat the first boss of the dungeon, an NPC will spawn right from where you have entered the dungeon named Sindragosa. She will give you access to teleports throughout the instance, with the first one being after defeating Leymor, the second one to the left after defeating Azureblade, and the last one being just before heading down to the last boss, Umbrelskul. Below you can find their exact locations:
Profession Bonuses in The Azure Vault
There will be one profession bonus in The Azure Vault from Inscription, located in the later stages of the dungeon (see the map below). In order to activate it, one of your team-members must have at least 25 skills in Dragon Isles Inscription. There is an alternative to having an Inscription and that is to have a Dracthyr at your party. Where to find them? What do they do? How to trigger them? And what is the best use for them? Find out below:
-
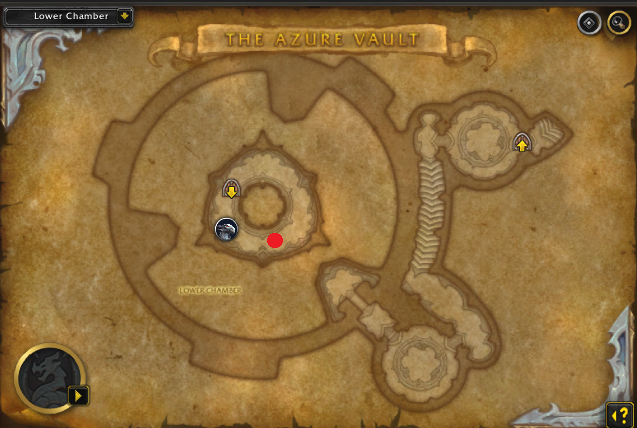
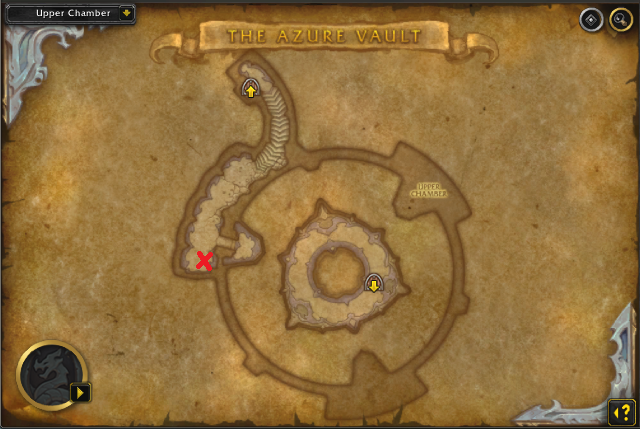
 There will be 2 Tome of Transmogrification
throughout the whole dungeon (see the minimaps below to find out the exact locations).
There will be 2 Tome of Transmogrification
throughout the whole dungeon (see the minimaps below to find out the exact locations). - Using your Extra Action Button will trigger its effect.
- Once you acquire the power, you will gain a
 Reverse Trap buff,
lasting for 2 minutes. Keep in mind there is only one charge
of the buff and only one member of your team can get it.
Reverse Trap buff,
lasting for 2 minutes. Keep in mind there is only one charge
of the buff and only one member of your team can get it. - It works similar to the Polymorph Circles located around the area leading towards Azureblade. Cast it on untriggered "trap" on the ground, let the mobs inside and upon triggering it will crowd-control them.
- It is yet uncertain how much damage exactly you need to do the mobs for the effect to break, but from the initial testing, it seems like it is quite a lot. Uncertain about the target cap on it too.

Dungeon Bonus Auras and How to Obtain Them
As soon as you defeat the first boss of the dungeon, Leymor, you
will be heading down the stairs towards The Upper Chamber, upon which you
will get
one of the floor-buffs: ![]() Scornful Haste,
Scornful Haste, ![]() Viscous Toads,
Viscous Toads,
![]() Sluggish Adoration,
Sluggish Adoration, ![]() Shrinking Form, or
Shrinking Form, or ![]() Hardening Scales
to random members of your party after using the first
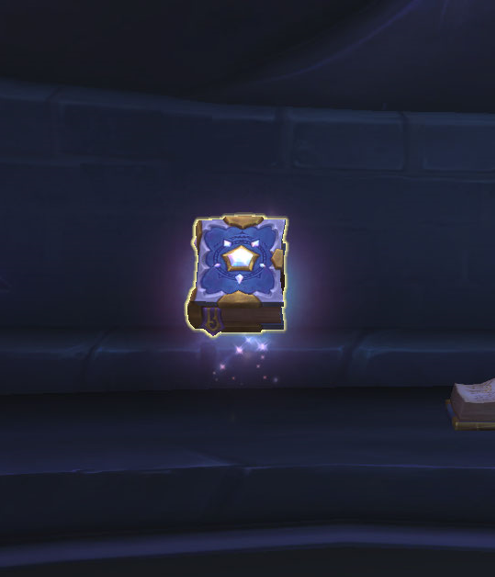
Book of Translocation that you come across. Each of the
buffs provide
different effects,
lasting 1 minute. It is also important to note that there is a
possibility
of not getting any buff, as it is not guaranteed, and they are exclusively
active
in the Upper Chamber area (the area before Azureblade).
Here is some more information about them:
Hardening Scales
to random members of your party after using the first
Book of Translocation that you come across. Each of the
buffs provide
different effects,
lasting 1 minute. It is also important to note that there is a
possibility
of not getting any buff, as it is not guaranteed, and they are exclusively
active
in the Upper Chamber area (the area before Azureblade).
Here is some more information about them:
 Scornful Haste is quite tricky as any member of your party that
stays within the 10-yard radius circle will gain 15% Haste, but
if enemies stay within, they will gain 30% Haste. Make sure you do not let
any nearby enemies get inside!
Scornful Haste is quite tricky as any member of your party that
stays within the 10-yard radius circle will gain 15% Haste, but
if enemies stay within, they will gain 30% Haste. Make sure you do not let
any nearby enemies get inside! Viscous Toads is the less valuable aura, it is good for crowd
control as it incapacitates enemies every
10 seconds.
Viscous Toads is the less valuable aura, it is good for crowd
control as it incapacitates enemies every
10 seconds. Sluggish Adoration slows any enemies within 10 yards
by 25%.
Sluggish Adoration slows any enemies within 10 yards
by 25%. Shrinking Form increases your movement speed by 25%, but
increases all damage taken by 5%.
Shrinking Form increases your movement speed by 25%, but
increases all damage taken by 5%. Hardening Scales reduces your movement speed by 25%, but
also reduces all damage taken by 5%.
Hardening Scales reduces your movement speed by 25%, but
also reduces all damage taken by 5%.

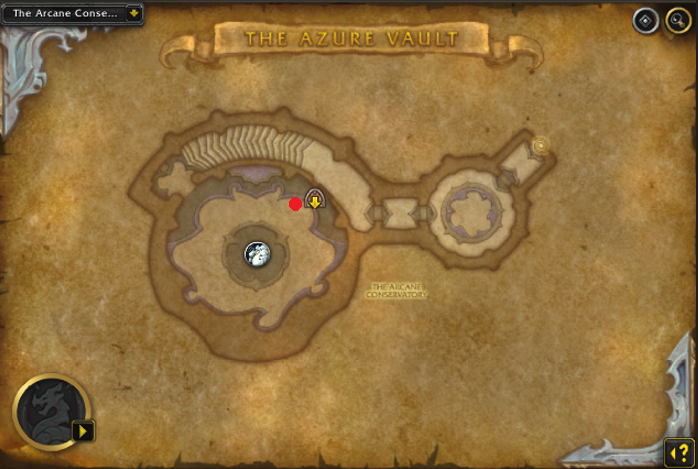
The Arcane Conservatory and Leymor
Notable Trash Before Leymor
-
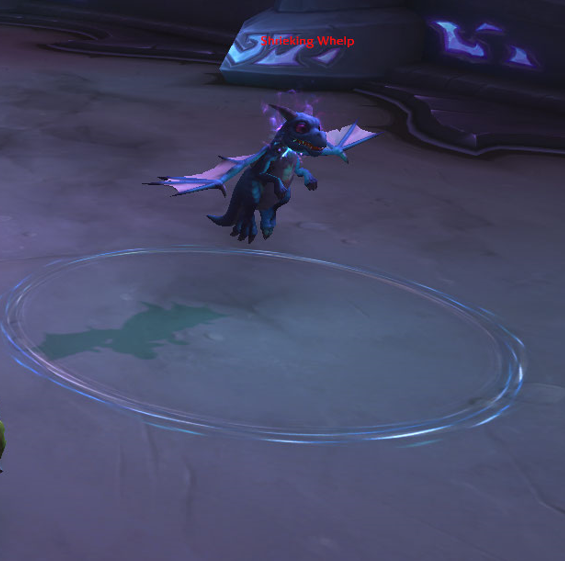 If you do not stop Shrieking Whelp's
  Shriek cast, it will
activate 2 incredibly powerful mobs: Crystal Fury and
Crystal Thrasher. The mobs only trigger if you enter their "aura"
and let it finish the Shriek cast, hence why it is important to either
stop it or completely walk around it and not engage the mob.
Shriek cast, it will
activate 2 incredibly powerful mobs: Crystal Fury and
Crystal Thrasher. The mobs only trigger if you enter their "aura"
and let it finish the Shriek cast, hence why it is important to either
stop it or completely walk around it and not engage the mob. - In case you trigger Crystal Fury, the most important ability
you should pay attention to is its
 Piercing Shards frontal. It all goes
in the direction your tank is facing, and if hit, it also leaves a stackable
DoT on you; try to stop as many casts as you can with your crowd-control spells.
Piercing Shards frontal. It all goes
in the direction your tank is facing, and if hit, it also leaves a stackable
DoT on you; try to stop as many casts as you can with your crowd-control spells. - Walk out of melee to avoid Crystal Thrasher's
 Crystalline Rupture,
as it will not only do massive damage to you, but also root you. The mob will
periodically cast
Crystalline Rupture,
as it will not only do massive damage to you, but also root you. The mob will
periodically cast  Splintering Shards on a random member of your party.
Since this is unavoidable damage, it
is an excellent opportunity to use your
defensives. Just make sure to have enough distance so that you do not overlap
the circles and take even more damage.
Splintering Shards on a random member of your party.
Since this is unavoidable damage, it
is an excellent opportunity to use your
defensives. Just make sure to have enough distance so that you do not overlap
the circles and take even more damage. - Conjured Lasher is one of the mandatory mobs you will meet
along the way to the first boss. They have only one
important ability to stop,
 Mystic Vapors. If you
cannot interrupt it, you can use Stun effects (it will not recast!).
Multiple Mystic Vapors casts going through are going to turn lethal as
the damage-over-time effect stacks, though the good thing is that it is dispellable.
Mystic Vapors. If you
cannot interrupt it, you can use Stun effects (it will not recast!).
Multiple Mystic Vapors casts going through are going to turn lethal as
the damage-over-time effect stacks, though the good thing is that it is dispellable. - The last important trash mob is Arcane Tender. You must
defeat all 3 them in order to activate Leymor (the first boss).
They have 2 abilities, the first being the
 Wild Eruption
projectile, which also leaves Infused Ground ichor on the
ground that you must not step in. The second one is
Wild Eruption
projectile, which also leaves Infused Ground ichor on the
ground that you must not step in. The second one is  Erratic Growth,
which must be interrupted. You can also dispel the effect so that you do not
have to stay stunned for the full duration!
Erratic Growth,
which must be interrupted. You can also dispel the effect so that you do not
have to stay stunned for the full duration!

Leymor Boss Guide
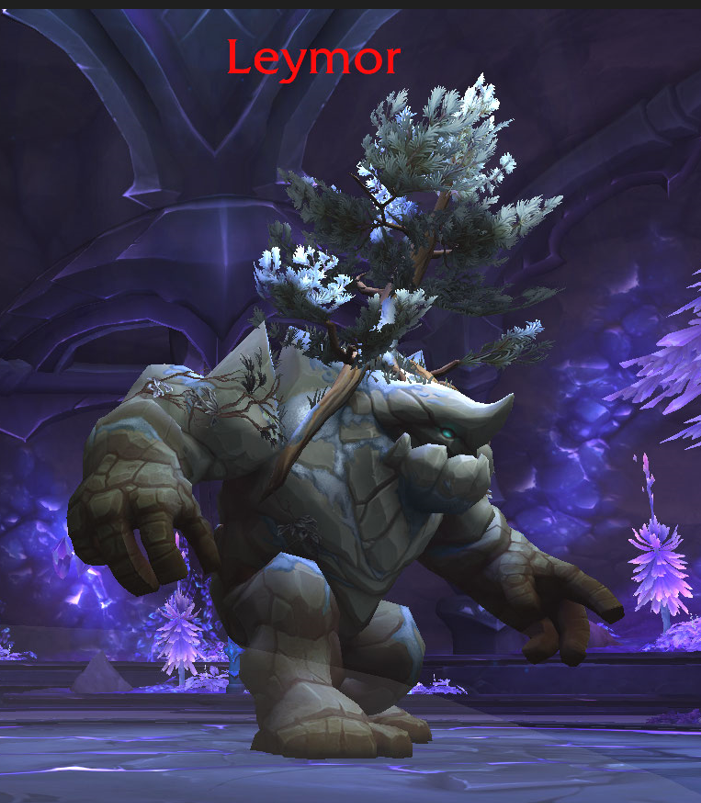
Upon defeating the 3 Arcane Tenders, the boss, will activate and be ready to be engaged. Here is what you should do:
All Roles
-
 Everyone is responsible to clear
  Ley-Line Sprouts with
Explosive Brand. Make sure you communicate about who goes where
as the initial slam of the boss will push you back and reposition you.
Ley-Line Sprouts with
Explosive Brand. Make sure you communicate about who goes where
as the initial slam of the boss will push you back and reposition you. - Use defensives when the boss casts
 Consuming Stomp. Remember that
the more active sprouts there are, the more damage the boss will do, due to
Consuming Stomp. Remember that
the more active sprouts there are, the more damage the boss will do, due to
 Arcane Power.
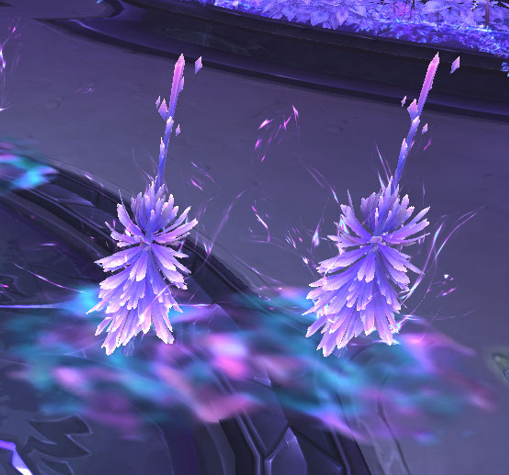
 - Upon clearing the Ley-Line Sprouts,
 Volatile Saplings will spawn.
They do not do much melee damage, but beware once they explode, as
Volatile Saplings will spawn.
They do not do much melee damage, but beware once they explode, as  Stinging Sap
will deal massive damage to you. Avoid this at all costs.
Stinging Sap
will deal massive damage to you. Avoid this at all costs.

Tank
- Beware of
 Infused Strike, and use active mitigation to reduce
the incoming damage.
Infused Strike, and use active mitigation to reduce
the incoming damage. - The Erupting Fissure is a frontal spell that will help you clear
the Ley-Line Sprouts. Do your best to pre-position the boss so
that it does not cleave any of your party members and also clears as many
Sprouts as possible.
Healer
- Watch out when Explosive Brand is happening, and make sure people
get topped up quickly once it goes through.
- Depending on how many Ley-Line Sprouts are left, you might
take more damage from Consuming Stomp. Account for this and use any
healing cooldowns if needed.
Mausoleum of Legends and Azureblade
Notable Trash Before Azureblade
On the way to the second boss of the dungeon, Azureblade, you will meet more Shrieking Whelps. Do your best to not pull it as it will activate the Crystal Fury and Crystal Thrasher, which are both extremely difficult mobs to deal with.
 As soon as you use the first Book of Translocation
you will be granted 2 buffs (described earlier in this guide).
This can potentially speed up the rest of the trash if done correctly. You should
also beware of the circles on the ground, as they will activate once
you walk on top of them and polymorph you for 20 sec. You have a small
grace period to get out of the circle
before you get Polymorphed. The effect is also dispellable!
Here are the most notable trash mobs prior to engaging Azureblade.
As soon as you use the first Book of Translocation
you will be granted 2 buffs (described earlier in this guide).
This can potentially speed up the rest of the trash if done correctly. You should
also beware of the circles on the ground, as they will activate once
you walk on top of them and polymorph you for 20 sec. You have a small
grace period to get out of the circle
before you get Polymorphed. The effect is also dispellable!
Here are the most notable trash mobs prior to engaging Azureblade.
- Interrupt the
 Arcane Bolt coming from the Arcane Elemental,
but make sure to save an interrupt for
Arcane Bolt coming from the Arcane Elemental,
but make sure to save an interrupt for  Waking Bane as it sleeps you
— it is dispellable.
Waking Bane as it sleeps you
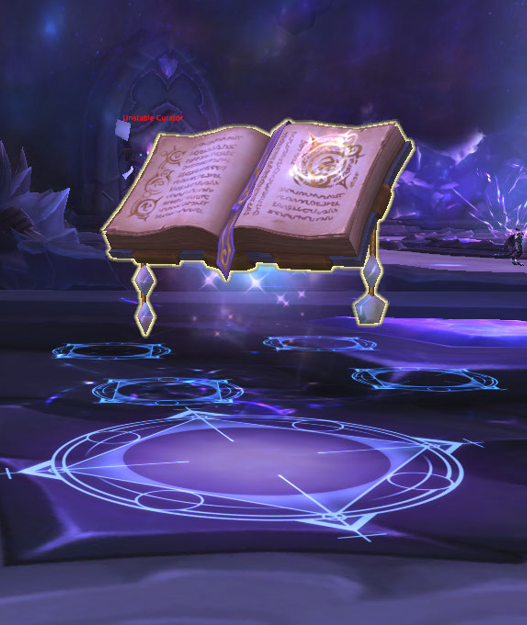
— it is dispellable. - Sidestep the
 Forbidden Knowledge cast from Unstable Curator.
Failing to do so will disorient you and can quickly lead to death by other
mechanics.
Forbidden Knowledge cast from Unstable Curator.
Failing to do so will disorient you and can quickly lead to death by other
mechanics. - Rune Seal keeper is a dangerous caster that has two important
abilities to stop:
 Condensed Frost and
  Icy Bindings. Keep in
mind
that if Icy Bindings goes through, you can always use immunities or
root-clearing effects to
effect to clear it (Paladin's
Icy Bindings. Keep in
mind
that if Icy Bindings goes through, you can always use immunities or
root-clearing effects to
effect to clear it (Paladin's  Blessing of Freedom, Monk's
 Tiger's Lust, Hunter's
  Posthaste, etc.), but you
should most definitely first look to interrupt it.
Posthaste, etc.), but you
should most definitely first look to interrupt it. - Beware when fighting Arcane Construct, as it will periodically cast
 Arcane Bash which can knock you off the platform if you are too close
to the edge. Move to the middle! They also cast
Arcane Bash which can knock you off the platform if you are too close
to the edge. Move to the middle! They also cast  Conjured Barrier,
but
that should not trouble you as much; you can burn through it!
Conjured Barrier,
but
that should not trouble you as much; you can burn through it! - Astral Attendant is another important mob to pay attention to. Even
though
there is nothing to interrupt here, beware of the Unstable Power cast.
This, combined with any other effect (Rune Seal keeper's
Icy Bindings,
for example) will turn lethal.
- Vault Guard is a dangerous "tank-buster" trash mob. Use
active mitigation when it casts
 Ice Cutter. The mob will periodically
cast
Ice Cutter. The mob will periodically
cast  Brilliant Scales, which will make it a lot more resistant
to magic damage. Use a Purge effect to remove it.
Brilliant Scales, which will make it a lot more resistant
to magic damage. Use a Purge effect to remove it. - Finally, we have the Scalebane Lieutenant. The mob itself
will have a tank-buster ability called Ice Cutter (just like
Vault Guard),
and it will also have a
 Mage Hunter's Fervor aura, increasing the damage
dealt by nearby enemies by 25% if they stay in it, hence why you want to
focus it first. The mob will periodically
also cast Brilliant Scales, which will make it a lot more durable
against magic damage; use Purge effects to remove it.
Mage Hunter's Fervor aura, increasing the damage
dealt by nearby enemies by 25% if they stay in it, hence why you want to
focus it first. The mob will periodically
also cast Brilliant Scales, which will make it a lot more durable
against magic damage; use Purge effects to remove it.
Azureblade Boss Guide
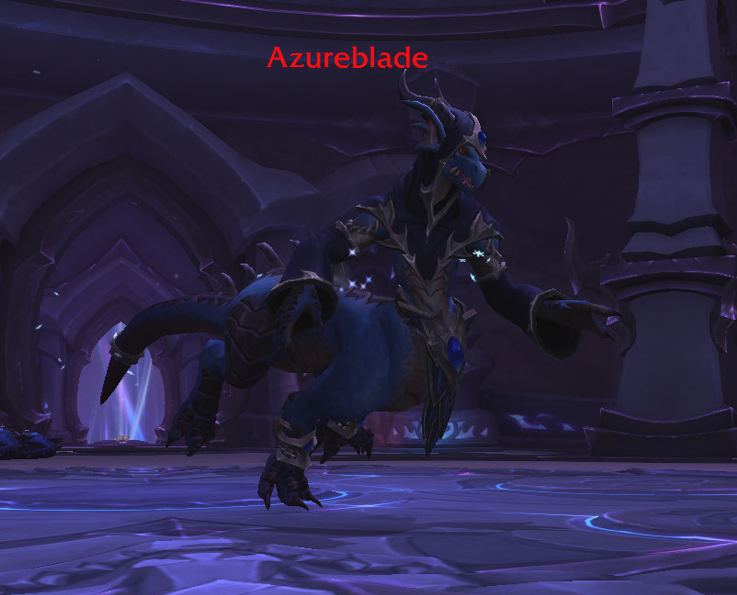
The boss has 2 phases that he rotates between throughout the whole
fight, with the first one being the ![]() Summon Draconic Image and
Summon Draconic Image and ![]() Ancient Orb
combo, and the second one being the
Ancient Orb
combo, and the second one being the ![]() Overwhelming Energy paired with
Draconic Illusion. Keep in mind that during the "second phase" you
will not be able to damage the boss until you defeat the 4
Draconic Illusion adds, upon which they will stop casting the
Overwhelming Energy paired with
Draconic Illusion. Keep in mind that during the "second phase" you
will not be able to damage the boss until you defeat the 4
Draconic Illusion adds, upon which they will stop casting the
![]() Seal Empowerment, causing the first phase to repeat. Here is what you
should know:
Seal Empowerment, causing the first phase to repeat. Here is what you
should know:
All Roles
-
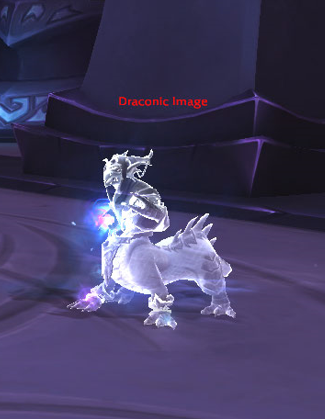 Periodically, the boss will cast
  Summon Draconic Image, focus the
Draconic Image immediately, while interrupting(Stun effects work too)
its
Summon Draconic Image, focus the
Draconic Image immediately, while interrupting(Stun effects work too)
its  Illusionary Bolt cast. Upon defeating the
Draconic Image, it will cause
Illusionary Bolt cast. Upon defeating the
Draconic Image, it will cause  Unstable Magic. Do your best to
sidestep it.
Unstable Magic. Do your best to
sidestep it. - Sidestep the
 Ancient Orb cast.
 - During the
 Overwhelming Energy, sidestep any
 Ancient Orb Fragments
coming your way.
Ancient Orb Fragments
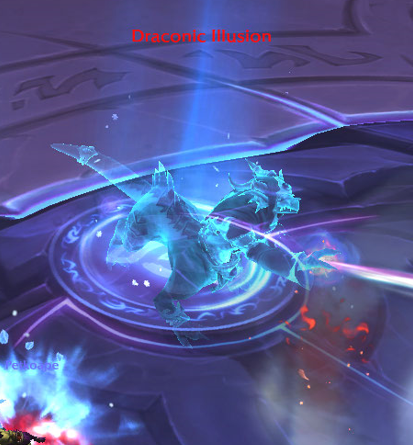
coming your way. -
Fully focus the Draconic Illusion adds during the second phase of the
encounter. This is a good place to use your personal defensives. Upon defeating the Draconic Illusion, it will trigger the
Unstable Magic ground animation; do your best to sidestep it.

Tank
-
 Beware of how you position Azureblade because of its
 Arcane Cleave.
It has a 10-yard frontal effect, so you should never face it
towards
your party.
Arcane Cleave.
It has a 10-yard frontal effect, so you should never face it
towards
your party. - Do your best to position the boss next to the Draconic Images to allow your damage dealers to effectively "cleave" the add, and deal damage to both targets.

Healer
- The Overwhelming Energy phase is going to be the most
healing-intensive part
of the whole encounter. This is a good place to use your offensive and
defensive cooldowns.
Lower Chamber and Telash Greywing
Notable Trash Before Telash Greywing
Upon defeating Azureblade, head down to the cave where you will be making your way towards the third boss of the dungeon, Telash Greywing. The circles on the ground (the same as the ones in the previous area) will be present on your way towards Telash. Do your best to sidestep them! Here are the most notable non-boss-enemies on your way down:
- Drakonid Breaker's
 Shoulder Slam targets a random
player and charges at them, dealing physical damage. In addition, they also have
Shoulder Slam targets a random
player and charges at them, dealing physical damage. In addition, they also have
 Bestial Roar which deals heavy group AoE damage.
 - Avoid the
 Null Stomp ground animation coming from
Nullmagic Hornswog.
Null Stomp ground animation coming from
Nullmagic Hornswog. - Beware of Tarasek Looter's
 Tear Flesh cast; it will deal
direct damage and will add a bleed effect to the highest threat target (your
tank).
Keep in mind that this effect stacks, and can be cleared with
Tear Flesh cast; it will deal
direct damage and will add a bleed effect to the highest threat target (your
tank).
Keep in mind that this effect stacks, and can be cleared with
 Blessing of Protection,
 Stoneform, etc.
Telash Greywing Boss Guide

The boss has an additional "intermission" phase called ![]() Absolute Zero,
used when he reaches 100 Energy. During this phase, he will shield
himself with
Absolute Zero,
used when he reaches 100 Energy. During this phase, he will shield
himself with ![]() Glacial Shield and spawn a
Glacial Shield and spawn a ![]() Vault Rune. You must
stay under the
Vault Rune. You must
stay under the ![]() Vault Rune
by the end of the
Vault Rune
by the end of the ![]() Absolute Zero cast to survive. Failing to do so
will probably result in death (unless you use your own immunity or defensive to
survive).
Absolute Zero cast to survive. Failing to do so
will probably result in death (unless you use your own immunity or defensive to
survive).
 At the beginning of the fight, Telash Greywing will have 60
Energy. After each
At the beginning of the fight, Telash Greywing will have 60
Energy. After each ![]() Absolute Zero intermission, he will start at 0. It
takes roughly 50 seconds for him to enter his intermission if he starts
from 0. Here is the more detailed breakdown of the boss fight:
Absolute Zero intermission, he will start at 0. It
takes roughly 50 seconds for him to enter his intermission if he starts
from 0. Here is the more detailed breakdown of the boss fight:
All Roles
- The boss will periodically cast
 Frost Bomb on everyone in your
group, followed by
Frost Bomb on everyone in your
group, followed by  Frozen Ground upon expiration. Make sure you do not
overlap each other and spread accordingly to avoid additional damage. It is
important to also put the bombs close to each other for better space management,
due
to Frozen Ground.
Frozen Ground upon expiration. Make sure you do not
overlap each other and spread accordingly to avoid additional damage. It is
important to also put the bombs close to each other for better space management,
due
to Frozen Ground. - Throughout the whole fight, Telash Greywing will cast
 Icy Devastator
on a random member of your party. This is a good place to use your defensives
and immunities. Remember that abilities that reset combat can fully neglect this
boss mechanic, such as the
Icy Devastator
on a random member of your party. This is a good place to use your defensives
and immunities. Remember that abilities that reset combat can fully neglect this
boss mechanic, such as the  Night Elf
 Shadowmeld racial,
Rogue's
Shadowmeld racial,
Rogue's  Vanish, Hunter's
  Feign Death,
Mage's
Feign Death,
Mage's  Invisibility, and the like.
 Night Elf
Tank
- Tank the boss close to the Frozen Ground ground puddles to
reduce the downtime of your melee DPS, as they put the next puddles close to the
existing ones for better space management.
Healer
- Be ready to top up your party once the boss has finished his
 Absolute Zero cast.
 - Spot-heal the person that gets Icy Devastator.
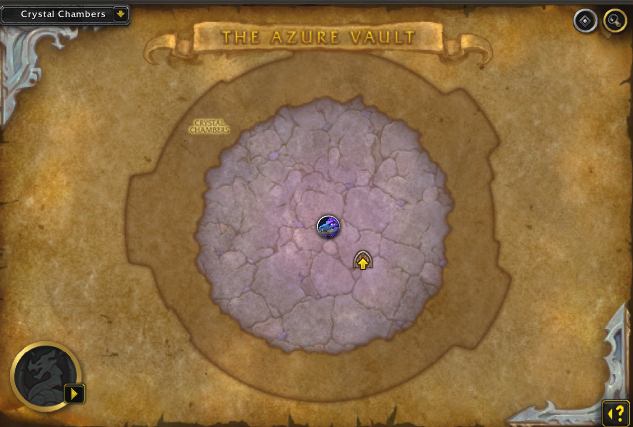
Crystal Chamber and Umbrelskul
Umbrelskul Boss Guide
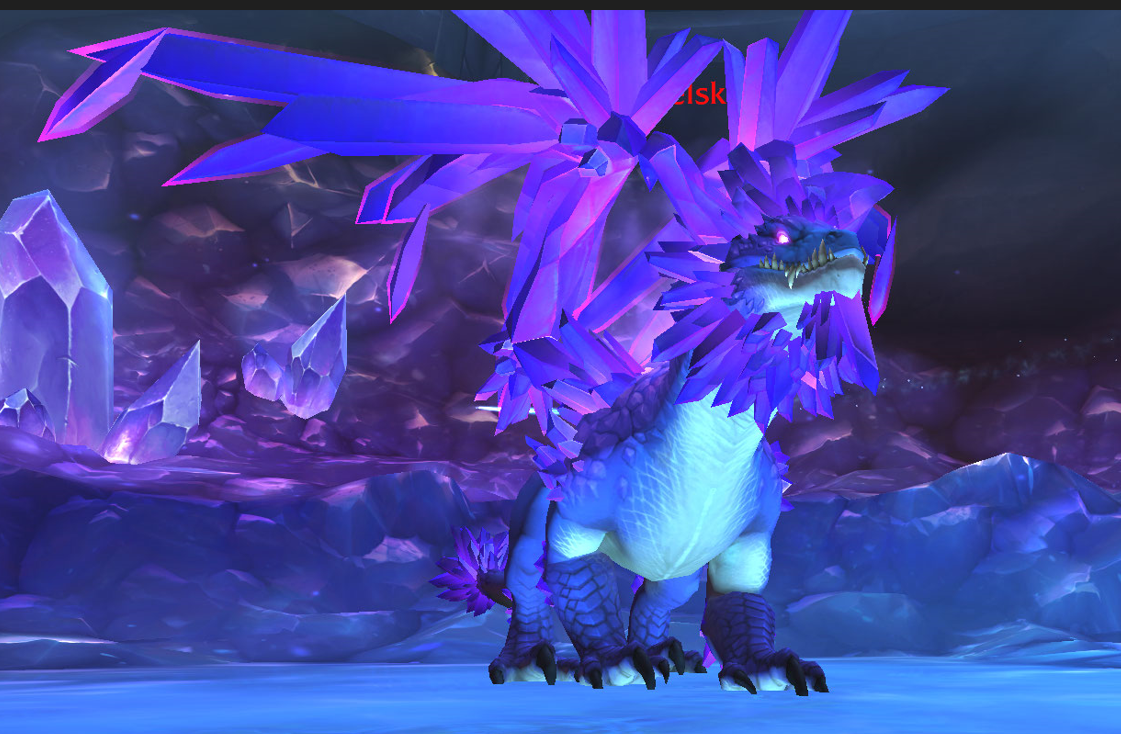
Upon defeating Telash Greywing, click on any nearby
Book of Translocation (or you can manually drop down) to
get to the last boss of the dungeon, Umbrelskul.
The boss has 3 tiny intermissions at 75%,
50%, and 25% health where he will become ![]() Brittle. Here
are further details about the boss fight:
Brittle. Here
are further details about the boss fight:
All Roles
-
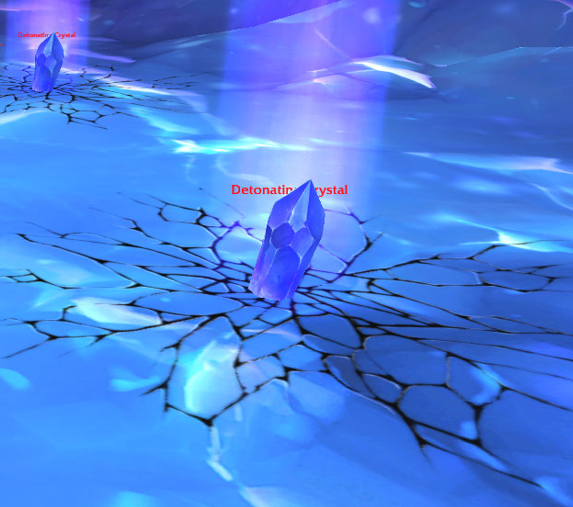 Once the boss enters the
  Brittle intermission, immediately focus the
Detonating Crystals. This is the highest priority of the whole fight, as
failing to do so will apply a group-wide damage-over-time effect called
Fracture. Beware that Hardened Crystal has been
reworked recently and now does pulsating group-wide AoE damage the longer the
Brittle intermission, immediately focus the
Detonating Crystals. This is the highest priority of the whole fight, as
failing to do so will apply a group-wide damage-over-time effect called
Fracture. Beware that Hardened Crystal has been
reworked recently and now does pulsating group-wide AoE damage the longer the
 Crystallize shield persists, break it as quick as possible!
 - Avoid being hit by the
 Crystalline Roar at all costs.
 - Dodge the ground effect coming from the Arcane Eruption
cast. In addition, it will create a lingering Crackling Vortex effect
that will damage you if you stand in it.

Tank
- Use active mitigation when Umbrelskul is casting
 Dragon Strike.
 - Move the boss closer to any Detonating Crystals to allow your damage dealers to effectively cleave them.
Healer
- Dispel the tank's DoT from Dragon Strike.
- If Fracture goes through, use your major healing cooldowns
to try to recover the situation.
- The boss will occasionally cast Unleashed Destruction,
damaging every member of your party; be ready to top them up!
The Azure Vault Loot Table
Leymor
| Type | Item | Stats |
|---|---|---|
| Trinket | AGI/STR | |
| Leather Waist | Crit/Haste | |
| Cloth Wrist | Crit/Vers | |
| Polearm | Str, Haste/Mastery | |
| Mail Shoulder | Crit/Mastery | |
| Ring | Haste/Crit |
Azureblade
| Type | Item | Stats |
|---|---|---|
| Back | Crit/Haste | |
| 1-H Axe | Agi, Vers/Haste | |
| Trinket | Int | |
| Plate Feet | Crit/Vers | |
| 1-H Sword | Int, Haste/Vers |
Telash Greywing
| Type | Item | Stats |
|---|---|---|
| Cloth Hands | Haste/Mastery | |
| Neck | Vers/Mastery | |
| Staff | Agi, Mastery/Vers | |
| Plate Waist | Mastery/Crit | |
| Leather Wrist | Mastery/Haste |
Umbrelskul
| Type | Item | Stats |
|---|---|---|
| Shield | Haste/Vers | |
| Plate Chest | Haste/Mastery | |
| Cloth Head | Crit/Vers | |
| Leather Shoulder | Crit/Mastery | |
| 1-H Sword | Agi, Vers/Crit | |
| Mail Legs | Haste/Crit | |
| Trinket | Int |
The Azure Vault Achievements
There are 8 total achievements to obtain in The Azure Vault:
| Achievement | Criteria |
|---|---|
| Defeat Umbrelskul in The Azure Vault. | |
| Defeat Umbrelskul in The Azure Vault
on |
|
| Defeat Umbrelskul in The Azure Vault
on |
|
| Complete The Azure Vault at Mythic Level 20 or higher, within the time limit. | |
| Defeat Umbrelskul in The Azure Vault on
|
|
| Defeat Telash Greywing after using |
|
| Defeat Umbrelskul after smashing Shimmering Geodes
with |
|
| Defeat Umbrelskul without being hit by a Polymorph Trap
or triggering a |
Changelog
- 23 Apr. 2024: Guide updated for Season 4.
- 25 Nov. 2022: Page added.