

Welcome to our guide to the Shadowmoon Burial Grounds dungeon in Season 1 of the Dragonflight World of Warcraft expansion. This guide will cover everything you need to know about the dungeon, including how to get to it, its layout, the trash and boss mechanics within, and its loot.
Getting into Shadowmoon Burial Grounds
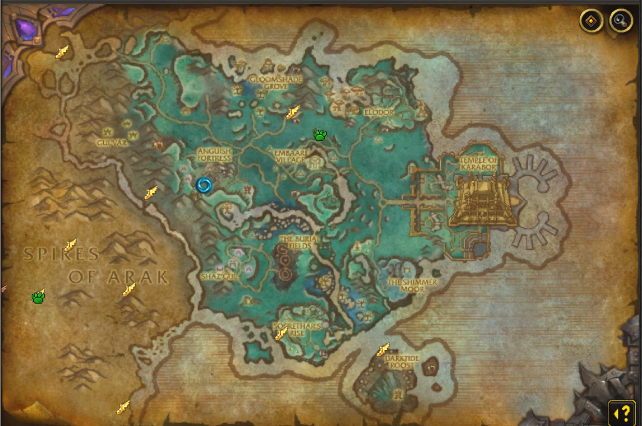
Shadowmoon Burial Grounds is a level 70 dungeon located on the west coast of - Shadowmoon Valley, Draenor. The nearest flight point for Alliance and Horde players is Akeeta's Hovel, Shadowmoon Valley. Upon landing, head further to the east until you uncover the dungeon's entrance.
This guide will focus on an extensive overview of the dungeon, providing vital information
to complete it on ![]() Mythic and Mythic Keystone difficulty. We will cover all 4 boss
fights supported by the most notable trash enemies in the
dungeon and their important abilities. If you would like to learn about the other
Dragonflight Dungeons or the Mythic+ season instead; please see our
overviews linked below. Otherwise, without further ado, let us begin!
Mythic and Mythic Keystone difficulty. We will cover all 4 boss
fights supported by the most notable trash enemies in the
dungeon and their important abilities. If you would like to learn about the other
Dragonflight Dungeons or the Mythic+ season instead; please see our
overviews linked below. Otherwise, without further ado, let us begin!
Crypt of the Ancients and Sadana Bloodfury
Notable Trash Before Sadana Bloodfury
Luckily for you, Shadowmoon Burial Grounds is one of the most straightforward dungeons in this season. There are no dungeon buffs and no special events you must complete to time this key. Once you exit from the first room of The Crypt of the Ancients (upon defeating the first 3 mobs), you can choose to go either left or right; both ways share the same difficulty. Here is what you should know about the trash mobs in this area:
- Shadowmoon Bone-Mender is going to be the most dangerous caster
in the first area of the dungeon. Interrupts its heal effect -
 Shadow Mend
at all costs while doing your best to stop as many incoming
Shadow Mend
at all costs while doing your best to stop as many incoming  Shadow Bolts
as possible.
Shadow Bolts
as possible. - Reanimated Ritual Bones will do mostly tank damage with his auto-attacks
and
 Void Slash.
 - Beware of Void Spawn and its
 Void Pulse cast, you cannot out-range
the AoE damage, but you can line of sight it. In addition, do your best to sidestep
any
Void Pulse cast, you cannot out-range
the AoE damage, but you can line of sight it. In addition, do your best to sidestep
any  Void Eruptions on the ground projectiles.
 - When Defiled Spirit teleports behind you, sidestep its
 Cry of Anguish
cast.
Cry of Anguish
cast. - Shadowmoon Loyalist does not do anything besides auto-attacks. They will
occasionally cast
 Sinister Focus buff; use your Purge effects to remove
it.
Sinister Focus buff; use your Purge effects to remove
it.
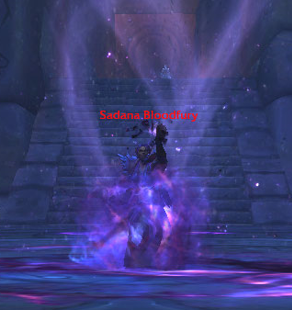
Sadana Bloodfury Boss Guide
All Roles
- Avoid the
 Daggerfall cast at all costs.
 - Use defensive when appropriate during
 Whispers of the Dark Star
channel cast, it will do AoE damage to everyone!
Whispers of the Dark Star
channel cast, it will do AoE damage to everyone! - When Sadana Bloodfury spawns a spirit through
 Dark Communion,
focus it immediately. Stun, slow, immobilize and knockback effects also
work on the mob. If the boss devours the spirit, it will heal her for 10%
of her health and give her 20% extra damage for 20 sec.
Dark Communion,
focus it immediately. Stun, slow, immobilize and knockback effects also
work on the mob. If the boss devours the spirit, it will heal her for 10%
of her health and give her 20% extra damage for 20 sec. - When Sadana Bloodfury casts
 Dark Eclipse, enter in one
of the
Dark Eclipse, enter in one
of the  Lunar Purity runes on the ground (there are a bunch of them in the
inner circle of the boss) to reduce the damage from it by 80%. Failing to
do so might be lethal, depending on the key level.
Lunar Purity runes on the ground (there are a bunch of them in the
inner circle of the boss) to reduce the damage from it by 80%. Failing to
do so might be lethal, depending on the key level.
Tank
- Beware of Deathspike from the boss, be ready to use
active mitigation if your health drops low.
- Make sure there is a good distance between you and the spirit
spawning from Dark Communion.
Healer
- Use healing cooldowns when Whispers of the Dark Star channel is happening.
- Top up your party members after the Dark Eclipse cast.
Whispering Hollows and Nhallish
Notable Trash Before Nhallish
Upon defeating Sadana Bloodfury, continue straight into the Whispering Hollows zone, where you will find the second boss of the dungeon Nhallish. You will find one of the most challenging trash mobs throughout this area. Here is what you should know about them:
- Shadowmoon Dominator is going to be one of the caster mobs that you must
pay attention to simply because of their
 Domination ability. Since it is
considered a charm effect, you can stop it with any cast or use a utility like
Shaman's
Domination ability. Since it is
considered a charm effect, you can stop it with any cast or use a utility like
Shaman's  Tremor Totem to completely negate the effect. In addition, interrupt
 Rending Voidlash channel cast as soon as you see it.
 - Subjugated Soul is a harmless mob that only does auto-attacks to your tank.
- Once you engage Shadowmoon Exhumer, he will spawn 2
Exhumed Spirits. First, it is crucial to interrupt
Shadowmoon Exhumer's Void Bolt as it does high single-target damage.
And second, use Purge/Dispel effects to remove the shield of the
Exhumed Spirits, followed by stopping their
 Death Blast cast.
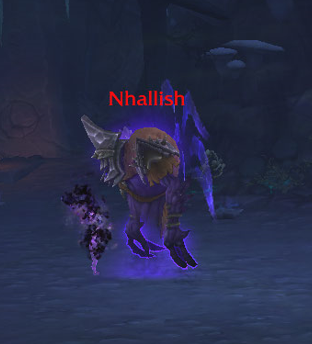
Nhallish Boss Guide
Before you engage Nhallish, be aware that there are shadowy tombs on the ground that, upon stepping on them, you will spawn Exhumed Spirits. Avoid them at all costs, especially during the boss fight.
All Roles
- When the boss is casting
 Planar Shift, use any movement speed abilities
to get away from the
Planar Shift, use any movement speed abilities
to get away from the  Void Vortex as quickly as you can.
 - During the
 Soul Steal phase of Nhallish, quickly defeat
your soul to get
Soul Steal phase of Nhallish, quickly defeat
your soul to get  Returned Soul buff for 20 sec. Remember, the longer
it takes to kill your soul, the more damage you will take from
Returned Soul buff for 20 sec. Remember, the longer
it takes to kill your soul, the more damage you will take from  Soul Shred.
 - Avoid the shadow ground projectiles coming from
 Void Devastation.
Tank
- Aim the
 Void Blast frontal away from your team.
Healer
- Top up your party when the Soul Steal phase is over.
Pools of Reflection and Bonemaw
Notable Trash Before Bonemaw
There are not many new trash mobs in this area outside of the already familiar Shadowmooni Dominator and Shadowmoon Exhumer, you are going to face Monstrous Corpse Spider, Plagued Bat and Carrion Worm. Here is what you should know about them:
- Interrupt the
 Necrotic Burst ability from Monstrous Corpse Spider,
the damage-over-time Disease effect will go on everyone from your party if
it is not stopped!
Necrotic Burst ability from Monstrous Corpse Spider,
the damage-over-time Disease effect will go on everyone from your party if
it is not stopped! - Beware of Plagued Bat and its
 Plague Spit, use your interrupts
to stop it.
Plague Spit, use your interrupts
to stop it. - Once you get closer to the bridge that leads to Bonemaw, there will be
2 Carrion Worms waiting for you, one located at the beginning
and on at the end of the bridge. Both of them will disappear once they reach
20% health, they will cast their uninterruptible spell Fetid Spit
on random targets and have a frontal for you to avoid —
 Body Slam.
Bonemaw Boss Guide

Throughout the fight, the 2 Carrion Worms that you fought previously on the bridge will spawn. You can either ignore them and finish the boss fight or switch to them; remember that they will be spread around the platform where the boss is. More information about the fight is down below:
All Roles
- Avoid the Bonemaw's
 Body Slam when you see it.
 - When the boss is casting
 Inhale, stay under the
  Corpse Breath
ground puddles, they will prevent you from being pulled towards Bonemaw.
You will take initial damage and spit off the platform if you get caught in his Inhale cast.
Corpse Breath
ground puddles, they will prevent you from being pulled towards Bonemaw.
You will take initial damage and spit off the platform if you get caught in his Inhale cast. - If possible, cleave all Bonemaw and Carrion Worms when they spawn. This is mostly available to ranged damage dealers; if you are a melee, focus on one of them.
Tank
- Make sure you are in a healthy state when the boss is casting
Fetid Spit on you.
Healer
- Top up your party once they stay in the Corpse Breath when
Inhale is happening. If anyone is accidentally caught
in the cast, spot heal them to prevent them from sure death.
Altar of Shadow and Ner'zhul
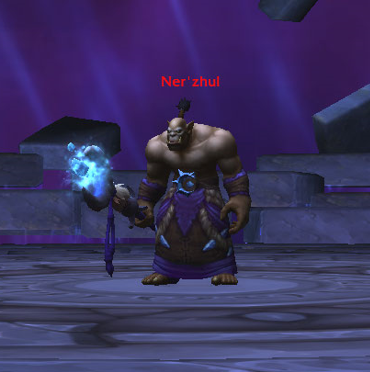
Ner'zhul Boss Guide
Since there are not any new mobs leading toward the final boss of the dungeon Ner'zhul, we are just going to mention that there is 2 pack of mobs before the boss. The first being a combination of Plagued Bat and Monstrous Corpse Spider and second one 2 Void Spawns.
All Roles
- Run away from the
 Omen of Death spawn. The damage varies depending
on the proximity of your position. In addition, it will always go on the furthest
target (or mostly on ranged players), so you can deliberately "bait" it near the
edge of the area.
Omen of Death spawn. The damage varies depending
on the proximity of your position. In addition, it will always go on the furthest
target (or mostly on ranged players), so you can deliberately "bait" it near the
edge of the area. - Dodge the
 Malevolence frontal cast.
 - Pre-assigned one of the skeletons before the
 Ritual of Bones
cast, this way, you will save time and avoid confusion.
Ritual of Bones
cast, this way, you will save time and avoid confusion.
Tank
- Move Ner'zhul away from the Omen of Death ground eruption.
- Once the boss casts Ritual of Bones, move Ner'zhul to the
pre-assigned skeletons. This way, you will enable your DPS players
to cleave both targets and speed up the fight.
Healer
- During the Omen of Death area effect, top up the health of
your party members.
- If any of the players cross the threshold of the marching
skeletons during the Ritual of Bones cast, they will take a heavy
ticking damage-over-time effect, which you must heal to prevent them from dying.
Shadowmoon Burial Grounds Loot Table
Sadana Bloodfury
| Type | Item | Stats |
|---|---|---|
| Off-Hand | Crit/Haste |
Nhallish
| Type | Item | Stats |
|---|---|---|
| Polearm | Str, Crit/Mastery | |
| Cloth Chest | Crit/Haste | |
| Mail Chest | Crit/Haste | |
| Cloth Wrist | Crit/Haste | |
| Plate Wrist | Haste/Vers | |
| Mail Wrist | Crit/Haste | |
| Trinket | Int |
Bonemaw
| Type | Item | Stats |
|---|---|---|
| Bow | Crit/Vers | |
| Plate Hands | Haste/Crit | |
| Leather Waist | Haste/Crit | |
| Trinket | Str |
Ner'zhul
| Type | Item | Stats |
|---|---|---|
| Staff | Int, Haste/Crit | |
| Dagger | Haste/Mastery | |
| Plate Head | Crit/Vers | |
| Cloth Head | Crit/Mastery | |
| Leather Feet | Crit/Mastery | |
| Cloth Feet | Crit/Mastery | |
| Mail Feet | Crit/Haste |
Shadowmoon Burial Grounds Achievements
There are 8 total achievements to obtain in Shadowmoon Burial Grounds:
| Achievement | Criteria |
|---|---|
| Defeat Ner'zhul in Shadowmoon Burial Grounds. | |
| Defeat Ner'zhul in Shadowmoon Burial Grounds
on |
|
| Defeat Ner'zhul in Shadowmoon Burial Grounds
on |
|
| Defeat Ner'zhul in Shadowmoon Burial Grounds on
|
|
| Complete Shadowmoon Burial Grounds at |
|
| Defeat Bonemaw after having fed him 25
Corpse Skitterlings in Shadowmoon Burial Grounds on
|
|
| Defeat Ner'zhul after slaying 2 Ritual of Bones
skeletons within 5 seconds of each other in
Shadowmoon Burial Grounds on |
|
| Defeat Sadana Bloodfury while only having the runes
that correspond to her active lunar cycle lit in
Shadowmoon Burial Grounds on |
Changelog
- 19 Dec. 2022: Guide added.