

De Other Side Quick Dungeon Guide: Video, Boss Strategies, and Trash
Last Updated: Nov 26, 2020 - 10:15 PM
(5y ago)

Welcome to our quick guide to the De Other Side dungeon in the Shadowlands World of Warcraft expansion. This guide aims at giving you proper direction to complete the dungeon (boss strategies and trash mobs) without being unnecessarily long. We also have encounter journal pages, for those who want a complete breakdown of the abilities.
1.
Ready Check Pull Video
2.
Mythic+ Difficulty
To see how difficult De Other Side is to complete on Mythic+ this week, we recommend checking out our Mythic+ dungeon difficulty rankings, linked below.
3.
Bosses
Please consult our De Other Side encounter journal pages for more information regarding what the bosses do exactly in each difficulty.

The first three bosses can be done in any order.
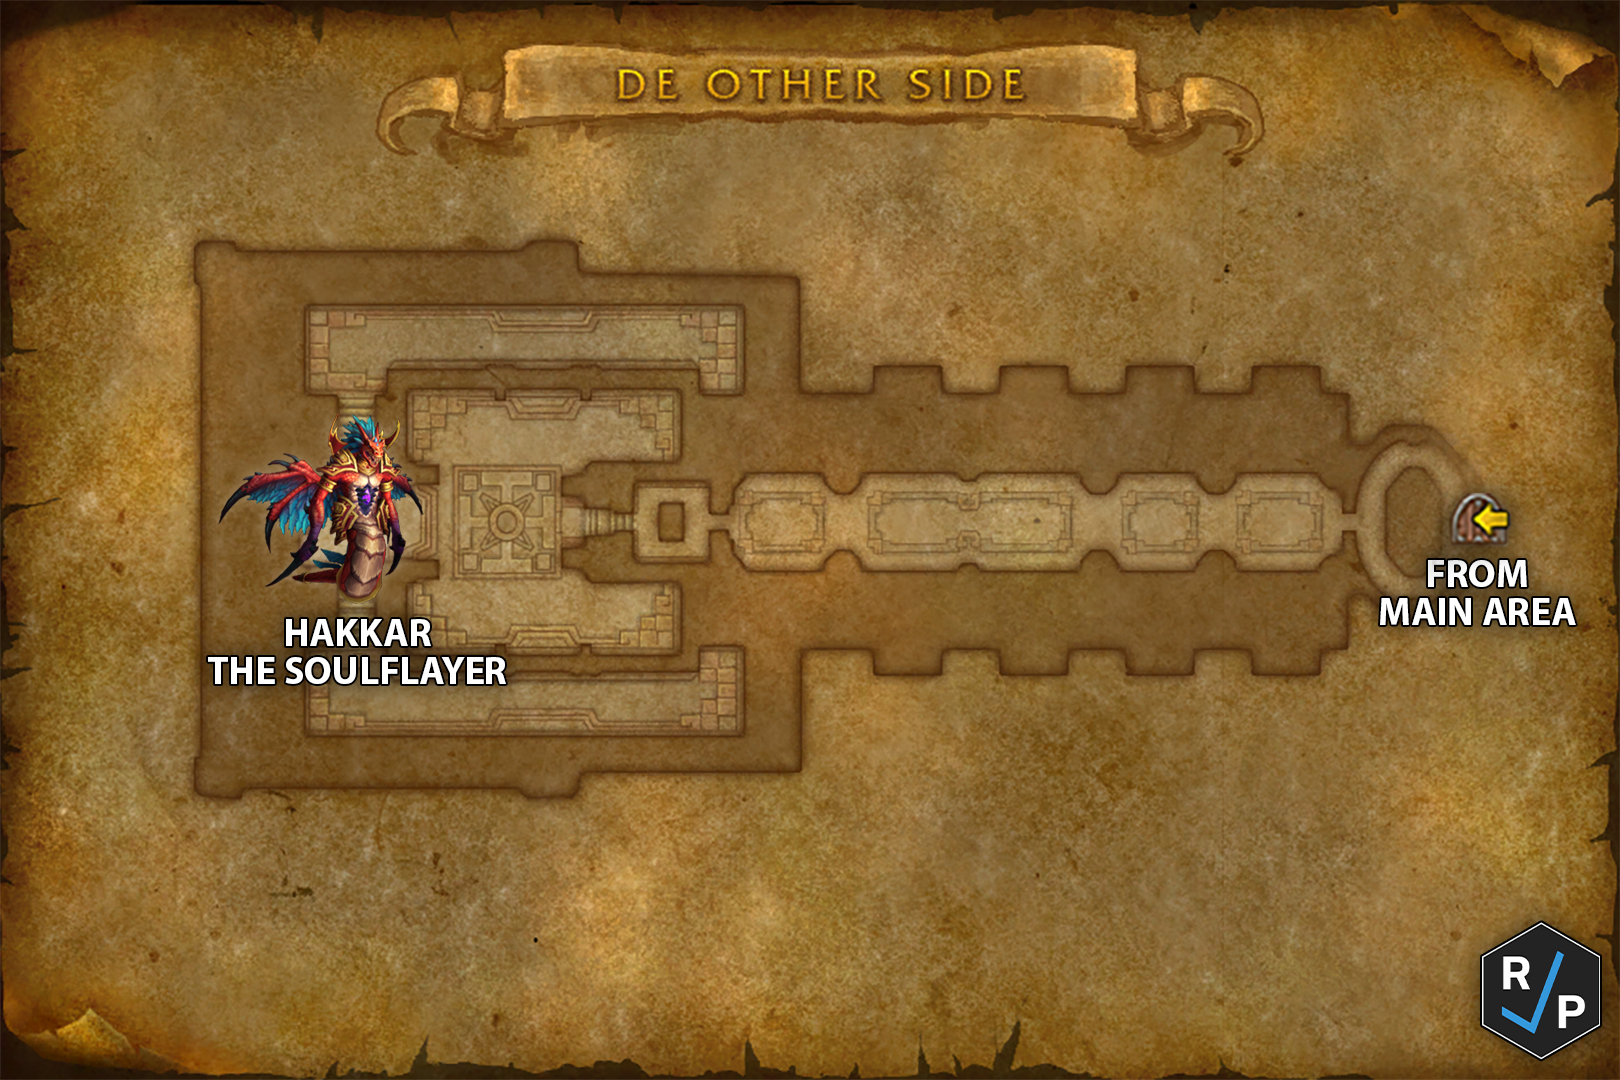
3.1.
Hakkar the Soulflayer
- If you get a red circle around you, stay away from other players until it goes
away (
 Corrupted Blood). It will spread to other players if they get hit by it.
 - Focus on killing the "Son of Hakkar" add that occasionally spawns. It will fixate a random player and drop a damaging red pool on the ground when it dies. It will also respawn after a while, so you will be dealing with more and more of them as the fight goes on.
- At full energy, Hakkar will gain a shield and start channeling
 Blood Barrage.
DPS through the shield while dodging the red swirls, and interrupt the channel once
the shield is broken.
Blood Barrage.
DPS through the shield while dodging the red swirls, and interrupt the channel once
the shield is broken.
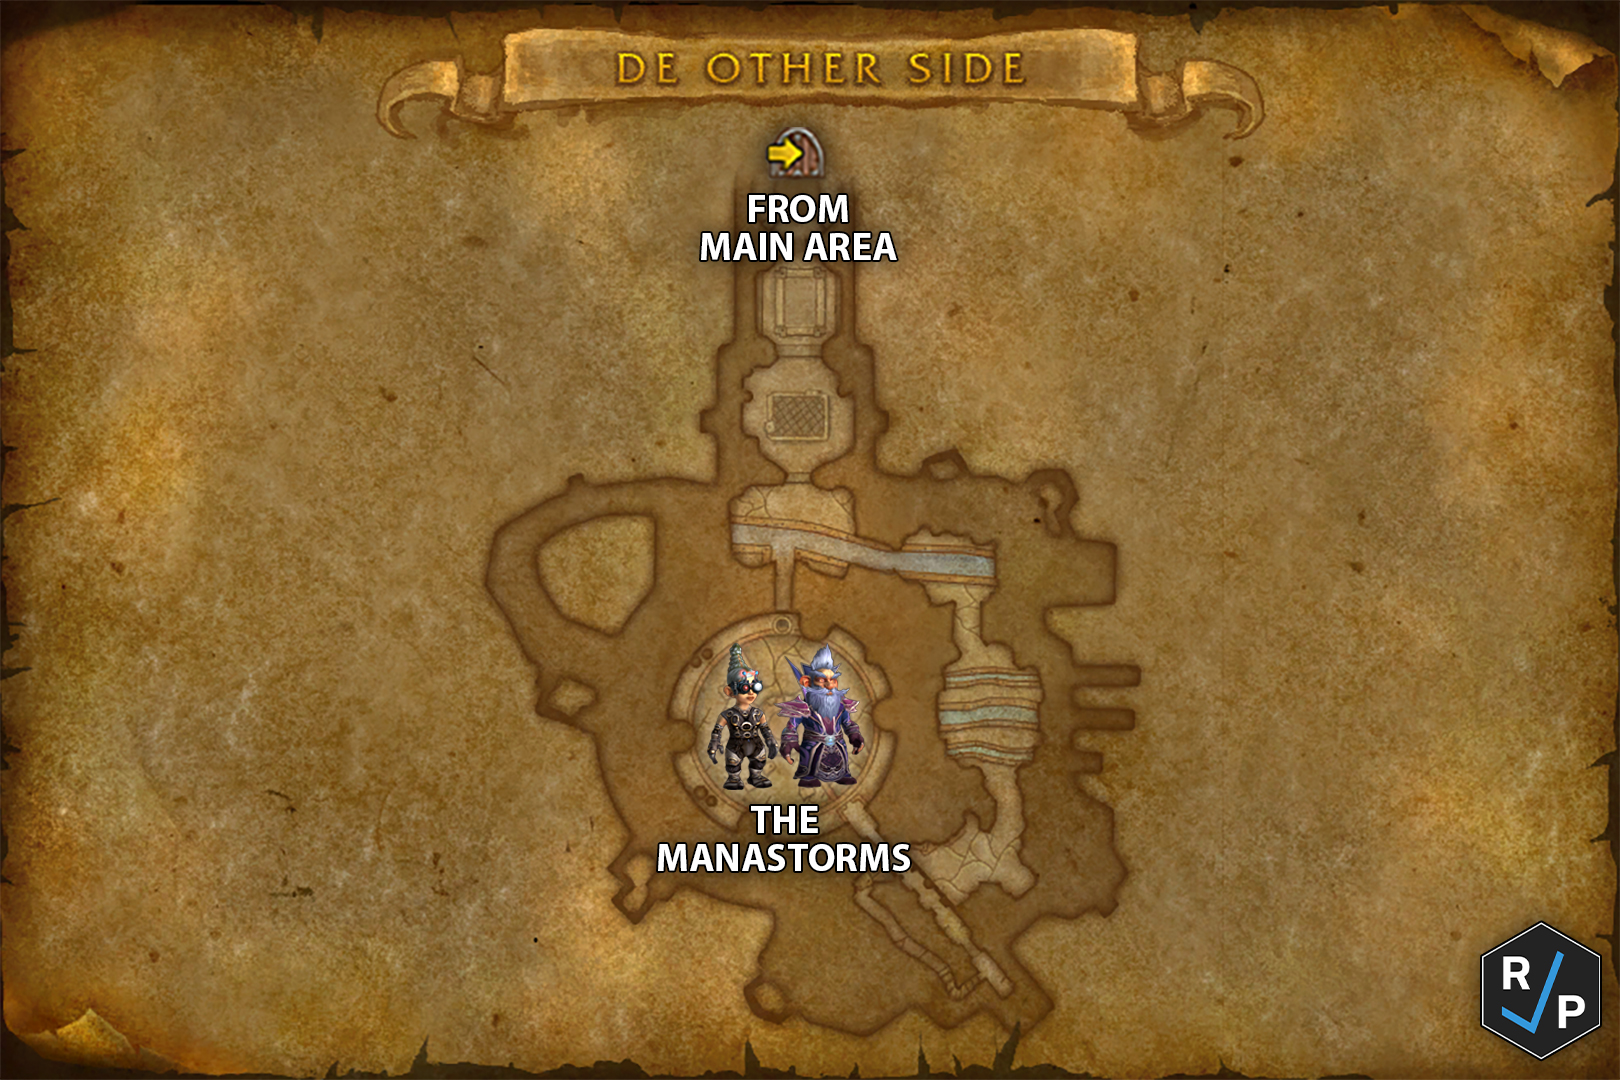
3.2.
The Manastorms
- Start out attacking Millhouse. Millificent jumps up to her platform and becomes unattackable.
- Interrupt
 Frostbolt and intercept the purple beam from each crystal that
spawns. The beam does stacking damage to the intercepting player, but also gives
them a stacking damage buff (
Frostbolt and intercept the purple beam from each crystal that
spawns. The beam does stacking damage to the intercepting player, but also gives
them a stacking damage buff ( Power Overwhelming).
 - The bosses will occasionally swap places with each other.
- Millificent will release walking bombs that need to be disarmed by right-clicking
them. Otherwise they explode at the end of their timer (
 Experimental Squirrel Bomb).
 - Each boss is defeated at 10% health.
- On Mythic, while fighting Millhouse, two players will get red arrows
on their head. They need to position themselves so that the boss is between the players,
in order for the
 Echo Finger Laser X-treme to hit Millhouse and stun him.
While fighting Millificent, the player that gets a purple circle around them should
position themselves so that Millificent is in the circle, in order for the
Echo Finger Laser X-treme to hit Millhouse and stun him.
While fighting Millificent, the player that gets a purple circle around them should
position themselves so that Millificent is in the circle, in order for the  Shadowfury
to hit Millificent and stun her.
Shadowfury
to hit Millificent and stun her.
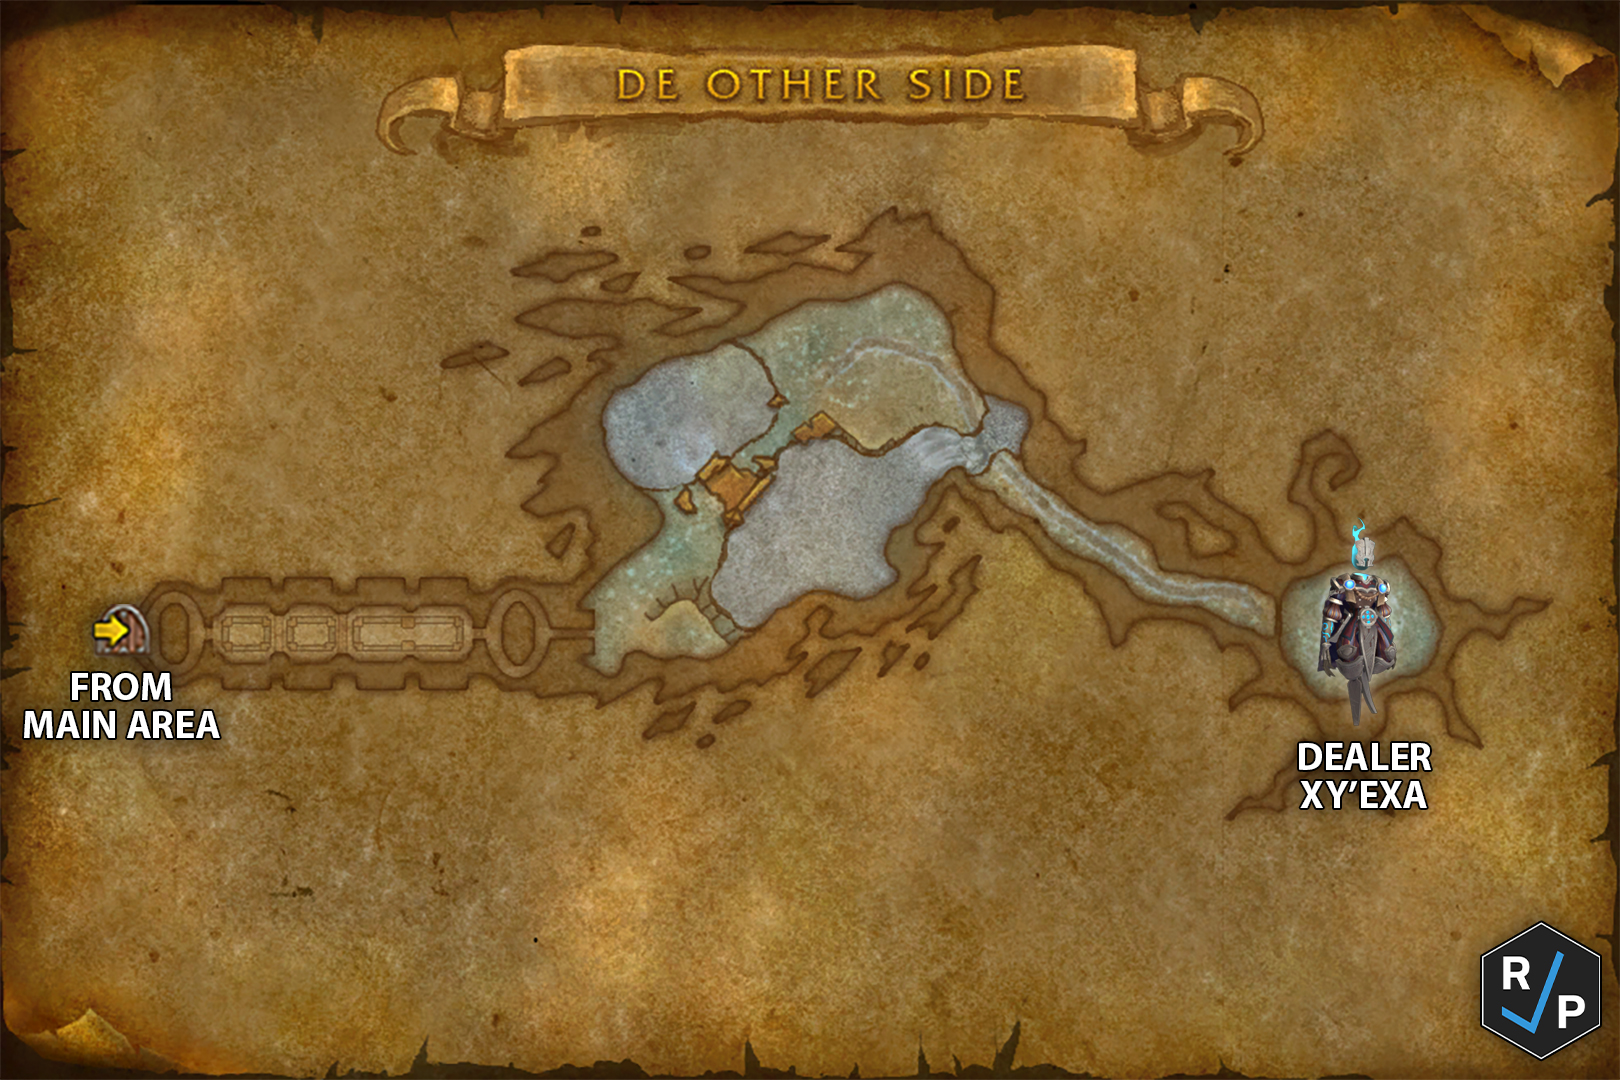
3.3.
Dealer Xy'exa
- Avoid stepping in the swirly white traps (
 Displacement Trap). They knock
you high into the air, and you will need them for other mechanics.
Displacement Trap). They knock
you high into the air, and you will need them for other mechanics. - Quickly dodge white lazers that come from random directions (
 Displaced Blastwave).
 - Occasionally, a random player will get a bomb timer above their head (
 Explosive Contrivance).
That player needs to step on a trap toward the end of the timer. If done correctly,
no one else will take damage from the bomb.
Explosive Contrivance).
That player needs to step on a trap toward the end of the timer. If done correctly,
no one else will take damage from the bomb. - The boss also occasionally casts the same bomb on itself. Every player will need to step on a trap toward the end of the cast, so that it explodes underneath everyone and no one takes damage from it.
- On Mythic, a DoT debuff,
 Arcane Lightning, goes on a random player
and switches to the next closest player every 9 seconds. Try not to put this on the
same player repeatedly, because it applies a stacking damage taken increase.
Arcane Lightning, goes on a random player
and switches to the next closest player every 9 seconds. Try not to put this on the
same player repeatedly, because it applies a stacking damage taken increase.
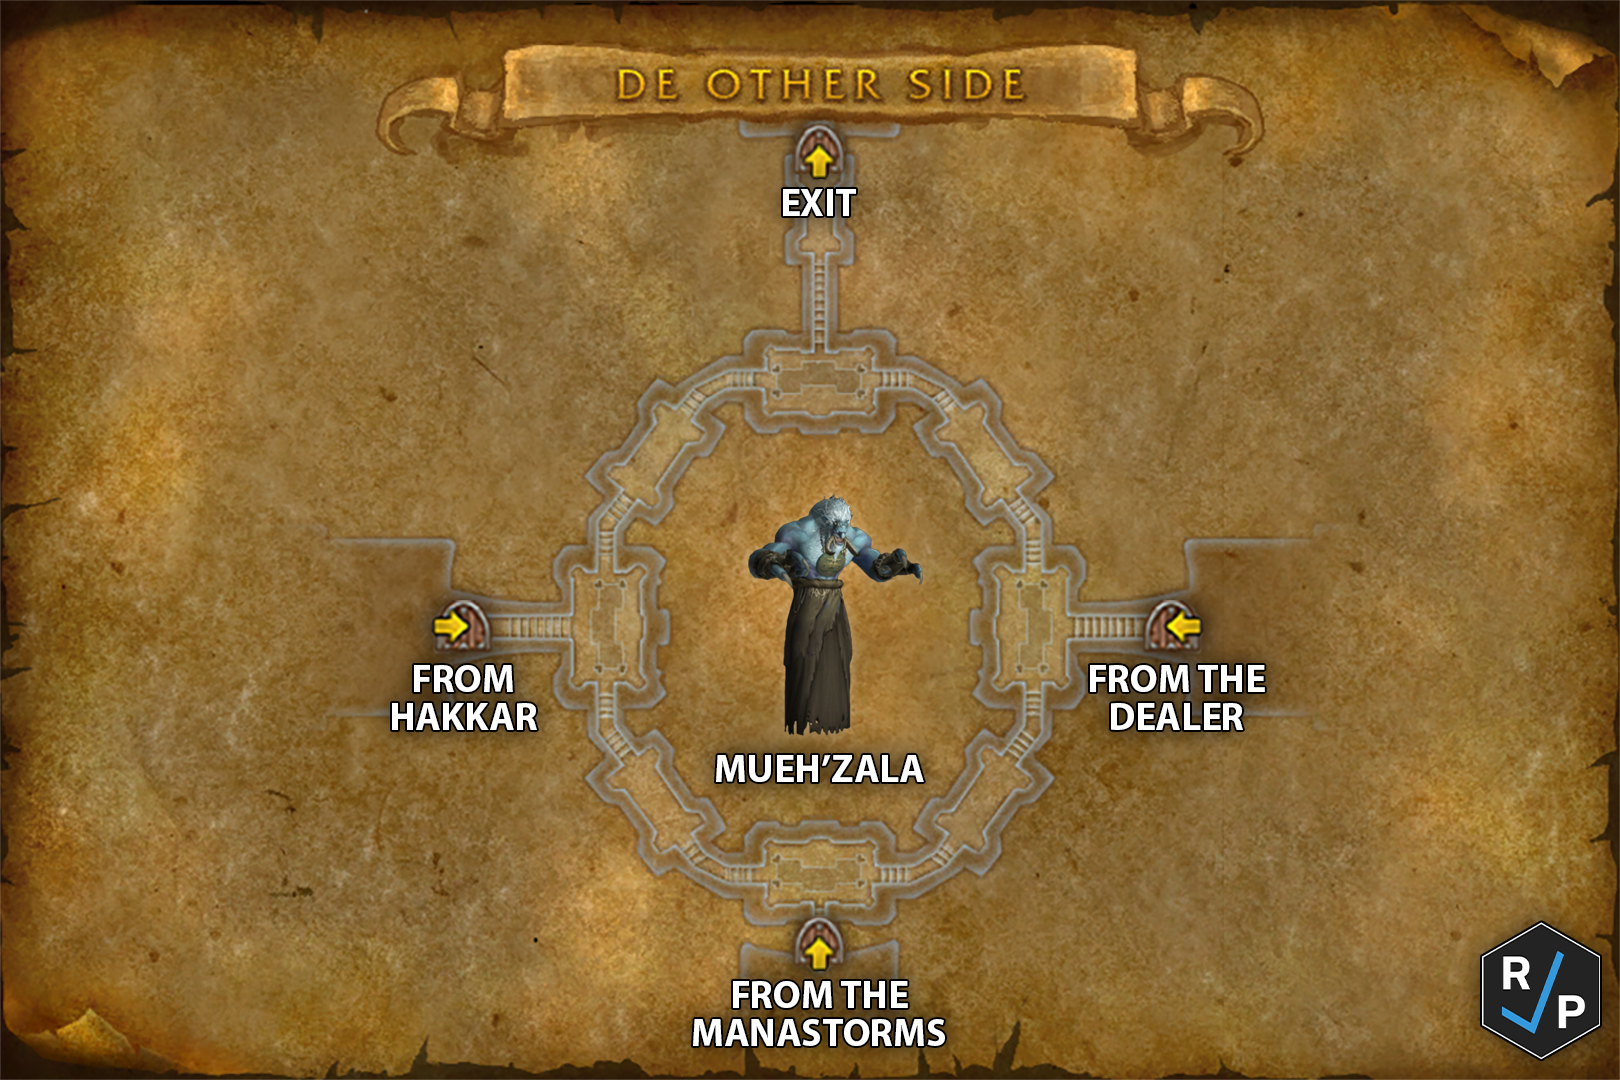
3.4.
Mueh'zala
- Before starting the boss, assign two DPS to go to the front-left portal and the rest of the group to go to the front-right portal for later on in the fight.
- Make sure the tank is always in melee range of the boss when it is not casting.
- The boss will regularly put a debuff on two players (
 Cosmic Artifice).
The healer should quickly dispel one of these debuffs and let the other one expire
on its own. This will stagger the AoE party damage from each debuff expiring.
Cosmic Artifice).
The healer should quickly dispel one of these debuffs and let the other one expire
on its own. This will stagger the AoE party damage from each debuff expiring. - Avoid the purple circles on the ground (
 Cosmic Collapse)
 - When the boss starts casting
 Master of Death, look at his arms to know
if you need to dodge left, right, or backwards. He always does a combination of
three attacks. If you get hit by any of these attacks, you take a ton of damage and
get a really bad DoT debuff.
Master of Death, look at his arms to know
if you need to dodge left, right, or backwards. He always does a combination of
three attacks. If you get hit by any of these attacks, you take a ton of damage and
get a really bad DoT debuff. - When the boss starts casting
 Shatter Reality, green spell effects will
cover your screen. This is when you will need to quickly go to your assigned side
and run into the green portal. Each side will need to kill an add while dodging
purple circles, and then right-click the nearby totem once the add is dead.
Shatter Reality, green spell effects will
cover your screen. This is when you will need to quickly go to your assigned side
and run into the green portal. Each side will need to kill an add while dodging
purple circles, and then right-click the nearby totem once the add is dead. - The boss will then pull everyone to him, and Bwonsamdi will damage him for 20% of his health for each totem that was clicked. If done correctly, you will only have to go through the portals twice. You will only have to do 10% of the boss's health yourself, because he is defeated at 10% health remaining and Bwonsamdi does 80% of his health via the totems.
4.
Notable Trash
4.1.
In the Main Area
- Risen Warlord
- Quickly remove the enrage this mob casts on itself if capable. It gains double
damage and is unable to die during the enrage (
 Undying Rage).
- Quickly remove the enrage this mob casts on itself if capable. It gains double
damage and is unable to die during the enrage (
- Death Speaker
- Do not worry about interrupting
 Shadowcore. Interrupt
  Death's Embrace
when possible, because it gives another mob 100% Haste.
Death's Embrace
when possible, because it gives another mob 100% Haste. - Dodge the frontal blast from
 Erupting Darkness.
- Do not worry about interrupting
4.2.
In Hakkar's Area
- Atal'ai Devoted
- Focus kill and stun/CC these mobs quickly, or else they will turn into a "Son of Hakkar" add that does a ton of AoE damage.
- Atal'ai Deathwalker
- Quickly move away from their
 Bladestorm channel.
 - When these mobs die, they turn into an untankable spirit that will slowly move toward and attack the player that is doing the most healing (probably the healer). The spirit will despawn after a few seconds.
- Quickly move away from their
4.3.
In The Manastorms' Area
- Defunct Dental Drill
- Quickly line-of-sight the
 Haywire cast.
- Quickly line-of-sight the
- Headless Client
- When these mobs start their
 Spinning Up channel, everyone but the tank
should quickly move away from them. This cast does AoE damage to nearby players,
but they will bounce off of the tank and stop the channel after a couple hits.
Alternatively, they can be stunned/CC'ed to stop the channel.
Spinning Up channel, everyone but the tank
should quickly move away from them. This cast does AoE damage to nearby players,
but they will bounce off of the tank and stop the channel after a couple hits.
Alternatively, they can be stunned/CC'ed to stop the channel.
- When these mobs start their
- Volatile Memory
- These mobs explode while moving after a short cast, so make sure they are
slowed/rooted and get away from them (
 Volatile Capacitor).
- These mobs explode while moving after a short cast, so make sure they are
slowed/rooted and get away from them (
4.4.
In the Dealer's Area
- Weald Shimmermoth
- Quickly move away from their
 Soporific Shimmerdust cast. If you get
hit by it, you get a debuff that makes it so you have to keep jumping to avoid falling
asleep. This debuff can also be decursed.
Soporific Shimmerdust cast. If you get
hit by it, you get a debuff that makes it so you have to keep jumping to avoid falling
asleep. This debuff can also be decursed.
- Quickly move away from their
5.
Changelog
- 26 Nov. 2020: Added Mythic mechanics and updated the guide for the release of Shadowlands.
- 13 Jul. 2020: Guide added.
Show more
Show less