

Warmaster Blackhorn DPS Strategy Guide (Heroic Mode included)

Introduction
This guide is intended to provide a comprehensive description of the encounter with Warmaster Blackhorn in Dragon Soul. It is mostly targeted to DPS who desire to have a short but detailed overview of what is expected of them during that fight.
This guide is updated for World of Warcraft WoD 6.1.2.
The Warmaster Blackhorn encounter is a two-phase fight during which you will have to deal with many types of adds, before finally performing a DPS burn against Backhorn himself. The encounter is very reminiscent of the Gunship Battle from Icecrown Citadel, although much more difficult.
DPS players will have to properly prioritise targets, while avoiding various abilities and performing a variety of different tasks.
Overview of the Fight
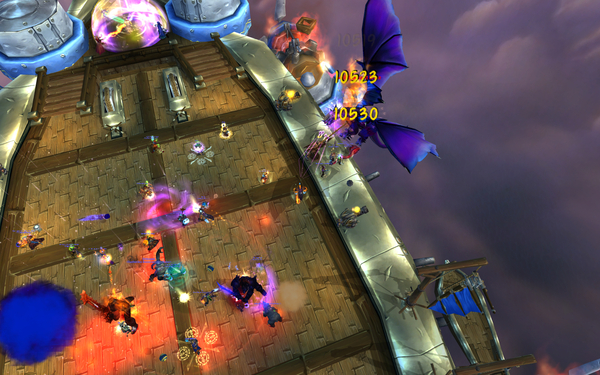
The Warmaster Blackhorn encounter takes place on a flying gunship. The ship has a health pool and can be damaged by various abilities during the encounter. Aside from defeating Warmaster Blackhorn, you will also have to ensure the survival of your ship, if you wish to succeed in this encounter.
The encounter is a two phase fight. During the first phase, your raid will mainly have to deal with 4 different types of adds (3 types of adds in LFR). You will also have to watch out for many void zones in which you must stand in order to protect the gunship. If 3 waves of adds are dealt with successfully, the second phase will begin. During this phase, your raid will have to deal with Warmaster Blackhorn himself.
| Phase One | Phase Two |
|---|---|
|

|
Phase One
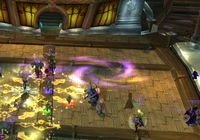
During Phase one, the raid will be spread out all over the ship and you will have to perform a few simple tasks, given below, in order of priority.
-
 Move into the large swirling void zones created by
  Twilight Onslaught, in
order to soak the damage from the impact. Move out immediately afterwards.
Twilight Onslaught, in
order to soak the damage from the impact. Move out immediately afterwards. - DPS the Twilight Sappers as soon as they land (does not apply in LFR, where these adds do not exist).
- DPS the Twilight Assault Drakes when they are close to the ship (NPCs will harpoon and reel them in regularly).
- Move into the small swirling void zones created by
 Twilight Barrage, in order
to soak the damage from the impact. Keep in mind that there should be at least
two people in each Twilight Barrage void zone for the damage not to be
fatal.
Twilight Barrage, in order
to soak the damage from the impact. Keep in mind that there should be at least
two people in each Twilight Barrage void zone for the damage not to be
fatal. - DPS the Twilight Elite Slayers and Twilight Elite Dreadblades.

Phase Two
Phase Two begins as soon as all the Twilight Assault Drakes have been killed. During this phase, the strategy can be summarised as follows.
-
 DPS Goriona to 25% health (melee players should skip this step, as
she is out of their range);
DPS Goriona to 25% health (melee players should skip this step, as
she is out of their range); - DPS Warmaster Blackhorn, while dealing with the following mechanics:
- avoid the large purple void zones that Goriona lays on the ground;
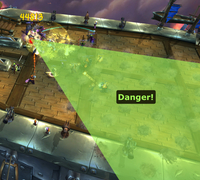
- move away from the area that the boss will cast
 Shockwave
in (he faces a random player, and the conic area is marked by a clearly
visible ground effect for a few seconds prior to the damage);
Shockwave
in (he faces a random player, and the conic area is marked by a clearly
visible ground effect for a few seconds prior to the damage); - casters stay out of a 10 yard range of Blackhorn to avoid an interrupt and silence effect.

Moving out of the Shockwave area is easier the closer you are to the boss, so attempt to stay as close to him as possible. There is no requirement to be spread out during this phase.
Heroic Mode
As a DPS player, the heroic mode of Warmaster Blackhorn is very similar to the normal mode, with only a few relevant changes.
Differences from Normal Mode
In addition to increased health and damage, the following changes are of importance to you:
- During Phase One, parts of the ship's deck will be randomly covered in fire. Simply move out of the fire. The fires will progressively be put out by NPCs, freeing up space.
- Taking damage from a Twilight Barrage (small void zone) will leave a
debuff on you for 15 seconds, that increases the Shadow damage you take by
50%.
- During Phase Two, when Goriona reaches 80% health she lands and must be tanked and DPSed down. At 20% health, she flies away.
Strategy
Phase One
During Phase One, you only have two added concerns:
- Stay out of the fires on the deck of the ship;
- Make sure that, while soaking damage from Twilight Barrage, you do
not have the Shadow damage increasing debuff.
Because the number of Twilight Barrages is affected by how many Twilight Assault Drakes are currently alive, the Drakes have a high kill priority, and you should switch to them each time they are harpooned (even if you are a melee DPS player).
If you are a ranged DPS player, you can move to the very top of the ship at the start of the fight (by climbing up the stairs next to the ship's cabin) and from there you can nuke and DoT the Twilight Assault Drake that is in range.
Additionally, you can also attack and DoT Goriona (although you should focus on the Twilight Assault Drake until it is dead).
Phase Two
During Phase Two, simply do as in normal mode (melee DPS on Blackhorn, ranged DPS on Goriona) until Goriona lands. After Goriona lands, burn her down. She has a breath attack and will be tanked facing away from the raid.
After Goriona flies away, simply focus on finishing off Warmaster Blackhorn.
Lastly, it is likely that you will be asked to stack together in a group during Phase Two, in order to more efficiently be healed through one of Goriona's heroic-only abilities (which is, otherwise, of no concern to you). Pay attention to your raid leader's instructions.