

Brackenhide Hollow Dungeon Guide: Location, Boss Strategies, Trash, and Loot
Welcome to our guide to the Brackenhide Hollow dungeon in the Dragonflight World of Warcraft expansion. This guide will cover everything you need to know about the dungeon, including how to get to it, its layout, the trash and boss mechanics within, and its loot.
Getting into Brackenhide Hollow
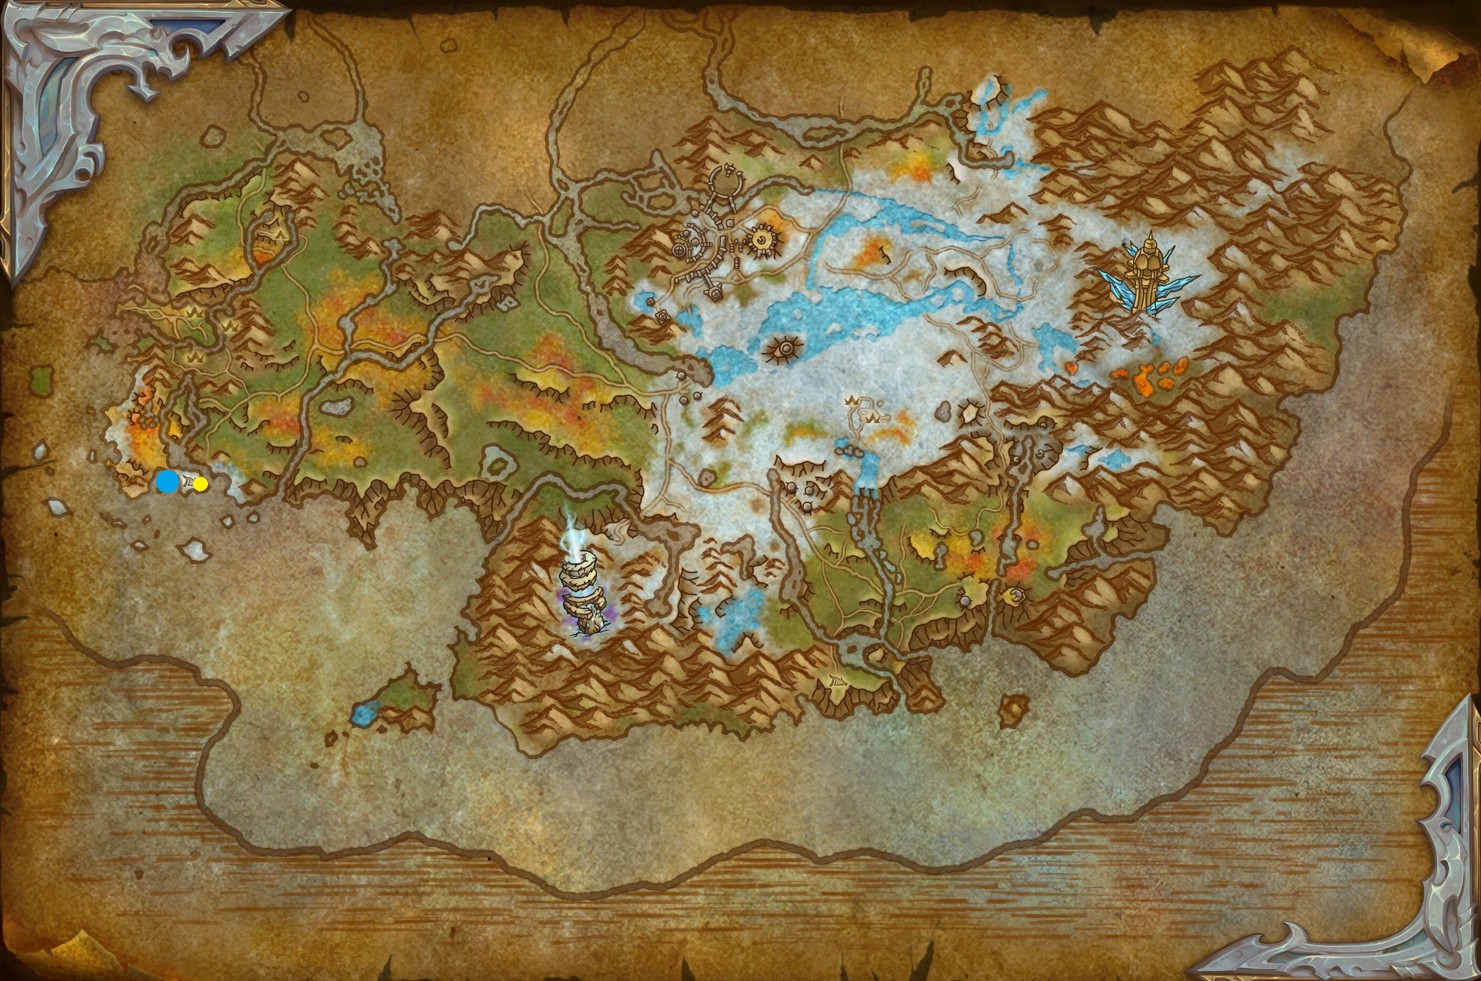
Brackenhide Hollow is a max-level dungeon in the The Azure Span zone on the Dragon Isles. The nearest flight point for Alliance and Horde players is Iskaara, Azure Span, just a few feet from the dungeon.
This guide will focus on an extensive overview of the dungeon, providing vital information
to complete it across all difficulties (Normal, ![]() Heroic,
and
Heroic,
and ![]() Mythic). We will cover all 4 boss fights supported by the most
notable trash enemies in the
dungeon and their important abilities. If you would like to learn about the other
Dragonflight Dungeons or the upcoming Mythic+ season instead, please see our
overviews linked below. Otherwise, without further ado, let us begin!
Mythic). We will cover all 4 boss fights supported by the most
notable trash enemies in the
dungeon and their important abilities. If you would like to learn about the other
Dragonflight Dungeons or the upcoming Mythic+ season instead, please see our
overviews linked below. Otherwise, without further ado, let us begin!
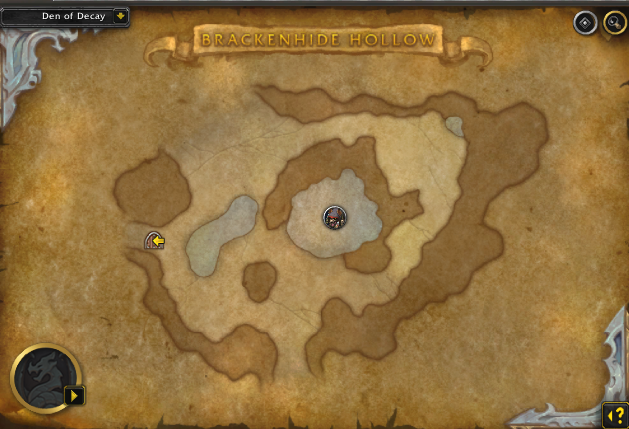
Brackenhide Hollow Layout

Unlock Unique Bonuses in Brackenhide Hollow
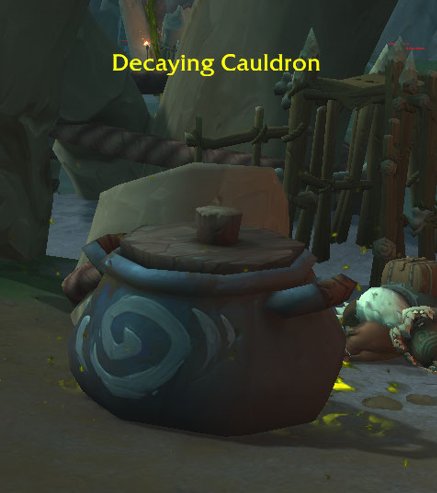 Throughout the entire dungeon, you will find several locations where
Decaying Cauldron is present. In order to activate it,
one of your party members must have at least 25 skill
in Dragon Isles Alchemy.
Below you can find more details on how to make the best use of it:
Throughout the entire dungeon, you will find several locations where
Decaying Cauldron is present. In order to activate it,
one of your party members must have at least 25 skill
in Dragon Isles Alchemy.
Below you can find more details on how to make the best use of it:
- Once you activate the Decaying Cauldron, you and each
of your party members can collect their
 Cleansed Rot
brew that can be used to clear one
Cleansed Rot
brew that can be used to clear one  Disease of
your choice (using the extra action button to trigger it).
Disease of
your choice (using the extra action button to trigger it). - Upon consumption, the Cleansed Rot will disappear
and the only way to get it again is if you get back to the
Decaying Cauldron and collect it.
- Luckily, there are several locations where you can obtain the brew spread across the entire map of Brackenhide Hollow!
Lost Kanniak and Hackclaw's War-Band
Notable Trash Before Hackclaw's War-Band
Before we continue with the further details of the trash enemies in this dungeon, we have to mention that there is an extensive event that must be completed to be able to summon the first boss, Hackclaw's War-Band. The event consists of freeing 5 Tuskarr located in Meat Storage cages around the Lost Kanniak area. You can choose which cages to open and design your route and how it suits your taste. Just know that whichever cage you open is surrounded by packs of angry gnolls! Here is what you should know about them and their abilities:
- Claw Fighter will fixate on random players with
 Vicious Clawmangle,
in which case you can use crowd-control spells to stop it, kite them away or use combat-reset
abilities to cancel the cast (such as a Rogue's
Vicious Clawmangle,
in which case you can use crowd-control spells to stop it, kite them away or use combat-reset
abilities to cancel the cast (such as a Rogue's  Vanish, for example).
 - Bonecrusher has only to worry
 Crushing Smash and it usually
targets your tank, slowing their movement speed by 30% for 12 sec.
Crushing Smash and it usually
targets your tank, slowing their movement speed by 30% for 12 sec. - ViciousHyena will reduce your tank's healing intake with its
 Infected Bite cast. This, in combination with the rest of the
"tank-buster" mobs, will make them difficult to heal, so watch out!
Infected Bite cast. This, in combination with the rest of the
"tank-buster" mobs, will make them difficult to heal, so watch out! - Bonebolt Hunter will be one of the higher-priority targets not only
because of its unavoidable
 Shoot damage on random targets but also
because of its
Shoot damage on random targets but also
because of its  Bone Bolt, dealing great initial damage to a random
player and leaving a tough
Bone Bolt, dealing great initial damage to a random
player and leaving a tough  Bleed effect afterward. Avoid triggering its
 Toxic Trap at all costs.
 - Interrupt TrickclawMystic's
 Earth Bolt.
 - Decay Speaker are the highest-priority target in the first area
of the dungeon due to its extremely dangerous
 Withering Burst cast,
which applies a follow-up Disease effect. Any spare kick should go on the
a single-target high damage
Withering Burst cast,
which applies a follow-up Disease effect. Any spare kick should go on the
a single-target high damage  Decay Surge as it is not as important.
 - Speaking about high-alert mobs, I would advise to be cautious when pulling
Bracken Warscourge with many mobs due to its
 Pack Tactics aura.
Interrupt
Pack Tactics aura.
Interrupt  Hideous Cackle at all costs, as the AoE fear effect will send
you shrieking in fear for a short period of time, which is likely to result in a wipe.
In addition, step out of their
Hideous Cackle at all costs, as the AoE fear effect will send
you shrieking in fear for a short period of time, which is likely to result in a wipe.
In addition, step out of their  Ragestorm and do not ever stay in it.
Hackclaw's War-Band Boss Guide
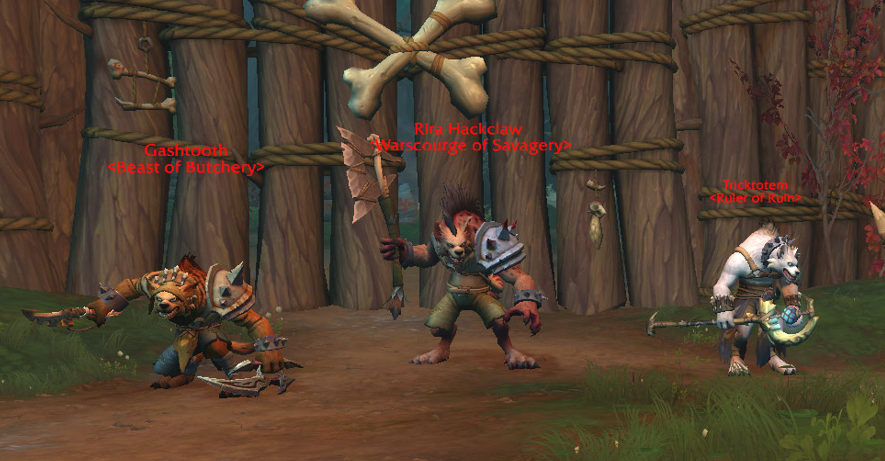
You will be simultaneously fighting the 3 chief gnolls, Rira Hackclaw, Gashtooth, and Tricktotem, each of them having unique abilities under their belt. Here is a more detailed breakdown of the boss fight:
All Roles
-
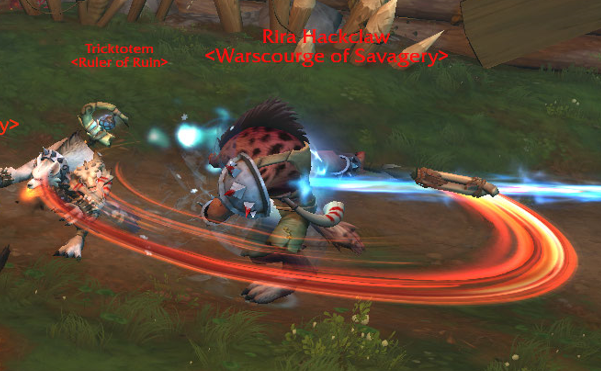 Avoid being hit by Rira Hackclaw's
  Bladestorm; she will
be slowed by 70% during the cast, which will make dodging much easier.
Bladestorm; she will
be slowed by 70% during the cast, which will make dodging much easier. - Interrupt
 Greater Healing Rapids at all costs to prevent the bosses
from healing.
Greater Healing Rapids at all costs to prevent the bosses
from healing. - Any spare interrupts should go towards Earth Bolt casts.
- Beware of
 Bloodfrenzy; if one of the gnolls drops below
15% health, this will automatically trigger. You want to cleave them
equally until they are all at 15% HP to prevent increasing the fight's difficulty.
Another strategy here is to just zerg the Tricktotem caster, this way
you don't have to deal with interrupts, which can be a better strategy if you play with classes
that have a long cooldown on their stops.
Bloodfrenzy; if one of the gnolls drops below
15% health, this will automatically trigger. You want to cleave them
equally until they are all at 15% HP to prevent increasing the fight's difficulty.
Another strategy here is to just zerg the Tricktotem caster, this way
you don't have to deal with interrupts, which can be a better strategy if you play with classes
that have a long cooldown on their stops. - Quickly nuke the
 Hextrick Totem to prevent your teammates from
being
Hextrick Totem to prevent your teammates from
being  Hextricked.

Tank
- Be careful of how you position Rira Hackclaw, since her auto
attacks
 Cleave all players in front of her within an 8-yard cone.
 - Periodically, Rira Hackclaw will charge a random member of your
party with
 Savage Charge. It is your responsibility to stay in front of
the charge and soak the damage incoming damage, or else they will die.
Unless your party member specifically instructs you not to do it because they have an
immunity available, you should pay attention to this cast at all costs!
Savage Charge. It is your responsibility to stay in front of
the charge and soak the damage incoming damage, or else they will die.
Unless your party member specifically instructs you not to do it because they have an
immunity available, you should pay attention to this cast at all costs!
Healer
- Gashtooth will occasionally cast
 Gash Frenzy, shadowstepping
behind every player and applying a Bleed effect for 15 sec, which
you can remove if you heal your teammates above 90% health!
Gash Frenzy, shadowstepping
behind every player and applying a Bleed effect for 15 sec, which
you can remove if you heal your teammates above 90% health! - Gashtooth will additionally cast
 Marked for Butchery
on one player; use your external defensive cooldowns
on them and spot-heal!
Marked for Butchery
on one player; use your external defensive cooldowns
on them and spot-heal! - Dispel Gashtooth's
 Decayed Senses as quickly as you can
to prevent your team member from being crowd-controlled for 15 sec.
Decayed Senses as quickly as you can
to prevent your team member from being crowd-controlled for 15 sec. - During the entire boss fight, there will be a
 Prey on the Weak aura
that will empower each boss with the
Prey on the Weak aura
that will empower each boss with the  Predatory Instincts stackable
buff based on their missing health. It is your duty to keep everyone above
90% health at all times!
Predatory Instincts stackable
buff based on their missing health. It is your duty to keep everyone above
90% health at all times!
Gutshot Overlook and Gutshot
Notable Trash Before Gutshot
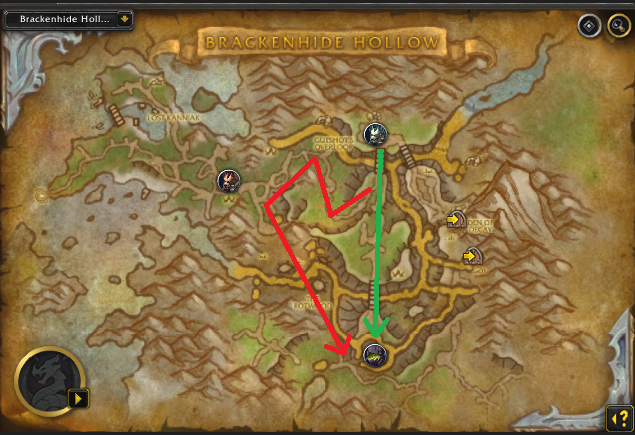
Once you have defeated Hackclaw's War-Band, the gate in front of you will open, leaving you with the choice of either going left toward Gutshot or going right toward Treemouth. Although a much common strategy is to go right side, for the sake of the guide, we will display all of the mobs that you will face should you go to the left side (much more dangerous). Here is what you should know on the way there:
- Fleshripper Vulture is the first trash mob you will be facing.
The only ability to watch out for is
 Screech; interrupt it as soon as
it casts it.
Screech; interrupt it as soon as
it casts it. - Gutchewer Bear has slightly more health, with the only important
ability being
 Maul
Maul - For several reasons, Rotbow Ranger will be the hardest mob in this area. First, they will have Pack Tactics aura buff that will empower
all the enemies around them, followed by its Shoot and Bone Bolt
abilities that can go on a random target from your party. Avoid their
Bone Bolt Volley frontal damage (it has a 40-yard range so you
have to side-step it rather than out-range it). Finally, this mob will empower
nearby Fleshripper Vultures and ViciousHyenas with
 Rotten Meat to chase one random member of your party. Help your
teammates with stuns, slows, and other disruption effects to prevent them from
facing certain death.
Rotten Meat to chase one random member of your party. Help your
teammates with stuns, slows, and other disruption effects to prevent them from
facing certain death.
As soon as you pass the first "room," more terrain will appear only to have the already-known Bracken Warscourge. It is a trap! There will be 6 stealthed Gutstabbers that will ambush you.
Gutshot Boss Guide
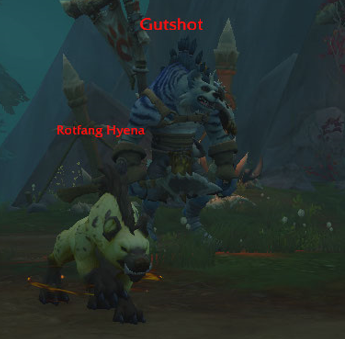
Right from the beginning of the boss fight Gutshot will have
2 Rotfang Hyenas next to her. They will attack only the
tank until Gutshot casts ![]() Meat Toss. Your highest priority
is to defeat them before she casts
Meat Toss. Your highest priority
is to defeat them before she casts ![]() Call Hyenas again, calling 2 more
of them. Finally, the boss has a
Call Hyenas again, calling 2 more
of them. Finally, the boss has a ![]() Huntleader's Tactics aura, further
empowering both Rotfang Hyenas, another reason why you should kill them
before the new ones are going to spawn, just make sure you do not lose out on too much
boss damage. Below you can find more information about the boss fight:
Huntleader's Tactics aura, further
empowering both Rotfang Hyenas, another reason why you should kill them
before the new ones are going to spawn, just make sure you do not lose out on too much
boss damage. Below you can find more information about the boss fight:
All Roles
- Cleave any existing Rotfang Hyenas while focusing the boss. Make sure,
they are dead before the new set of Rotfang Hyenas spawn.
They will attack the target debuffed by
 Meat Toss.
 - Speaking about Meat Toss, it will be cast on a random target
making them Smell Like Meat. Kite away from the Rotfang Hyenas
and never let them catch you.
- The Rotfang Hyenas will gain the
 Feeding Frenzy
 Enrage effect and, upon inflicting damage, will also apply a Bleed
effect from their
Enrage effect and, upon inflicting damage, will also apply a Bleed
effect from their  Crippling Bite ability.
 - You should watch out for their
 Bounding Leap ground animation;
it does massive damage and stuns you if you get caught in it!
Bounding Leap ground animation;
it does massive damage and stuns you if you get caught in it! -
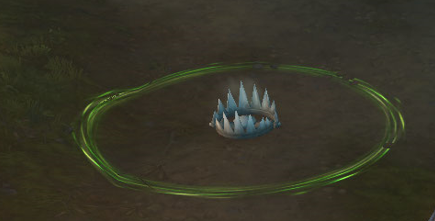 Dodge the
  Ensnaring Trap on the ground. Note that you can kite the
existing Rotfang Hyenas into them!. Upon the trap being
triggered for the first time, it will rearm itself after
5.2 seconds!
Ensnaring Trap on the ground. Note that you can kite the
existing Rotfang Hyenas into them!. Upon the trap being
triggered for the first time, it will rearm itself after
5.2 seconds! - Gutshot will periodically cast
 Master's Call, if it goes through,
it will free any Rotfang Hyenas from Ensnaring Trap and give them
15% movement speed for 5 sec. Once you see the boss casting it
it is extremely important to interrupt it.
Master's Call, if it goes through,
it will free any Rotfang Hyenas from Ensnaring Trap and give them
15% movement speed for 5 sec. Once you see the boss casting it
it is extremely important to interrupt it.

Tank
- Kite the Rotfang Hyena into the Ensnaring Traps, if they
do, are not chasing anyone with a Smell Like Meat debuff on them.
- Beware of the
 Gut Shot ability. It deals great damage and knocks you back,
so be careful not to be caught in one of the Ensnaring Traps on the ground!
Gut Shot ability. It deals great damage and knocks you back,
so be careful not to be caught in one of the Ensnaring Traps on the ground!
Healer
- Focus on healing your teammates if they get caught by one of the Rotfang Hyenas; do your best to keep them away from your party!
Once you defeat Gutshot, this will be your new spawn point if you end up dying!
The Rotwood and Treemouth
Notable Trash Before Treemouth
A few new non-boss-enemies are on the path heading toward Treemouth, and the distance is relatively short if you do head left upon defeating Gutshot. Now keep in mind, if you decided to go from the right side through the river after defeating Hackclaw's War-Band, there are a few unique non-boss-enemies. Here is more about it:
Stinkbreath is the only "mini-boss" in this dungeon and he has has several abilities to watch out for:
 Violent Whirlwind will deal Physical damage to all
enemies within 6 yards and knock them back; get away from it
immediately!
Violent Whirlwind will deal Physical damage to all
enemies within 6 yards and knock them back; get away from it
immediately!- He will occasionally cast Stinkbreath; if you are caught
in the frontal ability, you will become Disoriented for
4 seconds so watch out!
If you choose the right path, here is what you should know about the trash mobs there:
- Interrupt Brackenhide Shaper's
 Infuse Corruption.
 - Watch out for Infected Lashers as they will randomly melee you
and apply a stackable Bleed effect -
 Bleeding.
 -
6.2.
Treemouth Boss Guide
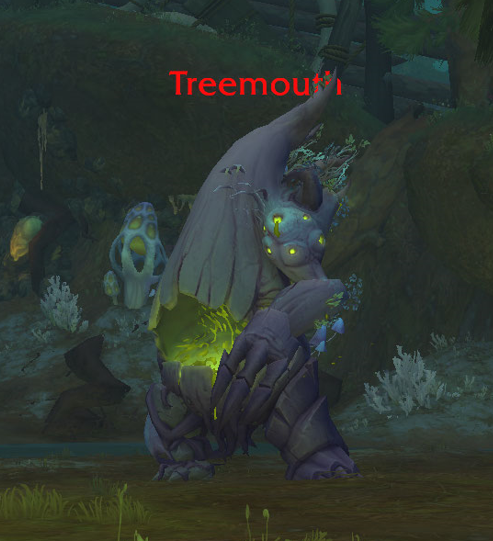
Treemouth will periodically regenerate its Energy. Upon reaching 100 Energy, it will cast
 Grasping Vines, dragging
all players towards it for 4 sec. There are
several more abilities to watch out for in the fight:6.2.1.
Grasping Vines, dragging
all players towards it for 4 sec. There are
several more abilities to watch out for in the fight:6.2.1.All Roles
- Dodge the
 Decay Spray frontal ability.
 -
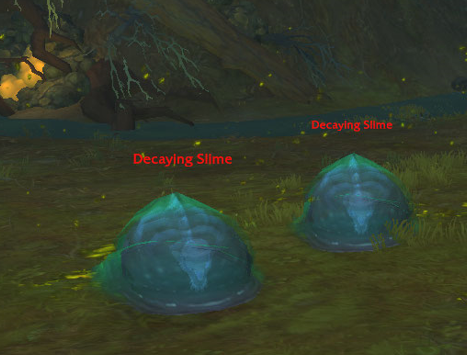 Immediately after Decay Spray, Treemouth will
spawn 4 Decaying Slimes that will cast
Immediately after Decay Spray, Treemouth will
spawn 4 Decaying Slimes that will cast  Gushing Ooze;
use your interrupts to stop them!
Gushing Ooze;
use your interrupts to stop them! - Upon defeating Decaying Slime they will cast
 Burst, dealing damage to any players within 5 yards and
leaving a pool of decay on the ground for 30 seconds.
Standing in the pool will damage you due to
Burst, dealing damage to any players within 5 yards and
leaving a pool of decay on the ground for 30 seconds.
Standing in the pool will damage you due to  Withering Away!, so
you better watch out!
Withering Away!, so
you better watch out! - Once Treemouth begins its Grasping Vines it will
 Consume all players within 10 yards, dealing damage and
creating an absorb shield. A common strategy here is to let the most
durable member from your party (tank) be Consumed or anyone with a
magical immunity. If none of the players is close enough to be Consume
then the boss gets a permanent Enrage through
Consume all players within 10 yards, dealing damage and
creating an absorb shield. A common strategy here is to let the most
durable member from your party (tank) be Consumed or anyone with a
magical immunity. If none of the players is close enough to be Consume
then the boss gets a permanent Enrage through  Starving Frenzy.
 - In addition, be mindful that if the same person gets Consumed twice
in a row due to the
 Partially Digested debuff, it is better to alternate players
and their defensive cooldowns.
Partially Digested debuff, it is better to alternate players
and their defensive cooldowns. - Once you break the shield, the player that was Consumed will be spat out
and continue the fight. Even if you are being Consumed, you can still use
your abilities!
ayers!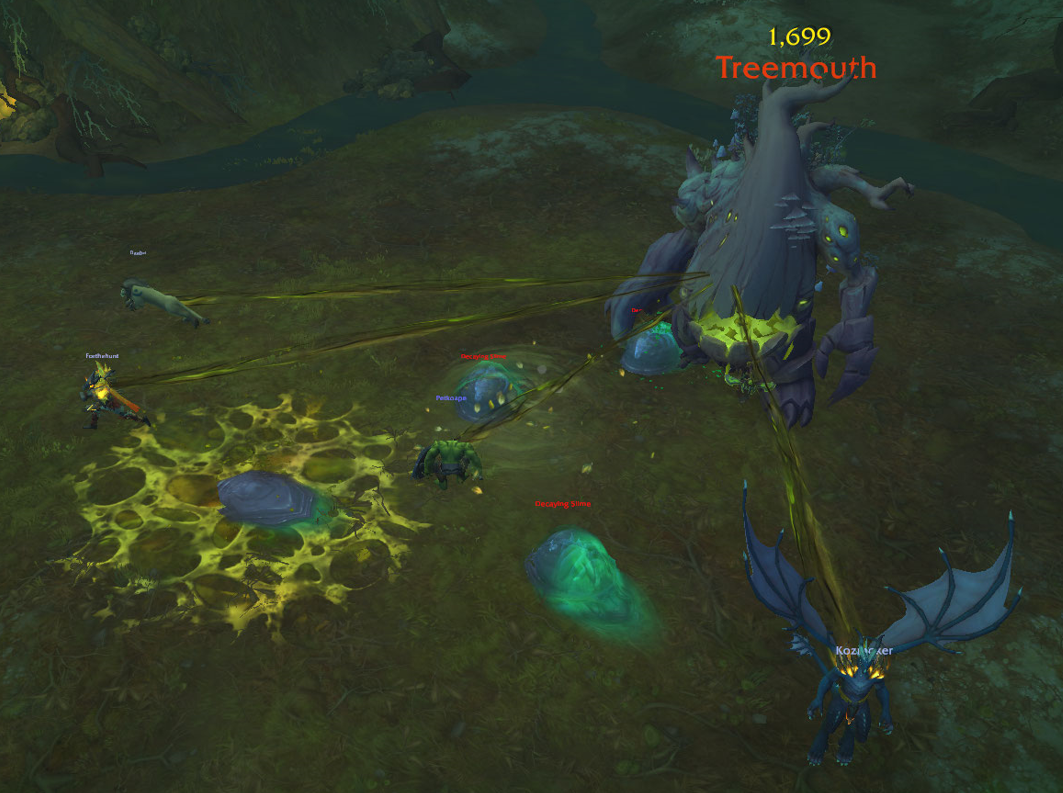
- Dodge the


Tank
 Vine Whip is a frontal ability that will follow your direction
until the end of the cast. Be careful how you aim it; you do not want to
endanger the life of your teammates!
Vine Whip is a frontal ability that will follow your direction
until the end of the cast. Be careful how you aim it; you do not want to
endanger the life of your teammates!
Healer
- Spot-heal the player that is being Consumed!
Den of Decay and Decatriarch Wratheye
Notable Trash Before Decatriarch Wratheye
Once you defeat Treemouth, head to the right, where you will find one of the roads leading toward the Den of Decay, where you will find the last boss of the dungeon, Decatriarch Wratheye. However, there are several trash mobs to watch out for:
- Filth Caller is going to be the first trash mob you have to
deal with. Interrupt its Decay Surge cast and beware of
 Rotting Surge toxins on the ground.
 - Pay attention to Disease Slasher's
 Decay Claws and
 Bloody Bite, as it will endanger the life of your tank!
 - Fetid Rotsinger will be one of the hardest enemies in
this area. They will have the Pack Tactics aura and an important cast
to interrupt called
 Burst of Decay. However, as soon as it
casts
Burst of Decay. However, as soon as it
casts  Summon Totem, swap to the totem and nuke it immediately to prevent
your group from taking the Withering Disease effect.
Summon Totem, swap to the totem and nuke it immediately to prevent
your group from taking the Withering Disease effect. - Vile Rothexer is another caster that spreads Disease
effects. Maintain at least 5 yards of distance between each other to prevent
 Withering Contagion from spreading and do your best to prevent
them from empowering with
Withering Contagion from spreading and do your best to prevent
them from empowering with  Siphon Decay by standing further than
30 yards away before they finish their cast.
Siphon Decay by standing further than
30 yards away before they finish their cast. - Wither Biter will also be included in every pack. Even though
they are non-elite mobs, they can apply Bloody Bite to your
tank!
Decatriarch Wratheye Boss Guide
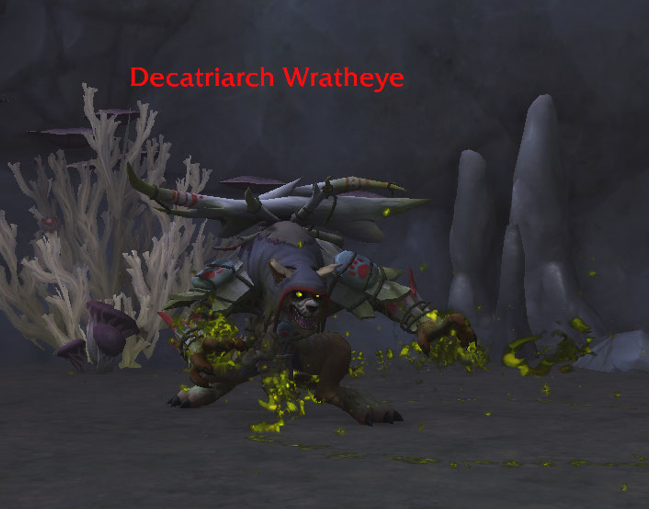
The final boss of the dungeon, Decatriarch Wratheye, will
have Energy as her resource. Upon reaching maximum Energy (100)
she will cast ![]() Decaying Strength, empowering herself and applying
Decaying Strength, empowering herself and applying
![]() Withered Eruption to your entire party. Here is more about the fight:
Withered Eruption to your entire party. Here is more about the fight:
All Roles
-
 Avoid being hit by
  Choking Rotcloud; it will deal damage and
silence you if you stay in the cloud. Getting hit by the cloud
will apply a stackable
Choking Rotcloud; it will deal damage and
silence you if you stay in the cloud. Getting hit by the cloud
will apply a stackable  Withering Rot damage-over-time effect on you,
inflicting damage and reducing your damage done.
Withering Rot damage-over-time effect on you,
inflicting damage and reducing your damage done. - Withering Rot does not expire until Decatriarch Wratheye
absorbs it with
 Decaying Strength or the encounter ends.
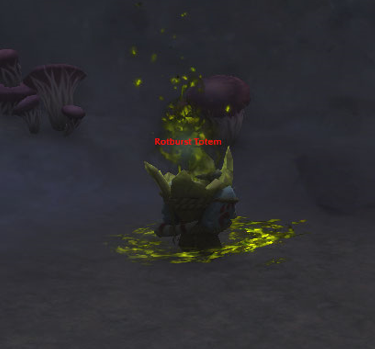
 - Swap to the
 Rotburst Totem as soon as the boss is about to
spawn it, if the cast goes through, your entire party will have
Withering Rot debuff.
Rotburst Totem as soon as the boss is about to
spawn it, if the cast goes through, your entire party will have
Withering Rot debuff. - Once the boss casts Decaying Strength, she will apply
 Withered Eruption
to everyone on your team. The more application of Withering Rot you have,
the larger the size of the effect will be, so make sure to spread accordingly!
Withered Eruption
to everyone on your team. The more application of Withering Rot you have,
the larger the size of the effect will be, so make sure to spread accordingly!

Tank
- Use active mitigation when the boss applies Decaystrike on you.
Be careful; this stacks!
- Move Decatriarch Wratheye close to the Rotburst Totem
to allow your party to cleave both targets simultaneously.
Healer
- Heal up the Decaystrike from your tank as quickly as possible.
- Use healing cooldowns if your whole party has Withering Rot as it will deal
constant damage until its removed.
Brackenhide Hollow Loot Table
Hackclaw's War-Band
| Type | Item | Stats |
|---|---|---|
| 2H Mace | Mastery/Haste | |
| Ring | Mastery/Vers | |
| Trinket | Agi/Str | |
| Polearm | Agi, Crit/Haste | |
| Cloth Feet | Vers/Haste |
Gutshot
| Type | Item | Stats |
|---|---|---|
| Cloth Shoulder | Vers/Haste | |
| Leather Wrist | Vers/Crit | |
| Crossbow | Mastery/Haste | |
| Plate Waist | Haste/Vers | |
| Necl | Crit/Vers |
Treemouth
| Type | Item | Stats |
|---|---|---|
| Leather Feet | Crit/Mastery | |
| Plate Wrist | Vers/Haste | |
| 2H Mace | Mastery/Crit | |
| Cloth Head | Vers/Mastery | |
| Mail Shoulder | Haste/Vers | |
| Mail Waist | Crit/Haste | |
| Trinket | Agi/Str |
Decatriarch Wratheye
| Type | Item | Stats |
|---|---|---|
| Leather Hands | Crit/Haste | |
| 1H Mace | Int, Mastery/Crit | |
| Plate Head | Vers/Haste | |
| Trinket | Agi/Int | |
| Dagger | Agi, Crit/Vers | |
| Mail Legs | Mastery/Vers |
Bracken Hollow Achievements
There are 10 total achievements to obtain in Brackenhide Hollow:
| Achievement | Criteria |
|---|---|
| Defeat Decatriarch Wratheye in Brackenhide Hollow. | |
| Defeat Decatriarch Wratheye in
Brackenhide Hollow on |
|
| Defeat Decatriarch Wratheye in
Brackenhide Hollow on |
|
| Defeat Decatriarch Wratheye in
Brackenhide Hollow on |
|
| Complete Brackenhide Hollow at |
|
| Defeat Treemouth after every player
has been consumed at least once in Brackenhide Hollow
on |
|
| Defeat Hackclaw's War Band after freeing Chief Softpaw,
equipping her with a spear and shield and making sure she
survives in Brackenhide Hollow on |
|
| Defeat Decatriarch Wratheye after finding and
planting three Resilient Mushrooms, then destroying them with
Decaystrike in Brackenhide Hollow on |
|
| Learn five hyena facts from Gwybod in a single
visit to Brackenhide Hollow on |
Changelog
- 23 Apr. 2024: Guide updated for Season 4.
- 04 Sep. 2023: No further changes required for 10.1.7 Patch.
- 10 Jul. 2023: No further changes required for the 10.1.5 Patch.
- 18 Apr. 2023: Updated for Season 2.
- 25 Nov. 2022: Guide added.