

Sanguine Depths Quick Dungeon Guide: Video, Boss Strategies, and Trash
Last Updated: Nov 26, 2020 - 10:15 PM
(5y ago)

Welcome to our quick guide to the Sanguine Depths dungeon in the Shadowlands World of Warcraft expansion. This guide aims at giving you proper direction to complete the dungeon (boss strategies and trash mobs) without being unnecessarily long. We also have encounter journal pages, for those who want a complete breakdown of the abilities.
1.
Ready Check Pull Video
2.
Mythic+ Difficulty
To see how difficult Sanguine Depths is to complete on Mythic+ this week, we recommend checking out our Mythic+ dungeon difficulty rankings, linked below.
3.
Bosses
Please consult our Sanguine Depths encounter journal pages for more information regarding what the bosses do exactly in each difficulty.
3.1.
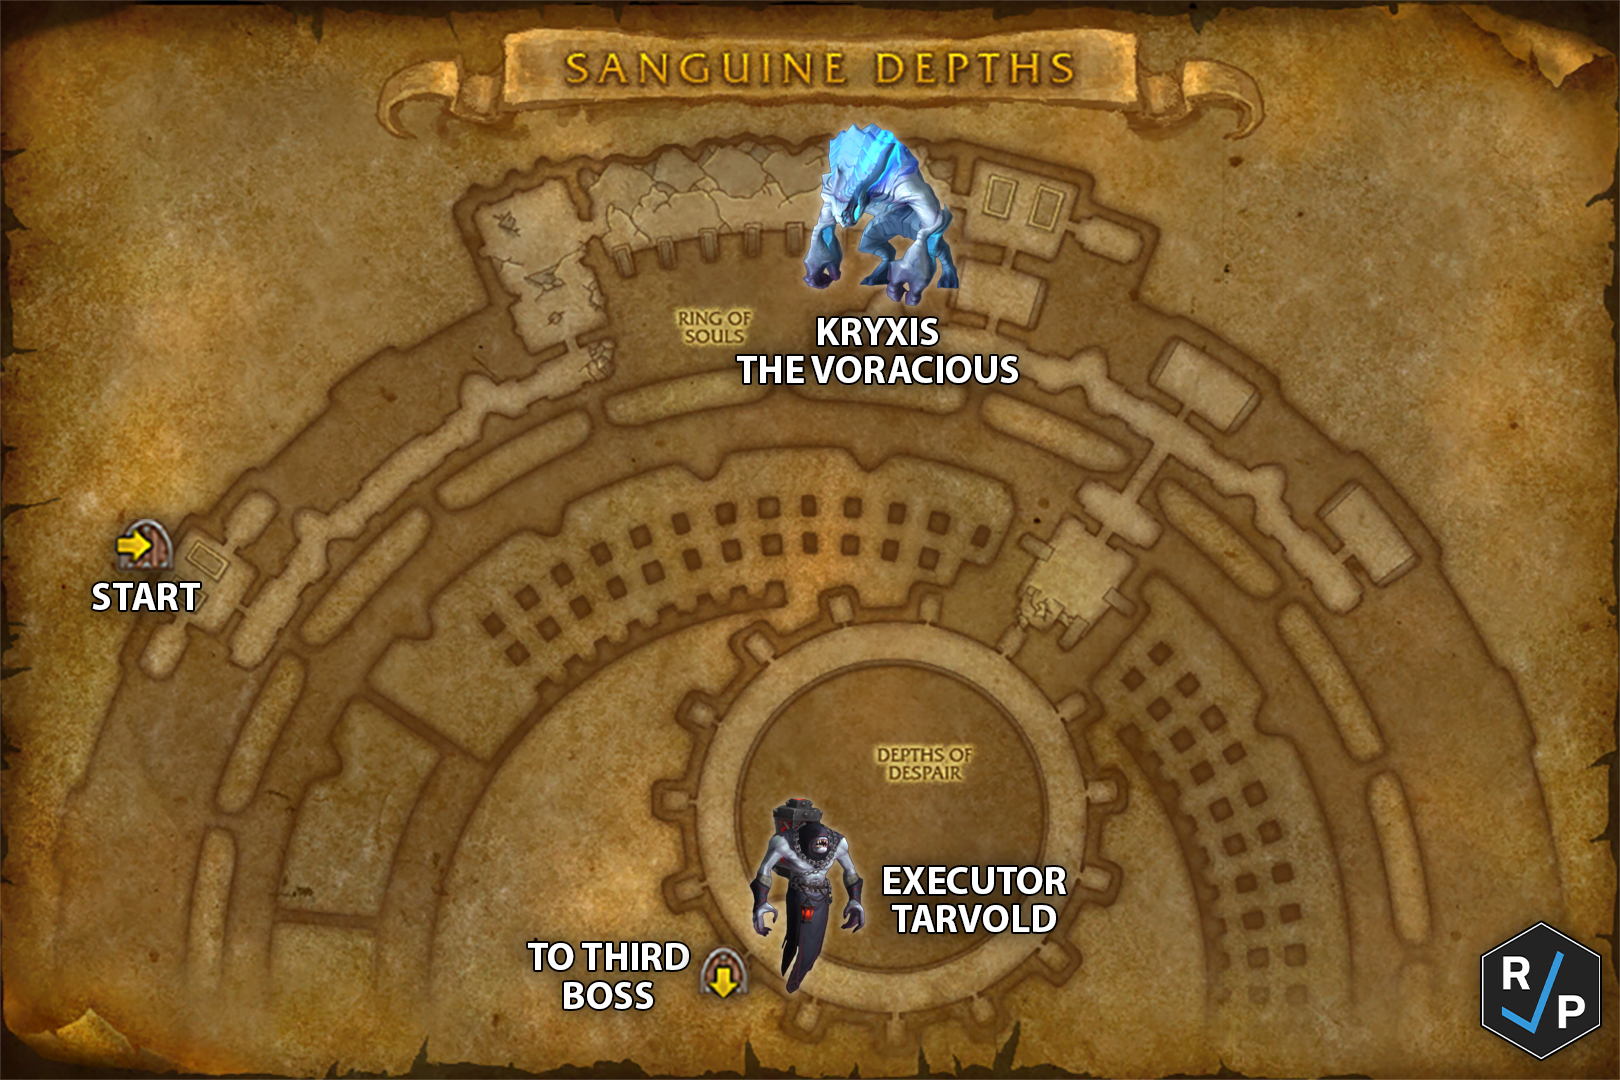
Kryxis the Voracious
- Do not face the boss toward the edge, because it frequently casts a knockback on
the tank (
 Vicious Headbutt).
 - Interrupt its
 Hungering Drain channel as quickly as possible.
 - When the boss starts casting
 Juggernaut Rush on a player, all other players
should move in between the targeted player and the boss in order to split the damage.
Juggernaut Rush on a player, all other players
should move in between the targeted player and the boss in order to split the damage. - When the boss casts
 Severing Smash at full energy, everyone should try to
be on the same side of the boss. The smash will knock everyone back and spawn an
orb from each player. These orbs will move toward the boss, and everyone should
help soak the orbs before they get to the boss.
Severing Smash at full energy, everyone should try to
be on the same side of the boss. The smash will knock everyone back and spawn an
orb from each player. These orbs will move toward the boss, and everyone should
help soak the orbs before they get to the boss. - On Mythic, the damage from soaking the orbs hits all players, so stagger soaking them in order for your healer to keep everyone alive.
3.2.
Executor Tarvold
- Try to stay spread out, and move away from your allies if you get a red circle
around you (
 Castigate).
 - Focus kill the add that regularly spawns, and move out of the big red pool it leaves on the ground when it dies.
- On Mythic, two orbs orbit around the prison in opposite directions
(
 Sintouched Anima). Dodge these by moving to the inner or outer wall based
on which one will get to you first.
Sintouched Anima). Dodge these by moving to the inner or outer wall based
on which one will get to you first.
3.3.
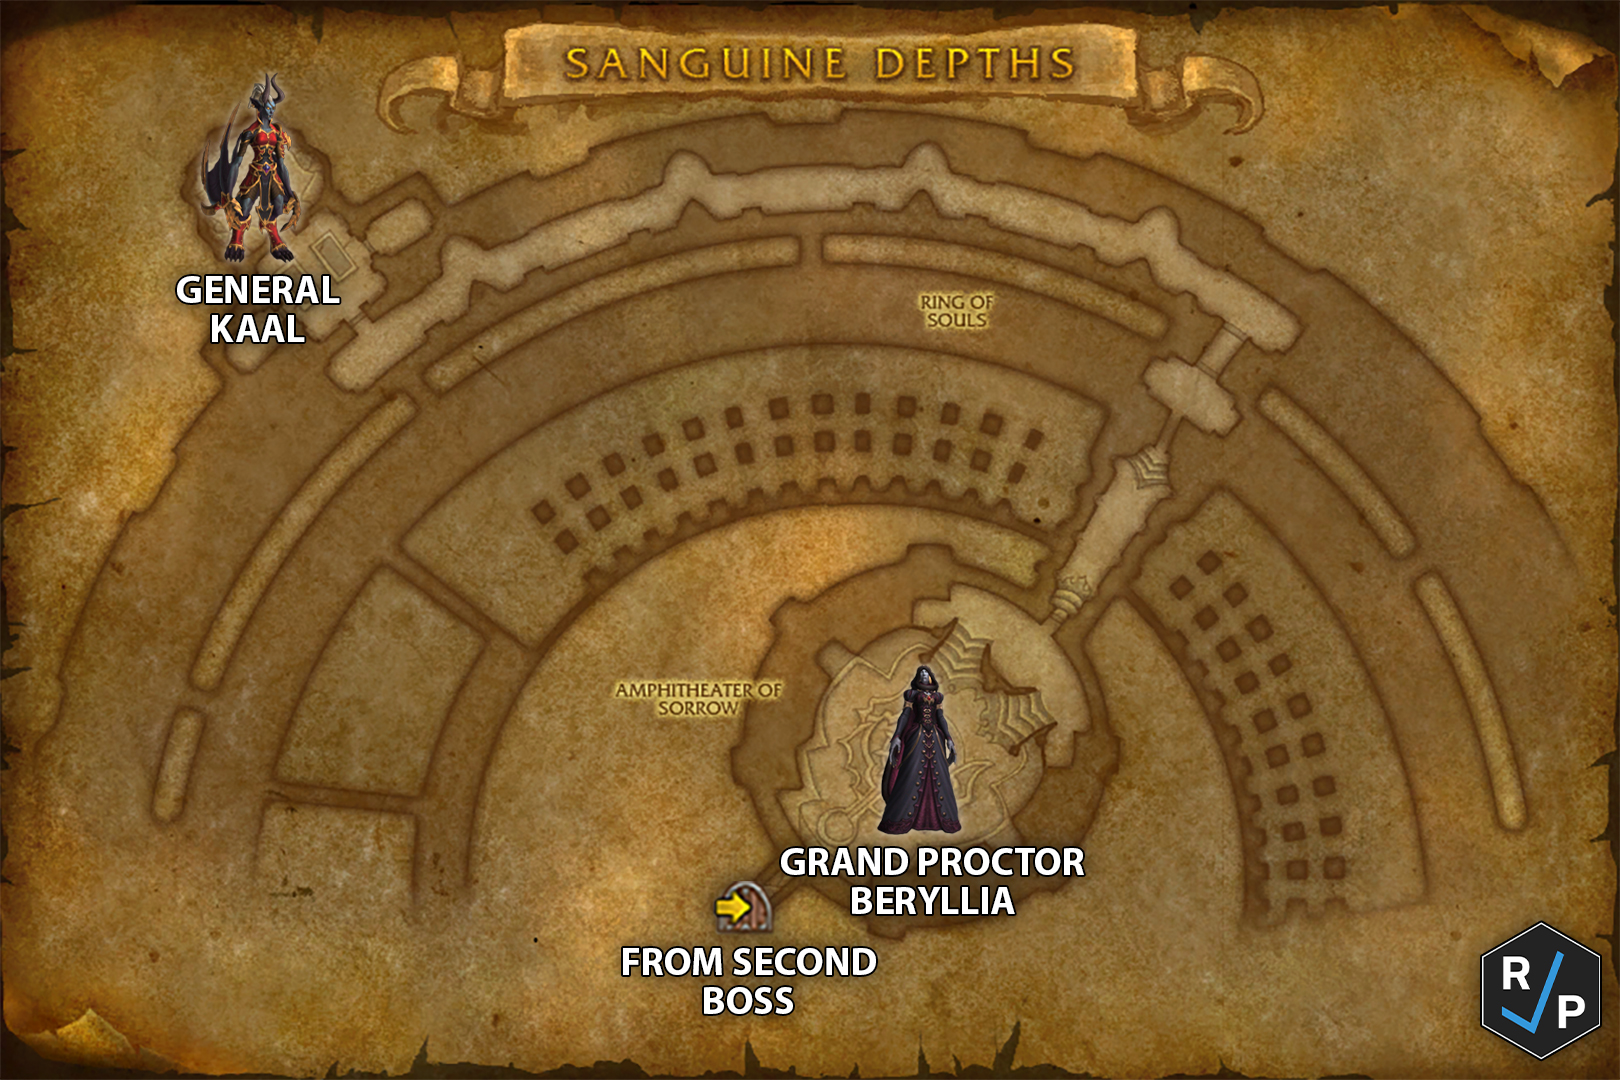
Grand Proctor Beryllia
- When the boss starts casting
 Rite of Supremacy, look for a yellow circle
to spawn on the ground and move to it by the end of the cast.
Rite of Supremacy, look for a yellow circle
to spawn on the ground and move to it by the end of the cast. - Dodge yellow swirlies (
 Endless Torment).
 - On Mythic, during Rite of Supremacy, little yellow orbs spawn
on the ground instead of a yellow circle. Everyone needs to run over 3 or 4 of these
orbs in order to survive the cast, because it gives each player damage reduction
(
 Fragment of Radiance).
3.4.
General Kaal
- Before starting the fight, make sure someone has picked up the Naaru and has
the extra action ability (
 Shining Radiance).
 - Stay spread out, because the boss will frequently mark players and charge to
them after a short delay, applying a stacking bleed to anyone in 5 yards (
 Wicked Gash).
 - Dodge the swirly red blasts that frequently cover a section of the platform
(
 Piercing Blur).
 - When the boss teleports away and starts casting
 Gloom Squall, the player
with the extra action ability should use it, and everyone should move into the yellow
circle it creates.
Gloom Squall, the player
with the extra action ability should use it, and everyone should move into the yellow
circle it creates.
4.
Notable Trash
- Regal Mistdancer
- Move enemies out of the red pool it casts on the ground, because it buffs
enemy damage by 50% (
 Sanctified Mists).
 - Dodge the frontal cast from this mob and the echoes it leaves behind (
 Echoing Thrust).
- Move enemies out of the red pool it casts on the ground, because it buffs
enemy damage by 50% (
- Grand Overseer
- Focus kill this mob, because it stacks a damage and healing reduction on
the party (
 Overbearing Presence).
 - Interrupt the
 Curse of Suppression cast, because it silences the target
for 5 seconds.
Curse of Suppression cast, because it silences the target
for 5 seconds.
- Focus kill this mob, because it stacks a damage and healing reduction on
the party (
- Chamber Sentinel
- Do not stand in front of this mob, because it casts a cleave that applies
a heavy bleed (
 Severing Slice).
 - Interrupt the
 Stoneskin cast, because it reduces their damage taken.
- Do not stand in front of this mob, because it casts a cleave that applies
a heavy bleed (
- Head Custodian Javlin
- This mob aggroes all of the neutral mobs in the area, so let the tank get aggro on them.
- Dodge the randomly facing frontal (
 Sweeping Slash).
- Hallway Gauntlet
- Before entering the hallway, make sure someone picked up the Naaru after the
third boss and has the extra action ability ( Shining Radiance).
- You will fight an easier version of General Kaal three times during this hallway gauntlet, alongside other trash mobs. She retreats further down the hallway each time her health is reduced by 10%.
- When General Kaal starts casting Gloom Squall, the player with the
extra action ability should use it, and everyone should move into the yellow
circle it creates.
- Before entering the hallway, make sure someone picked up the Naaru after the
third boss and has the extra action ability (
5.
Changelog
- 26 Nov. 2020: Added Mythic mechanics and updated the guide for the release of Shadowlands.
- 14 Jul. 2020: Guide added.
Show more
Show less