

This Mage Tower Challenge for a variety of specializations — Beast Mastery Hunter, Destruction Warlock, Discipline Priest, and Windwalker Monk — is focused on mechanics, positioning, some adds, and keeping yourself alive through unavoidable damage.
You will be fighting Tugar Bloodtotem and his massive worm pet, along with a few adds spawned by Tugar's totems.
This guide will explain everything you need to know to improve your chances of success at Feltotem's Fall, including a strategy on the encounter itself, and how to best prepare your character.
Feltotem's Fall (Tugar Bloodtotem) Mage Tower Guide
Welcome to our strategy guide for the Mage Tower challenge Feltotem's Fall. On this page, we will tell you everything you need to know about the encounter, and how to defeat it. If you are not playing the specs listed below, check out one of our other Mage Tower guides for your spec.
Feltotem's Fall Mage Tower Rewards
Completing this Mage Tower Challenge will unlock a unique recolor of the Tier
20 Raid Set from Tomb of Sargeras. Completing all 7 of the Mage Tower
challenges will unlock the ![]() Mage-Bound Spelltome Mount.
Mage-Bound Spelltome Mount.
If you would like to learn more about what else is available during Legion Timewalking or other mounts available in Patch 9.1/9.1.5, please consult our overviews below.
How To Start Feltotem's Fall
This Mage Tower challenge will only be available during Legion Timewalking events, the first of which will begin on December 7th, 2021 (December 8th for European, Korean, and Taiwanese realms). The challenge can be attempted as many times as you want, and there is no minimum gear requirement. To begin Feltotem's Fall, you must be playing one of the following specializations:
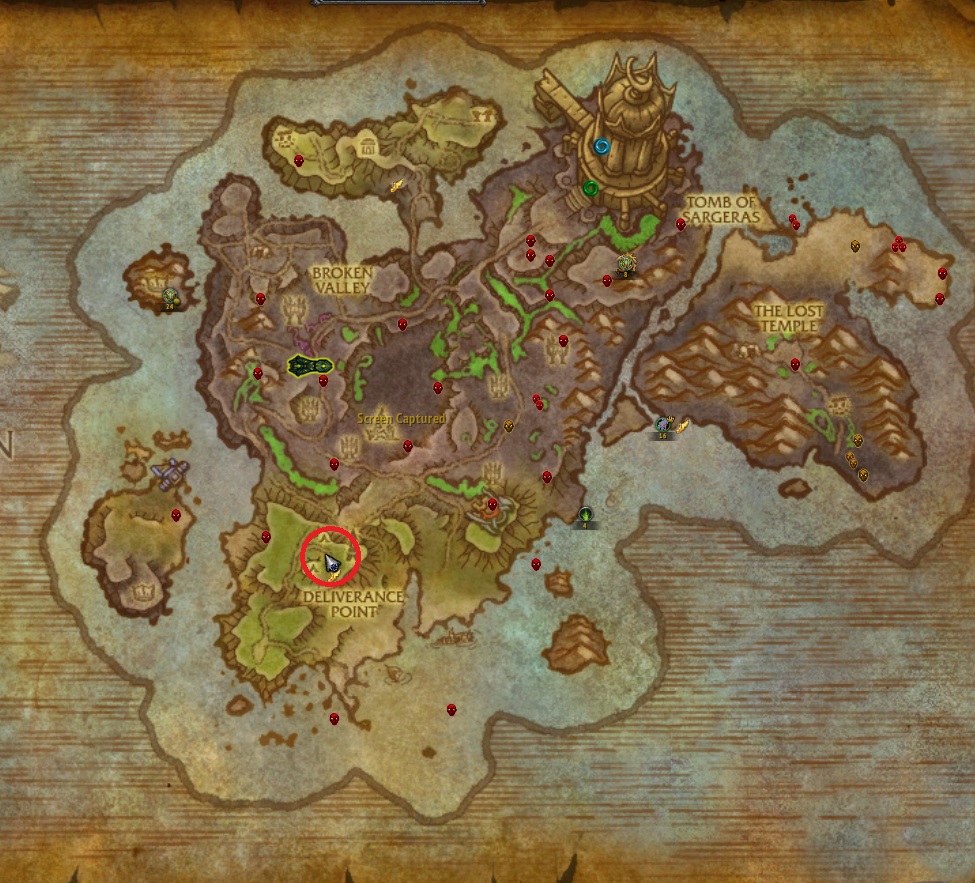
To begin this challenge, you need to visit War Councilor Victoria on
the Broken Shore (coords. 45, 62). If you have your ![]() Dalaran Hearthstone,
you can get there very easily. If you do not have your Dalaran Hearthstone, go
to Orgrimmar/Stormwind and take the portal to Azsuna to fly to the Broken
Shore.
Dalaran Hearthstone,
you can get there very easily. If you do not have your Dalaran Hearthstone, go
to Orgrimmar/Stormwind and take the portal to Azsuna to fly to the Broken
Shore.
Gear Considerations for the Mage Tower
The effects below will not function within the Timewalking Mage Tower event:
- Any Covenant-related effects (Covenant Ability, Signature Ability, Soulbinds, Conduits)
- Legendary Powers from Shadowlands or Legion (the items will still provide stats, their equip effects will not)
- Legendary items from Questlines (
 Ashjra'kamas, Shroud of Resolve,
Warlords of Draenor Legendary Rings,
Ashjra'kamas, Shroud of Resolve,
Warlords of Draenor Legendary Rings,  Dragonwrath, Tarecgosa's Rest,
 Val'anyr, Hammer of Ancient Kings)
 - Any Shards of Domination
- Any Battle for Azeroth systems (Azerite Gear, Traits, Essences)
- Any tier set bonuses
- Mists of Pandaria Legendary Meta Gems
You should also keep in mind that all items are scaled to item level 50 in the Mage Tower. This means that your item level is completely irrelevant, and that all that matters is the quality of the items you are bringing. This also means that sockets have exceptional value in Mage Tower Challenges.
BiS List for Legion Timewalking/Mage Tower Challenges
Since many specs can do this challenge, we can not offer an individual BiS list for every single spec. However, the sources for nearly all BiS items are the same.
| Slot | Item | Source |
|---|---|---|
| Helm | Any 2-Socket Helm | Throne of Thunder/Siege of Orgrimmar |
| Necklace | Battle for Azeroth Main Storyline/Legion Archaeology | |
| Shoulders | Any 2-Socket Shoulders (enchant with
|
Throne of Thunder/Siege of Orgrimmar/Dragon Soul |
| Cloak | MoP Legendary Cloak (enchant with |
No Longer Obtainable - MoP Legendary Cloak Questline |
| Cloak Alternative | Patch 8.3 'Through the Darkness' Questline (starts at Magni in the Chamber of Heart) | |
| Chest | Any 3-Socket Chest (enchant with
|
Throne of Thunder/Siege of Orgrimmar |
| Bracers | Any 2-Socket Bracers (enchant with
|
Cataclysm Tailoring/Leatherworking |
| Gloves | Any 2-Socket Gloves/ |
Throne of Thunder/Siege of Orgrimmar/Legion Legendary |
| Belt | Any 2-Socket Belt | Throne of Thunder/Siege of Orgrimmar or Pandaria Tailoring/Leatherworking.
Add extra socket with |
| Legs | Any 3-Socket Legs (enchant with
|
Throne of Thunder/Siege of Orgrimmar or Pandaria Tailoring/Leatherworking |
| Boots | Any 2-Socket Boots/ |
Throne of Thunder/Dragon Soul/Legion Legendary |
| Rings | WoD Pre-Legendary Ring (for example, Spellbound Runic Band of Unrelenting Slaughter) (enchant with Accord, or Binding of Haste/Mastery/Crit/Vers depending on iLvl and spec) | WoD Legendary Ring Questline |
| Rings (alternatives) | Operation: Mechagon | |
| Trinkets | Supreme Lord Kazzak World Boss/Gruul's Lair/Hellfire Citadel | |
| Weapon (Hunter) | Siege of Orgrimmar Heirlooms (unobtainable)/The Eternal Palace | |
| Weapon (Caster) | Icecrown Citadel | |
| Weapon (AGI Melee) | Icecrown Citadel |
There are also potentially better weapons from utilizing Chromie Time, but they require a leveled character on a second account and so are not within the scope of this guide.
If you prefer not to farm old raids for gear, you can use Crafted Dreadful
Gladiator's pieces as an alternative. These can be crafted by all the primary
gear crafting Professions, and you will want to use the ![]() Relic of the Past V
Optional Reagent to upgrade their item level when crafting. These items have
plentiful sockets, socket bonuses, and can fill gaps in your gear.
Relic of the Past V
Optional Reagent to upgrade their item level when crafting. These items have
plentiful sockets, socket bonuses, and can fill gaps in your gear.
Best Gems and Consumables for Mage Tower Challenges
Gems
- Meta Gems:
 Burning Primal Diamond for Casters and
Agile Primal Diamond for Agility users
Burning Primal Diamond for Casters and
Agile Primal Diamond for Agility users - Intellect: 1x
 Timeless Tanzanite and rest
 Brilliant Queen's Garnet
 - Agility: 1x
 Nightmare Tear and rest
Delicate Queen's Garnet
Nightmare Tear and rest
Delicate Queen's Garnet
Flasks
 Greater Flask of the Currents/
 Greater Flask of Endless Fathoms
Potions
 Potion of Unbridled Fury
Food
- Any Main Stat Feast/Optimal Secondary Stat Food
Feltotem's Fall Mage Tower Strategy Guide
The fight consists of two phases. During Phase 1, you will kill Tugar Bloodtotem while bringing down the health of his pet worm, Jormog the Behemoth, as much as possible in preparation for Phase 2 where you will fight Jormog alone while its damage is buffed.
Jormog the Behemoth begins the fight with 9 stacks of
![]() Fel Hardened Scales, reducing its damage taken by 10% per stack. There is
a way to remove these stacks, and once a significant amount of stacks have been
removed, it is worth keeping Tugar and Jormog close so that you can cleave them
both in Phase 1.
Fel Hardened Scales, reducing its damage taken by 10% per stack. There is
a way to remove these stacks, and once a significant amount of stacks have been
removed, it is worth keeping Tugar and Jormog close so that you can cleave them
both in Phase 1.
Phase 1
In Phase 1, you will kill Tugar Bloodtotem while interrupting his
![]() Fel Burst ability every time it is cast, and cleaving down
Jormog the Behemoth. You can use stuns to interrupt it as well. In
addition, you will have to deal with a few other mechanics:
Fel Burst ability every time it is cast, and cleaving down
Jormog the Behemoth. You can use stuns to interrupt it as well. In
addition, you will have to deal with a few other mechanics:
Discipline Priest Note: ![]() Fel Burst cannot be interrupted
by Discipline Priests normally. However, you can use
Fel Burst cannot be interrupted
by Discipline Priests normally. However, you can use ![]() Psychic Scream on
cooldown to cancel a good deal of them. For the Fel Bursts that you do not have
Psychic Scream for, pre-cast a
Psychic Scream on
cooldown to cancel a good deal of them. For the Fel Bursts that you do not have
Psychic Scream for, pre-cast a ![]() Power Word: Shield,
Power Word: Shield, ![]() Fade, and
ensure you have
Fade, and
ensure you have ![]() Protective Light active on yourself from a
Protective Light active on yourself from a
![]() Flash Heal before it goes off.
Flash Heal before it goes off.
 Earthquake causes brown circles to spawn where rocks will fall
from the ceiling that stay on the ground. Stand near the rocks to bait Jormog's
Earthquake causes brown circles to spawn where rocks will fall
from the ceiling that stay on the ground. Stand near the rocks to bait Jormog's
 Jormog's Fury ability to them. If he hits a rock, it will remove a stack
of his
Jormog's Fury ability to them. If he hits a rock, it will remove a stack
of his  Fel Hardened Scales buff that gives him reduced damage taken.
- Step out of the "X" pattern of green circles when they spawn.
- Avoid casting spells when Jormog the Behemoth casts
 Sonic Scream to avoid getting silenced. You can also stun this cast
to stop it from going off, but we generally recommend saving stuns for
Sonic Scream to avoid getting silenced. You can also stun this cast
to stop it from going off, but we generally recommend saving stuns for
 Fel Bursts and only using stuns to interrupt Sonic Scream when
Tugar is dead.
Fel Bursts and only using stuns to interrupt Sonic Scream when
Tugar is dead. - You will also take damage from
 Fel Shock and
 Fel-Infused Saliva, but these are unavoidable and should be self-healed
through.
Fel-Infused Saliva, but these are unavoidable and should be self-healed
through. - Kill the Bile Spitter Eggs before their cast finishes. If their cast finishes, kill the Bile Spitter that spawns. The add's health is based on the remaining health of the eggs.
- Kill Fel Surge Totems before their cast finishes, or you will be stunned for 4 seconds. They can easily be oneshot, and it is worth making a macro that targets and kills them with a simple, instant-cast ability of your class. We have posted an example below.
- /tar Fel Surge Totem
- /use Cobra Shot
- /targetlasttarget
Your choice of when to kill Tugar will depend a lot on your specialization
and the quality of your gear. In any case, you should never kill Tugar before
all 9 stacks of ![]() Fel Hardened Scales have been removed from Jormog. The
higher Jormog's health is when Tugar dies, the tougher it will be to kill Jormog
before his damage overwhelms you. On the other hand, the fight is drastically
simplified when Tugar dies, so you will have to find the best trade-off of DPS
requirement and mechanical difficulty for you.
Fel Hardened Scales have been removed from Jormog. The
higher Jormog's health is when Tugar dies, the tougher it will be to kill Jormog
before his damage overwhelms you. On the other hand, the fight is drastically
simplified when Tugar dies, so you will have to find the best trade-off of DPS
requirement and mechanical difficulty for you.
Phase 2
Phase 2 begins when Tugar Bloodtotem dies and dramatically simplifies
the fight. During this phase, you will fight Jormog the Behemoth while he
does his ![]() Fel-Infused Saliva and
Fel-Infused Saliva and ![]() Sonic Scream abilities that
deal heavy damage to you. Due to
Sonic Scream abilities that
deal heavy damage to you. Due to ![]() Fel Rage, these will deal 150%
more damage, increasing even more over time. Use
Fel Rage, these will deal 150%
more damage, increasing even more over time. Use ![]() Drums of Deathly Ferocity
and DPS cooldowns to kill Jormog as quickly as possible before you run out of
self-sustain here.
Drums of Deathly Ferocity
and DPS cooldowns to kill Jormog as quickly as possible before you run out of
self-sustain here.
Changelog
- 01 Dec. 2021: Guide added.