

Nazjatar Zone Guide
Battle for Azeroth Patch 8.2 Guides
Welcome to the Nazjatar Zone guide, where we go over the zone which was introduced in Patch 8.2.
Read on to find out about everything this zone holds in store for both Alliance and Horde players, including quests, rewards, and exploration.
Introduction
Questing in Nazjatar
As the amount of questing you can do in Nazjatar is extensive, we will split this section over a few "chapters" for added ease of reading / goal-setting. The vast majority of Nazjatar questlines are perfectly mirrored between Alliance and Horde, down to the name of the quests (but with different NPCs), thus unless explicitly stated otherwise the quest listings and descriptions below apply to both factions even though they are mostly described from a Horde player's point of view.
Getting to Nazjatar
Once you log in to Patch 8.2, you will be called down to your ship, in The Warchief's Order and asked to perform a dangerous mission at sea in Send the Fleet. After pulling yourself together from Azshara's ambush, start off by checking up on Oculeth in Upheaval, and enlist his help to ensure a safe Descent from the waterfall. Lor'themar will ask you to find and help The First Arcanist, Thalyssra. Once you find her, crush the nearby Naga in Disruption of Power, Ritual of Tides, and Fortunate Souls and move on to In Deep. Next, you will be made aware of Lady Ashvane's fate since her breakout in Up Against It, and meet your Nazjatar faction allies, as well as Queen Azshara herself in Stay Low, Stay Fast. Help Oculeth open a portal to your BfA capital in A Way Home and you are done with the introduction.
Learning about Essences
Magni appears close to where you finished the previous section, and sends you
towards the new Chamber of the Heart (accessed through the BfA capital's portal
to Silithus, as usual) in Essential Empowerment Once there, pick up MOTHER Knows Best
and enjoy the introduction to Essences, the new
Heart of Azeroth system, which will be further explained in its own guide in
the future. When you are ready, pick up A Disturbance Beneath the Earth
and ask MOTHER to teleport you to Highmountain. Meet up with Spiritwalker Ebonhorn
and search for your first Essence in Take My Hand followed up by Calming the Spine
and Dominating the Indomitable Return to the Chamber in A Friendly Face
and unlock the Essence system and your first major power, ![]() Concentrated Flame,
in The Heart Forge Finally, return to your Nazjatar faction hub in Back Out to Sea
and proceed to the next chapter.
Concentrated Flame,
in The Heart Forge Finally, return to your Nazjatar faction hub in Back Out to Sea
and proceed to the next chapter.
If you would like to know more about this quest line, complete with video, check out this article.
Bodyguards / Guardians
Before you begin questing in Nazjatar properly, you should recruit a guardian to help you. To make them available, you need to continue questing from where you left off in the previous section in Scouting the Palace and Settling In. Once you are done with these, find the scouts in Scouting the Pens and Save a Friend before returning to the hub. Once you do, start Becoming a Friend and you can recruit a bodyguard to accompany you in Nazjatar from then on.
Alliance players get to choose between:
- Bladesman Inowari;
- Farseer Ori;
- Hunter Akana

Horde players get to choose between:
- Neri Sharpfin;
- Poen Gillbrack;
- Vim Brineheart

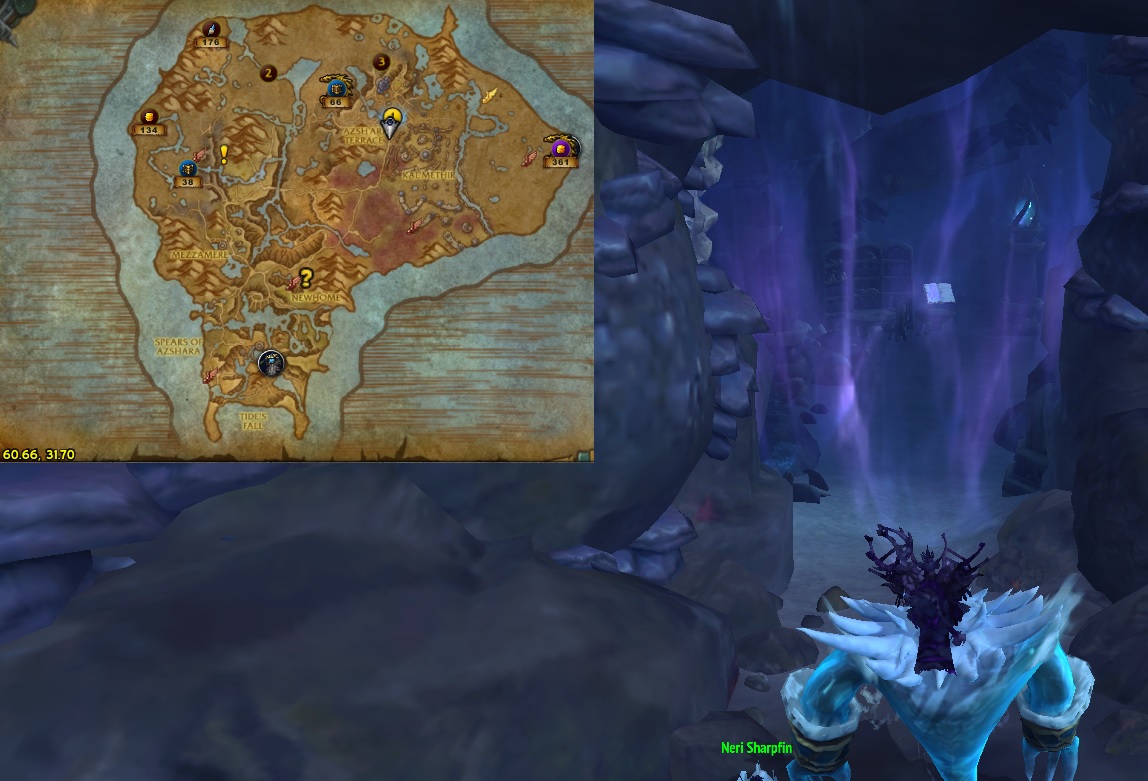
All of these guardians have helpful abilities that are unlocked or increase in power as they rank up. Neri Sharpfin and Hunter Akana are the most useful as they deal significant amounts of damage, disable your enemies for extended periods quite often and, once rank 15 is reached, their aura increases your damage and ability to avoid combat altogether while questing by a huge amount.
Ranking up your Bodyguard / Guardian
Your chosen guardian will increase its rank as both of you adventure through Nazjatar. You can only have a single guardian accompanying you every day, and must choose which before any will accompany you for the day.
Once you choose a guardian, you are able to pick various rotating daily and bounty quests that will grant it experience towards its next rank, such as WANTED: Braxicus.
You can gain up to 300 experience (a full rank up) from daily quests every day, and certain items also grant further experience:
- Ancient Reefwalker Bark grants 100 experience to all guardians. It occasionally drops from Anemonar, Kelpwillow, Oronu and Urduu, but you cannot loot it more than once each week.
- Reefwalker Bark grants 20 experience to all guardians. It occasionally drops from Coral Ancients in Nazjatar.
 Unusually Wise Hermit Crab grants 75 experience to any guardian, and is
occasionally sold by Mrrl.
Unusually Wise Hermit Crab grants 75 experience to any guardian, and is
occasionally sold by Mrrl. Naga Deployment Orders (Alliance) and
Naga Deployment Orders (Horde) grant 150 experience to all guardians. It rarely
drops from
Naga Deployment Orders (Alliance) and
Naga Deployment Orders (Horde) grant 150 experience to all guardians. It rarely
drops from  Scrying Stone-hidden chests, and can also be sometimes found in
Mrrl's secret wares inside an
Scrying Stone-hidden chests, and can also be sometimes found in
Mrrl's secret wares inside an  Ominous Looking Tome.
- Fathom Ray Wing grants 50 experience to Neri Sharpfin or Hunter Akana. It is occasionally found after killing Fathom Rays in Nazjatar.
- Giant Crab Leg grants 50 experience to Poen Gillbrack or Bladesman Inowari. It is occasionally found after killing Crabs in Nazjatar.
- Eel Filet grants 50 experience to Vim Brineheart or Farseer Ori. It is occasionally found after killing Eels in Nazjatar.
Bodyguard / Guardian rank-up rewards
Ranking up your guardian to certain thresholds will also grant additional rewards:
- Every rank up grants 250 reputation with the Nazjatar allied faction.
- Also, every few ranks, your guardian gives you a quest to go somewhere in Nazjatar
and loot a secret stash that has profession and world materials. Reputation is also
awarded, sometimes in the form of
 Vibrant Sea Blossom /
  Ceremonial Ankoan Scabbard
which grant 400 reputation each.
Ceremonial Ankoan Scabbard
which grant 400 reputation each. - At rank 20, Neri Sharpfin and Hunter Akana award you with a mount:
 Snapdragon Kelpstalker and
  Deepcoral Snapdragon, respectively.
 - At rank 20, Poen Gillbrack and Bladesman Inowari award you with a pet:
 Lustrous Glimmershell and
  Brilliant Glimmershell, respectively.
 - At rank 20, Vim Brineheart and Farseer Ori award you with a toy: Book of the Unshackled and
 Carved Ankoan Charm, respectively.
Faction Hub Quests
Within the area you arrive to, besides a big array of World Quests spread all over the map, there are a few quests available:
While not technically picked up at the Nazjatar hub, but instead from your faction's mission table ship helmsman, The Missing Crew is completed in Nazjatar and rewards the aforementioned helmsman as a new mission table follower. Because the lost crew members are spread all over Nazjatar, you should aim to complete this quest as you venture close to each one while completing the storyline quests.
Down into Nazjatar will allow you to get your second Essence, ![]() Pearl of Lucid Dreams,
after you unlock your bodyguard.
Pearl of Lucid Dreams,
after you unlock your bodyguard.
Payment in Kind for Alliance players / Visions of Danger for Horde players leads to the continuation of Baine Bloodhoof's storyline.
There are also a few PvP-related quests you can pick at the Nazjatar hub: Drowning the Horde / Drowning the Alliance require you to kill enemy faction players on Nazjatar, while Call to Arms quests rotate weekly and require you to kill enemy faction players on a specific location of the world.
There is also a new system of daily quests which is unlocked after you complete Desperate Need and its follow-up quest The Needs of the People From then on you can pick up to three daily quests at the hub, such as Bounty: A Few Snapdragons
Daily and World Quests in Nazjatar
Some of the daily quests you can complete in Nazjatar grant experience to your bodyguard. Typically, daily quests picked up outside the faction hub, or from the bounty board, will grant experience to your bodyguard. You should always aim to complete these first, as they are the most impactful, and generally easier to complete than the bounty quests.
Bodyguard Experience Daily Quests: Neri Sharpfin / Hunter Akana
- Making Kelpberry Wine requires you to gather some (kelp) berries nearby, make them into wine, and deliver them to a Tortollan living in an underground cave in the nearby lake.
- Extra Shiny requires you to gather some (shiny!) pearls in the water pools nearby.
- Kill the Kritch requires you to kill an elite NPC in the zone, after which you return to the quest giver for the reward.
- Broken Controller requires you to talk to several nearby NPCs to break their mind control, followed by killing an elite in the zone and turning in the quest at the faction hub.
- Emergent Sea Weeds requires you to gather
 Vent Kelp Sprout nearby, and turn them in at the faction hub.
 - Void Cache requires you to get a rare drop
 Void Cache Key from nearby Naga, and use it to open the chest that starts the quest.
 - Break a Few Eggs requires you to destroy a few eggs nearby, after which you return to the quest giver for the reward.
- A Little Edge requires you to collect
 Chitterspine Spine in Chitterspine Caverns, to the north, and return them to the quest giver.
 - WANTED: Commander Sarjeth requires you to kill an elite NPC in the zone and loot its head to deliver at your faction hub.
- WANTED: Lady Narjiss requires you to kill a powerful (group advised) elite NPC in the zone, loot its head, and deliver it at your faction hub.
- WANTED: Inquisitor Ithriza requires you to kill a powerful (group advised) elite NPC in the zone, loot its head, and deliver it at your faction hub.
Bodyguard Experience Daily Quests: Poen Gillbrack / Bladesman Inowari
- Gather Friends requires you to gather some Sandclaw Crabs and Muck Creepers to bring back to the quest giver in the cave.
- She Sells These Shells requires you to gather some seashells in the water pools nearby, followed by turning them at the faction hub.
- The Heart Of The Water requires you to kill water elementals nearby for Living Droplets to bring back to the quest giver in the hill.
- To Soar Like a Ray requires you to loot eggs located on top of the big plants nearby (the quest item gives you a much higher jump than usual) and turn them in at the quest giver.
- Feed Them All requires you to gather some seashells in the water pools nearby, followed by turning them at the faction hub.
- Drunk Angry Murlocs requires you to enter an underwater cave at 27, 30 to reach the quest giver, followed by gathering 12 Ocean "Infused" Lager in the murloc village, which you are to return to the quest giver.
- Misdirection requires you to find Dani's Treasure inside one of the nearby clams in the Murloc village and return it to him (quest giver).
- Most Delicious Clams requires you to collect some Neptulian Clams from the lake nearby for the quest giver.
- Poen's Favorite Dish requires you to collect some Fresh Unagi and return them to the quest giver.
- We've Got Crabs! requires you to collect some Crackleclaw Crabs nearby and return them to the quest giver.
- Arcane Cache requires you to get a rare drop Arcane Cache Key from nearby Naga, and use it to open the chest that starts the quest.
Bodyguard Experience Daily Quests: Vim Brineheart / Farseer Ori
- Reinforced Cache requires you to get a rare drop Void Cache Key from nearby Naga, and use it to open the chest that starts the quest.
- Turn the Scale requires you to gather
 Hydra Scale from nearby Hydras and turn them in to the quest giver in the hill.
 - Plug the Geysers requires you to seal nearby geysers by jumping on them, followed by returning to the quest giver. There are two separate quests with the same mechanic, but in one of them a mini-boss will spawn after you are done sealing the geysers, which you must kill to finish the quest.
- Where They Hide requires you to kill some stealthed Naga nearby with the help of the given quest item, followed by returning to the quest giver.
- A Good Offense requires you to kill a lot of nearby Naga with the Sea Giant NPC that starts the quest.
- WANTED: Gler'thogg requires you to kill a powerful (group advised) elite NPC in the zone, loot its eye, and deliver it at your faction hub.
- WANTED: Lady Naz'jess requires you to kill a powerful (group advised) elite NPC in the zone, loot its head, and deliver it at your faction hub.
- WANTED: Lord Ha'kass requires you to kill a powerful (group advised) elite NPC in the zone, loot its head, and deliver it at your faction hub.
World Quests in Nazjatar
There will also typically be a handful of world quests for you to complete in
Nazjatar at any point, which sometimes give Benthic gear or ![]() Prismatic Manapearl
as rewards. For one of the toughest, Jumping Jellies, this small video
guide by FuzzfingerGaming might be of help. Also, watch this video,
by WoW Quests, if you are struggling with Leylocked chest questlines.
Prismatic Manapearl
as rewards. For one of the toughest, Jumping Jellies, this small video
guide by FuzzfingerGaming might be of help. Also, watch this video,
by WoW Quests, if you are struggling with Leylocked chest questlines.
Nazjatar Storyline Part I: Lady Ashvane's Azerite Weapons
In the starting faction hub of Nazjatar, Insight into Our Enemies starts the next part of Nazjatar's storyline, and leads into The Price is Death and Deteriorating Knowledge which in turn lead into Ancient Technology (picked up at the previous quests' location) and What We Know of the Naga which is a storyline breadcrumb that leads into Scouting Undercover
This quest will have you work for the Naga while undercover in Sating Snapdragons and Working with Purpose Completing these quests allows you to pick up We Can't Have Dull Weapons which will in turn lead to Stealing the Naga's Secrets and a daring escape from the Naga. Once you deliver the Azerite Weapon to Lor'themar, a plot is devised to steal the Naga Azerite Weapon cache and you are sent off again by Oculeth to complete Coveted Crystals and Sea Slug Liquidation which will lead into Let the Residue Lead You
While following the residue, you might want to pick up A Safer Place along the way (look for the yellow "!" on the map after you cross the bridge with the talking giant). Turn the quest in at the cache in front of the cavern and prepare to go inside for Clearing Out the Cache where you will face a gauntlet of enemies lead by a familiar face. These can be easily defeated by combining the buff gained from standing in an Azerite pool with the buff gained from looting the completed Azerite weapons nearby. Once you are done, return to the faction hub and pick up Down But Not Out from Lor'themar, which will require you to finish world quests and finish this "chapter" of the storyline.
Abyssal Focus and Mrrl's Murloc Vendors
Turning in Ancient Technology allows you to start gathering ![]() Abyssal Shards
for An Abyssal Opportunity, which will unlock the Abyssal Focus. This
tool is used to craft profession gear that goes up to 440 item level, once you complete
the follow up quests The Eternal Palace: We Can Make It Stronger...
and The Eternal Palace Pushing the Limits.
Abyssal Shards
for An Abyssal Opportunity, which will unlock the Abyssal Focus. This
tool is used to craft profession gear that goes up to 440 item level, once you complete
the follow up quests The Eternal Palace: We Can Make It Stronger...
and The Eternal Palace Pushing the Limits.
Also, completing A Safer Place will add Murloc vendors to the encampment,
with whom you can barter to complete the follow-up quest, No Backs.
You can also barter with them for the ![]() Crimson Tidestallion mount, if you have
Crimson Tidestallion mount, if you have
![]() Azsh'ari Stormsurger Cape, which allows you to see more items at the Murloc vendors.
Azsh'ari Stormsurger Cape, which allows you to see more items at the Murloc vendors.
If you wish to get the mount, start by obtaining ![]() Hungry Herald's Tentacle Taco
from Murloco, who you sometimes find, and rescue, at this cave:
Hungry Herald's Tentacle Taco
from Murloco, who you sometimes find, and rescue, at this cave:

After this, you need to wait until Mrrl has the mount on his wares,
which is not guaranteed every day, so make sure to keep checking. Once he does, do
some trading between the murloc vendors to get the remaining materials: ![]() Cultist Pinky Finger
and
Cultist Pinky Finger
and ![]() Pulsating Blood Stone. Trade them for
Pulsating Blood Stone. Trade them for ![]() Crimson Tidestallion, and
you will also receive the
Crimson Tidestallion, and
you will also receive the ![]() Mrrl's Secret Stash achievement.
Mrrl's Secret Stash achievement.
There are other, less noteworthy items, sold by Mrrl daily. You can use the weak aura displayed in this video, by Sipder, to automatically buy the required items in the mini-game, if you see any item you would like to purchase.
Murloc Traders' Normal Stocks
| Mrrl's Item | Reward from Item |
|---|---|
| Mardivas Laboratory Item | |
| 75 experience for current bodyguard | |
| Nazjatar Environment Item | |
| Benthic Item | |
| Azerite Power | |
Murloc Traders' Special Stocks
You need to have ![]() Azsh'ari Stormsurger Cape equipped to see these.
Azsh'ari Stormsurger Cape equipped to see these.
| Mrrl's Item | Reward from Item |
|---|---|
| Mount | |
| 150 experience for all bodyguards | |
| 150 reputation | |
| Mardivas Laboratory Item |
Nazjatar Storyline Part II: Queen Azshara and the Javelin of Suramar
After completing Down But Not Out Lor'themar will ask you to go to the ruins of Azshara's capital, Zin-Azshari, with Thalyssra, in To Zin-Azshari Once arriving and turning in the quest, you will be asked to search for magical relics in Making the Connection While doing this, it is likely that you will find Collector Kojo, who asks for your help with Legacy of Naranan and Snap Back Once you are done with these two quests, you can get The Fate of Professor Elryna from him, the completion of which finishes this small sub-plot on how snapdragons were created.
Once you find all the items and return to Thalyssra, you will witness a short scene with Azshara herself and be assigned to clean up Terrors in the Deep Once you do so (and assuming you did not go mad from the whispers), turn in the quest further north, where Azshara will make another appearance. Pick up Secrets of Telemancy and Speak with the Dead: completing these quests will inform you about the Javelin of Suramar, which will be needed to pierce Azshara's Tidestone-powered shield around her palace. Once you return to Thalyssra, some more conversation will ensue, and all that remains is to hunt down the Javelin in The Handmaiden's Tale and return to the faction hub with it, in We'll Poke Their Eye Out
Nazjatar Storyline Part III: Recovering the Tidestone and Opening the Raid
Start the final stretch by picking up The Tide Turns and ordering the combined Horde/Alliance assault to start. Enjoy all the fighting and cutscenes, and finish by picking up The Eternal Palace: Queen's Gambit which will require you to enter The Eternal Palace raid and finish things with Azshara.
Beyond the Storyline: Additional Zin-Azshari questing
After you complete the previous chapter, you can accept City of Drowned Friends from Thalyssra, who can be found around the entrance of Zin-Azshari. Help her get through The Ever Drowning and witness the Warbringer cinematic in The Warbringer Finally, accept They Made Their Choice and face Abyssal Commander Sivara to finish this additional questline.
Also, in the upper part of Zin-Azshari you can find Kelya Moonfall, who
can be unlocked as a flight master if you complete her short questline: The High Life
Saving Corin and On Ghostly Wings. Doing this also unlocks
![]() Flight Master's Whistle's usage in Nazjatar and Corin Moonfall in
this small hub as a vendor who can also repair your gear.
Flight Master's Whistle's usage in Nazjatar and Corin Moonfall in
this small hub as a vendor who can also repair your gear.
Finally, keep an eye out for the odd quest in the field, such as A Curious Discovery These are generally simple to complete and reward unique toys and pets.
Exploring Nazjatar
How to get Fabious
As detailed in our article,
![]() Fabious, a sea horse mount, has been discovered in Bloodfin Village, around
25,29 in Nazjatar. To obtain him, simply take a picture of him with
Fabious, a sea horse mount, has been discovered in Bloodfin Village, around
25,29 in Nazjatar. To obtain him, simply take a picture of him with ![]() S.E.L.F.I.E. Camera MkII.
It can be difficult to find him so keep watching!
S.E.L.F.I.E. Camera MkII.
It can be difficult to find him so keep watching!
Hidden Treasure Chests in Nazjatar
By completing the Scrying Stones quest, you learn how to detect
hidden treasures in Nazjatar, and can from then on find ![]() Scrying Stone
from rares, or from Mrrl's item
Scrying Stone
from rares, or from Mrrl's item ![]() Faintly Humming Sea Stones. Using a stone
gives you a 5-minute buff that allows you to detect hidden treasure chests in
most of the Nazjatar, which are required for the
Faintly Humming Sea Stones. Using a stone
gives you a 5-minute buff that allows you to detect hidden treasure chests in
most of the Nazjatar, which are required for the ![]() Nothing To Scry About achievement.
Make sure to be on the lookout for when the scrying secondary button appears! Using
it can sometimes spawn the rare enemy Sandcastle, instead of a chest.
Nothing To Scry About achievement.
Make sure to be on the lookout for when the scrying secondary button appears! Using
it can sometimes spawn the rare enemy Sandcastle, instead of a chest.
Rarely, when looting these hidden chests, you can loot ![]() Silver Knife
which will start Strange Silver Knife which leads into
Preserved Clues. After completing this quest, you can continue
searching for clues in Diaries of the Dead, culminating in
Enchanted Lock which asks you to solve a very simple match-3 puzzle,
after which you return to your faction hub to turn in Treasure Tale and
finish this quest chain, unlocking new types of World Quests in the process.
Silver Knife
which will start Strange Silver Knife which leads into
Preserved Clues. After completing this quest, you can continue
searching for clues in Diaries of the Dead, culminating in
Enchanted Lock which asks you to solve a very simple match-3 puzzle,
after which you return to your faction hub to turn in Treasure Tale and
finish this quest chain, unlocking new types of World Quests in the process.
The Laboratory of Mardivas
While questing through Nazjatar, you might also find ![]() Lesser Benthic Arcanocrystal
from opening the aforementioned hidden treasure chests, which will direct you towards
The Laboratory of Mardivas, which is located here:
Lesser Benthic Arcanocrystal
from opening the aforementioned hidden treasure chests, which will direct you towards
The Laboratory of Mardivas, which is located here:
Once inside the cave, you can accept the quest The Laboratory of Mardivas
and activate the Elemental Essence Amalgamator to fight a mini-boss that
can drop ![]() Prismatic Manapearl when killed.
Prismatic Manapearl when killed.
Some items found in Nazjatar, such as ![]() Strange Volcanic Rock, will allow
you to customize the mini-boss fight, making it harder but also more rewarding.
Strange Volcanic Rock, will allow
you to customize the mini-boss fight, making it harder but also more rewarding.
The amount of manapearls you get per kill scales with the amount of arcanocrystals
you activated before using the amalgamator. This event can only be completed once
per week, and is linked to the ![]() Periodic Destruction achievement.
Periodic Destruction achievement.
Cursed Items in Nazjatar
If you ever find cursed items in Nazjatar, such as ![]() Skeletal Hand, you
will start getting random harmful debuffs that stack up as time goes on while you
have them in your inventory.
Skeletal Hand, you
will start getting random harmful debuffs that stack up as time goes on while you
have them in your inventory.
To get rid of these problematic items, and make some gold in the process, go to Gloomseeker Yarga, inside a underwater cave around 38, 59. This NPC will take the cursed item and give you a bag with a random amount of gold in return.
Rare Creature Hunting in Nazjatar
There are 40 rare creatures in Nazjatar, such as Sandclaw Stoneshell,
and killing them all completes the ![]() I Thought You Said They'd Be Rare? achievement.
Besides the usual small chunk of Azerite drop, these can also drop special zone items,
such as the What Will It Lure?-starting
I Thought You Said They'd Be Rare? achievement.
Besides the usual small chunk of Azerite drop, these can also drop special zone items,
such as the What Will It Lure?-starting ![]() Chum in the case of the
rare creature aforementioned.
Chum in the case of the
rare creature aforementioned.
Once you complete this quest, you can loot and throw more ![]() Chum into the water
around Nazjatar for extra rewards. Another example of this is picking up
Chum into the water
around Nazjatar for extra rewards. Another example of this is picking up ![]() Germinating Seed,
which leads to What Will It Grow?, a fun little side quest that unlocks
the possibility of looting further seeds to plant in Nazjatar.
Germinating Seed,
which leads to What Will It Grow?, a fun little side quest that unlocks
the possibility of looting further seeds to plant in Nazjatar.

To get this map in-game, use this addon, which shows most of the rare enemies and whether you killed them today or not, since you can only get good rewards for the first kill of the day.
This is a complete list of Nazjatar rares, their rewards and their locations,
which you will need for the ![]() I Thought You Said They'd Be Rare? achievement:
I Thought You Said They'd Be Rare? achievement:
| Rare Enemy Name | Notable Drop | Notes / Location |
|---|---|---|
| Soundless | Spawns around 59,55 (flies over much of the zone so location can vary) and can be hard to reach on foot, check WoW Quest's video for details on how to reach it | |
| Elder Unu | Azerite, unknown if there are special drops yet | Spawns around 65,32 |
| Chasm Haunter | Azerite, |
Spawns in an underwater cave around 48,86, check this video from WoW Quests for details |
| Avarius | Spawns around 37,12, requires |
|
| Shiznarasz the Consumer | Azerite, unknown if there are special drops yet | Spawns in a cave around 39,16 |
| Vorkoth | Spawns around 47,24, requires |
|
| Alga the Eyeless | Azerite, unknown if there are special drops yet | Spawns around 61,45 and is stealthed, although its star appears in the world map when nearby |
| Tidelord Aquatus and Tidelord Dispersius | Dispersius spawns around 58,26 while Aquatus spawns around 62,30. You need to kill Azshari Invokers around each pool to have a shot at spawning them | |
| King Gakula | Spawns around 29,29, once you right click on enough baby murlocs | |
| Needlespine | Found in multiple water locations, such as around 53,16 | |
| Anemonar, Kelpwillow, Oronu and Urduu | Chance at an item that grants 350 reputation and 100 experience to all bodyguards | Each of these enemies requires a specific condition to become hostile, check this video from FullStacks for the details. |
| Elderspawn Nalaada | Spawns around 53,73 | |
| Shassera | Spawns around 63,13 | |
| Siltstalker the Packmother | Spawns around 72,55 | |
| Banescale the Packfather | Spawns around 72,55 sometimes, after you kill Siltstalker the Packmother | |
| Rockweed Shambler | Spawns around 46,65 | |
| Prince Typhonus | Spawns around 44,88 | |
| Toxigore the Alpha | Spawns around 68,46 | |
| Deepglider | Azerite, unknown if there are special drops yet | Spawns around 56,44 |
| Tidemistress Lethsindra | Spawns around 67,23, check WoW Quests's video for details on how to spawn her | |
| Sandclaw Stoneshell | Found in multiple ground locations, commonly in the eastern parts of Nazjatar | |
| Iridescent Glimmershell | Spawns around 42,55 | |
| Caverndark Terror | Spawns inside a cave around 42,14, check WoW Quests's video for details on how to reach it | |
| Mirecrawler | Spawns around 62,50 | |
| Scale Matriarch Gratinax, Scale Matriarch Vynara and Scale Matriarch Zodia | All of these spawn around 31,40, one per day, and can drop the pet | |
| Prince Vortran | Spawns around 43,76 | |
| Voice in the Deeps | Spawns around 67,34, requires |
|
| Carnivorous Lasher | Spawns around 55,43, requires |
|
| Daggertooth Terror | Found in multiple water locations all around Nazjatar | |
| Blindlight | Spawns inside a cave around 36,80 | |
| Garnetscale | Spawns in the water around 37,41 | |
| Sandcastle | Spawns rarely when |
|
| Amethyst Spireshell | Found in multiple ground locations, such as around 72,36 |
Pet Battles in Nazjatar
There are 12 legendary wild pets spread all over the zone, usually inside small
caves, such as ![]() Ravenous Scalespawn and
Ravenous Scalespawn and ![]() Giant Opaline Conch. Defeating
any of them for the first time rewards an item that can be used for 250 allied faction
reputation.
Giant Opaline Conch. Defeating
any of them for the first time rewards an item that can be used for 250 allied faction
reputation.
Special PvE Events in Nazjatar
There are two noteworthy zone-wide events that happen periodically in Nazjatar:
- The Summons from the Depths event, identified by a skull icon on the map and the zone wide emote - The air crackles with power as Azshara's forces begin summoning a minion from the Depths. To participate, you are first required to kill some of Queen Azshara's elite naga forces within the given timer, followed by facing a boss enemy. Your reward for defeating the boss is an item that grants 150 reputation with your Nazjatar allied faction, and progress towards the Back to the Depths achievement.
- If the PvP event PvP Event: Battle for Nazjatar would start with unbalanced
faction representation, Azshara's Elite Commanders will spawn instead, creating
five different elite NPCs who appear in various locations across Nazjatar. Your
reward for defeating any of them are
 Prismatic Manapearls and a
  Nazjatar Battle Commendation.
World PvP in Nazjatar
There is a PvP event happening periodically the zone: PvP Event: Battle for Nazjatar. While this event is active, there will be five zones marked in the zone map and available to be captured and controlled by Alliance or Horde players, as well as NPCs from both factions fighting over them. The event ends after 45 minutes or once a faction reaches 3000 points, which can be obtained by controlling points and killing other faction NPCs / players.
The reward for doing the event is 500 Reputation, ![]() Nazjatar Battle Commendation
currency and some Conquest Points. Even if your faction loses, you still get full
reputation, and a small amount of currency and conquest points, as long as you
are in the zone when the event ends and have killed at least one player during
the event, as proof of participation.
Nazjatar Battle Commendation
currency and some Conquest Points. Even if your faction loses, you still get full
reputation, and a small amount of currency and conquest points, as long as you
are in the zone when the event ends and have killed at least one player during
the event, as proof of participation.
For more detailed information on this event, including screenshots of the contested zones and the PvP vendor's wares, check out this article.
World Bosses in Nazjatar
There are at least two World Bosses present in Nazjatar: Ulmath and Wekemara. Their loot table and abilities can be found here.
Nazjatar Rewards
There are multiple vendors with all kinds of items in Nazjatar, as well as multiple
rewards available throughout the zone. Feel free to consult our
Nazjatar Reputation
Guide for further details, and make sure you get some of the new contracts
(![]() Contract: Ankoan /
Contract: Ankoan / ![]() Contract: Unshackled) to maximize your
reputation gains.
Contract: Unshackled) to maximize your
reputation gains.
Prismatic Manapearls
![]() Prismatic Manapearl are commonly given rewards in the zone and are used
to buy and upgrade Benthic gear, or some of the vendor items, such as the new Nazjatar
essences. The
Prismatic Manapearl are commonly given rewards in the zone and are used
to buy and upgrade Benthic gear, or some of the vendor items, such as the new Nazjatar
essences. The ![]() A Fistful of Manapearls achievement is also related to their collection.
A Fistful of Manapearls achievement is also related to their collection.
Professions in Nazjatar
You can train any profession in your Nazjatar hub by talking to the
profession trainer NPCs. These not only teach multiple professions each, but
also sell the required tools for using each of the professions, such as
![]() Crystal Vial for alchemists.
Crystal Vial for alchemists.
In addition to the new recipes learned at the trainers, there are multiple new reputation-bound vendor recipes, which teach crafters how to create stronger PvP starter gear / the contract with your hub's faction / rank 3 of the new Engineering patterns, new potions, new enchants, and new Blacksmithing patterns.
In order to create these items you will need new Nazjatar-specific materials:
 Osmenite Ore is a new ore, used for Engineering and Blacksmithing and
prospected into new epic gems:
Osmenite Ore is a new ore, used for Engineering and Blacksmithing and
prospected into new epic gems:  Lava Lazuli,
  Sand Spinel,
  Sage Agate,
 Dark Opal,
  Sea Currant and
  Azsharine, as well as the very
rare
Azsharine, as well as the very
rare  Leviathan's Eye.
 Gilded Seaweave is used for Tailoring.
 Dredged Leather is used for Leatherworking.
 Zin'anthid is a new herb, used for Alchemy and prospected into
  Maroon Pigment for Inscription.
You can also get new Cooking recipes
from Nazjatar quests, which need Nazjatar materials to create them: ![]() Moist Fillet /
Moist Fillet /
![]() Rubbery Flank from hunting and
Rubbery Flank from hunting and ![]() Viper Fish /
Viper Fish / ![]() Mauve Stinger
from Fishing.
Mauve Stinger
from Fishing.
Special mention to the ![]() Troop Requisition item at revered reputation,
which allows you to recruit Ankoan Tidehunters /
Unshackled Mercenaries troops able to counter the new mission threat,
Troop Requisition item at revered reputation,
which allows you to recruit Ankoan Tidehunters /
Unshackled Mercenaries troops able to counter the new mission threat,
![]() Deep Sea.
Deep Sea.
Nazjatar Benthic Items (Catch-up Gear)
Artisan Itanu (Alliance) and Finder Palta (Horde) are the vendors of Benthic items, where you can buy 385 item level gear for every slot, except weapons and trinkets. You can also buy item level upgrades from Voidbinder Zorlan, allowing you to increase the item level of the tokens, up to a maximum of 425, just shy of the Heroic raid's 430 item level.
Benthic Azerite gear will come with new traits: ![]() Undulating Tides,
Undulating Tides, ![]() Loyal to the End
and
Loyal to the End
and ![]() Arcane Heart. Each piece will also have special unique properties, such
as
Arcane Heart. Each piece will also have special unique properties, such
as ![]() Akana's Reefstrider Soles increasing your critical strike damage, or
Akana's Reefstrider Soles increasing your critical strike damage, or ![]() Zanj'ir Scaleguard Greatbelt
causing you to deal 2% extra damage to Aberrations while in Nazjatar or The Eternal Palace.
Zanj'ir Scaleguard Greatbelt
causing you to deal 2% extra damage to Aberrations while in Nazjatar or The Eternal Palace.
Bind-to-Account reputation tokens
On patch 8.3, players who hit Revered reputation with their Nazjatar allies,
can now buy bind-on-account items for 20 ![]() Prismatic Manapearls.
Prismatic Manapearls.
Nazjatar Mounts / Pets / Toys
The hardest mount to obtain in Nazjatar is ![]() Snapback Scuttler, the sideways
walking crab. It is obtained through the zone's meta-achievement,
Snapback Scuttler, the sideways
walking crab. It is obtained through the zone's meta-achievement, ![]() Undersea Usurper,
which requires you to explore, fight and discover through every nook and cranny of the
zone over a period of weeks, if not months.
Undersea Usurper,
which requires you to explore, fight and discover through every nook and cranny of the
zone over a period of weeks, if not months.
There are multiple new pets and toys available to be bought from various
Nazjatar hub vendors, such as ![]() Inkscale Deepseeker,
Inkscale Deepseeker, ![]() Prismatic Softshell,
and
Prismatic Softshell,
and ![]() Alliance War Standard
Alliance War Standard
For screenshots and details on how to obtain the various new pets of 8.2, and specifically those of Nazjatar origins at the bottom, check out this article.
Nazjatar Essences
![]() Ripple in Space is obtained from completing Drowning the Alliance (or
Drowning the Horde). Rank 2 is obtained by finishing
Ripple in Space is obtained from completing Drowning the Alliance (or
Drowning the Horde). Rank 2 is obtained by finishing ![]() Fighting on Two Fronts.
Collecting
Fighting on Two Fronts.
Collecting ![]() Call to Arms Distinction from the Nazjatar World PvP event is required
for Rank 3, and completing
Call to Arms Distinction from the Nazjatar World PvP event is required
for Rank 3, and completing ![]() Supplying the Assassins is required for the Rank
4, symbolizing your mastery of World PvP (in Nazjatar).
Supplying the Assassins is required for the Rank
4, symbolizing your mastery of World PvP (in Nazjatar).
![]() Memory of Lucid Dreams is obtained from completing Down into Nazjatar (or
A Brief Respite). Rank 2 is obtained through Down But Not Out (or
Friends In Need).
Memory of Lucid Dreams is obtained from completing Down into Nazjatar (or
A Brief Respite). Rank 2 is obtained through Down But Not Out (or
Friends In Need). ![]() Nautical Battlefield Training is required for
Rank 3, and
Nautical Battlefield Training is required for
Rank 3, and ![]() Aqua Team Murder Force is required for the Rank 4, symbolizing
your mastery of the Nazjatar zone and its bodyguards.
Aqua Team Murder Force is required for the Rank 4, symbolizing
your mastery of the Nazjatar zone and its bodyguards.
The ![]() The Unbound Force (damage),
The Unbound Force (damage), ![]() The Ever-Rising Tide (healing)
and
The Ever-Rising Tide (healing)
and ![]() Aegis of the Deep (tanking) essences are obtained by raising your
reputation with your Nazjatar allied faction to friendly. You can obtain
upgraded versions by increasing your reputation, with the Rank 2 version coming
from honored, Rank 3 from revered, and Rank 4 from paragon reputation supply
caches with your Nazjatar allied faction.
Aegis of the Deep (tanking) essences are obtained by raising your
reputation with your Nazjatar allied faction to friendly. You can obtain
upgraded versions by increasing your reputation, with the Rank 2 version coming
from honored, Rank 3 from revered, and Rank 4 from paragon reputation supply
caches with your Nazjatar allied faction.
Changelog
- 12 Jan. 2020: Updated the Nazjatar guide for 8.3 patch changes: bind on account reputation token and reduced essence requirements.
- 13 Aug. 2019: Added the final bodyguard experience daily quests.
- 03 Aug. 2019: Added more bodyguard experience daily quests.
- 28 Jul. 2019: Added more bodyguard experience daily quests.
- 22 Jul. 2019: Added more bodyguard experience daily quests.
- 16 Jul. 2019: Added more bodyguard experience daily quests.
- 14 Jul. 2019: Reworked the bodyguard section, and added experience item and rank up rewards information.
- 13 Jul. 2019: Added more bodyguard experience daily quests.
- 08 Jul. 2019: Added more bodyguard experience daily quests, clarifications on the Azshara Elite Commanders event and on the Coral Rare Elites.
- 01 Jul. 2019: Added more bodyguard experience daily quests.
- 30 Jun. 2019: Added full information on Nazjatar rares, on murloc traders and more repeatable quest information and tips.
- 27 Jun. 2019: Added bodyguard experience daily quests and information on world quests, as well as correcting the points required to win the PvP event.
- 24 Jun. 2019: Reworked the information on Mardivas' Laboratory, the zone's meta-achievement, pet battles and Nazjatar reputation sources.
- 23 Jun. 2019: Added information on Mrrl's hidden mount and the Abyssal Focus, as well as professions and Nazjatar specific materials.
- 20 Jun. 2019: Added information about the two PvE events of the zone.
- 12 Jun. 2019: Made minor updates to guide to reflect the current PTR state of the zone.
- 21 May 2019: Added the new world boss and an in-detail link to their ability descriptions and loot. Added a video walkthrough of the essence introduction quest line.
- 18 May 2019: Added the quest line that leads you to Nazjatar and a storyline that is available once you finish the main quests.
- 12 May 2019: Guide added.