Battle for Azeroth Patch 8.2 Guides
Operation: Mechagon is a 5-man dungeon which was introduced in Patch 8.2 alongside the The Eternal Palace raid. While originally only available at the baseline Mythic difficulty, in Patch 8.3 this dungeon was split into two wings that can be accessed through the dungeon finder and as Mythic+ dungeons.
In this guide, players will find strategies and role-based information for each
boss within the dungeon. We will also include information on how to activate the
"hard mode" version of its baseline Mythic difficulty, which awards the ![]() Keep DPS-ing and Nobody Explodes
achievement.
Keep DPS-ing and Nobody Explodes
achievement.
Patch 8.3 Operation: Mechagon Changes
In Patch 8.3, Operation: Mechagon can now be entered through the dungeon finder and ran as a Mythic+ dungeon. In order to make this huge dungeon more manageable, it has been split into two wings: Mechagon Junkyard and Mechagon Workshop.
Mechagon Junkyard
Players can complete the first three bosses in whichever order they so choose. After the third boss encounter, HK-8 Aerial Oppression Unit will land in Junkwatt Depot. It is recommended that when players see the HK-8 Aerial Oppression Unit flying over any of the bosses that they do not engage that particular boss unless they want to activate Hard Mode on normal Mythic difficulty.
Along your way, make sure to pick up the buffs from the various buff robots spread all around the junkyard area.
The HK-8 Aerial Oppression Unit will begin to have a pattern once players defeat the first boss. It will begin to move to new locations as players progress through the dungeon. Players will want to defeat any boss that does not have the HK-8 Aerial Oppression Unit hovering above it, due to it making the fight harder if it is located at the same boss encounter.
The four bosses of Junkyard are:
Gunker
In order for players to summon Gunker, all three Toxic Monstrosities will need to be cleared in the Outflow. Doing this will free the Squirt Bots, which will activate the boss and assist the players during the encounter.
Please keep in mind for the duration of this fight, most of Gunker's
abilities will revolve around ![]() Toxic Goop. Players will want to avoid
coming into contact with
Toxic Goop. Players will want to avoid
coming into contact with ![]() Toxic Goop, as it will cause them to become
Toxic Goop, as it will cause them to become
![]() Gooped. Players that become Gooped will be incapacitated, preventing
them from using any of their actions. Once one player is Gooped, all other
players should burn down the Goop that is encasing them.
Gooped. Players that become Gooped will be incapacitated, preventing
them from using any of their actions. Once one player is Gooped, all other
players should burn down the Goop that is encasing them.
Throughout the fight with Gunker, players will receive help from
Squirt Bots. Once the encounter begins, Squirt Bot will activate
the ability ![]() Sanitizing Spray around the players and slowly will make its
way around Gunker. Squirt Bot will periodically walk over the
Sanitizing Spray around the players and slowly will make its
way around Gunker. Squirt Bot will periodically walk over the
![]() Toxic Goop, which will remove the pool from the ground. However, there will
be a permanent pool of
Toxic Goop, which will remove the pool from the ground. However, there will
be a permanent pool of ![]() Toxic Goop under Gunker, so damage dealers will want
to avoid this.
Toxic Goop under Gunker, so damage dealers will want
to avoid this.
During the encounter, there will be one Squirt Bot that walks around the
melee range which can be permanently followed by melee players; however, Gunker
will cast ![]() Splatter throughout the fight, which will apply
Splatter throughout the fight, which will apply ![]() Gooped
to a random Squirt Bot. At this point, players will need to defeat the Goop that
is encasing the Squirt Bot, but keep in mind that it will not have the
Gooped
to a random Squirt Bot. At this point, players will need to defeat the Goop that
is encasing the Squirt Bot, but keep in mind that it will not have the ![]() Sanitizing Spray
aura while encased.
Sanitizing Spray
aura while encased.
Throughout the fight with Gunker, he will have a set amount of abilities
that he will use. Mainly, he will use ![]() Toxic Fumes, which will cause damage
every 3 seconds. But as stated, he will have a set pattern of abilities that he
will use throughout the fight.
Toxic Fumes, which will cause damage
every 3 seconds. But as stated, he will have a set pattern of abilities that he
will use throughout the fight.
 Toxic Goop: This will be indicated by green swirls on the ground.
 Coalesce: This will draw all pools of the Toxic Goop to him.
It is recommended that players make sure that there are no pools behind them and
should try to stand in the area of the Squirt Bot.
Coalesce: This will draw all pools of the Toxic Goop to him.
It is recommended that players make sure that there are no pools behind them and
should try to stand in the area of the Squirt Bot.- At this time, he will once again cast Toxic Goop.
- Lastly, he will cast
 Toxic Wave, which casts out a wave of Toxic Goop
in all directions. Players will need to be standing in a Squirt Box or directly
behind one to avoid this ability.
Toxic Wave, which casts out a wave of Toxic Goop
in all directions. Players will need to be standing in a Squirt Box or directly
behind one to avoid this ability.
Trixie and Naeno
Considered one of the toughest boss encounters, Trixie and Naeno DO NOT
share the same health pool. When one is defeated, the other will become empowered,
so players will want to kill the bosses at the same time. If players defeat
Naeno first, Trixie will gain ![]() Super Boost, which increases her Haste by
100%, and if Trixie Tazer is defeated first, Naeno Megacrash will
gain
Super Boost, which increases her Haste by
100%, and if Trixie Tazer is defeated first, Naeno Megacrash will
gain ![]() Turbo Boost, which increases the damage he deals.
Turbo Boost, which increases the damage he deals.
Throughout the fight, Trixie will allow Naeno to enter the Mechacycle when
she casts ![]() Jump Start. While in the Mechacycle, Naeno will aim in any
given direction. After 4 seconds, he will cast
Jump Start. While in the Mechacycle, Naeno will aim in any
given direction. After 4 seconds, he will cast ![]() Pedal to the Metal, which
causes him to launch across the area in a straight line. Players will need to be
aware of where the Mechacycle is and what direction he is in, due to the near
lethal damage this ability will cause.
Pedal to the Metal, which
causes him to launch across the area in a straight line. Players will need to be
aware of where the Mechacycle is and what direction he is in, due to the near
lethal damage this ability will cause.
Afterwards, Naeno will cast ![]() Burnout, which will create a
Burnout, which will create a ![]() Smoke Cloud,
and will cast
Smoke Cloud,
and will cast ![]() Pedal to the Metal again. Once again, players will need to
aware of where the bike is and what direction it is pointing in. After
casting the second
Pedal to the Metal again. Once again, players will need to
aware of where the bike is and what direction it is pointing in. After
casting the second ![]() Pedal to the Metal, Naeno will exit the Mechacycle and
begin combat once more.
Pedal to the Metal, Naeno will exit the Mechacycle and
begin combat once more.
Once in combat, Naeno Megacrash will begin to follow the Tank and cast
![]() Roadkill, which will charge to an area, causing high damage to any players
in that area. Tanks will need to be on the look out for
Roadkill, which will charge to an area, causing high damage to any players
in that area. Tanks will need to be on the look out for ![]() Bolt Buster, which
is a frontal cleave that is cast towards them and will kill any non-tank player
that is in the area.
Bolt Buster, which
is a frontal cleave that is cast towards them and will kill any non-tank player
that is in the area.
During the fight, Trixie Tazer does not melee the tank, but instead
she will spam her ![]() Taze cast, which deals a small amount of up-front
damage, but applies a harder damage over time to any
player that is hit that lasts for 20 seconds. During the fight with Trixie Tazer, it is recommended
that players alternate interrupts. Keep in mind that Trixie will also reposition
herself using
Taze cast, which deals a small amount of up-front
damage, but applies a harder damage over time to any
player that is hit that lasts for 20 seconds. During the fight with Trixie Tazer, it is recommended
that players alternate interrupts. Keep in mind that Trixie will also reposition
herself using ![]() Electric Slide.
Electric Slide.
Trixie is also known to cast ![]() Mega Taze instead. This is an uninterruptable
cast that will mark a player. Once the 8-second cast is finished, the player that is
marked will be stunned for a total of 8 seconds and will take a very high amount
of damage. Players who are marked will need to enter the
Mega Taze instead. This is an uninterruptable
cast that will mark a player. Once the 8-second cast is finished, the player that is
marked will be stunned for a total of 8 seconds and will take a very high amount
of damage. Players who are marked will need to enter the ![]() Smoke Cloud in
order to avoid the damage from
Smoke Cloud in
order to avoid the damage from ![]() Mega Taze.
Mega Taze.
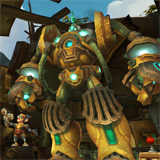
King Gobbamak
Upon engaging King Gobbamak, players will notice that the boss will be summoning Scrapbone Grunters throughout the fight. These troggs will only deal minor damage, but can quickly become overwhelming if not dealt with. Players will want to use the Stolen Tech that is around the area to keep the number of Troggs to a minimum.
When King Gobbamak reaches 100 Energy, he will begin to cast ![]() Charged Smash
on the tank. This deals a very high amount of damage that will be split among
the players around the tank. For this ability, the party should be grouped up
during the cast to help alleviate the amount of damage done and to keep the tank
alive.
Charged Smash
on the tank. This deals a very high amount of damage that will be split among
the players around the tank. For this ability, the party should be grouped up
during the cast to help alleviate the amount of damage done and to keep the tank
alive.
After players are hit with ![]() Charged Smash, they will have an
Charged Smash, they will have an ![]() Electrical Charge,
which will deal a small amount of damage over time to the player. In order to
remove this, players will need to stand near either a Stolen Scrapbo or
a Stolen Shock Coil. Doing this will activate the Stolen Tech for 20 seconds
and instantly kills any Scrapbone Grunters that come near it.
Electrical Charge,
which will deal a small amount of damage over time to the player. In order to
remove this, players will need to stand near either a Stolen Scrapbo or
a Stolen Shock Coil. Doing this will activate the Stolen Tech for 20 seconds
and instantly kills any Scrapbone Grunters that come near it.
Lastly,King Gobbamak will cast ![]() Rumble every 45 seconds,
which will deal a high amount of damage to all players over 5 seconds and causes
Cave-Ins to occur. It is recommended that players should use any defensives they
have and should avoid the falling rocks.
Rumble every 45 seconds,
which will deal a high amount of damage to all players over 5 seconds and causes
Cave-Ins to occur. It is recommended that players should use any defensives they
have and should avoid the falling rocks.
HK-8 Aerial Oppression Unit
Players will find that this boss will consist of three phases. For the first
phase, players will fight a Tank Buster MK1 and for Phase 2, players will
need to return to an Overcharge station, which will cause triple damage to the
HK-8 Aerial Oppression Unit going ![]() Haywire.
Haywire.
For Phase 1, this will take place against the Tank Buster MK1 while
HK-8 Aerial Oppression Unit is in the air. The Tank Buster will cast
![]() Wreck, which will deal a large amount of Physical damage to the tank every
3 seconds. Every time the tank gets hit, it will begin to stack a debuff called
Wreck, which will deal a large amount of Physical damage to the tank every
3 seconds. Every time the tank gets hit, it will begin to stack a debuff called
![]() Wreck, which will make every hit harder. At this point, tanks will need
to make sure they have any and all cooldowns available for this ability.
Wreck, which will make every hit harder. At this point, tanks will need
to make sure they have any and all cooldowns available for this ability.
Throughout Phase 1, the HK-8 will cast the ability ![]() Reinforcement Relay,
which will summon Walkie Shockie X1s into the arena. These mobs will focus
random players and slowly walk towards them, which will leave a
Reinforcement Relay,
which will summon Walkie Shockie X1s into the arena. These mobs will focus
random players and slowly walk towards them, which will leave a ![]() Static Discharge
behind. Please keep in mind that these robots are immune to any damage and can
only be crowd controlled. Once the energy has been depleted, the robots will begin to cast
Static Discharge
behind. Please keep in mind that these robots are immune to any damage and can
only be crowd controlled. Once the energy has been depleted, the robots will begin to cast
![]() Self-Destruct.
Self-Destruct.
Players will need to keep some of the other minor things in mind during Phase 1
of this fight. First, when players engage the Tank Buster, a Blue Ring will lock them
within the arena and they will not able to leave. Players in the healer role will need
to take care of the Tank Buster MK1 using ![]() Fulminating Zap on random
players in the fight. Lastly, the HK-8 will begin to move around the outskirts
of the arena and cast
Fulminating Zap on random
players in the fight. Lastly, the HK-8 will begin to move around the outskirts
of the arena and cast ![]() Cannon Blast towards the center. If any player
is hit with
Cannon Blast towards the center. If any player
is hit with ![]() Cannon Blast, it will be a near one-shot and should be
avoided at all costs.
Cannon Blast, it will be a near one-shot and should be
avoided at all costs.
After completing the above and the Tank Buster has been destroyed, Phase 2
will begin. This phase will begin with an announcement that either the North
or South Overcharge station has been activated and players will need to start
positioning themselves to the side of the arena. The HK-8 Aerial Oppression Unit
will fly to the center and begin casting ![]() Annihilation Ray, which will deal
light damage to the entire party.
Annihilation Ray, which will deal
light damage to the entire party.
At this point of the phase, players will need to go to the Overcharge Station
while making sure to dodge the various traps that they will encounter. The first
trap players will encounter is called ![]() Vent Blast and can be located underneath
the grated floors. Standing on these grates, while they are lit up, will cause
players to take a high amount of damage and stun any player for a total of 2 seconds.
Vent Blast and can be located underneath
the grated floors. Standing on these grates, while they are lit up, will cause
players to take a high amount of damage and stun any player for a total of 2 seconds.
The second trap that players will encounter will be the Sentry Array. This trap will have a rotating set of beams that will teleport players to the beginning if they are hit. Players with leaps and jumps will be able to avoid these beams and avoid being sent back to the start of the dungeon.
The last trap that players will encounter during this boss encounter will be Sentry Bots. Players that get hit by these bots will not only send you back to the start of the dungeon, but will also alternate between the left and right side of the platforms. During the second wave of bots, however, they will rotate around the Overcharge Station instead.
Once players have made it to the top, they will need to begin a Hacking channel
on the Overcharge Station. The Overcharge Station begins with 100 energy and every
second that any player spends hacking will remove 2 energy from the station. Once
the Overcharge Station reaches 0 energy, this will cause the HK-8 Aerial Oppression Unit
to go ![]() Haywire and it will take 300% damage for 30 seconds. While HK-8 Aerial Oppression Unit is down on the ground,
players will want to avoid the area of impact from the Malfunction Sparks
that come from the boss.
Haywire and it will take 300% damage for 30 seconds. While HK-8 Aerial Oppression Unit is down on the ground,
players will want to avoid the area of impact from the Malfunction Sparks
that come from the boss.
Please note that if the boss is NOT destroyed after 30 seconds, players
will need to start from Phase 1 to finish the boss. Players must ALSO cause the
boss to go into ![]() Haywire mode before it finishes the 3 minute cast of
Haywire mode before it finishes the 3 minute cast of
![]() Annihilation Ray. If players do not cause Haywire, the party will wipe.
Annihilation Ray. If players do not cause Haywire, the party will wipe.
Mechagon Workshop
Workshop is a much more linear dungeon, with very little trash to kill, although much of it is extremely dangerous, especially the pull right before the last boss! Make sure to skip it, if possible.
The four bosses of Workshop are:
Tussle Tonks
Once players have cleared the trash Tonks, the bosses The Platinum Pummeler
and Gnomercy 4.U. will spawn. Once again, these two bosses do not share
a health pool. While in the Robodome Arena, players will encounter various
environmental hazards scattered throughout and they are important to be aware of
during this fight. First, ![]() Buzz Saws will be active and roll around the arena
in a particular pattern.
Buzz Saws will be active and roll around the arena
in a particular pattern.
Another environmental hazard that players will need to be aware of are the 4 Piston Smashers that are located in the center of the room. Each time that the piston smashes the The Platinum Pummeler, it will become deactivated and will remove one stack. Tanks will want to use taunt at the start of the encounter and kite The Platinum Pummeler to 3 Piston Smashers. At this point, Healers will most likely gain aggro until the first stack is removed, so make sure your tank taunts in the right direction.
Throughout the fight, the boss will cast ![]() Whirling Edge, which will deal
a high amount of damage to anyone who is in melee range after the cast. Players
will need to back away and kite the The Platinum Pummeler during this
time. During this phase, the boss will also begin to lay mines on the ground, which
players should try and avoid.
Whirling Edge, which will deal
a high amount of damage to anyone who is in melee range after the cast. Players
will need to back away and kite the The Platinum Pummeler during this
time. During this phase, the boss will also begin to lay mines on the ground, which
players should try and avoid.
Gnomercy 4.U. is next and it will spend a lot of time not attacking the
tank. Once Gnomercy 4.U. begins to cast ![]() Maximum Thrust, players
will need check which direction it is facing and dodge the ability. Once the boss
impacts the wall, it will be stunned for 10 seconds.
Maximum Thrust, players
will need check which direction it is facing and dodge the ability. Once the boss
impacts the wall, it will be stunned for 10 seconds.
Another ability Gnomercy 4.U. will do is ![]() Vent Jets, which will be
fixated on random players. The entire party will take a high amount of Fire damage
every 10 seconds and it is recommended that healers use their cooldowns during this
time. Players that are directly in front of the boss during
Vent Jets, which will be
fixated on random players. The entire party will take a high amount of Fire damage
every 10 seconds and it is recommended that healers use their cooldowns during this
time. Players that are directly in front of the boss during ![]() Vent Jets
will take an additional amount of damage.
Vent Jets
will take an additional amount of damage.
K.U.-J.0.
The next boss encounter is with K.U.-J.0. and is a very simple and straight-forward
encounter with minimal mechanics. While in the arena, Junk Cubes will begin
to be dropped. Any player who gets hit with ![]() Air Drop will deal minor damage
to players in the area along with a knockback. Players will want to be aware
of when these Junk Cubes are hit by K.U.-J.0.'s abilities, so that they can
become "Heated" the first time it is hit; they will become a Junk Bomb the second
time it is hit. Players will be instantly dealt with a deadly amount of damage and it
will knock them back.
Air Drop will deal minor damage
to players in the area along with a knockback. Players will want to be aware
of when these Junk Cubes are hit by K.U.-J.0.'s abilities, so that they can
become "Heated" the first time it is hit; they will become a Junk Bomb the second
time it is hit. Players will be instantly dealt with a deadly amount of damage and it
will knock them back.
K.U.-J.0.'s last ability will be ![]() Explosive Leap. This ability will
cause players to be marked and jumped on. The players that are marked should
spread out from both the other players and the Junk Cubes. His most deadly ability
is
Explosive Leap. This ability will
cause players to be marked and jumped on. The players that are marked should
spread out from both the other players and the Junk Cubes. His most deadly ability
is ![]() Venting Flames. Players will be dealt a very high amount of Fire
damage if they are in the line of sight of the boss. Players can use the Junk Cubes
that are scattered around the arena or go into any corner to hide. Players will want
to make sure to avoid any "Heated" Junk Cubes at the start of the cast.
Venting Flames. Players will be dealt a very high amount of Fire
damage if they are in the line of sight of the boss. Players can use the Junk Cubes
that are scattered around the arena or go into any corner to hide. Players will want
to make sure to avoid any "Heated" Junk Cubes at the start of the cast.
Tanks will have ![]() Blazing Chomp cast upon them, which will deal a very
high amount of Magic damage every second and will need to be dispelled as soon as
possible. Once this is dispelled, it will deal a minor amount of damage to the rest
of the party.
Blazing Chomp cast upon them, which will deal a very
high amount of Magic damage every second and will need to be dispelled as soon as
possible. Once this is dispelled, it will deal a minor amount of damage to the rest
of the party.
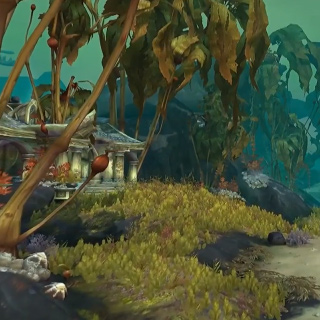
Machinist's Garden
At first glance, The Machinist's Garden appears to be a nice robot garden. But hidden away are many traps that will try to kill you and the other players of your group. As the fight with the Machinist's Garden goes on, it will continue to lay more traps that players will need to try and avoid.
At the start of the fight, Head Machinist Sparkflux will have an energy
bar. Once the bar reaches 100, he will begin to cast ![]() "Hidden" Flame Cannon,
which will leave a high ticking DoT on the player and can stack if you cross
multiple lines. You can avoid this cast by looking at the center statue and look
for the little sprouts that protrude after the cast. These spouts will tell the
player where the Flame Cannons will begin and, once they begin to fire, players are
locked into the room they are standing in.
"Hidden" Flame Cannon,
which will leave a high ticking DoT on the player and can stack if you cross
multiple lines. You can avoid this cast by looking at the center statue and look
for the little sprouts that protrude after the cast. These spouts will tell the
player where the Flame Cannons will begin and, once they begin to fire, players are
locked into the room they are standing in.
Sparkflux will begin activating Inconspicuous Plants throughout
the fight. Players will be randomly focused and have ![]() Blossom Blast
channelled onto them. This will deal a significant amount of damage until the
Inconspicuous Plant is killed. Once destroyed, it will become an
Blossom Blast
channelled onto them. This will deal a significant amount of damage until the
Inconspicuous Plant is killed. Once destroyed, it will become an ![]() Oil Fountain
and transform itself once it has been hit with the next
Oil Fountain
and transform itself once it has been hit with the next ![]() "Hidden" Flame Cannon.
"Hidden" Flame Cannon.
When it is hit by the ![]() "Hidden" Flame Cannon, it will evolve into a
"Hidden" Flame Cannon, it will evolve into a
![]() Roaring Flame, causing fire patches in the area. Please keep in mind that
Roaring Flame, causing fire patches in the area. Please keep in mind that
![]() Roaring Flame will not despawn and players will have more fire patches to
dodge as this fight goes on.
Roaring Flame will not despawn and players will have more fire patches to
dodge as this fight goes on.
Head Machinist Sparkflux will also cast ![]() Discom-BOMB-ulator throughout
the fight and this will leave a blue swirl on the ground. Players will
have this cast on them at random and getting hit with this will end up disorienting
the player for 9 seconds, but it can be dispelled. If the tank
ends up getting hit with this cast, the boss will begin to melee another
target.
Discom-BOMB-ulator throughout
the fight and this will leave a blue swirl on the ground. Players will
have this cast on them at random and getting hit with this will end up disorienting
the player for 9 seconds, but it can be dispelled. If the tank
ends up getting hit with this cast, the boss will begin to melee another
target.
Head Machinist Sparkflux's last ability is called ![]() Self-Trimming Hedge.
This ability is a bouncing sawblade that will not despawn and any player getting
hit with this will be dealt a large amount of damage.
Self-Trimming Hedge.
This ability is a bouncing sawblade that will not despawn and any player getting
hit with this will be dealt a large amount of damage.
King Mechagon
King Mechagon is the final boss of the instance and will have a total of 3
phases. At the start of Phase 1, the boss will be in his ![]() Aerial Unit R-21/X
and while in this mode, the boss will not hit the
tank in melee. Instead, tanks will have
Aerial Unit R-21/X
and while in this mode, the boss will not hit the
tank in melee. Instead, tanks will have ![]() Pulse Blast cast on them,
which deals pure Magic damage.
Pulse Blast cast on them,
which deals pure Magic damage.
King Mechagon will summon 4 Plasma Orbs at the start of the fight.
Players will want to avoid the orbs, as those who get too close will be dealt
damage and knocked back. King Mechagon will also occasionally move these orbs using
his ability ![]() Recalibrate and deal massive damage in the areas marked,
but also deal a smaller amount of damage to players that they pass through. Players
will want to dodge these orbs by checking where they are going from
the directional arrows on each orb.
Recalibrate and deal massive damage in the areas marked,
but also deal a smaller amount of damage to players that they pass through. Players
will want to dodge these orbs by checking where they are going from
the directional arrows on each orb.
Players will be targeted randomly with Giga-Zap. During the first phase
of this fight, players will be hit with a large amount of upfront damage and will
be left with a damage over time effect. Players can expect the debuff to last
12 seconds and damage taken will be increased from Giga-Zap by 100%. King Mechagon's
last ability for Phase 1 is ![]() Cutting Beam.
Cutting Beam.
The Aerial Unit R-21/X that King Mechagon is in will begin to fly
and start to cast ![]() Cutting Beam. All players in the party will receive
a high amount of damage, but will do massive damage to anyone who is directly under
Cutting Beam. All players in the party will receive
a high amount of damage, but will do massive damage to anyone who is directly under
![]() Cutting Beam. During this time, a random player will be chased by the
Aerial Unit.
Cutting Beam. During this time, a random player will be chased by the
Aerial Unit.
Once players have defeated the Aerial Unit R-21/X, King Mechagon will stun
all players and enter the Omega Buster. This will begin Phase 2.
Players can expect to face ![]() Plasma Orbs and
Plasma Orbs and ![]() Recalibrate from Phase 1
and the Omega Buster can be tanked like a regular boss. The biggest
difference in this phase will be the Giga-Zap ability.
Recalibrate from Phase 1
and the Omega Buster can be tanked like a regular boss. The biggest
difference in this phase will be the Giga-Zap ability.
During Phase 2, all players will be hit with Giga-Zap that are in the area, instead of it being on one player. This ability will also be cast three times in a row, which will make the debuff more important to manage during this phase. Any player who is marked with Giga-Zap will be tethered and it is recommended that they do not move. If Giga-Zap is not targeted on you, you will want to move out of the area to not get the debuff.
King Mechagon's final move of phase 2 will be to detach his ![]() Magneto-Arm
which lands in the arena. All players and Plasma Orbs will be drawn to the Arm
for 9 seconds. While this happens, it will do ticking damage to the entire party
and can be reduced by increasing your distance from the
Magneto-Arm
which lands in the arena. All players and Plasma Orbs will be drawn to the Arm
for 9 seconds. While this happens, it will do ticking damage to the entire party
and can be reduced by increasing your distance from the ![]() Magneto-Arm.
Magneto-Arm.
For King Mechagon's final phase, King Mechagon ejects from the Omega Buster and will become a Tank and Spank fight. He will not have any special mechanics during this final phase.
Operation: Mechagon Hard Mode
HK-8 Aerial Oppression Unit Hard Mode
Players can activate a hard mode of the HK-8 Aerial Oppression Unit boss fight if they so choose to. In order to unlock the hard mode fight, players will need to defeat the first 3 bosses with the unit hovering over the boss. Players will not need to clear trash while the unit is above and can summon Gunker before the unit moves to make the fight a little easier.
When the HK-8 Aerial Oppression Unit is hovering over each boss while players fight, it will spawn 3 Walkie Shockie X1 robots that function the same way as in the HK-8 Aerial Oppression Unit boss fight. The only difference between these two are that the players will have the robots to deal with during the first 3 bosses.
Once players have cleared the first 3 bosses with the HK-8 Aerial Oppression Unit
in the air, they will need to head to the HK-8 Aerial Oppression Unit.
Players will be able to tell when they have activated the hard mode of this boss
due to a Tank Buster MK2 instead of Tank Buster MK1. This new version
is going to have similar mechanics to the first one, but will be harder; the
![]() Fulminating Zap ability will be changed to
Fulminating Zap ability will be changed to ![]() Fulminating Burst.
Fulminating Burst.
Players will notice that the Walkie Shockie X1s have been upgraded to Walkie Shockie X2s during Phase 1 of the fight. These robots are now all connected by Shock Link and players will want to avoid being in the middle of this connection. Players will have the chance to leave the area of the link, but will take a small amount of damage leaving.
The last change to the encounter is that players will only have 55 seconds
to have HK-8 Aerial Oppression Unit go into ![]() Haywire mode before the
cast of
Haywire mode before the
cast of ![]() Annihilation Ray has a chance to wipe the party.
Annihilation Ray has a chance to wipe the party.
K.U.-J.0. Hard Mode
Once players have defeated HK-8 Aerial Oppression Unit, Players will be able to make there way to K.U.-J.0. as they normally would. Once players get to HK-8 Aerial Oppression Unit, a pile of Robo-Waste will be located on the ground. These will be on the left where you walk in at and players will need to click on the Robo-Waste to send it flying into the fire which will activate hard mode.
Once players have begun to pull K.U.-J.0., a debuff will slowly begin to
start stacking on the party, which will reduce everyone's movement speed by 5%
per stack. This debuff will cap at 16 stacks which will slow every player by up to
80%. Players will need to defeat K.U.-J.0. while under the effects of this
debuff and will need to head to the Junk Cubes when he casts ![]() Venting Flames.
Venting Flames.
King Mechagon Hard Mode
Once players have defeated K.U.-J.0., a pillar with a red button will appear. You will need to interact with the button to activate the hard mode when you pull King Mechagon. King Mechagon's Hard Mode involves Annihilo-tron 5000, which is an untargetable NPC that will detonate once its countdown reaches 0. Annihilo-tron 5000 will have an energy bar that can be seen on the Boss Frames and it will drain at a rate of 20 energy every 9 seconds. Once the energy bar hits 0, every player within the party will be instantly killed after a few seconds.
Players will need to keep in mind that when Annihilo-tron 5000 hits 35 energy, a "Termination Sequence" will begin. When this begins, the Input Panels will flash a color and picture until each one has flashed once. Players will not need to remember the picture or color but the sequence of the Input Panels. These panels will then all flash a Red Skull again before they all reactivate with colors. This will begin the Input Phase, which will allow players to interact with the Input Panels and will need to input the correct Termination Sequence.
When players input the correct Termination Sequence, this will reset Annihilo-tron 5000 back to 100 Energy. Players will then be able to click on the Input Panels when the Annihilo-tron 5000 is at 11 Energy, which means that there is only 5 seconds to input the entire Termination Sequence. It is recommended to have one person stationed at each Input Panel.
The termination sequence will occur every 45 seconds throughout the fight with
King Mechagon, which causes overlaps with some of the other mechanics that
he has. ![]() Recalibrate will cause a
Recalibrate will cause a ![]() Plasma Orb to spawn if players
stand near the Input Panels when that phase of the fight is not occurring. It is
also recommended that you do not kill
Plasma Orb to spawn if players
stand near the Input Panels when that phase of the fight is not occurring. It is
also recommended that you do not kill ![]() Aerial Unit R-21/X when the termination
sequence is beginning, as this will cause the party to be stunned for the Input Phase.
Aerial Unit R-21/X when the termination
sequence is beginning, as this will cause the party to be stunned for the Input Phase.
With ![]() Giga-Zap,
Giga-Zap, ![]() Magneto-Arm, and
Magneto-Arm, and ![]() Cutting Beam: These
can be lined up with the termination sequence, so players will need to try and survive
this while paying attention to the combo sequence. Once done correctly and King Mechagon
has been defeated, you will have successfully defeated Hard Mode.
Cutting Beam: These
can be lined up with the termination sequence, so players will need to try and survive
this while paying attention to the combo sequence. Once done correctly and King Mechagon
has been defeated, you will have successfully defeated Hard Mode.
Loot
Mounts
Players will have the opportunity to obtain two rare mounts Operation: Mechagon that drop from the bosses within.
 Mechagon Peacekeeper: Players can obtain this rare mount from the
fourth boss of the dungeon, HK-8 Aerial Oppression Unit.
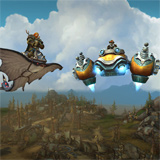
Mechagon Peacekeeper: Players can obtain this rare mount from the
fourth boss of the dungeon, HK-8 Aerial Oppression Unit. Aerial Unit R-21/X: Players can obtain this rare flying mount from the
last boss of the dungeon, King Mechagon.
Aerial Unit R-21/X: Players can obtain this rare flying mount from the
last boss of the dungeon, King Mechagon.
Pets
There are also two pets that players can obtained from the bosses within the dungeon.
 Microbot 8D: Players can obtain this rare pet from the 4th boss of
the dungeon, HK-8 Aerial Oppression Unit.
Microbot 8D: Players can obtain this rare pet from the 4th boss of
the dungeon, HK-8 Aerial Oppression Unit. Golden Snorf: Players can obtain this rare pet from the last boss
of the dungeon, King Mechagon.
Golden Snorf: Players can obtain this rare pet from the last boss
of the dungeon, King Mechagon.
Battle Pets
Players can obtain a total of 4 Battle Pets from the dungeon. Players can obtain these by engaging in pet battles with the wild pets while inside the dungeon.
- Alloyed Alleyrat
- Clanking Scrapsorter
- Copper Hopper
- H4ND-EE
Azerite Armor
Please note that all Azerite Helms have been removed from the dungeon journal and it is not known if they have been removed entirely.
| Item Name | Slot | Type | Trait | Source |
|---|---|---|---|---|
| Helm | Cloth | King Mechagon | ||
| Shoulders | Cloth | King Mechagon | ||
| Chest | Cloth | HK-8 Aerial Oppression Unit | ||
| Helm | Leather | King Mechagon | ||
| Shoulders | Leather | King Mechagon | ||
| Chest | Leather | HK-8 Aerial Oppression Unit | ||
| Helm | Plate | King Mechagon | ||
| Shoulders | Plate | HK-8 Aerial Oppression Unit | ||
| Chest | Plate | King Mechagon | ||
| Helm | King Mechagon | |||
| Shoulders | HK-8 Aerial Oppression Unit | |||
| Chest | King Mechagon |
Punch Cards
| Item Name | Color | Source | Stats |
|---|---|---|---|
| Red | HK-8 Aerial Oppression Unit | Healing allies under 50% health has a chance to restore 4157 mana to you over 6 seconds. | |
| Yellow | Multiple Bosses | +311 Haste, +93 Random Stat | |
| Blue | HK-8 Aerial Oppression Unit | Track nearby Mechanic creatures, showing their location on the minimap. | |
| Red | HK-8 Aerial Oppression Unit | Deals 7170 damage to target creature, and gives this effect a 10% boost when used on targets of the same name. Resets if used on a target of a different name. 45 second cooldown. | |
| Yellow | Multiple Bosses | +311 Versatility, +93 Random StatM | |
| Blue | King Mechagon | Reduces the potency of forced movement effects. | |
| Red | King Mechagon | Your abilities have a chance to grant you 280 Haste for 12 seconds. | |
| Yellow | Multiple Bosses | +311 Mastery, +93 Random Stat | |
| Yellow | Multiple Bosses | +311 Crit, +93 Random Stat |
Profession Patterns
| Item Name | Profession | Source | Description |
|---|---|---|---|
| Engineering | K.U.-J.0. | This pattern teaches how to craft the |
|
| Blacksmithing | K.U.-J.0. | This pattern teaches how to craft the |
|
| Alchemy | Any Boss | This recipe teaches the Rank 3 craft for |
|
| Alchemy | Any Boss | This recipe teaches the Rank 3 craft for |
|
| Alchemy | Any Boss | This recipe teaches the Rank 3 craft for |
|
| Cooking | Any Boss | Teaches the Rank 3 craft for |
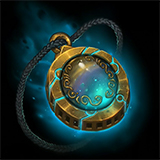
Azerite Essence
Players can obtain the ![]() Vision of Perfection Azerite Essence from running
Operation: Mechagon or its Mythic+ wings. While Ranks 1-3 come from running the dungeon,
Rank 4 is tied to the achievement
Vision of Perfection Azerite Essence from running
Operation: Mechagon or its Mythic+ wings. While Ranks 1-3 come from running the dungeon,
Rank 4 is tied to the achievement ![]() Hertz Locker and is account-wide once unlocked.
Hertz Locker and is account-wide once unlocked.
 Engine of Mecha-Perfection: This Essence has a 100% drop chance from
King Mechagon or the end of run Mythic+ chest, and is used to learn Rank 1
Engine of Mecha-Perfection: This Essence has a 100% drop chance from
King Mechagon or the end of run Mythic+ chest, and is used to learn Rank 1  Vision of Perfection.
 Blueprint: Perfectly Timed Differential: This blueprint drops from
King Mechagon or the end of run Mythic+ chest, and teaches the player to craft
Blueprint: Perfectly Timed Differential: This blueprint drops from
King Mechagon or the end of run Mythic+ chest, and teaches the player to craft  Perfectly Timed Differential
from Junkyard Tinkering.
Perfectly Timed Differential
from Junkyard Tinkering. Progression Sprocket: This Essence has a 100% drop chance from
King Mechagon or the end of run Mythic+ chest, and will need six to combine and create
Progression Sprocket: This Essence has a 100% drop chance from
King Mechagon or the end of run Mythic+ chest, and will need six to combine and create  Perfection-Enhancing Gearbox
 Mecha-Perfection Turbo: This can be obtained from the achievement
 Hertz Locker and will require players to have Rank 3 Vision of Perfection
obtained.
Hertz Locker and will require players to have Rank 3 Vision of Perfection
obtained.
Rings
Players will be able to obtain rings from within Operation: Mechagon that have
effects on them which are unfinished and will need to be equipped with the corresponding
effect. These are called Conditions and Effects. An example of this
would be equipping ![]() Logic Loop of Division and
Logic Loop of Division and ![]() Shorting Bit Band, which will
cause you to deal Nature damage to a nearby enemy while attacking an enemy from
behind.
Shorting Bit Band, which will
cause you to deal Nature damage to a nearby enemy while attacking an enemy from
behind.
 Logic Loop of Division/
 Overclocking Bit Band: If you damage an
enemy while you are behind them then you gain 191 Haste for 15 seconds.
Overclocking Bit Band: If you damage an
enemy while you are behind them then you gain 191 Haste for 15 seconds.- Logic Loop of Maintenance/ Protecting Bit Band: If you activate
an ability while your health is below 50% then you absorb the next 20,040 Magic
damage within 8 seconds.
- Logic Loop of Recursion/ Rebooting Bit Band: If you use 3 different
spells or abilities on the same target, then you heal up to 5 injured allies for
10590.
- Logic Loop of Synergy/ Shorting Bit Band: If you heal a target
whose health is below 50%, then you deal 15643 Nature damage to a nearby enemy.
Trinkets
| Item Name | Type | Main Stats | Source |
|---|---|---|---|
| Trinket | Agility or Strength | The Platinum Pummeler | |
| Trinket | Intellect | Head Machinist Sparkflux | |
| Trinket | Agility or Strength | Trixie Tazer |
Weapons
| Item Name | Type | Main Stats | Source |
|---|---|---|---|
| One-Handed Mace | Intellect/Stamina | The Platinum Pummeler | |
| One-Handed Mace | Agility/Stamina | King Gobbamak | |
| One-Handed Axe | Agility/Stamina | Gunker | |
| One-Handed Axe | Strength/Stamina | HK-8 Aerial Oppression Unit | |
| Two-Handed Mace | Strength/Stamina | King Gobbamak | |
| Gun | Agility/Stamina | HK-8 Aerial Oppression Unit | |
| Shield | Strength/Stamina/Intellect | Trixie Tazer | |
| One-Handed Sword | Strength/Stamina | Head Machinist Sparkflux | |
| One-Handed Sword | Intellect/Stamina | Gunker | |
| Dagger | Agility/Stamina | The Platinum Pummeler | |
| Dagger | Agility/Stamina | Trixie Tazer | |
| Staff | Agility/Stamina | King Gobbamak | |
| Dagger | Intellect/Stamina | Head Machinist Sparkflux |
Armor
| Item Name | Slot | Type | Main Stats | Source |
|---|---|---|---|---|
| Hands | Cloth | Intellect/Stamina | Gunker | |
| Hands | Cloth | Intellect/Stamina | K.U.-J.0 | |
| Hands | Leather | Agility or Intellect/Stamina | King Mechagon | |
| Hands | Leather | Agility or Intellect/Stamina | King Gobbamak | |
| Hands | Agility or Intellect/Stamina | K.U.J-.0 | ||
| Hands | Agility or Intellect/Stamina | Gunker | ||
| Hands | Plate | Strength or Intellect/Stamina | King Mechagon | |
| Hands | Plate | Strength or Intellect/Stamina | Trixie Tazer | |
| Legs | Cloth | Intellect/Stamina | King Mechagon | |
| Legs | Cloth | Intellect/Stamina | HK-8 Aerial Oppression Unit | |
| Legs | Leather | Agility or Intellect/Stamina | Trixie Tazer | |
| Legs | Leather | Agility or Intellect/Stamina | K.U.-J.0. | |
| Legs | Agility or Intellect/Stamina | Trixie Tazer | ||
| Legs | Agility or Intellect/Stamina | Head Machinist Sparkflux | ||
| Legs | Plate | Strength or Intellect/Stamina | King Gobbamak | |
| Legs | Plate | Strength or Intellect/Stamina | The Platinum Pummeler | |
| Feet | Cloth | Intellect/Stamina | King Gobbamak | |
| Feet | Cloth | Intellect/Stamina | The Platinum Pummeler | |
| Feet | Leather | Agility or Intellect/Stamina | Gunker | |
| Feet | Leather | Agility or Intellect/Stamina | Head Machinist Sparkflux | |
| Feet | Agility or Intellect/Stamina | King Mechagon | ||
| Feet | Agility or Intellect/Stamina | King Gobbamak | ||
| Feet | Plate | Strength or Intellect/Stamina | K.U.-J.0. | |
| Feet | Plate | Strength or Intellect/Stamina | Gunker | |
| Waist | Cloth | Intellect/Stamina | The Platinum Pummeler | |
| Waist | Cloth | Intellect/Stamina | Trixie Tazer | |
| Waist | Leather | Agility or Intellect/Stamina | Gunker | |
| Waist | Leather | Agility or Intellect/Stamina | The Platinum Pummeler | |
| Waist | Agility or Intellect/Stamina | Gunker | ||
| Waist | Plate | Strength or Intellect/Stamina | Gunker | |
| Waist | Plate | Strength or Intellect/Stamina | Head Machinist Sparkflux | |
| Wrist | Cloth | Intellect/Stamina | King Mechagon | |
| Wrist | Leather | Agility or Intellect/Stamina | Trixie Tazer | |
| Wrist | Agility or Intellect/Stamina | The Platinum Pummeler | ||
| Wrist | Plate | Strength or Intellect/Stamina | King Mechagon | |
| Back | Agility or Strength or Intellect/Stamina | K.U.-J.0. | ||
| Back | Agility or Strength or Intellect/Stamina | Trixie Tazer |
Changelog
- 02 Feb. 2020: Clarified how to obtain Vision of Perfection in 8.3.
- 15 Jan. 2020: Updated for 8.3 patch changes and elaborated on the Mythic+ version of the dungeon.
- 03 Aug. 2019: Added Hardmode and Loot Tables.
- 10 Jul. 2019: Guide added.