

Queen Azshara Strategy Guide in The Eternal Palace Raid

Welcome to our strategy guide for the encounter with Queen Azshara in The Eternal Palace raid. Here, you will first find the strategy to defeat the boss, followed by a detailed analysis of the abilities.
To familiarize yourself with the encounter, we suggest you watch this short video guide from Hazel Nutty.
Fight Overview
The fight against Queen Azshara is a long, complex, and difficult 4-phase fight (with an additional 2 transition phases). If the previous fights in The Eternal Palace tested and stresses various aspects of your raid group, this encounter will put every element of your group to the test.
Strategy / Fight Summary
The fight against Queen Azshara does not really progress by building up from each phase. Instead, the four phases and the two transition phases are quite distinct from each other (although the two transition phases themselves are almost identical), with only a handful of elements being shared (the most important of which are Ancient Wards).
Handling the Ancient Wards
One constant throughout the fight is your raid's requirement to handle
the Ancient Wards and the ![]() Ward of Power (circles on the ground that
need to have their energy recharged by having players stand in them).
We will go over what this
means for your raid on a phase-by-phase basis. Note that the Ancient Wards
should not normally lose Energy during Transition Phases.
Ward of Power (circles on the ground that
need to have their energy recharged by having players stand in them).
We will go over what this
means for your raid on a phase-by-phase basis. Note that the Ancient Wards
should not normally lose Energy during Transition Phases.
To put it very simply, you must always ensure that no Ancient Wards reach
0 Energy, since this will trigger a ![]() Pressure Surge and deal-raid
wide damage, and certainly that all 3 Wards are never at 0 Energy, since
this will guarantee a wipe.
Pressure Surge and deal-raid
wide damage, and certainly that all 3 Wards are never at 0 Energy, since
this will guarantee a wipe.
Your raid will have to establish a rotation (most likely on-the-fly,
adjusted dynamically based on what is happening in the fight) of players to
stand on the Wards to recharge them (and in the process receive stacks of
![]() Drained Soul). These players must then wait for their Drained Soul to
expire before they can charge another Ward.
Drained Soul). These players must then wait for their Drained Soul to
expire before they can charge another Ward.
In other words, the players who are not affected by
![]() Drained Soul will have to be prepared to recharge which ever
Ancient Ward needs to be recharged.
Drained Soul will have to be prepared to recharge which ever
Ancient Ward needs to be recharged.
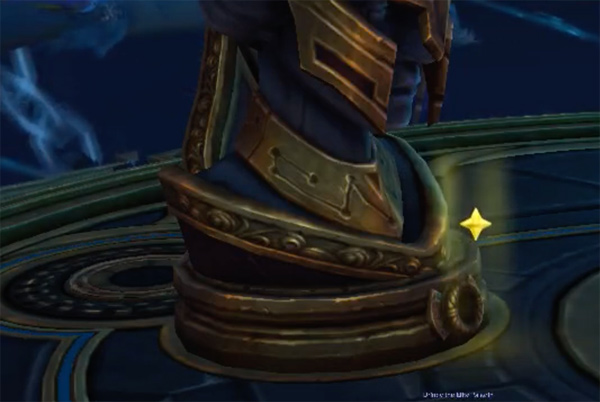
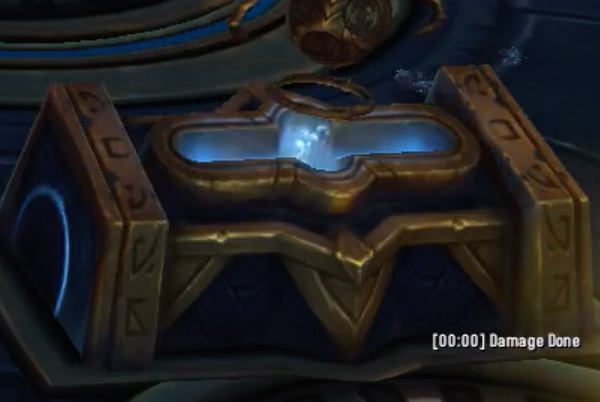
Below, we show you the various states of the UI indicator
for the Ancient Wards and the ![]() Ward of Power.
Ward of Power.
 Ancient Wards all charged up (beginning of the fight)
 Azshara draining an Ancient Ward

Phase One
During Phase One, the raid fights Aethanel and Cyranus (while Azshara flies over the room and throws some abilities). This phase revolves around the following guidelines.
- Correctly handle the Ancient Wards (as described below).
- Have one tank pick up Aethanel and the other Cyranus.
- The two tanks will have to perform a tank swap to deal with the
effects of
 Cold Blast (at 3 stacks).
 - The two mini-bosses must be kept in line of sight of one another when
affected by
 Longing, and out of line of sight of one another
(using the pillars or the Titan Console) when affected by
Longing, and out of line of sight of one another
(using the pillars or the Titan Console) when affected by
 Painful Memories.
 - While affected by Longing, the mini-bosses should be kept to the
absolute edges of the room in an attempt to place the resulting
 Cursed Heart void zones in as safe a location as possible.
- The two tanks will have to perform a tank swap to deal with the
effects of
- Ranged DPS players should aim to be as far as possible from the center
of the room when
 Beckon is about to be cast, so as to ensure that the
effect runs out before they are pulled to the center.
Beckon is about to be cast, so as to ensure that the
effect runs out before they are pulled to the center.- If any players are not far enough and do reach the center, the bubbles in which they are encased must be killed with priority in order to free these players.
- DPS the Overzealous Hulk before it has time to reach its target
Ancient Ward. You can use one crowd control on this add before it
becomes
 Infuriated and immune to further crowd control, so we
recommend a long stun.
Infuriated and immune to further crowd control, so we
recommend a long stun. - Interrupt Aethanel's
 Chain Lightning and avoid the
 Lightning Orbs he creates.
 - Players targeted by Cyranus'
 Charged Spear should move
away from other raid members.
Charged Spear should move
away from other raid members. - Make sure to soak the
 Arcane Orbs that spawn before their
20-second duration comes to and end and they explode.
Arcane Orbs that spawn before their
20-second duration comes to and end and they explode.
This phase ends when both the mini-bosses have been killed. Try to avoid
transitioning just as a new set of ![]() Arcane Orbs spawns, because
doing so will overlap these orbs with the Arcane Orbs that spawn naturally
during the First Transition Phase, which could lead to deaths.
Arcane Orbs spawns, because
doing so will overlap these orbs with the Arcane Orbs that spawn naturally
during the First Transition Phase, which could lead to deaths.
 Pillar
 Titan Console

 Overzealous Hulk
 Aethanel's
Handling Ancient Wards
During Phase One, the raid will simply have to rotate players
to stand on the Wards that have had some of their Energy depleted (by the
boss's ![]() Drain Ancient Ward) in order to increase their Energy.
Drain Ancient Ward) in order to increase their Energy.
Because standing on an Ancient Ward debuffs players with
a stack of ![]() Drained Soul every second, your raid will have to come up
with rotations of players to recharge Ancient Wards as needed, without having
players refresh their Drained Soul debuff, as that would be quite
detrimental.
Drained Soul every second, your raid will have to come up
with rotations of players to recharge Ancient Wards as needed, without having
players refresh their Drained Soul debuff, as that would be quite
detrimental.
The recommended strategy is for players to go in and gain multiple stacks
of ![]() Drained Soul at once, and then stay off any Ancient Wards until
Drained Soul has expired, to prevent refreshing it.
Drained Soul at once, and then stay off any Ancient Wards until
Drained Soul has expired, to prevent refreshing it.
Moreover, during Phase One, the Overzealous Hulk can drain an Ancient Ward's Energy rather aggressively if not stopped/killed in time, so players will need to be ready to react to this and charge up that specific Ward.
First Transition Phase
The First Transition Phase requires that your raid follow Azshara's decrees.
 Suffer!: soak an Arcane Orb.
- Obey!: avoid soaking an Arcane Orb.
 Stand Together!: stand next to allies.
 Stand Alone!: stand away from allies.
In Heroic mode, you will be affected by two decrees at the same time
(and the ![]() Stay! decree, which requires you not to move, is also a
potential candidate). This complicates the transition phase, but overall
it should not be too bad.
Stay! decree, which requires you not to move, is also a
potential candidate). This complicates the transition phase, but overall
it should not be too bad.
Phase Two
Phase Two has the raid finally face Azshara herself. Here, you will have to perform the following tasks.
- Correctly handle the Ancient Wards and the
 Ward of Power (as
described below).
Ward of Power (as
described below). - Tanks must perform a tank swap to deal with the
 Arcane Jolt ability
and the
Arcane Jolt ability
and the  Arcane Vulnerability debuff this applies.
 - Tanks must also attempt to bring the boss close to a pillar or to the
Titan Console when her Energy is about to reach 100% and she is about to cast
 Arcane Detonation.
- All players must line of sight Azshara when Arcane Detonation is
being cast.
- All players must line of sight Azshara when
- Healers must keep up with the various sources of damage, including
Arcane Mastery.
- It is true that the damage of Arcane Mastery can be avoided by
being out of line of sight of the boss, but this is not something we recommend
trying to do. Healers may get away with it sometimes (by being in line of sight
of the raid but not of the boss), but generally you will benefit more from
correctly executing the other mechanics of the fight.
- It is true that the damage of
- Players affected by
 Arcane Burst must move out of line of sight
of everyone else (and in Heroic mode, even of the boss) when the 30-second
debuff is expiring.
Arcane Burst must move out of line of sight
of everyone else (and in Heroic mode, even of the boss) when the 30-second
debuff is expiring. - Ranged DPS players must stand as far away as possible from the boss when
Beckon is about to be cast, so that the effect runs out before they
reach the boss.
- It can help to position in such a way that the Cursed Heart
void zones from Phase One are between ranged DPS players and the boss, so
that any players affected by Beckon are slowed running through
these void zones.
- Any players who do reach the boss and become mind controlled must be damaged until the mind control is removed.
- It can help to position in such a way that the
- DPS must focus down the Azshara's Indomitable and Azshara's
Devoted adds whenever they spawn, in attempts to prevent them from reaching
the Ward of Power. The Devoted adds can and should be
crowd-controlled.
The transition timing (when the boss reaches 70% health) is somewhat
important here as well. Particularly, you want to avoid pushing the boss
over while ![]() Arcane Burst is active on players, since this could
complications during the transition phase.
Arcane Burst is active on players, since this could
complications during the transition phase.

Handling Ancient Wards and Wards of Power
Starting in Phase Two, you will not only need to make sure to power up the
Ancient Wards, but also have players stand in the ![]() Ward of Power to drain its energy.
Ward of Power to drain its energy.
The boss's ![]() Titanic Machinations will drain Energy from the nearest
Ancient Ward or grant Energy to the central
Titanic Machinations will drain Energy from the nearest
Ancient Ward or grant Energy to the central ![]() Ward of Power, if it is nearest
to her. This actually allows the raid a measure of control over which
Wards are being drained.
Ward of Power, if it is nearest
to her. This actually allows the raid a measure of control over which
Wards are being drained.
In practice, you should employ the same general strategy as during Phase One
(rotating players to power up Wards, as their ![]() Drained Soul debuff
allows), but you have the added "luxury" of being able to move the boss next to
a fully powered up Ward if you cannot afford to charge up the one next to the
boss immediately.
Drained Soul debuff
allows), but you have the added "luxury" of being able to move the boss next to
a fully powered up Ward if you cannot afford to charge up the one next to the
boss immediately.
During this phase you will no longer need to worry about
![]() Drain Ancient Ward randomly draining Wards; the result of this is that,
in theory, you could spend the entire phase next to the same Ancient
Ward, charging it up as the boss drains it.
Drain Ancient Ward randomly draining Wards; the result of this is that,
in theory, you could spend the entire phase next to the same Ancient
Ward, charging it up as the boss drains it.
You will also have to contend with the centrally-located
![]() Ward of Power. The absolutely ideal scenario is that the Ward of Power
is on 0 Energy (always drained) since any Energy that this Ward does have will
buff the damage the boss does. For example, you could have an Ancient Ward on
20 Energy, and while this is quite low, it presents no "danger" as it will not
affect the raid in any way until it reaches 0, whereas the Ward of Power on any
amount of Energy will already be buffing the boss.
Ward of Power. The absolutely ideal scenario is that the Ward of Power
is on 0 Energy (always drained) since any Energy that this Ward does have will
buff the damage the boss does. For example, you could have an Ancient Ward on
20 Energy, and while this is quite low, it presents no "danger" as it will not
affect the raid in any way until it reaches 0, whereas the Ward of Power on any
amount of Energy will already be buffing the boss.
The adds that spawn during this phase, Azshara's Indomitable and
Azshara's Devoted will go straight for the ![]() Ward of Power and,
if they reach it, kill themselves and grant it power. Under optimal
circumstances, these adds should never make it, but if they do, you will have
to drain the Ward of Power.
Ward of Power and,
if they reach it, kill themselves and grant it power. Under optimal
circumstances, these adds should never make it, but if they do, you will have
to drain the Ward of Power.
Finally, in Heroic mode, the boss will sometimes cast
![]() Reversal of Fortune during this phase. This will swap the location of
an Ancient Ward with that of the
Reversal of Fortune during this phase. This will swap the location of
an Ancient Ward with that of the ![]() Ward of Power. Since, as we
established, it is preferable to have the Ward of Power on 0 Energy, if the
Ward next to where the boss is turns into the Ward of Power, you should move
the boss so that the closest Ward to her is not the Ward of Power.
Ward of Power. Since, as we
established, it is preferable to have the Ward of Power on 0 Energy, if the
Ward next to where the boss is turns into the Ward of Power, you should move
the boss so that the closest Ward to her is not the Ward of Power.
Second Transition Phase
The Second Transition Phase is very similar to the first. The boss will be attackable during this phase, and the raid should take advantage of this and deal as much damage as possible to the boss while still dealing with her decrees.
On Heroic mode, a new potential decree is introduced, ![]() March!. This
can lead to a few difficult combinations.
March!. This
can lead to a few difficult combinations.
- Stand Together! +
 March!: ideally, the players affected
by both of these decrees will group together and move as a whole.
March!: ideally, the players affected
by both of these decrees will group together and move as a whole. - Suffer! + March!: players affected by these two decrees
will have to keep moving while soaking Arcane Orbs.
Phase Three
In Phase Three, the main objective of the raid will be to kill the two Tidemistresses as quickly as possible and push the boss into Phase Four.
Since the two Tidemistresses will eventually shield themselves in
![]() Crystalline Shield, the raid will have to make use of the
Loyal Myrmidon's
Crystalline Shield, the raid will have to make use of the
Loyal Myrmidon's ![]() Charged Spear to break these shields down.
This means that the Myrmidon will have to be kept alive, and players will have
to position themselves so as to put the Tidemistress between themselves and the
Myrmidon so that Charged Spear hits the shielded Tidemistress.
Charged Spear to break these shields down.
This means that the Myrmidon will have to be kept alive, and players will have
to position themselves so as to put the Tidemistress between themselves and the
Myrmidon so that Charged Spear hits the shielded Tidemistress.
Aside from that, and from dealing with the Wards (described below), the raid will have to perform a number of tasks.
- DPS the Tidemistresses as quickly as possible to end the phase.
- Keep the Loyal Myrmidon add alive until both Tidemistresses'
 Crystalline Shields have been broken by its Charged Spear.
 - If targeted by Charged Spear, move away from other players.
- Interrupt the Tidemistresses' Chain Lightning whenever
possible.
- If affected by
 Static Shock, move away from other players until
the debuff expires.
Static Shock, move away from other players until
the debuff expires. - Stand more than 8 yards away from other players when Beckon is
about to be cast, as otherwise the movement speed increases(s) from
Jealousy will mean you will get to the boss before your forced
movement runs out and you will become mind controlled. Ranged DPS players
will still want to be as far away from the boss as possible when Beckon is
cast, and placing the Cursed Heart void zones form phase one in their
potential path towards the boss can help.
- Deal with Arcane Burst, Arcane Detonation,
Arcane Jolt, and Arcane Mastery the same as during Phase
Two.
Handling Ancient Wards and Wards of Power
In terms of handling the Wards, nothing much changes in Phase Three
compared to Phase Two. The major differences are that the boss starts using
![]() Reversal of Fortune in Normal mode,
and in Heroic mode the boss starts using
Reversal of Fortune in Normal mode,
and in Heroic mode the boss starts using ![]() Greater Reversal of Fortune.
Greater Reversal of Fortune.
![]() Greater Reversal of Fortune basically means that, at some point during
this phase, there will be 3 Wards of Power and a single Ancient Ward. Making
sure the Ancient Ward is not fully drained is a top priority, since
if that does happen, a wipe-inducing
Greater Reversal of Fortune basically means that, at some point during
this phase, there will be 3 Wards of Power and a single Ancient Ward. Making
sure the Ancient Ward is not fully drained is a top priority, since
if that does happen, a wipe-inducing ![]() Catastrophic Failure will
occur.
Catastrophic Failure will
occur.
As a result, the raid will have to contend with the increased boss and add damage that happens as a result of the boss granting some Energy to the various Wards of Power, and it is in draining these Wards of Energy that your raid's efforts should be spent.
Moreover, your raid will have to deal with the effects of the two
Tidemistresses. These adds will constantly drain Energy from the Ancient Wards
on which they spawn (which the raid must re-charge), and, after
![]() Reversal of Fortune or
Reversal of Fortune or ![]() Greater Reversal of Fortune, they may
grant Energy to the
Greater Reversal of Fortune, they may
grant Energy to the ![]() Ward of Power, which the raid must counter by
depleting.
Ward of Power, which the raid must counter by
depleting.
Phase Four
During this final phase of the fight, you will still have to deal with the
Ancient Wards and the ![]() Ward of Power (explained below), more or less in
the same way as up to now.
Ward of Power (explained below), more or less in
the same way as up to now.
In addition to this, you will have to manage the ![]() Overloaded
Titan Console. Essentially, players should, in a staggered fashion that allows
healers to top up the raid, trigger
Overloaded
Titan Console. Essentially, players should, in a staggered fashion that allows
healers to top up the raid, trigger ![]() Controlled Bursts by interacting
with the Titan Console. The goal is to remove all of its energy before it has
a chance to explode.
Controlled Bursts by interacting
with the Titan Console. The goal is to remove all of its energy before it has
a chance to explode.
Aside from that, the raid will have to perform a few tasks.
- The tanks should perform a tank swap on the boss to deal with the
 Void Touched debuff she applies.
 - Everyone must move out of the Piercing Gaze beam and must avoid
standing in
 Nether Portal void zones.
 - Ranged DPS players must stand as far as possible from Azshara and spread
out before Beckon is cast.
- As before, ranged DPS players should spread out in preparation for
Beckon being cast, and they should try to position so that the
Cursed Heart void zones from Phase One are between themselves and the
boss.
- Any players who are mind controlled by the boss as a result of
Beckon should be killed.
- As before, ranged DPS players should spread out in preparation for
- Healers must beware of the damage spikes coming in from each
 Controlled Burst, and in particular must pay attention to players who
become affected by System Shock as a result of interacting with
the Titan Console as well.
Controlled Burst, and in particular must pay attention to players who
become affected by System Shock as a result of interacting with
the Titan Console as well.
Handling Ancient Wards and Wards of Power
During Phase Four, the boss still retains her
![]() Titanic Machinations passive, draining the nearest Ancient Ward or,
if a
Titanic Machinations passive, draining the nearest Ancient Ward or,
if a ![]() Ward of Power is nearest, granting it Energy.
Ward of Power is nearest, granting it Energy.
The new addition here comes in the form of ![]() Short Circuit, one of 3
possible effects that happen when a player interacts with the Titan Console.
Short Circuit fully drains an Ancient Ward of its power.
Short Circuit, one of 3
possible effects that happen when a player interacts with the Titan Console.
Short Circuit fully drains an Ancient Ward of its power.
We are not certain exactly how quickly Short Circuit performs its
Energy-draining effect, but assuming that it is instant or too quick for
players to be able to counter by charging the Ward while it is happening, you
will have to avoid interacting with the Titan Console while
![]() Greater Reversal of Fortune has made it so that there is a single
Ancient Ward in the entire fight (as draining it to 0 would result in an
immediate wipe).
Greater Reversal of Fortune has made it so that there is a single
Ancient Ward in the entire fight (as draining it to 0 would result in an
immediate wipe).
In Normal mode (where ![]() Greater Reversal of Fortune does not happen),
Greater Reversal of Fortune does not happen),
![]() Short Circuits only mean that sometimes, you will have to more
aggressively gain
Short Circuits only mean that sometimes, you will have to more
aggressively gain ![]() Drained Soul stacks to power up the fully
depleted Ancient Ward.
Drained Soul stacks to power up the fully
depleted Ancient Ward.
Heroism/Bloodlust/Time Warp
The optimal timing for ![]() Heroism/
Heroism/![]() Bloodlust/
Bloodlust/![]() Time Warp is during the last phase of the fight, which is the most difficult part. This
phase is especially dangerous in terms of preventing Ancient Wards from
being depleted, and failing to do so will lead to a certain wipe.
Time Warp is during the last phase of the fight, which is the most difficult part. This
phase is especially dangerous in terms of preventing Ancient Wards from
being depleted, and failing to do so will lead to a certain wipe.
Summary for Tanks
- During Phase One
- Pick up the two mini-bosses, one tank each.
- Perform a tank swap when Cold Blast reaches 3 stacks on
Aethanel's tank.
- Interrupt Aethanel's Chain Lightning.
- Move the two mini-bosses out of line of sight of each other when they
are affected by Painful Memories and keep them in line of sight of
each other when they are affected by Longing.
- During Longing, both mini-bosses will leave behind
Cursed Heart void zones that last until the end of the fight; keep
the mini-bosses close to the edges of the room so that these void zones do
not cause problems down the line.
- During Phase Two
- Perform a tank swap on Queen Azshara to handle her
Arcane Jolt ability.
- The boss will constantly drain Energy from the nearest Ancient Ward
through
 Titanic Machinations; make sure to move her to a different
Ward if the current one is getting dangerously low on Energy.
Titanic Machinations; make sure to move her to a different
Ward if the current one is getting dangerously low on Energy. - If
 Reversal of Fortune (Heroic-only) changes the closest
Ancient Ward to a Ward of Power, move her away from it so it does not
gain Energy.
Reversal of Fortune (Heroic-only) changes the closest
Ancient Ward to a Ward of Power, move her away from it so it does not
gain Energy. - When the boss's Energy bar nears 100%, move her close to a pillar or to
the Titan Console, so that players can easily line of sight her when she
casts Arcane Detonation.
- Keep in mind the fact that ranged DPS players want to keep as far as
possible from the boss before Beckon is being cast; keep in mind
also that they may try to have the Phase One Cursed Heart void zones
between themselves and the boss.
- Perform a tank swap on Queen Azshara to handle her
- During Phase Three
- Perform a tank swap on Queen Azshara in the same way as during Phase Two.
- The off-tank should handle the Loyal Myrmidon add, making sure that
it does not die. This add will have to be positioned so that the
Charged Spear it throws at the raid goes through and breaks the
Tidemistress's Crystalline Shield.
- The Ancient Wards must be handled in the same way as during Phase Two.
Reversal of Fortune appears in Normal mode as well. In Heroic mode,
if
 Greater Reversal of Fortune makes it so that there is a single
Ancient Ward, the boss must be kept away from it.
Greater Reversal of Fortune makes it so that there is a single
Ancient Ward, the boss must be kept away from it.
- During Phase Four
- Perform a tank swap on Queen Azshara to handle the
Void Touched debuff she applies (swap when the off-tank's debuff has
run out).
- Keep in mind the same Beckon and Ancient Ward positioning as
before.
- Perform a tank swap on Queen Azshara to handle the
During both the First and Second transition phases, do the same as the DPS and healers (described below).
Summary for Healers and DPS
- During Phase One
- Ranged DPS players be as far as possible from the center
of the room when Beckon is about to be cast.
- The bubbles that any players are trapped in must be killed with priority in order to free these players.
- DPS the Overzealous Hulk. You can use one crowd control on this add before it becomes immune to crowd control; use a long stun.
- Interrupt Aethanel's Chain Lightning and avoid the
Lightning Orbs he creates.
- Players targeted by Cyranus' Charged Spear should move
away from other raid members.
- Soak the Arcane Orbs that spawn before their
20-second duration comes to and end and they explode.
- Manage the Ancient Wards' Energy: never let an Ancient Ward reaches 0
Energy, taking turns to stand on the Ancient Wards to power them while not
letting your
 Drained Soul stacks get too high or get refreshed before
they can expire.
Drained Soul stacks get too high or get refreshed before
they can expire.
- Ranged DPS players be as far as possible from the center
of the room when
- During the First Transition Phase
- Perform the decree Queen Azshara issues to you.
- During Phase Two
- Line of sight Azshara when Arcane Detonation is being cast
(her Energy bar indicates it).
- Players affected by Arcane Burst move out of line of sight
of everyone else (and in Heroic mode, even of the boss) when the debuff
expires.
- Ranged DPS players be as far away as possible from the boss when
Beckon is about to be cast. Put the Cursed Heart
void zones from Phase One between yourselves and the boss to slow down your
movement speed.
- Any players who do reach the boss and become mind controlled by
Beckon must be damaged until the mind control is removed.
- DPS focus down the Azshara's Indomitable and Azshara's Devoted adds whenever they spawn.
- Manage the Ancient Wards' and the Ward of Power's Energy levels.
Stand on Ancient Wards if they are in danger of running out of Energy, and
stand on the Ward of Power if it gains too much. Make sure not to stack
Drained Soul too high or to refresh it. Watch out for
Reversal of Fortune changing Ancient Wards into Wards of Power and
vice-versa.
- Line of sight Azshara when
- During the Second Transition Phase
- Perform the decree Queen Azshara issues to you.
- DPS Queen Azshara as much as possible.
- During Phase Three
- Line of sight Azshara when Arcane Detonation is being cast.
- Players affected by Arcane Burst move out of line of sight
of everyone else (and in Heroic mode, even of the boss) when the debuff
expires.
- Players affected by Static Shock move more than 8 yards away
from others.
- Ranged DPS players be as far away as possible from the boss and spread out
more than 8 yards apart when
Beckon is about to be cast. Put the Cursed Heart
void zones from Phase One between yourselves and the boss to slow down your
movement speed.
- Any players who do reach the boss and become mind controlled by
Beckon must be damaged until the mind control is removed.
- Keep the Loyal Myrmidon alive until the raid has used its
Charged Spear attack to break the Tidemistresses'
Crystalline Shields. Then kill it.
- Kill the two Tidemistresses as quickly as possible, and interrupt their
Chain Lightning.
- Manage the Ancient Wards' and the Ward of Power's Energy levels.
Stand on Ancient Wards if they are in danger of running out of Energy (this
will happen for the Wards on which the Tidemistresses are standing), and
stand on the Ward of Power if it gains too much. Make sure not to stack
Drained Soul too high or to refresh it. Watch out for
Reversal of Fortune and Greater Reversal of Fortune changing
Ancient Wards into Wards of Power and vice-versa.
- Line of sight Azshara when
- During Phase Four
- Do not standing in Nether Portal void zones.
- Avoid the boss's Piercing Gaze beam.
- Ranged DPS players be as far away as possible from the boss and spread out
more than 8 yards apart when
Beckon is about to be cast. Put the Cursed Heart
void zones from Phase One between yourselves and the boss to slow down your
movement speed.
- Any players who do reach the boss and become permanently mind controlled by
Beckon must be killed.
- Manage the Ancient Wards' and the Ward of Power's Energy levels.
Stand on Ancient Wards if they are in danger of running out of Energy, and
stand on the Ward of Power if it gains too much. Make sure not to stack
Drained Soul too high or to refresh it. Watch out for
Reversal of Fortune and Greater Reversal of Fortune changing
Ancient Wards into Wards of Power and vice-versa.
- Manage the Titan Console, interacting with it in a staggered manner to
trigger Controlled Bursts and prevent it from releasing too much
energy at once.
- Healers pay special attention to players affected by
System Shock as a result of interacting with the Titan
Console.
- Do not standing in
Fight Structure and General Considerations
The Queen Azshara encounter is a 4-phase fight (including two transition phases). In the many sections that follow we will look at the mechanics of each phase, and to begin with, we will look at the Ancient Ward mechanics that are present throughout the fight and are particularly important.
Before anything else, though, here is the breakdown of when the various phases start and end.
- Phase One starts at the pull and lasts until Aethanel and Cyranus (the two mini-bosses you fight during this phase) are killed.
- The First Intermission Phase lasts roughly 40 seconds.
- Phase Two ends when Queen Azshara reaches 70% health.
- The Second Intermission Phase lasts the same as the First Intermission Phase, roughly 40 seconds.
- Phase Three ends when the two Tidemistress adds that spawn during this phase are killed, or when Queen Azshara reaches 40% health.
- Phase Four starts when the Tidemistresses are killed and ends when Queen Azshara is defeated.
Ancient Wards
Throughout the fight, all players' interfaces will display the state of
3 Ancient Wards (and, starting from Phase Two, a ![]() Ward of Power as
well).
Ward of Power as
well).
This mechanic is fairly complex, it is present throughout the fight, and is very important. We will go over it in detail in this section. That said, the "additions" to the Ancient Wards that various phases bring will be detailed later.
Ancient Wards all charged up (beginning of the fight)
Azshara draining an Ancient Ward
Three Ancient Wards (large circles) exist on the ground of the room, placed roughly in a triangle pattern. Each Ancient Ward has an Energy level (indicated on the UI seen above). The Energy of an Ancient Ward can be increased or decreased throughout the fight, as we will see.
- All Ancient Wards start out at 60 Energy at the start of the fight.
- If an Ancient Ward reaches 0 Energy, it will trigger a
 Pressure Surge, which deals moderate ticking Physical raid-wide damage
while it is on 0 Energy.
Pressure Surge, which deals moderate ticking Physical raid-wide damage
while it is on 0 Energy. - If all 3 Ancient Wards are on 0 Energy at the same time, this triggers a
 Catastrophic Failure, which will instantly wipe the raid.
 - Players can grant Energy to an Ancient Ward by standing on it. Every
second that a player stands on the ward, they gain a stack of the
Drained Soul debuff, which lasts 108 seconds and reduces maximum health
by 10% per stack. The exact amount of Energy restored by to the rune is
unclear, and it appears to depend on the raid size (smaller raids have higher
Energy restoration).
- There are many different mechanics throughout the encounter that drain the Energy of Ancient Wards, and we will cover these on a phase-by-phase basis below.
Starting in Phase Two, there will be a fourth Ward present in the center
of the room (and also shown on the interface). This is a ![]() Ward of Power,
and it works something like the opposite of the Ancient Wards.
Ward of Power,
and it works something like the opposite of the Ancient Wards.
- The more Energy the Ward of Power has, the more damage the boss and any adds that are alive at the time will deal, proportionally to the Energy the Ward of Power has.
- When players stand in the Ward of Power, they drain its Energy,
and in doing so gain stacks of Drained Soul.
- The boss will grant Energy to the Ward of Power through various means throughout the fight.
The Ancient Wards and the Ward of Power will sometimes have their locations swapped (one Ancient Ward will become the Ward of Power, while the central Ward of Power becomes an Ancient Ward, in LFR/Normal mode; in Heroic Mode, all Ancient Wards become Wards of Power, while the central Ward of Power becomes an Ancient Ward).
Fighting Area
The fight takes place in a large circular room. Aside from the 3 Ancient Wards described above (as well as the 4th, central Ward), there is one other notable feature of the room.
There are two large pillars (each located next to an Ancient Ward), and the, and one "Titan Console" (located next to the third Ancient Ward). These elements are present throughout the fight, and they block line of sight. As we will see, this is important, as line of sight plays a part at various points in the fight.
Phase One Abilities
Queen Azshara herself is not present during Phase One (although she does use 3 abilities), and instead the raid has to defeat two mini-bosses: Aethanel and Cyranus.
Aethanel and Cyranus
The two mini-bosses do not share health, and they have a number of shared abilities, as well as a few individual abilities (at which we will look in the sub-sections that follow).
Both mini-bosses are buffed by either ![]() Painful Memories or
Painful Memories or
![]() Longing at various points in the phase.
Longing at various points in the phase.
- While buffed by Painful Memories, the bosses will gain the
 Torment buff if they are within line of sight of one another.
 - While buffed by Longing, the bosses will gain Torment
if they are not within line of sight of one another.
![]() Torment buffs the target's Haste by 65% and damage by 100%. When
one is killed the other gains the
Torment buffs the target's Haste by 65% and damage by 100%. When
one is killed the other gains the ![]() Torment buff until their own
death.
Torment buff until their own
death.
Finally, while they are buffed by ![]() Longing, the two bosses will leave
behind
Longing, the two bosses will leave
behind ![]() Cursed Heart void zones at their location every second. These
void zones deal Shadow damage to any players standing in them, as well as
reducing affect players' attack, casting, and movement speeds by 30% while in
the void zone. It appears that these void zones never despawn.
Cursed Heart void zones at their location every second. These
void zones deal Shadow damage to any players standing in them, as well as
reducing affect players' attack, casting, and movement speeds by 30% while in
the void zone. It appears that these void zones never despawn.
Aethanel
Aethanel uses 3 abilities against the raid.
- Cold Blast deals a large amount of Frost damage to Aethanel's
current target, and debuffs them with a stack of Cold Blast for 30 seconds.
If Aethanel uses Cold Blast against a target with 3 stacks, it will stun the
target for 5 seconds and deal a massive amount of Frost damage to them
(
 Ice Shard).
 - Chain Lightning is an interruptible spell that deals Nature damage
to a random raid member, chaining up to 3 nearby allies (with each
subsequent target taking reduced damage).
- Lightning Orbs summons several orbs in the room, which appear in
the air and which bounce towards locations on the ground marked by blue areas.
Each orb will bounce 3 times before despawning, but if it comes into contact
with a player, it will despawn immediately. Players who come into contact with
a Lightning Orb will take a very high amount of Nature damage.
Cyranus
Cyranus uses two abilities against the raid.
 Serrated Edge applies a 6-second stacking Physical damage DoT on
Cyranus' current target.
Serrated Edge applies a 6-second stacking Physical damage DoT on
Cyranus' current target.- Charged Spear chooses a random melee DPS player and, a few seconds
later, throws a spear at that player. Anyone hit by the traveling spear will
take moderate Arcane damage, and when the spear reaches its target, the entire
raid will take high Arcane damage.
Overzealous Hulk
At regular intervals throughout Phase One, a single Overzealous Hulk add will spawn.
This add cannot be tanked, and does not deal any damage.
Instead, it simply runs towards a random Ancient Ward, and when it reaches it,
it begins channeling ![]() Ground Pound on it, dealing a low amount of
ticking raid-wide Physical damage and draining Energy from that Ancient
Ward.
Ground Pound on it, dealing a low amount of
ticking raid-wide Physical damage and draining Energy from that Ancient
Ward.
The Overzealous Hulk can be crowd controlled and stunned, but once a single
crowd control effect has been cast on it, it will buff itself with
![]() Infuriated, preventing any future crowd control effects.
Infuriated, preventing any future crowd control effects.
Queen Azshara
Throughout Phase One, Queen Azshara uses 3 abilities against the raid.
Drain Ancient Ward
![]() Drain Ancient Ward is an ability that Azshara uses to drain some
Energy (about 30/40/60 in LFR/Normal/Heroic) from a randomly chosen Ancient
Ward over 10 seconds.
Drain Ancient Ward is an ability that Azshara uses to drain some
Energy (about 30/40/60 in LFR/Normal/Heroic) from a randomly chosen Ancient
Ward over 10 seconds.
Beckon
![]() Beckon is used after each
Beckon is used after each ![]() Drain Ancient Ward cast, selecting
several random ranged DPS players and forcing them to move towards the center
of the room over a period of 8 seconds.
Drain Ancient Ward cast, selecting
several random ranged DPS players and forcing them to move towards the center
of the room over a period of 8 seconds.
Any players that reach the center of the room before the 8 seconds are up (at which point they regain control of their character) become encased in a bubble that damages them for 8% of their maximum health per second, and which must be killed by the raid for the player to be freed.
Arcane Orbs
Throughout Phase One, Queen Azshara will summon a number of
![]() Arcane Orbs around the room. These orbs will remain active for 20
seconds, at which point they will explode, dealing potentially very high
raid-wide Arcane damage.
Arcane Orbs around the room. These orbs will remain active for 20
seconds, at which point they will explode, dealing potentially very high
raid-wide Arcane damage.
If players stand within the ![]() Arcane Orbs while they are active,
they progressively drain the orbs, reducing the damage of their final
explosion the longer they stand there. If sufficiently drained, an Arcane Orb
can even despawn entirely before it has a chance to explode.
Arcane Orbs while they are active,
they progressively drain the orbs, reducing the damage of their final
explosion the longer they stand there. If sufficiently drained, an Arcane Orb
can even despawn entirely before it has a chance to explode.
Players who stand in ![]() Arcane Orbs to drain them take moderate
Arcane damage every second.
Arcane Orbs to drain them take moderate
Arcane damage every second.
First Transition Phase Abilities
When Aethanel and Cyranus are both killed, Phase One ends and a 40-second transition phase starts.
At the start of the transition phase, several ![]() Arcane Orbs will
spawn in the center of the room. Moreover, Queen Azshara will issue an order
(decree) to each raid member, as described below. Failing to execute
Azshara's order will debuff players with a stack of
Arcane Orbs will
spawn in the center of the room. Moreover, Queen Azshara will issue an order
(decree) to each raid member, as described below. Failing to execute
Azshara's order will debuff players with a stack of ![]() Sanction each
second that they are not following the order, which deals Arcane damage over
10 seconds.
Sanction each
second that they are not following the order, which deals Arcane damage over
10 seconds.
Queen Azshara can choose between one of the following 4 decrees to issue to
each player. Each decree only lasts 20 seconds, the same duration that
![]() Arcane Orbs are active.
Arcane Orbs are active.
- Suffer! requires the player to soak an Arcane Orb, and they gain
a stack of
 Sanction every second during which they are not
soaking.
Sanction every second during which they are not
soaking. - Obey! requires the player not to soak an Arcane Orb, and they gain
a stack of Sanction every second during which they are
soaking.
- Stand Together! requires the player to stand close to (we are not
sure of the exact range) an ally, and they gain a stack of Sanction
every second during which they are by themselves.
- Stand Alone! requires the player to stand away from other players,
and they gain a stack of Sanction every second that another player is
next to them (we do not know if multiple players being in range at the same
time grant multiple stacks, but we suspect not).
On Heroic mode, Queen Azshara issues two decrees to each player,
chosen from among the 4 described above, and one new, Heroic-only decree:
![]() Stay!. Stay requires the player to stand still, and any movement will
grant stacks of
Stay!. Stay requires the player to stand still, and any movement will
grant stacks of ![]() Sanction.
Sanction.
About 10 seconds after the ![]() Arcane Orbs despawn (or explode, if
improperly soaked) and the decrees end, Queen Azshara will become active and
Phase Two will begin.
Arcane Orbs despawn (or explode, if
improperly soaked) and the decrees end, Queen Azshara will become active and
Phase Two will begin.
Phase Two Abilities
Once the First Intermission Phase ends, Queen Azshara herself becomes active and must be picked up by the tank.
Practically none of the mechanics from Phase One are still in use during
Phase Two. The big exception are the Ancient
Wards, which are still present and still work the same way. As mentioned,
the central rune towards which ![]() Beckoned players walked to during
Phase One becomes a
Beckoned players walked to during
Phase One becomes a ![]() Ward of Power.
Ward of Power.
Queen Azshara uses 6 abilities during this phase, and there are also two types of adds that spawn.
Queen Azshara
Titanic Machinations
Throughout Phase Two, Queen Azshara's ![]() Titanic Machinations
(essentially a passive ability) will affect whichever Ancient Ward (or
Titanic Machinations
(essentially a passive ability) will affect whichever Ancient Ward (or
![]() Ward of Power) she is nearest to. If she is nearest to an Ancient Ward,
she will drain its Energy over time, while if she is nearest to the Ward of
Power, she will grant it Energy over time.
Ward of Power) she is nearest to. If she is nearest to an Ancient Ward,
she will drain its Energy over time, while if she is nearest to the Ward of
Power, she will grant it Energy over time.
Note that this ability will always affect one Ward (the closest one), and it is not possible to move the boss in a such way that no Ward is affected.
Arcane Burst
![]() Arcane Burst is a 30-second dispellable debuff the boss places on
several random raid members. This does nothing while active, but at the end of
the duration, or when dispelled, this causes all raid members in line of sight
of the affected player to take a high amount of Arcane damage.
Arcane Burst is a 30-second dispellable debuff the boss places on
several random raid members. This does nothing while active, but at the end of
the duration, or when dispelled, this causes all raid members in line of sight
of the affected player to take a high amount of Arcane damage.
On Heroic mode, if any players are in line of sight of the boss when their
![]() Arcane Burst is triggered, they will apply
Arcane Burst is triggered, they will apply ![]() Feedback to the
boss, which will cause her to re-cast Arcane Burst again.
Feedback to the
boss, which will cause her to re-cast Arcane Burst again.
Arcane Detonation
![]() Arcane Detonation is an ability Queen Azshara uses when she reaches
100 Energy (which she gains progressively, only as a means to show when this
ability will be cast). Arcane Detonation deals extremely high Arcane damage to
all raid members in line of sight of her.
Arcane Detonation is an ability Queen Azshara uses when she reaches
100 Energy (which she gains progressively, only as a means to show when this
ability will be cast). Arcane Detonation deals extremely high Arcane damage to
all raid members in line of sight of her.
Arcane Jolt
![]() Arcane Jolt is an ability Azshara uses against her current target,
dealing Arcane damage to them and debuffing them with a stack of
Arcane Jolt is an ability Azshara uses against her current target,
dealing Arcane damage to them and debuffing them with a stack of
![]() Arcane Vulnerability, which increases Arcane damage taken by
3% for 7 seconds.
Arcane Vulnerability, which increases Arcane damage taken by
3% for 7 seconds.
This ability requires a tank swap.
Arcane Mastery
![]() Arcane Mastery is another passive ability of Azshara, which deals
raid-wide Arcane damage every 3 seconds. This ability only affects players who
are within line of sight of the boss.
Arcane Mastery is another passive ability of Azshara, which deals
raid-wide Arcane damage every 3 seconds. This ability only affects players who
are within line of sight of the boss.
Beckon
![]() Beckon is used again throughout Phase Two, but it is somewhat
different from the Phase One version. In this phase, ranged raid members
targeted by Beckon are forced to run to Queen Azshara and, if they reach her,
they become mind controlled and have a damage absorption shield applied to
them. The mind control is broken when the shield has been broken by the raid's
damage.
Beckon is used again throughout Phase Two, but it is somewhat
different from the Phase One version. In this phase, ranged raid members
targeted by Beckon are forced to run to Queen Azshara and, if they reach her,
they become mind controlled and have a damage absorption shield applied to
them. The mind control is broken when the shield has been broken by the raid's
damage.
Like the Phase One ![]() Beckon, players can avoid being mind controlled
if they are far enough from the boss when the ability is cast, as the forced
movement will end after a certain amount of time.
Beckon, players can avoid being mind controlled
if they are far enough from the boss when the ability is cast, as the forced
movement will end after a certain amount of time.
Reversal of Fortune (Heroic-only)
![]() Reversal of Fortune is a new ability Queen Azshara gains in
Heroic mode (as we will see later, in Normal mode she gains this in
Phase Three). When this
is used, the locations of the
Reversal of Fortune is a new ability Queen Azshara gains in
Heroic mode (as we will see later, in Normal mode she gains this in
Phase Three). When this
is used, the locations of the ![]() Ward of Power and a random Ancient Ward
are swapped. The change is permanent (until a Reversal of Fortune is cast).
Ward of Power and a random Ancient Ward
are swapped. The change is permanent (until a Reversal of Fortune is cast).
Adds
There are two types of adds that spawn throughout Phase Two: Azshara's
Indomitable and Azshara's Devoted. Both types of adds do the same
thing: run towards ![]() Ward of Power and kill themselves when they reach
it, granting it Energy. They have no other abilities and cannot be tanked.
Ward of Power and kill themselves when they reach
it, granting it Energy. They have no other abilities and cannot be tanked.
The Azshara's Indomitable adds spawn one at a time, have a high amount of health, move slowly, and cannot be crowd controlled. The Devoted spawn in packs, have lower health, move quickly, and are susceptible to crowd control.
Second Transition Phase Abilities
Once Queen Azshara reaches 70% health, the Second Transition Phase will begin.
This transition phase also lasts about 40 seconds and is very similar to the first one, with a few differences.
- Queen Azshara remains active during this phase; she can be damaged, but does not use any abilities nor does she need to be tanked.
- In Heroic mode, there is a new decree that Azshara can choose to use on
raid members: March!. March requires that the targeted players keep
moving, and not moving will apply stacks Sanction.
Phase Three Abilities
At the start of Phase Three, Queen Azshara will start using abilities again. In addition to this, three new adds will spawn, and the Phase Two adds (Azshara's Indomitable and Azshara's Devoted) will no longer spawn.
Queen Azshara
In Phase Three, Queen Azshara continues to use ![]() Titanic Machinations,
Titanic Machinations,
![]() Arcane Burst,
Arcane Burst, ![]() Arcane Detonation,
Arcane Detonation, ![]() Arcane Jolt, and
Arcane Jolt, and
![]() Arcane Mastery, which are all identical to the Phase Two versions.
Arcane Mastery, which are all identical to the Phase Two versions.
Beckon
She also continues using ![]() Beckon, during Phase Three, but this is
somewhat changed from Phase Two.
Beckon, during Phase Three, but this is
somewhat changed from Phase Two.
When the ability is cast, each affected player gains a stack of
![]() Jealousy for every other raid member within 8 yards of them. This
grants them a movement speed increase (5%/10%/20% in LFR/Normal/Heroic) per
stack for the duration of the forced movement of
Jealousy for every other raid member within 8 yards of them. This
grants them a movement speed increase (5%/10%/20% in LFR/Normal/Heroic) per
stack for the duration of the forced movement of ![]() Beckon. Aside from
this, the ability works the same way as during Phase Two.
Beckon. Aside from
this, the ability works the same way as during Phase Two.
Reversal of Fortune and Greater Reversal of Fortune
In LFR/Normal mode, the boss now gains access to the
![]() Reversal of Fortune ability described in Phase Two, working in exactly
the same way.
Reversal of Fortune ability described in Phase Two, working in exactly
the same way.
In Heroic mode, in Phase Three ![]() Reversal of Fortune becomes
Reversal of Fortune becomes
![]() Greater Reversal of Fortune. What this does is turn all Ancient Wards
into a
Greater Reversal of Fortune. What this does is turn all Ancient Wards
into a ![]() Ward of Power, while the old Ward of Power turns into an Ancient
Ward. When the ability is used again, all the Wards are swapped back.
Ward of Power, while the old Ward of Power turns into an Ancient
Ward. When the ability is used again, all the Wards are swapped back.
Tidemistress Adds
At the start of the phase, two Tidemistress adds will spawn, each one on
top of an Ancient Ward. These adds will never move from their Wards, and
instead slowly drain Energy from them while they are alive. If the Ward on
which a Tidemistress is located is turned into a ![]() Ward of Power, then
she will instead give Energy to the ward.
Ward of Power, then
she will instead give Energy to the ward.
These adds have a number of abilities, and when they are both killed, the phase ends and Phase Four begins. Note that the phase will end when Queen Azshara reaches 40% health, even if the Tidemistresses have not been killed yet.
Static Shock
![]() Static Shock is a 6-second Nature damage DoT that deals damage to
the target and any players within 8 yards every second.
Static Shock is a 6-second Nature damage DoT that deals damage to
the target and any players within 8 yards every second.
Chain Lightning
![]() Chain Lightning is a standard, interruptible Chain Lightning
spell.
Chain Lightning is a standard, interruptible Chain Lightning
spell.
Crystalline Shield
Each Tidemistresses will, at some point, place a ![]() Crystalline Shield
on herself, becoming immune to all damage, silence, and interrupts.
Crystalline Shield
on herself, becoming immune to all damage, silence, and interrupts.
The only way for this buff to be removed is for the Tidemistress to be hit
by the Loyal Myrmidon's ![]() Charged Spear. Doing so also deals a
moderate amount of raid-wide damage through
Charged Spear. Doing so also deals a
moderate amount of raid-wide damage through ![]() Shattered Shield.
Shattered Shield.
Loyal Myrmidon
At the start of Phase Three, a Loyal Myrmidon will spawn, which
needs to be picked up and tanked. It has only one ability,
![]() Charged Spear, which works like the Phase One ability used by
Cyranus. The only differences are that the ability can target any
random raid member (except tanks), and that if it come in contact with a
Tidemistress's
Charged Spear, which works like the Phase One ability used by
Cyranus. The only differences are that the ability can target any
random raid member (except tanks), and that if it come in contact with a
Tidemistress's ![]() Crystalline Shield, it will break it.
Crystalline Shield, it will break it.
Phase Four Abilities
Phase Four begins when both the Tidemistresses from Phase Three have been killed or when the boss reaches 40% health. During this phase, Queen Azshara gives up using most of the abilities used previously, gains a few new abilities, and no longer spawns any adds.
Queen Azshara
The boss retains ![]() Titanic Machinations,
Titanic Machinations, ![]() Reversal of Fortune
(and
Reversal of Fortune
(and ![]() Greater Reversal of Fortune in Heroic mode), and
Greater Reversal of Fortune in Heroic mode), and ![]() Beckon
(although it has been modified yet again) from the previous phases.
Beckon
(although it has been modified yet again) from the previous phases.
Beckon
The only difference to ![]() Beckon from Phase Three is that the
players who reach Azshara and become mind controlled will remain mind
controlled until they are killed.
Beckon from Phase Three is that the
players who reach Azshara and become mind controlled will remain mind
controlled until they are killed.
Void Touched (Tank Debuff)
![]() Void Touched is a stacking 30-second debuff that Azshara regularly
applies to her current target. Each stack reduces healing received by the
target by 10%, and each application also does a moderate amount of Shadow
damage.
Void Touched is a stacking 30-second debuff that Azshara regularly
applies to her current target. Each stack reduces healing received by the
target by 10%, and each application also does a moderate amount of Shadow
damage.
Nether Portal
![]() Nether Portal is a void zone that lasts for 2 minutes and that
deals Shadow damage every second to players standing in it.
Nether Portal is a void zone that lasts for 2 minutes and that
deals Shadow damage every second to players standing in it.
Piercing Gaze
![]() Piercing Gaze is an ability that the boss uses to deal Shadow
damage to all players caught in a line in front of it (we suspect that the
boss faces in a random direction when casting this, but we are not sure).
Piercing Gaze is an ability that the boss uses to deal Shadow
damage to all players caught in a line in front of it (we suspect that the
boss faces in a random direction when casting this, but we are not sure).
Titan Console
At the start of Phase Four, Azshara ![]() Overloads the Titan Console
present in the encounter area. This makes the console clickable by players,
and also empowers it, charging it with energy (which has nothing to do with
the Energy of the Wards).
Overloads the Titan Console
present in the encounter area. This makes the console clickable by players,
and also empowers it, charging it with energy (which has nothing to do with
the Energy of the Wards).
After a certain amount of time (we are unsure how long), the Titan Console
will release all the energy it contains through ![]() Massive Energy Spike,
dealing raid-wide damage based on how much energy was left.
Massive Energy Spike,
dealing raid-wide damage based on how much energy was left.
Interacting with the console will trigger a ![]() Controlled Burst,
which releases some of the energy stored within the Titan Console. Each
Controlled burst deals a moderate amount of raid-wide Spellstrike damage,
and also triggers one of the following 3 effects, at random.
Controlled Burst,
which releases some of the energy stored within the Titan Console. Each
Controlled burst deals a moderate amount of raid-wide Spellstrike damage,
and also triggers one of the following 3 effects, at random.
- System Shock is a 10-second Spellstrike DoT placed on the player
who interacted with the Titan Console.
 Short Circuit will drain one of the Ancient Wards of all its
Energy.
Short Circuit will drain one of the Ancient Wards of all its
Energy. Essence of Azeroth is a 40-second buff that is placed on a random
DPS player. This grants them 50% increased melee and ranged Haste, increased
resource generation, and makes their spells instant cast for its duration. At
the end of the 40 seconds, however, the player is unavoidably killed.
Essence of Azeroth is a 40-second buff that is placed on a random
DPS player. This grants them 50% increased melee and ranged Haste, increased
resource generation, and makes their spells instant cast for its duration. At
the end of the 40 seconds, however, the player is unavoidably killed.
Heroic Difficulty Changes
Heroic mode brings with it a few changes.
- Drain Ancient Ward in Phase One drains 60 Energy from an Ancient
Ward, up from 20/40 in LFR/Normal.
- During transition phases, each player is affected by two decrees, up from
1. Heroic mode also brings in the new
 Stay! (starting in the First
Transition Phase) and March! (starting in the Second Transition Phase)
decrees.
Stay! (starting in the First
Transition Phase) and March! (starting in the Second Transition Phase)
decrees.- Stay! requires the player to stand still, and any movement will
grant stacks of Sanction.
- March! requires the player to keep moving, and standing still will
grant stacks of Sanction.
- The boss starts using Reversal of Fortune in Phase Two (as opposed
to starting in Phase Three, in LFR/Normal mode).
- In Phases Three and Four, the boss uses Greater Reversal of Fortune
instead, which turns all Ancient Wards into a Ward of Power and
vice-versa.
- The Jealousy buff that players affected by Beckon gain
in Phase Three increases movement speed by 20%, up from 5%/10% in LFR/Normal
mode.
- Hitting the boss with the detonation of Arcane Burst during Phases
Two and Three causes the next cast of Arcane Burst to affect an additional
raid member for each player that hits the boss with Arcane Burst.
Loot
In Mythic difficulty, Queen Azshara drops ![]() Sparkling Elemental Heart,
Sparkling Elemental Heart,
![]() Web of Unbridled Vitality, and
Web of Unbridled Vitality, and ![]() Dazzling Azerite Formation. These
are rank 4 upgrades for the 3 essences that
are specific to The Eternal Palace: Condensed Life-Force (for DPS),
Vitality Conduit (for healers), and Azeroth's Undying Gift (for
tanks).
Dazzling Azerite Formation. These
are rank 4 upgrades for the 3 essences that
are specific to The Eternal Palace: Condensed Life-Force (for DPS),
Vitality Conduit (for healers), and Azeroth's Undying Gift (for
tanks).
| Item> | Type | Slot |
|---|---|---|
| Staff | Two Hand | |
| Cloth Armor | Hands | |
| Cloth Armor | Feet | |
| Leather Armor | Hands | |
| Leather Armor | Waist | |
| Mail Armor | Legs | |
| Mail Armor | Feet | |
| Plate Armor | Waist | |
| Plate Armor | Legs | |
| Accessory | Ring | |
| Accessory | Trinket | |
| Essence upgrades | ||
| Pet |
For more information, please refer to our Eternal Palace Loot and Essence guide.
Class-specific Advice for Queen Azshara
Changelog
- 22 Jul. 2019: Updated Heroism/Bloodlust timing recommendation and clarified Arcane Burst on Heroic mode.
- 17 Jul. 2019: Updated Phase Three transition information.
- 08 Jul. 2019: Guide added.