

Morchok Tank Strategy Guide (Heroic Mode included)

Introduction
This guide is intended to provide a comprehensive description of the encounter with Morchok in Dragon Soul. It is mostly targeted to tanks who desire to have a short but detailed overview of what is expected of them during that fight.
This guide is updated for World of Warcraft WoD 6.1.2.
The encounter against Morchok, in the Dragon Soul raid instance, is one that presents very little difficulty for tanks. The only concerns are performing a simple tank-swap and occasionally hiding behind some pillars of stone in order to avoid a ground-based attack from the boss.
Overview of the Fight
Morchok is a relatively simple encounter made up of two alternating phases.
-
 The Crystal Phase, which lasts approximately 1 minute,
is a tank and spank phase during which the tanks' only concern is to
taunt the boss off of each other, due to a debuff that the boss applies.
The Crystal Phase, which lasts approximately 1 minute,
is a tank and spank phase during which the tanks' only concern is to
taunt the boss off of each other, due to a debuff that the boss applies. -
 The Black Blood Phase, which lasts approximately 30 seconds,
requires everyone to hide behind pillars
of stone (created during the encounter) to avoid being hit by the Black
Blood flowing out from Morchok.
The Black Blood Phase, which lasts approximately 30 seconds,
requires everyone to hide behind pillars
of stone (created during the encounter) to avoid being hit by the Black
Blood flowing out from Morchok.
Finally, at 20% health, Morchok gains the ![]() Furious buff. This does not
affect the alternation between the Crystal Phase and the Black Blood Phase: the
fight continues normally, just that the boss deals more damage and attacks
faster.
Furious buff. This does not
affect the alternation between the Crystal Phase and the Black Blood Phase: the
fight continues normally, just that the boss deals more damage and attacks
faster.
Crystal Phase
Abilities
Morchok performs the following relevant abilities:
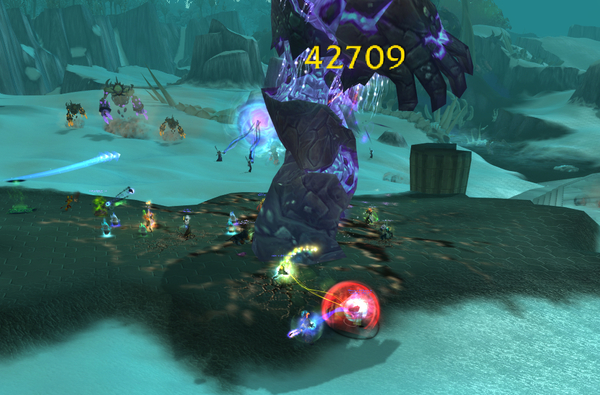
- a melee attack on his current target every 2.5 seconds. This attack hits for approximately 30,000 in 10-man difficulty, 60,000 in LFR difficulty, and probably a bit more in 25-man difficulty.
 Crush Armor, a debuff that the boss attempts (the applications
can be dodged or parried) to apply to its current target every 6 seconds. It
stacks up to 10 times, and each stack reduces the target's armor by 10%.
Crush Armor, a debuff that the boss attempts (the applications
can be dodged or parried) to apply to its current target every 6 seconds. It
stacks up to 10 times, and each stack reduces the target's armor by 10%.- every 15 seconds or so, tanks will also regularly take unavoidable damage
from
 Stomp. The damage of this ability is split among all players
within 25 yards of Morchok, with the tank and the player (usually the second tank)
closest to the tank taking a double share of damage.
Stomp. The damage of this ability is split among all players
within 25 yards of Morchok, with the tank and the player (usually the second tank)
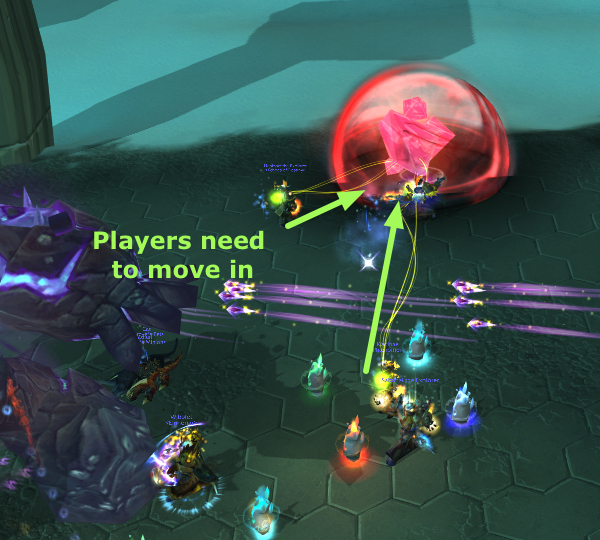
closest to the tank taking a double share of damage. - occasionally, the tank currently not tanking Morchok may be targeted by a beam of light, linked to a nearby crystal (a red object). In this case, they should simply move to the crystal (melee range of it) until it explodes, and then return to the tanking role.
Strategy
Because the raid needs to be within 25 yards of Morchok to soak the damage from Stomp, tanks should aim to keep the boss stationary for the entire duration of the phase.
 Tanks have two extremely simple tasks to perform during the Crystal
Phase:
Tanks have two extremely simple tasks to perform during the Crystal
Phase:
- Taunt Morchok off of each other whenever the current tank has 4 stacks of
Crush Armor;
-
Stand as close as possible to the other tank (in order to be the ones taking
the double share of damage from Stomp).
In case tanks are targeted by the Resonating Crystal (a rare, yet possible occurrence), they should move to melee range of the crystal before it explodes (12 seconds).
Black Blood Phase
 During this entire phase, Morchok is immobile and does not need to be
tanked. After 30 seconds, the boss returns to the Crystal Phase.
During this entire phase, Morchok is immobile and does not need to be
tanked. After 30 seconds, the boss returns to the Crystal Phase.
 He will begin the phase by pulling the entire raid to him before channeling
![]() Black Blood of the Earth. This ability causes Black Blood to flow outwards
of him, dealing heavy damage to anyone standing in it.
Black Blood of the Earth. This ability causes Black Blood to flow outwards
of him, dealing heavy damage to anyone standing in it.
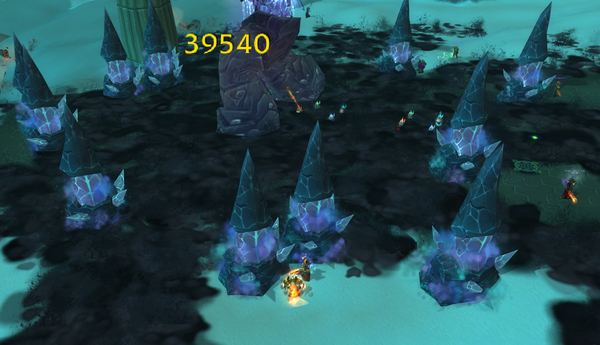
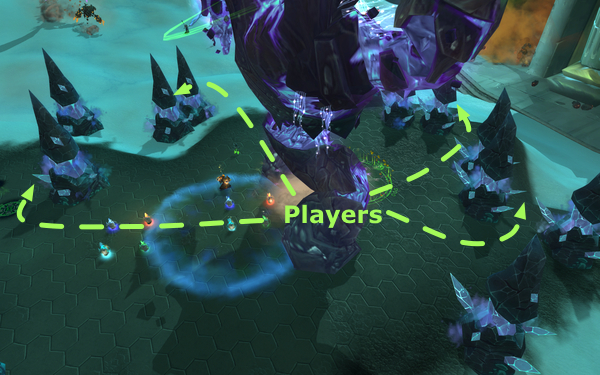
As soon as you are free to move (after being pulled by Morchok), hide behind one of the stone pillars that appeared when the phase started.
Once behind a stone pillar, simply stay there until the end of the phase (approximately 25 seconds). When the Crystal Phase resumes, Morchok needs to be tanked again.
Tips
The Morchok encounter is extremely simple for tanks, and the damage values
are, currently, quite low. Defensive cooldowns should be used during the
Crystal Phase, when Morchok's melee attacks (especially on a tank with stacks
of ![]() Crush Armor), coupled with the damage from
Crush Armor), coupled with the damage from ![]() Stomp, can be
deadly.
Stomp, can be
deadly.
Heroic Mode
As a tank, the heroic mode of Morchok is quite easy, but you will be required to be focused for its entire duration, and react accordingly at specific times, by moving the boss.
Differences from Normal Mode
The difference between normal and heroic Morchok are simple.
- At 90% health, Morchok splits himself in two, and your raid has to fight both Morchoks at the same time (the other boss is called Kohcrom).
- Both bosses use the same abilities as Morchok does in normal mode, with the same frequency and in the same way.
- Crush Armor no longer exists, meaning that there is no need to tank
switch on either of the two bosses.
- Morchok and Kohcrom have separate health pools, but every time you deal damage to one of them, both bosses take an equal share of damage (as was the case with Rhyolith's legs in Firelands).
- Both Morchok and Kohcrom place a debuff on their tanks each time they cast
a Stomp. This debuff lasts for 10 seconds and increases physical
damage taken by 100%.
In addition to this, the bosses have more health, melee the tanks for more, and all of their abilities deal more damage.
Strategy
Until the boss reaches 90% health, you should be within 25 yards of him,
to soak the damage from ![]() Stomp and simply tank him (or, if you
are the off-tank, simply DPS). At 90%, the actual heroic mode begins.
Stomp and simply tank him (or, if you
are the off-tank, simply DPS). At 90%, the actual heroic mode begins.
Your raid leader will split the raid into two balanced groups, one for each of the two bosses (Morchok and Kohcrom). Once the boss reaches 90% health and splits in two, simply go to the side where you were assigned.
It is extremely important that the two bosses be separated immediately, and taken so far apart from one another that the two groups of the raid will never be within range of each other. Quickly pick up your boss and move him away. After the split, Morchok will normally be on the right, and Kohcrom on the left.
Crystal Phase
During the Crystal Phase, you will have to perform the following tasks.
- Always be close to the DPS player assigned to taking a double share of
damage from Stomp with you.
- Whenever the boss spawns a
 Resonating Crystal, make sure that you move
the boss within 25 yards of the crystal (but not ON the crystal!), so that the
players handling it can still be in range to take the split damage from
Stomp.
Resonating Crystal, make sure that you move
the boss within 25 yards of the crystal (but not ON the crystal!), so that the
players handling it can still be in range to take the split damage from
Stomp.- If there is one or more melee DPS in the group of designated players, bringing the boss close enough will enable them to continue attacking it.
- Be prepared to use defensive cooldowns after (or right before) a
Stomp occurs, in order to mitigate the increased damage taken
due to the debuff applied by the Stomp.
It is important that, when moving the boss, you do not drag him over raid members (unless he has just performed a Stomp), as this runs the risk of an unprepared raid member taking a double share of damage from Stomp.
Black Blood Phase
The Black Blood Phase remains unchanged from normal mode and presents no difficulty.