

Spires of Ascension Quick Dungeon Guide: Video, Boss Strategies, and Trash

Welcome to our quick guide to the Spires of Ascension dungeon in the Shadowlands World of Warcraft expansion. This guide aims at giving you proper direction to complete the dungeon (boss strategies and trash mobs) without being unnecessarily long. We also have encounter journal pages, for those who want a complete breakdown of the abilities.
Ready Check Pull Video
Mythic+ Difficulty
To see how difficult Spires of Ascension is to complete on Mythic+ this week, we recommend checking out our Mythic+ dungeon difficulty rankings, linked below.
Bosses
Please consult our Spires of Ascension encounter journal pages for more information regarding what the bosses do exactly in each difficulty.
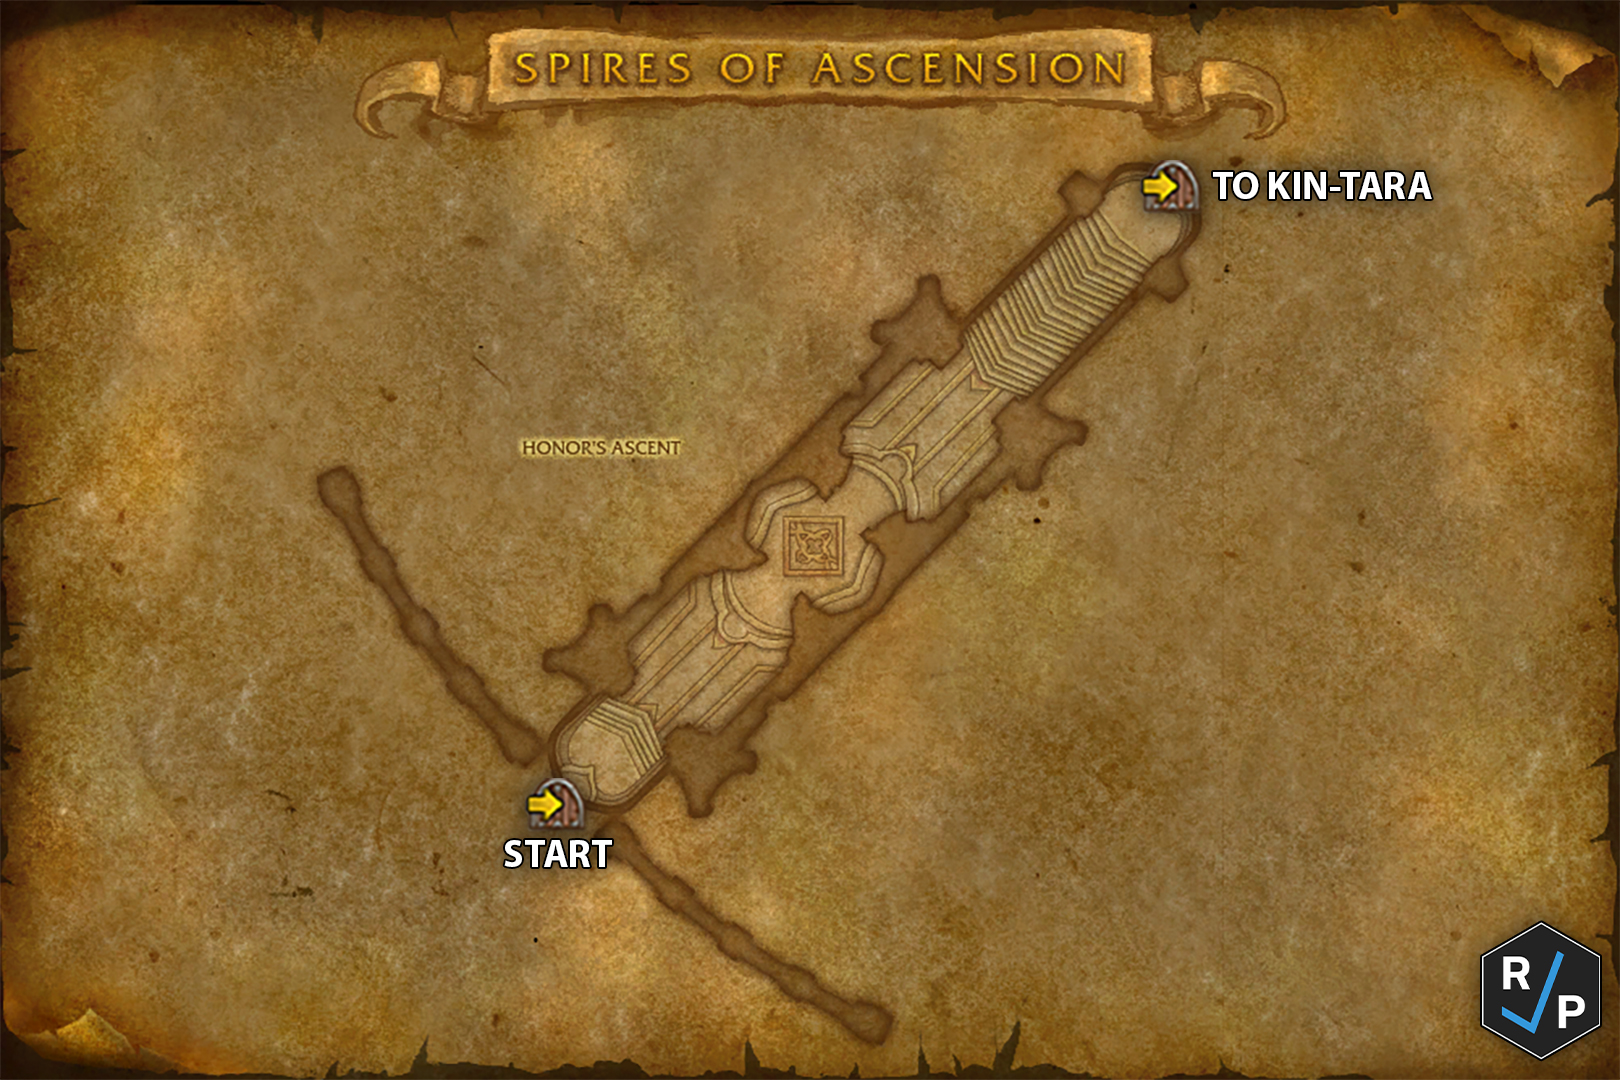
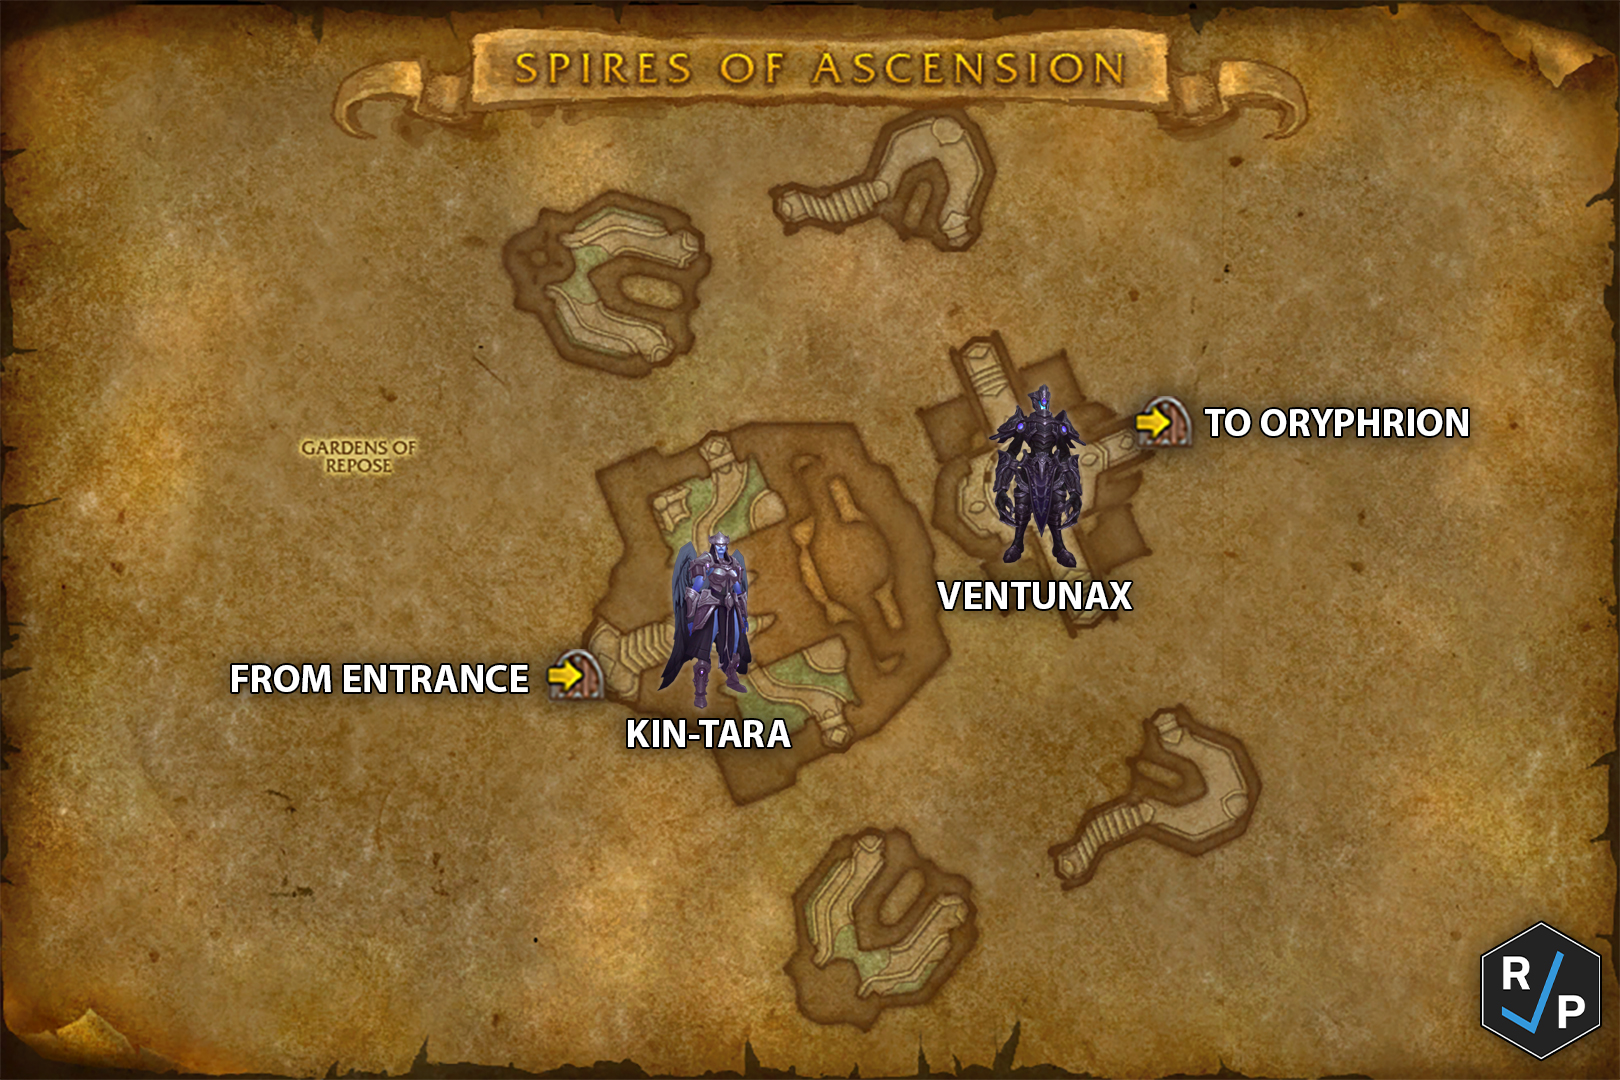
Kin-Tara
- The bosses share health, so stack them together for extra cleave damage when possible.
- Dodge the pet's waves of dark bolts (
 Attenuated Barrage).
 - Do not stand in front of Kin-Tara, because she casts a cleave on the tank
(
 Sweeping Strike).
 - Interrupt her
 Dark Lance cast as often as possible, because it puts
a heavy DoT on random players.
Dark Lance cast as often as possible, because it puts
a heavy DoT on random players. - When she starts flying around, quickly move out of her
 Charged Spear if you are targeted by it.
Ventunax
- Move away from the dark swirly clouds dropped by the boss, and dodge the
dark bolts that come out of them in all directions (
 Shadowhirl).
 - Dodge the frontal attack from the boss (
 Blinding Flash).
 - When the boss channels
 Reabsorb Anima at zero Energy, there will be
more dark bolts to dodge from the clouds.
Reabsorb Anima at zero Energy, there will be
more dark bolts to dodge from the clouds.
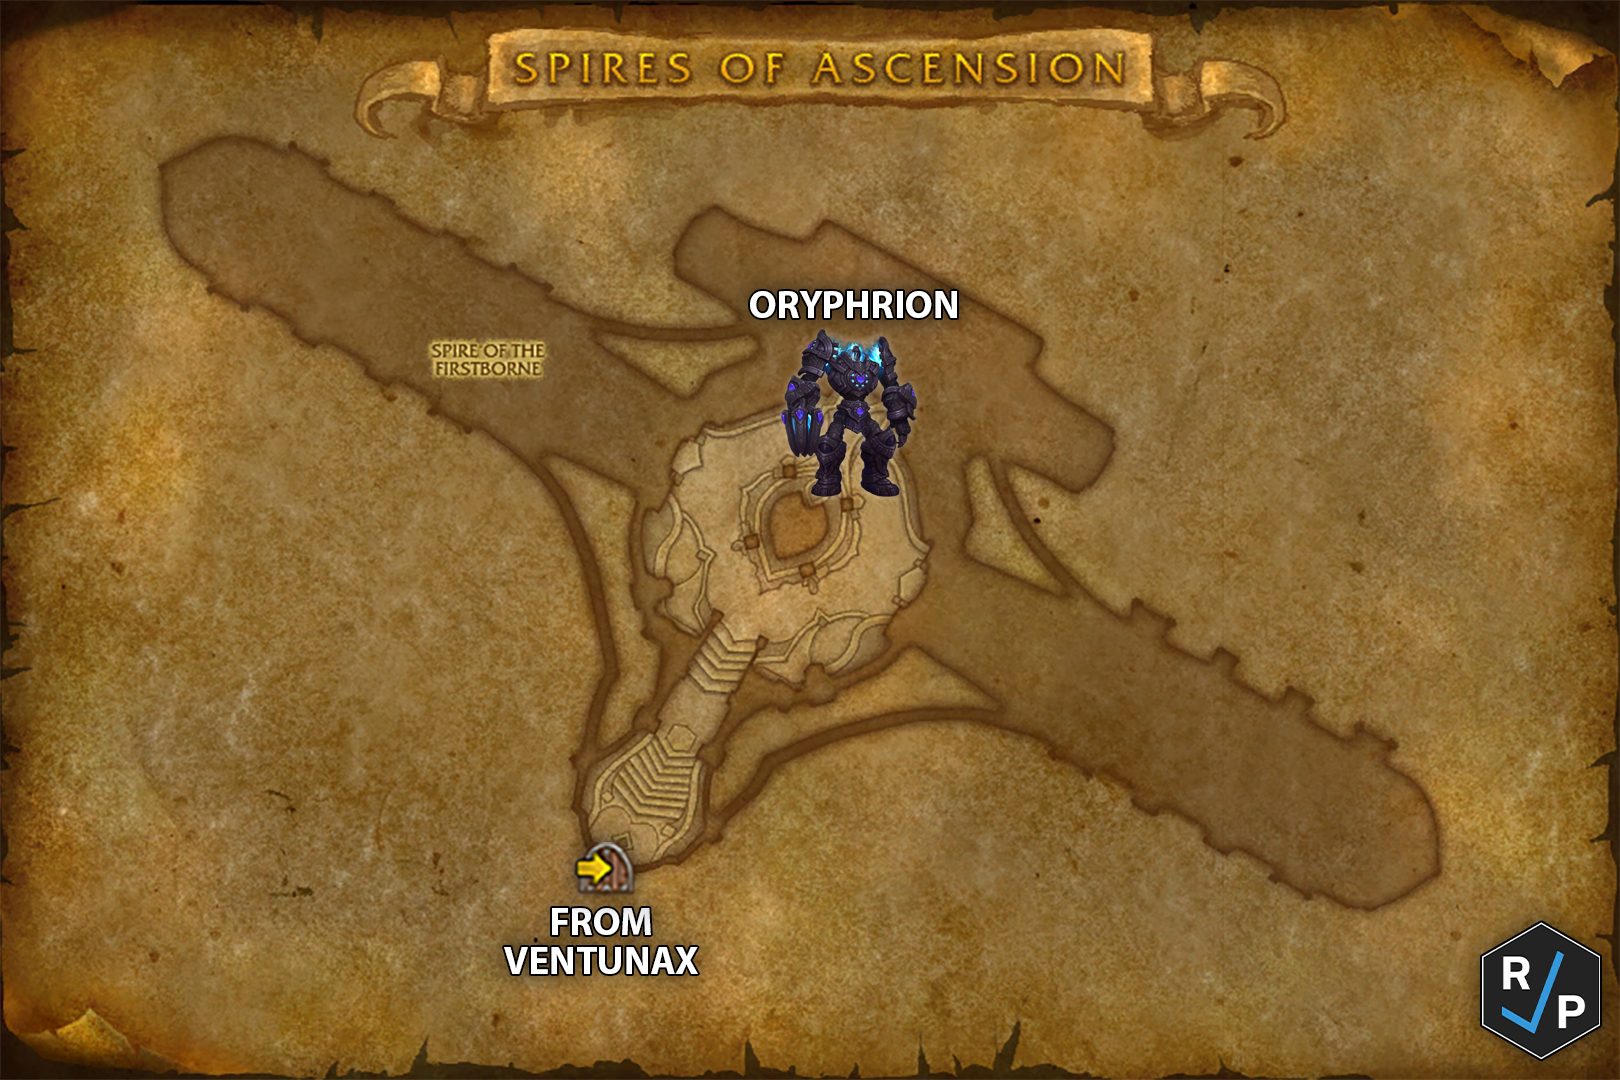
Oryphrion
- Stay spread at least 8 yards apart to avoid multiple people getting hit by
 Purifying Blast.
 - Do not stand on the tank, and dispel the tank as soon as the boss hits them with
 Charged Stomp. Otherwise the tank will be too slow to move the boss when needed.
 - When you get a blue arrow on your head, move it away from the boss and stack
with other players (
 Empyreal Ordnance). Then get out of the blue circle
when it expires, because it will spawn a blue pool that hurts you
(
Empyreal Ordnance). Then get out of the blue circle
when it expires, because it will spawn a blue pool that hurts you
( Volatile Anima).
 - Keep the boss out of the blue pools on the ground
(
 Anima Field).
 - When the boss channels
 Recharge Anima, the blue pools will turn
into blue orbs that will move toward the boss. Players need to soak these orbs
to prevent them from getting to the boss and doing huge AoE damage. The boss
takes double damage while channeling, so this would be a good time to use DPS
cooldowns.
Recharge Anima, the blue pools will turn
into blue orbs that will move toward the boss. Players need to soak these orbs
to prevent them from getting to the boss and doing huge AoE damage. The boss
takes double damage while channeling, so this would be a good time to use DPS
cooldowns. - On Mythic, the orbs apply a stacking debuff when soaked. Let the tank soak them all, have a player with an immunity soak them all, or have everyone soak a small number of them.
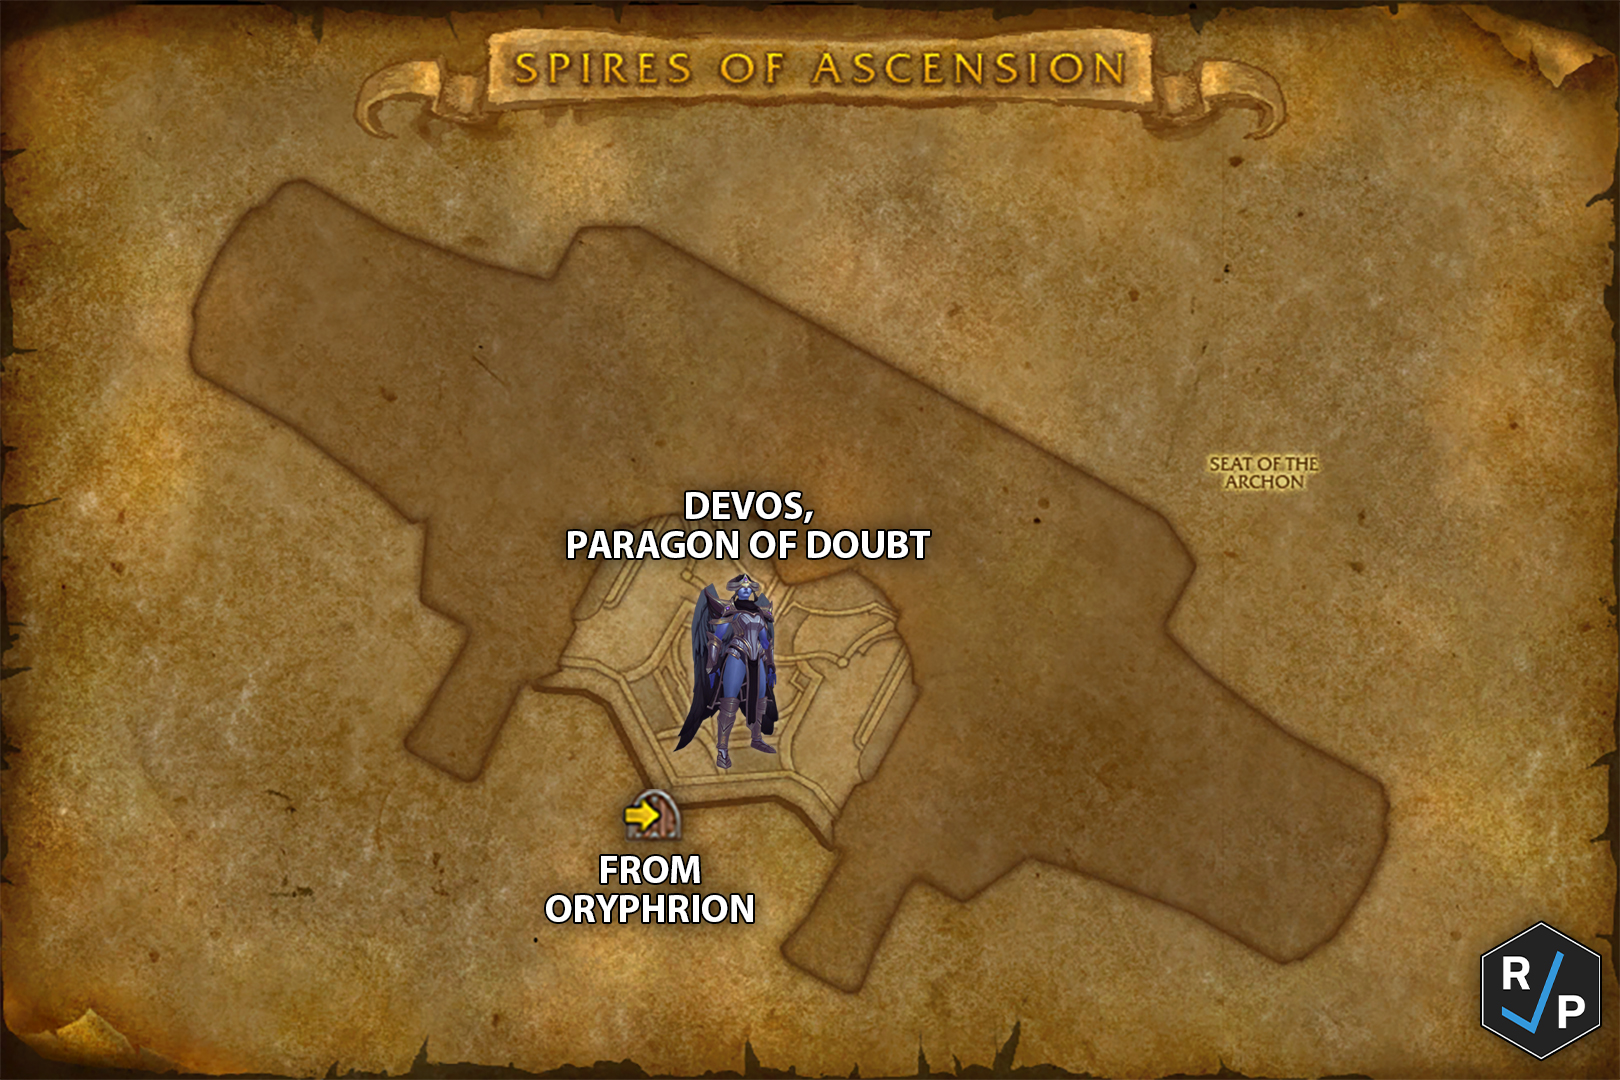
Devos, Paragon of Doubt
- Dodge the boss's charge in a random direction (
 Run Through).
 - Move away from the occasional dark swirly orb spawned by the boss, because
it will explode after a few seconds (
 Abyssal Detonation).
 - Dispel the debuff that gets put on a random player
(
 Lingering Doubt), and stay out of the dark pool it leaves on the
ground.
Lingering Doubt), and stay out of the dark pool it leaves on the
ground. - When the boss jumps to the middle of the room, she will activate the Anima Conduit and then fly away. Wind will then start blowing you around on the platform. Everyone will need to collect the blue orbs around the room and bring them to the Anima Conduit in the middle of the room while dodging the dark pools that move with the wind. Once all the orbs have been collected, one player will need to interact with the spear in the Anima Conduit and throw it at Devos flying around off the platform. This will bring the boss back down to continue fighting.
- On Mythic, the Abyssal Detonation hits everyone, but now a
blue zone also spawns that players need to move into in order to reduce the damage
taken from the detonation (
 Archon's Bastion).
Notable Trash
This dungeon is full of generic swirlies, frontals, and casts. Most of them are either obvious or not really worth mentioning, but here are the things to pay attention to:
- Forsworn Mender and Forsworn Champion
- Interrupt
 Forsworn Doctrine, because it heals another enemy.
- Interrupt
- Forsworn Goliath
- Interrupt
 Rebellious Fist, because it does damage to the whole
party.
Rebellious Fist, because it does damage to the whole
party.
- Interrupt
- Forsworn Squad-Leader
- Focus-kill this mob, because it reduces the damage taken of nearby enemies
by 75% (
 Inspiring Presence).
- Focus-kill this mob, because it reduces the damage taken of nearby enemies
by 75% (
- Forsworn Warden
- Interrupt
 Greater Mending, because it heals all nearby
enemies.
Greater Mending, because it heals all nearby
enemies. - Use an offensive dispel on this mob when it has
 Bless Weapon,
because it heals all nearby enemies.
Bless Weapon,
because it heals all nearby enemies.
- Interrupt
Changelog
- 26 Nov. 2020: Added Mythic mechanics and updated the guide for the release of Shadowlands.
- 19 Jul. 2020: Guide added.