
Welcome to our strategy guide for the encounter with Za'qul, Harbinger of Ny'alotha in The Eternal Palace raid. Here, you will first find the strategy to defeat the boss, followed by a detailed analysis of the abilities.
To familiarize yourself with the encounter, we suggest you watch this short video guide from Hazel Nutty.
Fight Overview
The fight against Za'qul is a complex four-phase encounter during which the raid will have to handle a large number of abilities and mechanics across multiple realms. Overall, this fight is considerably more complex than any of the 6 other fights up to this point in The Eternal Palace, and will require a much more refined execution from your raid.
Strategy / Fight Summary
Overall, this fight is very complex. Fortunately, the complexity of the encounter increases progressively as the raid moves through the different phases, with Phase Four incorporating most of the abilities and mechanics used previously.
A few abilities (the shared abilities described later on) are present throughout multiple parts of the fight, and should be handled in generally the same way. We will first look at these abilities, and then we will handle the strategy for each phase, one at a time, since this is the natural progression your raid will follow as well.
Shared Abilities
Mind Tether
Throughout the fight, your tanks must deal with ![]() Mind Tether. Simply
put, at the pull, at the start of Phase Two, and at the start of Phase Four,
the two tanks should be the closest two players to the boss. This will ensure
that Mind Tether will link the two tanks to one another for the remainder of
each phase (to the best of our current knowledge, Mind Tether is not re-cast
at the start of Phase Three).
Mind Tether. Simply
put, at the pull, at the start of Phase Two, and at the start of Phase Four,
the two tanks should be the closest two players to the boss. This will ensure
that Mind Tether will link the two tanks to one another for the remainder of
each phase (to the best of our current knowledge, Mind Tether is not re-cast
at the start of Phase Three).
Once the two tanks have ![]() Mind Tether, they should attempt to stay
within 12 yards of one another, in order to keep the amount of damage they
reflect to one another to a minimum.
Mind Tether, they should attempt to stay
within 12 yards of one another, in order to keep the amount of damage they
reflect to one another to a minimum.
There are no other tank-swap mechanics in the fight, and in theory the same
tank can tank the boss throughout the fight, with the other tank simply being
there to occasionally pick up adds and soak the reflected damage from
![]() Mind Tether.
Mind Tether.
Dark Beyond
The ![]() Dark Beyond area that surrounds the room should be avoided at
all times, since standing in it deals very high damage. Players normally have
no reason to enter it, but there are several abilities in the fight that
knock back, so players must pay attention not to be knocked back into the
Dark Beyond.
Dark Beyond area that surrounds the room should be avoided at
all times, since standing in it deals very high damage. Players normally have
no reason to enter it, but there are several abilities in the fight that
knock back, so players must pay attention not to be knocked back into the
Dark Beyond.
Furthermore, ![]() Dread, which is cast throughout most of the fight,
fears players, and healers must pay special attention in case a feared player
wanders into the
Dread, which is cast throughout most of the fight,
fears players, and healers must pay special attention in case a feared player
wanders into the ![]() Dark Beyond.
Dark Beyond.
Dread
![]() Dread is used in Phases One, Two, and Three, and should generally
always be handled in the same way. The players who are debuffed by Dread will
need to be dispelled by the healers in a staggered fashion, since each
dispel (or expiration of the 10-second DoT) results in a lot of raid-wide
damage.
Dread is used in Phases One, Two, and Three, and should generally
always be handled in the same way. The players who are debuffed by Dread will
need to be dispelled by the healers in a staggered fashion, since each
dispel (or expiration of the 10-second DoT) results in a lot of raid-wide
damage.
The actual damage ![]() Dread deals to its target is not too bad, so
leaving a player until late to dispel them is not a concern, although as
Dread players are also feared, they may stray into the
Dread deals to its target is not too bad, so
leaving a player until late to dispel them is not a concern, although as
Dread players are also feared, they may stray into the ![]() Dark Beyond or
some other void zone and take additional damage.
Dark Beyond or
some other void zone and take additional damage.
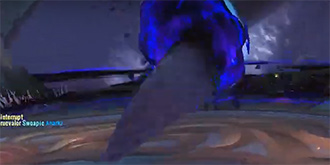
Crushing Grasp
![]() Crushing Grasp is present throughout the fight, and players will
simply have to get used to dodging this tentacle whenever the ability is
happening.
Crushing Grasp is present throughout the fight, and players will
simply have to get used to dodging this tentacle whenever the ability is
happening.
The blue portal from which the tentacle will spawn is always located at the side of the room, and the tentacle will always slam across the center of the room, so with a bit of practice, this should become fairly easy to see and dodge at all times.
Phase One
Phase One is the simplest of all phases in this encounter, and it helps establish a few baseline tasks for your raid.
Your raid will have to handle all of the above-mentioned shared abilities,
in addition to dealing with ![]() Portal of Madness.
Portal of Madness.
All 3 Horrific Summoners that spawn from the ![]() Portal of Madness
must be killed before they finish their cast of
Portal of Madness
must be killed before they finish their cast of ![]() Dark Tear, or else the
raid-wide damage will cause a wipe. DPS players should simply focus these adds
when they spawn.
Dark Tear, or else the
raid-wide damage will cause a wipe. DPS players should simply focus these adds
when they spawn.
The resulting Horrific Visions are not a priority, as they have no abilities and their melee attacks are not particularly threatening. The recommended strategy is to bring these adds to melee range of the boss (the off-tank can try to do this, but they should make sure not to move more than 12 yards away from the main tank) and then cleave them down.
Keep in mind that the void zones created by ![]() Portal of Madness
(from which the Summoners spawn) do deal damage if you stand in them, so avoid
them.
Portal of Madness
(from which the Summoners spawn) do deal damage if you stand in them, so avoid
them.
Once the boss reaches 85% health, Phase Two will begin.
Phase Two
In Phase Two, the raid will have to still handle ![]() Mind Tether, as
well as
Mind Tether, as
well as ![]() Crushing Grasp tentacles and
Crushing Grasp tentacles and ![]() Dread. These will be
handled exactly as before, and
Dread. These will be
handled exactly as before, and ![]() Portal of Madness adds will no longer
spawn during this phase.
Portal of Madness adds will no longer
spawn during this phase.
The entire raid will now be in the ![]() Fear Realm, and raid damage will
increase throughout this phase, as
Fear Realm, and raid damage will
increase throughout this phase, as ![]() Hysteria stacks on all players.
This cannot be avoided or mitigated in any way, and it is up to the healers to
keep up with the damage (healing cooldowns may be required towards the end of
the phase). Avoiding other sources of damage and maximising DPS to get through
the phase as quickly as possible will also help.
Hysteria stacks on all players.
This cannot be avoided or mitigated in any way, and it is up to the healers to
keep up with the damage (healing cooldowns may be required towards the end of
the phase). Avoiding other sources of damage and maximising DPS to get through
the phase as quickly as possible will also help.
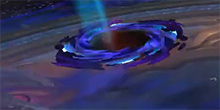
Importantly, the raid will have to handle ![]() Maddening Eruption and
Maddening Eruption and
![]() Manifest Nightmares throughout this phase.
Manifest Nightmares throughout this phase.
Maddening Eruption
![]() Maddening Eruption must be handled by moving Za'qul into
this void zone before it detonates. This will ensure that the raid does not
take damage from the detonation, and also debuffs the boss to take 30%
increased damage for 20 seconds. The tank will need to stay inside the void
zone with the boss (unless the boss's model will allow such precise positioning
that the tank can stay outside while the boss is in), and as such should be
prepared to take the void zone explosion damage as well.
Maddening Eruption must be handled by moving Za'qul into
this void zone before it detonates. This will ensure that the raid does not
take damage from the detonation, and also debuffs the boss to take 30%
increased damage for 20 seconds. The tank will need to stay inside the void
zone with the boss (unless the boss's model will allow such precise positioning
that the tank can stay outside while the boss is in), and as such should be
prepared to take the void zone explosion damage as well.
 Za'qul being moved into
 Manifest Nightmares
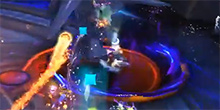
Players who are affected by ![]() Manifest Nightmares must stay away from
other raid members, and must be careful
of where they leave the void zones that each tick creates. We recommend
placing these void zones near the center of the room, since this is the area
where the
Manifest Nightmares must stay away from
other raid members, and must be careful
of where they leave the void zones that each tick creates. We recommend
placing these void zones near the center of the room, since this is the area
where the ![]() Crushing Grasp tentacles always hit, and which players will
want to move away from towards the edges of the room to avoid.
Crushing Grasp tentacles always hit, and which players will
want to move away from towards the edges of the room to avoid.
Moreover, to optimize the location of the ![]() Nightmare Pool void zones,
players should attempt to overlap them, or, failing that, to leave a gap
between so players can move through if needed. Since these void zones persist
for the rest of the fight and can deal
damage to players who are in the
Nightmare Pool void zones,
players should attempt to overlap them, or, failing that, to leave a gap
between so players can move through if needed. Since these void zones persist
for the rest of the fight and can deal
damage to players who are in the ![]() Delirium Realm (during Phases Three and
Four), even though these players cannot actually see the void zones, it is a
good idea for the raid to have consistent placement of these void zones
throughout multiple attempts, so everyone can get a feel for where they are
even if they cannot always see them.
Delirium Realm (during Phases Three and
Four), even though these players cannot actually see the void zones, it is a
good idea for the raid to have consistent placement of these void zones
throughout multiple attempts, so everyone can get a feel for where they are
even if they cannot always see them.
The Horrific Vision adds that spawn when ![]() Manifest Nightmares
expires are not really a concern, and should just be picked up by the tanks
and eventually cleaved down.
Manifest Nightmares
expires are not really a concern, and should just be picked up by the tanks
and eventually cleaved down.
Phase Three
At 70% health, the boss will enter Phase Three, but for most of the raid,
the fight will continue just like it did up to this point. All mechanics should
be handled exactly as during Phase Two, and only the
![]() Delirium's Descent ability will be new.
Delirium's Descent ability will be new.
DPS players (ideally those benefit most from increased Haste) should soak
the ![]() Delirium's Descent void zones (1 player per void zone), as this
will transport them from the
Delirium's Descent void zones (1 player per void zone), as this
will transport them from the ![]() Fear Realm into the
Fear Realm into the ![]() Delirium Realm. There are a few
considerations here.
Delirium Realm. There are a few
considerations here.

- The boss creates the
 Delirium's Descent void zones somewhere in
front of him, so the tank must make sure to face the boss away from the
Delirium's Descent void zones somewhere in
front of him, so the tank must make sure to face the boss away from the
 Dark Beyond.
 - The DPS players who enter the
 Delirium Realm can attack
one another (since they are all hostile), but should avoid doing so and should
instead focus entirely on damaging Za'qul.
Delirium Realm can attack
one another (since they are all hostile), but should avoid doing so and should
instead focus entirely on damaging Za'qul. - Eventually, all the players who enter the Delirium Realm will "die" (see last bullet point below),
as they cannot be healed from the other realms, and as they will take
increasing damage from
 Hysteria (even if they manage to avoid all
other damage).
Hysteria (even if they manage to avoid all
other damage).- The
 Nightmare Pools from the normal/Fear realms will damage players
who are in the Delirium Realm, although they will not be able to see
them, so avoiding them is more a matter of having a good understanding of where
the safe areas are (our recommendation above was to place these void zones near
the center of the room, which should leave the edges clear).
Nightmare Pools from the normal/Fear realms will damage players
who are in the Delirium Realm, although they will not be able to see
them, so avoiding them is more a matter of having a good understanding of where
the safe areas are (our recommendation above was to place these void zones near
the center of the room, which should leave the edges clear).  Dread can target players in the Delirium Realm, and this
will likely kill everyone in that realm.
Dread can target players in the Delirium Realm, and this
will likely kill everyone in that realm.- In Heroic mode, players inside the Delirium Realm will also have to
avoid the
 Tentacle Slam ability.
- The
- When players "die" in the Delirium Realm, they will be brought back
into the
 Fear Realm on 50% health and stunned by
 Shattered Psyche. Healers should dispel this and heal these players up
as soon as possible.
Shattered Psyche. Healers should dispel this and heal these players up
as soon as possible.
Phase Four
Phase Four starts when the boss reaches 50% health, with the entire raid
being transported out of the ![]() Fear Realm into the normal realm. This
will allow the stacks of
Fear Realm into the normal realm. This
will allow the stacks of ![]() Hysteria to drop off, providing much-needed
relief for the healers.
Hysteria to drop off, providing much-needed
relief for the healers.
The raid will still be dealing with ![]() Mind Tether and
Mind Tether and
![]() Crushing Grasp exactly as before. The Phase One Horrific
Summoners are back, but now they are immune to damage unless done by
players in the
Crushing Grasp exactly as before. The Phase One Horrific
Summoners are back, but now they are immune to damage unless done by
players in the ![]() Fear Realm, which can regularly be entered.
Fear Realm, which can regularly be entered.
Moreover, the boss now regularly shields himself and begins casting
![]() Dark Pulse, which must be interrupted by breaking through his
damage-absorption shield. The last change is that the
Dark Pulse, which must be interrupted by breaking through his
damage-absorption shield. The last change is that the ![]() Dread ability
that was used up until now is changed to
Dread ability
that was used up until now is changed to ![]() Manic Dread, which leaves
behind void zones at the place where players are dispelled and enable
players to access the
Manic Dread, which leaves
behind void zones at the place where players are dispelled and enable
players to access the ![]() Delirium Realm.
Delirium Realm.
The strategy for this phase is as follows.
- Most of the raid will spend most of the time in the normal realm, dealing with the boss's abilities there and with the Horrific Visions.
- Selected DPS players (again, who benefit from increased Haste) should
enter the Delirium Realm by standing in the
 Caustic Delirium
void zones for 5 seconds in preparation for the boss's
Caustic Delirium
void zones for 5 seconds in preparation for the boss's  Dark Pulse
cast.
Dark Pulse
cast.- Once inside the Delirium Realm, they must do as much damage as
possible to the boss in order to break through his 5% of maximum health
damage absorption shield.
- All Delirium Realm strategy considerations from Phase Three still
apply here.
- When players have broken through the shield, they should exit the
Delirium Realm by interacting with First Arcanist Thalyssra's
 Reality Portal.
- Once inside the
- Once the boss's Dark Pulse cast has been broken, players will need
to use the Fear Realm Portals present next to the Horrific Summoners
to enter the Fear Realm and kill the Summoners before their casts of
 Dark Tear can complete.
- Exactly how many players must enter the Fear Realm will depend on
several factors, but it is a good idea to send a mix of DPS and healers in to
ensure that no one dies.
- Once the Summoners are dead, players should exit the
Fear Realm by interacting with First Arcanist Thalyssra's
Reality Portal.
- Exactly how many players must enter the
As all of this goes on, players will need to continue DPSing Za'qul himself in order to finally kill him.
Heroism / Bloodlust / Time Warp
We are not certain what the best time to use ![]() Heroism/
Heroism/![]() Bloodlust/
Bloodlust/![]() Time Warp is, but it is going to be either Phase Three (to
accelerate the transition to Phase Four and rid the raid of the high stacks of
Time Warp is, but it is going to be either Phase Three (to
accelerate the transition to Phase Four and rid the raid of the high stacks of
![]() Hysteria) or Phase Four (which is the most complex and probably the
most demanding part of the fight).
Hysteria) or Phase Four (which is the most complex and probably the
most demanding part of the fight).
Summary for Tanks
- Make sure to be closest to the other tank on the pull and at the start of
Phases Two and Four, so that Mind Tether links the two tanks.
- Make sure to be within 12 yards of each other whenever possible to keep
the Mind Tether damage as low as possible.
- Do not tank the boss directly in the center of the room (since this is
where the
 Crushing Grasp tentacle will often hit).
 - Pick up the Horrific Vision adds and bring them in melee range so the DPS can cleave them.
- During Phases Two and Three, pull the boss into the
 Maddening Eruption void zones to soak them and ensure that the boss is
debuffed by them.
Maddening Eruption void zones to soak them and ensure that the boss is
debuffed by them. - During Phase Four, face the boss towards the inside of the room
so that the Caustic Delirium void zones do not spawn in the
Dark Beyond.
Summary for Healers and DPS
Phase One
- Avoid entering the Dark Beyond around the outer edges of the
room.
- Avoid getting hit by the Crushing Grasp tentacle.
- Dispel players affected by Dread in a staggered way, and heal up
the raid-wide damage.
- Do not stand in the Portal of Madness void zones.
- Focus the Horrific Summoners and cleave down the Horrific Visions.
Phases Two and Three
- Avoid entering the Dark Beyond around the outer edges of the
room.
- Avoid getting hit by the Crushing Grasp tentacle.
- Dispel players affected by Dread in a staggered way, and heal up
the raid-wide damage.
- Heal the increasing raid-wide damage from Hysteria.
- Move away from allies affected by
 Manifest Nightmares. If affected
by Manifest Nightmares, drop the resulting void zones in the center of the
room, either overlapping them or leaving gaps between them.
Manifest Nightmares. If affected
by Manifest Nightmares, drop the resulting void zones in the center of the
room, either overlapping them or leaving gaps between them. - Do not stand in the Maddening Eruption void zone.
- During Phase Three, assigned DPS players enter the
Delirium Realm by standing in Delirium's Descent void
zones.
- During Phase Three, healers must make sure to heal up and dispel players
who exit the Delirium Realm.
Phase Four
- Avoid entering the Dark Beyond around the outer edges of the
room.
- Avoid getting hit by the Crushing Grasp tentacle.
- Dispel players affected by Manic Dread in a staggered way, and
heal up the raid-wide damage.
- Assigned DPS players enter the Delirium Realm by standing in
Caustic Delirium void zones in order to break the boss's
damage absorption shield and interrupt Dark Pulse.
- Assigned healers and DPS players use the
 Fear's Gate portals to
enter the Fear Realm and focus the Horrific Summoners.
Fear's Gate portals to
enter the Fear Realm and focus the Horrific Summoners.
Abilities
The fight against Za'qul is a 4-phase encounter. The boss enters a new phase at various health thresholds, as detailed below.
- Phase One: 100-85% health
- Phase Two: 85-70% health
- Phase Three: 70-50% health
- Phase Four: 50-0% health
Phases Two and Three each have a "realm" associated with them. During
Phase Two, the entire raid is transported to the ![]() Fear Realm, whereas
during Phase Three, some players will be transported to the
Fear Realm, whereas
during Phase Three, some players will be transported to the
![]() Delirium Realm (while the rest of the raid stays in the Fear
Realm).
Delirium Realm (while the rest of the raid stays in the Fear
Realm).
Phase One takes place entirely in the "normal" realm, while in Phase Four, the raid will interact with all 3 realms. We explain all of this below!
Shared Abilities
Before we look at each phase, we should mention a few abilities that are used in all phases of the fight.
Dark Beyond
Throughout the fight, the outer ring of the fighting area is covered in a
![]() Dark Beyond. This is a permanent area that deals high Shadow damage
to players standing in it every second.
Dark Beyond. This is a permanent area that deals high Shadow damage
to players standing in it every second.
Dread
![]() Dread is a 10-second DoT that the boss applies to random raid
members throughout the fight (each cast applies it to several players at
once). The DoT deals small amount of Shadow damage every second to the player,
fearing them for the duration, and also dealing a high amount of raid-wide
Shadow damage when it expires or is dispelled.
Dread is a 10-second DoT that the boss applies to random raid
members throughout the fight (each cast applies it to several players at
once). The DoT deals small amount of Shadow damage every second to the player,
fearing them for the duration, and also dealing a high amount of raid-wide
Shadow damage when it expires or is dispelled.
Mind Tether
![]() Mind Tether is an ability that concerns the tanks. At the start of
the fight, as well as the start of Phases Two and Four, the boss will "link"
his current target to the player closest to them, causing them to each reflect
(copy) 50% of the damage they take to the other player as Shadow damage.
Mind Tether is an ability that concerns the tanks. At the start of
the fight, as well as the start of Phases Two and Four, the boss will "link"
his current target to the player closest to them, causing them to each reflect
(copy) 50% of the damage they take to the other player as Shadow damage.
If the two tethered players are farther than 12 yards apart, the amount of reflected damage is increased.
If there is no player in the same realm as the tank when this is cast (so,
if the ability cannot link the current tank to anyone else), then the tank
is stunned by ![]() Snapped for 10 seconds.
Snapped for 10 seconds.
Crushing Grasp
![]() Crushing Grasp spawns a portal at the side of the fighting area,
and from this portal a large tentacle appears and slams across the entire
length of the room twice, a few seconds later.
Crushing Grasp spawns a portal at the side of the fighting area,
and from this portal a large tentacle appears and slams across the entire
length of the room twice, a few seconds later.
The tentacle always hits across the room, in a straight line, and getting hit by it deals very high Shadow damage and knocks players back.
Phase One
Phase One lasts from the start of the fight until the boss reaches 85% health. During this phase, the boss uses a number of abilities against the raid.
During this phase, the boss will use all of the shared abilities described
above, as well as one new ability, ![]() Portal of Madness.
Portal of Madness.
Portal of Madness
When the boss casts ![]() Portal of Madness, it will create 3 void zones
at various locations in the room. Standing in a Portal of Madness void zone
will deal a massive amount Shadow damage to the player and fear them for 6
seconds.
Portal of Madness, it will create 3 void zones
at various locations in the room. Standing in a Portal of Madness void zone
will deal a massive amount Shadow damage to the player and fear them for 6
seconds.
A Horrific Summoner add will spawn from each Portal of Madness.
These Summoners do not melee and do not need to be tanked. They channel
a cast of ![]() Dark Tear for 120 seconds. If this cast ends, the entire
raid will take lethal damage.
Dark Tear for 120 seconds. If this cast ends, the entire
raid will take lethal damage.
During the ![]() Dark Tear cast, a stream of Horrific Vision adds
spawn from each portal. These adds have no abilities, but must be tanked
and eventually killed.
Dark Tear cast, a stream of Horrific Vision adds
spawn from each portal. These adds have no abilities, but must be tanked
and eventually killed.
On Heroic mode, the Horrific Vision adds spawn with 30 stacks of
a buff called ![]() Gathering Nightmare. Each stack of this buff increases
their damage taken by 5% and movement speed by 2%, and the adds lose 1 stack
every 2 seconds. If the buff expires, the Horrific Vision adds are transformed
into Unleashed Nightmare adds, which deal more damage and debuff their
current target with stacks of
Gathering Nightmare. Each stack of this buff increases
their damage taken by 5% and movement speed by 2%, and the adds lose 1 stack
every 2 seconds. If the buff expires, the Horrific Vision adds are transformed
into Unleashed Nightmare adds, which deal more damage and debuff their
current target with stacks of ![]() Hysteria, a 25-second Shadow damage
DoT.
Hysteria, a 25-second Shadow damage
DoT.
Phase Two
Phase Two begins when the boss reaches 85% health, and it lasts until 70% health.
Throughout this phase, the boss will continue to use the shared abilities mentioned above.
![]() Portal of Madness from Phase One will no longer be cast.
Portal of Madness from Phase One will no longer be cast.
At the start of Phase Two, the entire raid is moved to the
![]() Fear Realm. This brings with it a stacking Shadow damage DoT called
Fear Realm. This brings with it a stacking Shadow damage DoT called
![]() Hysteria, which will stack on all raid members inside the Fear Realm
every 15 seconds.
Hysteria, which will stack on all raid members inside the Fear Realm
every 15 seconds.
In addition to this, the boss uses two new abilities during Phase Two.
Maddening Eruption
![]() Maddening Eruption is a void zone that Za'qul regularly
creates during Phase Two. While active, this void zone does nothing, but
roughly 20 seconds after spawning, it explodes, dealing high raid-wide
Shadow damage.
Maddening Eruption is a void zone that Za'qul regularly
creates during Phase Two. While active, this void zone does nothing, but
roughly 20 seconds after spawning, it explodes, dealing high raid-wide
Shadow damage.
If Za'qul is within the void zone when it expires, then only raid members who
are within the void zone take damage, and the boss receives the
![]() Punctured Darkness debuff for 20 seconds, which increases damage taken
by 30%.
Punctured Darkness debuff for 20 seconds, which increases damage taken
by 30%.
Manifest Nightmares
![]() Manifest Nightmares debuffs 2 random raid members with a 6-second
DoT that deals Shadow damage to them and any other allies within 7 yards.
Moreover, each time the DoT ticks, it leaves behind a
Manifest Nightmares debuffs 2 random raid members with a 6-second
DoT that deals Shadow damage to them and any other allies within 7 yards.
Moreover, each time the DoT ticks, it leaves behind a ![]() Nightmare Pool
void zone for roughly 30 seconds, which deals Shadow damage to players standing in
it. When Manifest Nightmares expires, it spawns a Horrific Vision
add.
Nightmare Pool
void zone for roughly 30 seconds, which deals Shadow damage to players standing in
it. When Manifest Nightmares expires, it spawns a Horrific Vision
add.
Phase Three
Phase Three begins when the boss reaches 70% health, and lasts until 50% health.
During Phase Three, the boss will use all the same abilities from Phase
Two, and all raid members will remain in the ![]() Fear Realm (with
Fear Realm (with
![]() Hysteria continuing to stack).
Hysteria continuing to stack).
Additionally, the boss will allow some raid members to enter the
![]() Delirium Realm during this phase, as we explain below.
Delirium Realm during this phase, as we explain below.
Delirium Realm
Throughout Phase Three, the boss will cast ![]() Delirium's Descent. This
creates 3 void zones in an area in front of the boss which explode after 8
seconds, dealing a small amount of raid-wide Shadow damage. If, however, a
player is located in a void zone when it explodes, it will not deal raid
damage and instead transport that player to the
Delirium's Descent. This
creates 3 void zones in an area in front of the boss which explode after 8
seconds, dealing a small amount of raid-wide Shadow damage. If, however, a
player is located in a void zone when it explodes, it will not deal raid
damage and instead transport that player to the ![]() Delirium Realm. Each
void zone can only transport one player.
Delirium Realm. Each
void zone can only transport one player.
While in the ![]() Delirium Realm several things happen.
Delirium Realm several things happen.
- Hysteria stacks on players every 6 seconds, up from 15 in the
Fear Realm.
- Players in the Delirium Realm are hostile to each other.
- Players in the Delirium Realm can attack the boss and adds, but they cannot see or interact with any raid members not in the Delirium Realm.
- Players in the Delirium Realm have 80% increased Haste.
- Players who die in the Delirium Realm do not really die, but are instead
brought back to the Fear Realm on 50% health with a 6-second
dispellable stun called Shattered Psyche.
- Players in the Delirium Realm can be hit by Crushing Grasp,
targeted by the boss's Dread, and damaged by standing in the
Nightmare Pool void zones. In Heroic mode, they can also be hit by
the Tentacle Slam ability.
Phase Four
Phase Four starts when the boss reaches 50% health, and lasts until the boss is killed.
When the phase starts, all players are brought back from the
![]() Fear Realm and
Fear Realm and ![]() Delirium Realm into the normal realm by
First Arcanist Thalyssra, an NPC that will remain in the fighting area
until the end of the fight. She will have a
Delirium Realm into the normal realm by
First Arcanist Thalyssra, an NPC that will remain in the fighting area
until the end of the fight. She will have a ![]() Reality Portal next to her (visible and
accessible regardless of which realm raid members are in) which players
can use at any time throughout Phase Four to return to the normal realm.
Reality Portal next to her (visible and
accessible regardless of which realm raid members are in) which players
can use at any time throughout Phase Four to return to the normal realm.
Throughout Phase Four, the majority of the raid will mostly be in the normal
realm, but it is possible (and indeed necessary) for some players to enter both
the ![]() Fear Realm and the
Fear Realm and the ![]() Delirium Realm.
Delirium Realm.
Za'qul will continue to use the shared abilities during this phase, with the mention that ![]() Dread becomes
Dread becomes
![]() Manic Dread (explained directly below). In addition to this, the bosses
uses two new abilities:
Manic Dread (explained directly below). In addition to this, the bosses
uses two new abilities: ![]() Dark Passage (an ability similar to the Phase
One
Dark Passage (an ability similar to the Phase
One ![]() Portal of Madness ability) and
Portal of Madness ability) and ![]() Dark Pulse.
Dark Pulse.
Entering the Delirium Realm
![]() Manic Dread works exactly like
Manic Dread works exactly like ![]() Dread, except that when it
expires or is dispelled, it leaves behind a damaging
Dread, except that when it
expires or is dispelled, it leaves behind a damaging ![]() Caustic Delirium
void zone. Standing in this void zone deals increasingly high Shadow damage
every second, and after a player has been standing inside this void zone for 5
seconds, they are transported into the
Caustic Delirium
void zone. Standing in this void zone deals increasingly high Shadow damage
every second, and after a player has been standing inside this void zone for 5
seconds, they are transported into the ![]() Delirium Realm and the void
zone disappears.
Delirium Realm and the void
zone disappears.
The ![]() Delirium Realm works exactly the same during this phase as
during Phase Three.
Delirium Realm works exactly the same during this phase as
during Phase Three.
Entering the Fear Realm
Players can enter the ![]() Fear Realm by using the extra action
button present when they are near the
Fear Realm by using the extra action
button present when they are near the ![]() Fear's Gate portals that appear when
the boss casts
Fear's Gate portals that appear when
the boss casts ![]() Dark Passage (explained below).
Dark Passage (explained below).
This transports the player to the ![]() Fear Realm (which works exactly
the same as during Phases Two and Three). This includes the
Fear Realm (which works exactly
the same as during Phases Two and Three). This includes the
![]() Maddening Eruption and
Maddening Eruption and ![]() Manifest Nightmares Phase Two abilities.
Specifically, all raid members can take damage from the
Manifest Nightmares Phase Two abilities.
Specifically, all raid members can take damage from the ![]() Nightmare Pool
void zones, but only players within the Fear Realm can see them, and the
boss can still be debuffed by standing in the Maddening Eruption void zone
(in addition to soaking its damage), but again, only players who are inside
the Fear Realm can see this void zone.
Nightmare Pool
void zones, but only players within the Fear Realm can see them, and the
boss can still be debuffed by standing in the Maddening Eruption void zone
(in addition to soaking its damage), but again, only players who are inside
the Fear Realm can see this void zone.
Dark Pulse
Za'qul has an Energy bar during Phase Four, which indicates when he
will cast ![]() Dark Pulse. The boss will place a damage absorption shield
(5% of his maximum health) on himself and then begin the 18-second cast time
of Dark Pulse. If the cast succeeds, all raid members (regardless of which
realm they are in) will take a very high amount of Shadow damage.
Dark Pulse. The boss will place a damage absorption shield
(5% of his maximum health) on himself and then begin the 18-second cast time
of Dark Pulse. If the cast succeeds, all raid members (regardless of which
realm they are in) will take a very high amount of Shadow damage.
If the damage absorption shield is broken, then the boss will automatically
be stunned for 1.5 seconds by ![]() Mind Fracture, which also interrupts the
Mind Fracture, which also interrupts the
![]() Dark Pulse cast.
Dark Pulse cast.
Dark Passage
Much like ![]() Portal of Madness during Phase One, the boss will cast
Portal of Madness during Phase One, the boss will cast
![]() Dark Passage in Phase Four. This works almost exactly the same as
Portal of Madness, with two differences.
Dark Passage in Phase Four. This works almost exactly the same as
Portal of Madness, with two differences.
- The Horrific Summoners are protected by a
 Shroud of Fear
buff, which means they can only be damaged by players who are inside the
Fear Realm.
Shroud of Fear
buff, which means they can only be damaged by players who are inside the
Fear Realm.- As mentioned above, next to each Summoner there is a Fear's Gate portal
that players can use to enter the Fear Realm.
- As mentioned above, next to each Summoner there is a
- The explosion that happens if the Summoners finish their 2-minute
Dark Tear cast deals damage to players in all realms.
Heroic Difficulty Changes
Heroic mode brings two differences over LFR/Normal.
The first concerns the Horrific Vision adds, which in Heroic mode
spawn with 30 stacks of a buff called ![]() Gathering Nightmare. Each stack
of this buff increases their damage taken by 5% and movement speed by 2%, and
the adds lose 1 stack every 2 seconds. If the buff expires, the Horrific Vision
adds are transformed into Unleashed Nightmare adds, which deal more
damage and debuff their current target with stacks of
Gathering Nightmare. Each stack
of this buff increases their damage taken by 5% and movement speed by 2%, and
the adds lose 1 stack every 2 seconds. If the buff expires, the Horrific Vision
adds are transformed into Unleashed Nightmare adds, which deal more
damage and debuff their current target with stacks of ![]() Hysteria, a
25-second Shadow damage DoT.
Hysteria, a
25-second Shadow damage DoT.
The second change concerns the ![]() Delirium Realm (so Phases Three and
Four). A tentacle will regularly appear inside the Delirium Realm and shortly
afterwards it will slam the ground, dealing very high Shadow damage to players
who are hit, also stunning them for 2 seconds.
Delirium Realm (so Phases Three and
Four). A tentacle will regularly appear inside the Delirium Realm and shortly
afterwards it will slam the ground, dealing very high Shadow damage to players
who are hit, also stunning them for 2 seconds.
Loot
| Item> | Type | Slot |
|---|---|---|
| Axe | One Hand | |
| Warglaives | One Hand | |
| Cloth Armor | Chest | |
| Cloth Armor | Wrists | |
| Mail Armor | Shoulders | |
| Mail Armor | Wrists | |
| Leather Armor | Head | |
| Plate Armor | Shoulders | |
| Plate Armor | Chest | |
| Accessory | Back | |
| Accessory | Trinket | |
| Accessory | Trinket | |
| Accessory | Trinket | |
| Pet |
For more information, please refer to our Eternal Palace Loot and Essence guide.
Class-specific Advice for Za'qul, Harbinger of Ny'alotha
Changelog
- 08 Jul. 2019: Guide added.