

Lady Ashvane Strategy Guide in The Eternal Palace Raid

Welcome to our strategy guide for the encounter with Lady Ashvane in The Eternal Palace raid. Here, you will first find the strategy to defeat the boss, followed by a detailed analysis of the abilities.
To familiarize yourself with the encounter, we suggest you watch this short video guide from Hazel Nutty.
Fight Overview
The encounter against Lady Ashvane is a two-phase fight, with the two phases cycling back and forth until the boss is killed. Each Phase One ends when the raid breaks through the boss's damage absorption shield (which is 50% larger with each new Phase One), while Phase Two lasts a set amount of time (around 60 seconds).
The boss can only be damaged during Phase Two, during which time select
players from the raid will also be able to clear all of the ![]() Coral Growths that spawn
during Phase One, and which make each Phase One more and more difficult.
Coral Growths that spawn
during Phase One, and which make each Phase One more and more difficult.
All in all, the fight's difficulty increases over time, with each Phase One becoming progressively more dangerous.
 Phase One with a Coral Growth
 Destroying a Coral Growth in Phase Two
Strategy / Fight Summary
Phase One
During Phase One, your raid will have to destroy the boss's damage absorption shield as quickly as possible, all while performing a number of other tasks.
- The boss should be tanked near the edge of the room, and the tanks should
try to position themselves in such a way as to minimize the amount of space
taken up by the void zones
 Barnacle Bash leaves behind when it is
cast on them. Tanks must also taunt off one another whenever the off-tank's
Barnacle Bash debuff expires.
Barnacle Bash leaves behind when it is
cast on them. Tanks must also taunt off one another whenever the off-tank's
Barnacle Bash debuff expires. - The boss must be moved in such a way as to always be relatively far away
from any
 Coral Growths that form around the room.
 - When the boss casts
 Rippling Wave, the bubbles that spawn from
the Coral Growths and move towards the boss must be intercepted by players.
Rippling Wave, the bubbles that spawn from
the Coral Growths and move towards the boss must be intercepted by players.- Ideally, you should have a sort of rotation in your raid, ensuring that
the same player does not need to intercept more than 2 bubbles before the
stacking
 Waterlogged debuff that this applies can expire.
 - Note that each time a bubble is intercepted, the entire raid will take damage, so intercepting them in a staggered way is recommended.
- Ideally, you should have a sort of rotation in your raid, ensuring that
the same player does not need to intercept more than 2 bubbles before the
stacking
- Players must be mindful of the areas marked for
 Upsurge, making
sure to move out of these areas to avoid being damaged and knocked up.
Upsurge, making
sure to move out of these areas to avoid being damaged and knocked up. - Players who are affected by
 Briny Bubble should stack together
near melee range, but away from any other unaffected players. This should
enable the raid to cleave down all the bubbles to free the players.
Briny Bubble should stack together
near melee range, but away from any other unaffected players. This should
enable the raid to cleave down all the bubbles to free the players.


The above really does encompass everything your raid must do during Phase One.
We must mention that in each Phase One, the
boss's absorption shield will be higher than the previous Phase One. This
means that in each Phase One, there will be more and more time for added
![]() Coral Growths to spawn, which will eventually lead to your raid being
overwhelmed by the number of
Coral Growths to spawn, which will eventually lead to your raid being
overwhelmed by the number of ![]() Rippling Wave bubbles that must be
soaked. This is a sort of soft enrage for the fight, and nothing can be done
to mitigate it except to deal as much damage to the boss as possible, although
rotating defensive cooldowns to mitigate the raid-wide damage caused by the
bubbles being intercepted can help.
Rippling Wave bubbles that must be
soaked. This is a sort of soft enrage for the fight, and nothing can be done
to mitigate it except to deal as much damage to the boss as possible, although
rotating defensive cooldowns to mitigate the raid-wide damage caused by the
bubbles being intercepted can help.
Moreover, it is important to note that the incapacitation that comes as a
result of ![]() Briny Bubble can be prevented by immunities and other effects
that prevent the application of magic debuffs, like
Briny Bubble can be prevented by immunities and other effects
that prevent the application of magic debuffs, like
![]() Cloak of Shadows.
Cloak of Shadows.
Phase Two
While Phase One was all about intercepting the ![]() Rippling Wave bubbles
that spawn from
Rippling Wave bubbles
that spawn from ![]() Coral Growths, Phase Two is all about destroying these
Coral Growths with
Coral Growths, Phase Two is all about destroying these
Coral Growths with ![]() Arcing Azerite in order to clear the room for the
next Phase One. Here are the tasks your raid must perform.
Arcing Azerite in order to clear the room for the
next Phase One. Here are the tasks your raid must perform.
- Take this opportunity to deal as much damage as possible to the boss.
- Continue to handle Barnacle Bash, Briny Bubble, and
Upsurge in the same way as during Phase One.
- When
 Arcing Azerite is cast, each pair of marked players must
position themselves in such a way as to place one or more
Coral Growths between themselves, in the area where the line that
connects them will appear, all while ensuring that this line will not
touch any other raid members. The goal here is to have your pairs of
marked players destroy all of the Coral Growths in the room.
Arcing Azerite is cast, each pair of marked players must
position themselves in such a way as to place one or more
Coral Growths between themselves, in the area where the line that
connects them will appear, all while ensuring that this line will not
touch any other raid members. The goal here is to have your pairs of
marked players destroy all of the Coral Growths in the room.- Note that Arcing Azerite is cast twice per each Phase Two, so
you do not need to clear all the Coral Growths in the first cast.
- Note that
- Heal the raid damage from
 Exposed Azerite.
Heroism/Bloodlust/Time Warp
Since every Phase Two in the fight is of the same difficulty, and only each
subsequent Phase One becomes more difficult (due to the increased duration
leading to more ![]() Coral Growths and therefore more
Coral Growths and therefore more ![]() Rippling Wave
bubbles that must be intercepted), you have two options for when to use
Rippling Wave
bubbles that must be intercepted), you have two options for when to use
![]() Heroism/
Heroism/![]() Bloodlust/
Bloodlust/![]() Time Warp.
Time Warp.
The first option is to use it during a Phase Two (either the first or the second), with the aim being to use the increased DPS to make sure you deplete the boss's health and kill her before another cycle happens.
The second option is to use it during the final Phase One you think you will reach, in order to greatly reduce its duration and, as a result, its difficulty, ensuring that the boss will die in the following Phase Two.
The only thing to avoid doing is using ![]() Heroism/
Heroism/![]() Bloodlust/
Bloodlust/![]() Time Warp on the pull, since no matter how much you shorten the first
Phase One by, it makes no difference in the long run of the fight.
Time Warp on the pull, since no matter how much you shorten the first
Phase One by, it makes no difference in the long run of the fight.
Summary for Tanks
- Throughout both phases, tanks must perform a swap to deal with the
Barnacle Bash ability.
- Positioning is important, making sure that the tanks leave the void zones
created by Barnacle Bash close together, and also making sure that the
boss is never tanked too close to any Coral Growths.
Summary for Healers and DPS
Phase One
- Intercept the Rippling Wave bubbles; this leaves behind a debuff
on the intercepting player, and players should aim not to have more than 2-3
stacks of this debuff.
- Move out of Upsurge areas to avoid being damaged and knocked
up.
- Players affected by Briny Bubble must stack in melee range, but
away from any other unaffected players. The Briny Bubbles must be cleaved down
by the DPS.
Phase Two
- Deal as much damage as possible to the boss.
- Continue to handle Barnacle Bash, Briny Bubble, and
Upsurge in the same way as during Phase One.
- When Arcing Azerite is cast, each pair of marked players must
position themselves in such a way as to place one or more
Coral Growths between themselves.
- Healers must heal the raid damage from Exposed Azerite.
Abilities
As stated in the introduction of the guide, the fight comprises two phases, which alternate until the boss is killed.
At the start of the fight, Lady Ashvane is protected by a damage
absorption shield (![]() Hardened Carapace) through which the raid must
break. Once the shield is broken, the boss will enter Phase Two, lasting around
60 seconds.
Hardened Carapace) through which the raid must
break. Once the shield is broken, the boss will enter Phase Two, lasting around
60 seconds.
When Phase Two ends, Phase One resumes, with the boss replenishing her damage absorption shield (in each new Phase One, the boss's shield is 50% larger), and this cycle keeps on repeating.
Phase One
Coral Growth / Rippling Wave
The most important part of this phase is the boss's
![]() Coral Growth and
Coral Growth and ![]() Rippling Wave abilities.
Rippling Wave abilities.
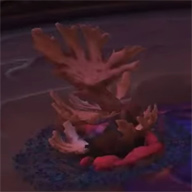
![]() Coral Growth is an ability that creates several coral formations
at random locations in the room, which are marked visually a few seconds
in advance. Any players in the 10-yard radius will take damage and be
knocked back when the coral formation appears.
Coral Growth is an ability that creates several coral formations
at random locations in the room, which are marked visually a few seconds
in advance. Any players in the 10-yard radius will take damage and be
knocked back when the coral formation appears.
These coral formations persist indefinitely (although, as we will see, the raid can and must destroy them during Phase Two), cannot be damaged, deal damage to players standing very close to them, and essentially do not do anything.
The boss's ![]() Rippling Wave ability is cast regularly throughout
Phase One (around every 25 seconds), and it causes a water bubble to form from
each existing coral formation, which then travels (rather slowly) towards the
boss.
Rippling Wave ability is cast regularly throughout
Phase One (around every 25 seconds), and it causes a water bubble to form from
each existing coral formation, which then travels (rather slowly) towards the
boss.
If a ![]() Rippling Wave reaches Lady Ashvane, the raid will take
moderate amount of Frost damage, and the boss will have 10% of her damage
absorption shield restored. If a player comes in contact with the Rippling
Wave bubble first, it will detonate, dealing the same amount of raid-wide
damage and debuffing the player with
Rippling Wave reaches Lady Ashvane, the raid will take
moderate amount of Frost damage, and the boss will have 10% of her damage
absorption shield restored. If a player comes in contact with the Rippling
Wave bubble first, it will detonate, dealing the same amount of raid-wide
damage and debuffing the player with ![]() Waterlogged, a stacking
debuff that deals Frost damage over 20 seconds.
Waterlogged, a stacking
debuff that deals Frost damage over 20 seconds.
Below, you can see what a ![]() Rippling Wave bubble looks like as it heads
for the boss.
Rippling Wave bubble looks like as it heads
for the boss.

Barnacle Bash (Tank Debuff)
The boss will regularly use ![]() Barnacle Bash against her current
target, dealing a moderate amount of Physical damage to them, debuffing them
to take 150% increased damage from Barnacle Bash for 35 seconds (stacking),
and leaving behind a large damaging void zone (
Barnacle Bash against her current
target, dealing a moderate amount of Physical damage to them, debuffing them
to take 150% increased damage from Barnacle Bash for 35 seconds (stacking),
and leaving behind a large damaging void zone (![]() Cutting Coral).
These void zones appear to last indefinitely on the PTR, although
this could change for the live version of the fight.
Cutting Coral).
These void zones appear to last indefinitely on the PTR, although
this could change for the live version of the fight.
Upsurge
![]() Upsurge marks the locations under several raid members, which then
explode about 2 seconds later, dealing high Frost damage to anyone still
standing there and knocking affected players up in the air.
Upsurge marks the locations under several raid members, which then
explode about 2 seconds later, dealing high Frost damage to anyone still
standing there and knocking affected players up in the air.
Briny Bubble
Throughout Phase One, the boss will mark several raid members (including the
current tank) with ![]() Briny Bubble. 5 seconds later, these
players will become trapped in an attackable bubble, taking moderate Nature
damage every 1.5 seconds until the bubble is killed.
Briny Bubble. 5 seconds later, these
players will become trapped in an attackable bubble, taking moderate Nature
damage every 1.5 seconds until the bubble is killed.
On Heroic and Mythic difficulties, when the bubbles form, targeted players will trap any other raid members within 12 yards of them in the bubble as well.
Pictured below is a set of 3 players trapped inside Briny Bubbles.
Phase Two
Phase Two begins when Lady Ashvane's damage absorption shield is depleted and takes 60 seconds to get back up, during which time the raid can deal damage to her.
Lady Ashvane uses all of the same abilities from Phase One, except
for spawning new ![]() Coral Growths and using
Coral Growths and using ![]() Rippling Wave. In
addition to this, she uses two new abilities.
Rippling Wave. In
addition to this, she uses two new abilities.
Arcing Azerite
![]() Arcing Azerite is used twice per Phase Two. This marks up to 6 raid
members with symbols above their heads, in pairs of 2, each pair having a
different symbol. After 10 seconds, a line will connect each pair of marked
players for a split-second, dealing extremely high Arcane damage to any players
touched by it (although the 2 marked players themselves do not take damage),
as well as destroying any
Arcing Azerite is used twice per Phase Two. This marks up to 6 raid
members with symbols above their heads, in pairs of 2, each pair having a
different symbol. After 10 seconds, a line will connect each pair of marked
players for a split-second, dealing extremely high Arcane damage to any players
touched by it (although the 2 marked players themselves do not take damage),
as well as destroying any ![]() Coral Growths it comes in contact with. Note
that it is possible to destroy multiple Coral Growths with the same line.
Coral Growths it comes in contact with. Note
that it is possible to destroy multiple Coral Growths with the same line.
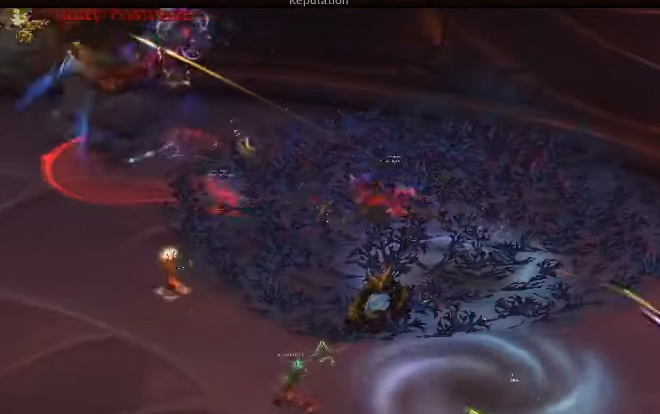
Below, you can see three images, one showing two marked players on either side
of a ![]() Coral Growth, the second showing
Coral Growth, the second showing ![]() Arcing Azerite going off,
forming a line between the players, and destroying the Coral Growth, and the last one showing the destroyed
Coral Growth.
Arcing Azerite going off,
forming a line between the players, and destroying the Coral Growth, and the last one showing the destroyed
Coral Growth.


Exposed Azerite
Throughout Phase Two, the boss will use ![]() Exposed Azerite to deal
unavoidable Arcane damage to random raid members.
Exposed Azerite to deal
unavoidable Arcane damage to random raid members.
Heroic Difficulty Changes
There are several differences Heroic mode brings over Normal/LFR.
- 3 Coral Growths spawn each time (up from 2), which naturally
increases the difficulty of the fight.
- Briny Bubble chains to other players within 12 yards when the
bubbles form.
- The void zones left behind by Barnacle Bash last indefinitely.
Mythic Difficulty
Mythic Difficulty Changes
Mythic mode brings a number of changes over Heroic mode.
- Each time Rippling Wave is cast, the Coral Growth farthest
away from the boss will spawn a larger bubble. This bubble must be soaked
3 times in order to disappear, and each soak will apply a stack of
Waterlogged and damage the raid the same as regular Rippling Wave
bubbles do. If this large bubble reaches the boss, it restores 30% of her
damage absorption shield.
- The Waterlogged debuff lasts 20 minutes (up from 15 seconds) and
persists through death. That
is not a mistake, the intention being that the debuff lasts indefinitely.
- During Phase Two, each time Arcing Azerite is used to destroy a
Coral Growth, the several zones around the destroyed growth will be
marked on the ground, and 5 seconds later new Coral Growths will spawn there
unless at least 1 player is standing in each marked zone. Players who soak
these zones in this way will take damage.
Aside from this, as with every Mythic difficulty encounter, the boss deals more damage and has more health than in Heroic mode.
Mythic Strategy
Phase One is likely to present the greatest challenge, since
![]() Waterlogged does not expire in Mythic mode. This means that everyone
in the raid will have to have to take turns intercepting the
Waterlogged does not expire in Mythic mode. This means that everyone
in the raid will have to have to take turns intercepting the
![]() Rippling Wave bubbles.
Rippling Wave bubbles.
The overall raid-damage will increase greatly, especially since the
larger ![]() Rippling Wave bubbles will take more
soaks to despawn on Mythic difficulty and, overall, this will lead to everyone
having very high stacks of
Rippling Wave bubbles will take more
soaks to despawn on Mythic difficulty and, overall, this will lead to everyone
having very high stacks of ![]() Waterlogged.
Waterlogged.
The actual tuning of the Mythic version of the fight will be very important, and that remains to be seen. Overall, though, the higher your raid's DPS will be, the shorter the fight will be, and therefore the less damage will be taken overall. This is likely to be the first heavy DPS-check in the instance.
Healers will also have to be on top of their game to deal with the
increased ![]() Waterlogged damage, and heavy cooldown rotations will need
to be employed, particularly towards the end of the fight.
Waterlogged damage, and heavy cooldown rotations will need
to be employed, particularly towards the end of the fight.
Phase Two will play very much the same as during Heroic mode, with the
only difference that the raid will need to make sure to soak all zones
that appear next to destroyed ![]() Coral Growths, in order to prevent
additional Coral Growths from spawning (additional Coral Growths will result
in added bubbles to soak during Phase One, and therefore even more
damage).
Coral Growths, in order to prevent
additional Coral Growths from spawning (additional Coral Growths will result
in added bubbles to soak during Phase One, and therefore even more
damage).
Loot
| Item> | Type | Slot |
|---|---|---|
| Mace | One Hand | |
| Cloth Armor | Chest | |
| Cloth Armor | Legs | |
| Leather Armor | Head | |
| Leather Armor | Wrists | |
| Mail Armor | Shoulders | |
| Mail Armor | Waist | |
| Plate Armor | Chest | |
| Plate Armor | Feet | |
| Accessory | Ring | |
| Accessory | Trinket | |
| Accessory | Trinket | |
| Accessory | Trinket | |
| Pet |
For more information, please refer to our Eternal Palace Loot and Essence guide.
Class-specific Advice for Lady Ashvane
Changelog
- 22 Jul. 2019: Added mention that Waterlogged persists through death.
- 15 Jul. 2019: Mythic section added.
- 08 Jul. 2019: Added loot.
- 05 Jul. 2019: Guide added.