
Beast Mastery Hunter DPS Uldir Raid Guide — Dragonflight 10.2.5
On this page, you will find tips, tricks, and strategies tailored to your Beast Mastery Hunter for each boss of the following raid: Uldir. All our content is updated for World of Warcraft Patch Dragonflight 10.2.5.
Disclaimer
This page will be a rough outline of the bosses and mechanics in the Uldir raid. This page will focus primarily on how a Beast Mastery Hunter can optimize its performance on the raid bosses in Uldir, and not on an actual raid strategy for the bosses. Initially, this page will focus on Heroic mode and lower, however, as more bosses are being killed on Mythic, the guide will also include optimizations for Mythic bosses.
Beast Mastery in Uldir
Beast Mastery Hunters have always been a popular choice for raiding, and Uldir is likely to be no exception. The spec offers well-balanced single-target and cleave damage, and it is the only ranged spec to be completely mobile, making it excellent for doing mechanics without any DPS penalty.
Talent Cheatsheet
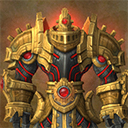
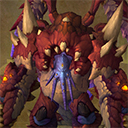
Taloc
More Taloc Guides on Icy Veins
This encounter is moderately movement-heavy but for the most part it is pure single-target, so we recommend the usual spec.
Beast Mastery Hunter Playstyle on Taloc
You should be ready to instantly send in your pets to newly spawning adds
using ![]() Kill Command. If there are no adds currently up, spam-click the
center of the room while tapping your Kill Command to ensure maximum pet uptime.
Kill Command. If there are no adds currently up, spam-click the
center of the room while tapping your Kill Command to ensure maximum pet uptime.
If there are no adds up and your ![]() Barbed Shot is hitting 2 charges,
then it is worth casting it on the boss to get the cooldown rolling and to give
your pet some
Barbed Shot is hitting 2 charges,
then it is worth casting it on the boss to get the cooldown rolling and to give
your pet some ![]() Frenzy stacks in preparation for add spawns.
Frenzy stacks in preparation for add spawns.
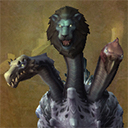
M.O.T.H.E.R.
More M.O.T.H.E.R. Guides on Icy Veins

Beast Mastery Hunter Playstyle on M.O.T.H.E.R.
This is mostly a single-target fight, and optimal performance is achieved by doing your single-target rotation as cleanly as possible, cleaving adds when possible (unless they are going to die in a second or so anyway), and saving your big cooldowns for the final boss room.
Zek'voz, Herald of N'Zoth
More Zek'voz, Herald of N'Zoth Guides on Icy Veins
Beast Mastery Hunter Playstyle on Zek'voz, Herald of N'Zoth
You should save ![]() Stampede and
Stampede and ![]() Aspect of the Wild for the first
set of adds.
Aspect of the Wild for the first
set of adds.
You should always attempt to cast ![]() A Murder of Crows on the big adds
that spawn.
A Murder of Crows on the big adds
that spawn.
![]() Intimidation is a valuable stun for the big adds.
Intimidation is a valuable stun for the big adds.
If you do not manage to cast your second ![]() Bestial Wrath before 30
seconds of the fight has passed, then delay it until the first adds spawn.
Bestial Wrath before 30
seconds of the fight has passed, then delay it until the first adds spawn.
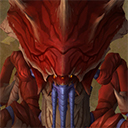
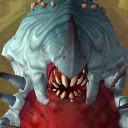
Vectis
More Vectis Guides on Icy Veins
Beast Mastery Hunter Playstyle on Vectis
Try to save ![]() Chimaera Shot for when the add spawns
throughout the fight.
Chimaera Shot for when the add spawns
throughout the fight.
Remember that ![]() Kill Command is a higher priority on the add than
keeping up
Kill Command is a higher priority on the add than
keeping up ![]() Beast Cleave all the time, but you should still attempt to do
both as well as possible. Prioritize Kill Command especially when the add is
under 35% health.
Beast Cleave all the time, but you should still attempt to do
both as well as possible. Prioritize Kill Command especially when the add is
under 35% health.
You should save ![]() A Murder of Crows for all add spawns except the very
first one, and cast it on the add as soon as it spawns.
A Murder of Crows for all add spawns except the very
first one, and cast it on the add as soon as it spawns.
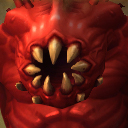
Fetid Devourer
More Fetid Devourer Guides on Icy Veins
Beast Mastery Hunter Playstyle on Fetid Devourer
On Heroic, this is mostly a pure single-target fight with no special considerations, other than saving your cooldowns for when the boss reaches 35% health.
On Mythic, killing the adds quickly is a top priority and that is what these tips will be for.
Firstly, you should consider a Aqiri pet. They have 30% more movement speed than other pets, which is useful for moving your pet across long distances.
Since Aqiris are Cunning, they allow you to use ![]() Master's Call. This
ability causes the pet to move to the target of the ability, which can be used
to move your pet from one side of the room to another very quickly.
Master's Call. This
ability causes the pet to move to the target of the ability, which can be used
to move your pet from one side of the room to another very quickly.
You should save ![]() Aspect of the Wild for the first set of adds. Unless
you get extremely lucky on
Aspect of the Wild for the first set of adds. Unless
you get extremely lucky on ![]() Barbed Shot resets, you should save your
second
Barbed Shot resets, you should save your
second ![]() Bestial Wrath as well.
Bestial Wrath as well.
You can use your boss mod timers to anticipate the add spawns, and use your cooldowns 3 seconds ahead of time. This will allow you to focus entirely on killing the adds, instead of spending time casting your cooldowns which are on the global cooldown, when you should be killing the adds.
From the start of the fight, you should generally let ![]() Frenzy
drop intentionally after you have refreshed the 3-stack once. Otherwise, if you
get no procs, you will run out of
Frenzy
drop intentionally after you have refreshed the 3-stack once. Otherwise, if you
get no procs, you will run out of ![]() Barbed Shot charges and have Frenzy
expire when the adds spawn, which is when you need it the most. This rule does
not apply as much if you got some good resets in the first minute.
Barbed Shot charges and have Frenzy
expire when the adds spawn, which is when you need it the most. This rule does
not apply as much if you got some good resets in the first minute.
Zul, Reborn
More Zul, Reborn Guides on Icy Veins

Beast Mastery Hunter Playstyle on Zul, Reborn
You can use ![]() Intimidation to stun the
Intimidation to stun the ![]() Congeal Blood cast by
the Bloodhexers. This prevents them from spawning the Ichor add, and thereby
saves your raid a lot of damage. It is a fairly quick cast, so you should try to
anticipate it.
Congeal Blood cast by
the Bloodhexers. This prevents them from spawning the Ichor add, and thereby
saves your raid a lot of damage. It is a fairly quick cast, so you should try to
anticipate it.
Heroic: Try to cleave the Crawgs from the boss, unless a Bloodhexer is very centered, in which case the Bloodhexer is the best target to cleave off of.
Mythic: If you have a lot of Rogues, which is common for this boss, then you
should generally not be using ![]() Multi-Shot at all for the first phase,
since Rogues require the Crawgs to stay alive in order to maximize their own
single-target damage. In Phase Two, you can cleave for your tanks' sake, but
still no more than necessary to achieve this.
Multi-Shot at all for the first phase,
since Rogues require the Crawgs to stay alive in order to maximize their own
single-target damage. In Phase Two, you can cleave for your tanks' sake, but
still no more than necessary to achieve this.
The Crusher is not an extremely high priority. Do not bother sending your pet after it when it steps out of the raid. Bloodhexers and Crawgs are your main focus.
If Crawgs are about to spawn on Normal/Heroic, consider saving
![]() Bestial Wrath a little bit.
Bestial Wrath a little bit.
Mythrax the Unraveler
More Mythrax the Unraveler Guides on Icy Veins
Beast Mastery Hunter Playstyle on Mythrax the Unraveler
This fight is mostly a single-target encounter, with the add phase having some important cleave as well.
Phase One is straightforward from a DPS perspective. You want to maximize your single-target damage done to the boss while doing mechanics properly.
In Phase Two, you should use ![]() Kill Command to close the gap to the
big add that spawns.
Kill Command to close the gap to the
big add that spawns.
Be ready to cleave onto the smaller adds that spawn. You should use your
![]() Intimidation stun,
Intimidation stun, ![]() Counter Shot interrupt, and
Counter Shot interrupt, and
![]() Freezing Trap aggressively to counter the adds that spawn. Cleaving off
adds is generally better than cleaving off of the big add, especially if
multiple small adds are clumped together.
Freezing Trap aggressively to counter the adds that spawn. Cleaving off
adds is generally better than cleaving off of the big add, especially if
multiple small adds are clumped together.
![]() Feign Death will stop the Mind Flay ability from the small adds
casting on you.
Feign Death will stop the Mind Flay ability from the small adds
casting on you.
G'huun
More G'huun Guides on Icy Veins
Beast Mastery Hunter Playstyle on G'huun
This fight is primarily single-target, especially on Mythic, where the final phase's DPS check is what makes or breaks progression.
In the first phase, interrupt adds that are far away as much as possible. On Mythic, you should always try to have a Tar Trap set down in preparation for the adds dying. Try to have your pet focus on Tentacles, since it will lose a lot of DPS by trying to chase around Spawns of G'huun all the time. However, Spawns of G'huun are a high priority and should not be ignored. If they are getting too fast then you should be swapping to them.
For Phase One, you can also use a Aqiri pet to help target swap with less of a DPS loss. A Spirit Beast is invaluable for Phases Two and Three, however. You can spend some of the downtime between phases to dismiss your Aqiri and summon your Spirit Beast.
Depending on the timing of your Orb Runs in Phase Two, you can use some
different strategies for ![]() Aspect of the Wild timing. Generally, using it
when the Gibbering Horrors spawn is a good bet, especially if it will die soon
enough that you get to have Aspect of the Wild for the small Spawns of G'huun
that result from it.
Aspect of the Wild timing. Generally, using it
when the Gibbering Horrors spawn is a good bet, especially if it will die soon
enough that you get to have Aspect of the Wild for the small Spawns of G'huun
that result from it.
Phase Three is all about single-target damage — and even more
importantly, not dying to the numerous dangerous mechanics and their
combinations throughout the phase. You can walk closer to the boss in order for
![]() Spirit Mend to work, but be careful not to stack when you are not
supposed to.
Spirit Mend to work, but be careful not to stack when you are not
supposed to.
Changelog
- 13 Jan. 2020: This page has been reviewed for the release of Patch 8.3 and no changes are necessary.
- 24 Jun. 2019: This page has been reviewed for the release of Patch 8.2 and no changes are necessary.
- 14 Apr. 2019: This page has been reviewed for Crucible of Storms and no changes are necessary.
- 10 Dec. 2018: Added tips for Mythic G'huun.
- 18 Sep. 2018: Added more tips for the first 5 bosses, now with a Mythic focus for some of them.
- 07 Sep. 2018: Added much more specific content to all bosses except for G'huun.
- 02 Sep. 2018: Added content.
- 12 Aug. 2018: Empty page for now.