


Introduction
This guide is intended to provide a comprehensive description of the encounter with Ko'ragh in Highmaul. It is targeted at anyone who desires to understand the fight mechanics.
This guide is updated for World of Warcraft WoD 6.1.2.
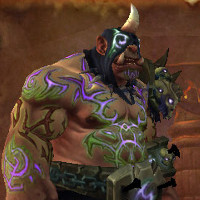
Ko'ragh is one of the bosses in the Highmaul raid instance. The fight requires your raid to handle adds throughout the fight, all while fighting Ko'ragh himself. Positioning is also very important during this encounter.
General Information
Normal and Heroic Difficulty
This main part of this guide covers both the Normal and Heroic versions of the encounter, as far as mechanics and general strategy is concerned. The only difference between these two modes is found in the tuning, with Heroic being more difficult.
When we speak of extreme situations (such as the difficulty of a soft enrage timer, or damage from a certain source being too high to survive), we mostly refer to Heroic mode.
In addition to this, we have a specific Mythic mode section, where we present all the differences between Normal/Heroic and Mythic, as well as the strategy to defeat the Mythic encounter.
Enrage Timer
We do not currently know what the hard enrage timer for this encounter is. There do not seem to be any soft enrage mechanics in the fight.
Summing Things Up
In this section, we will very briefly summarise what the players belonging to each of the three roles have to do during this fight. This is by no means meant to provide sufficient information to master the encounter, and it is only supposed to give you a very rough idea of what to watch out for.
Tanks
- Perform a tank switch when the tank is targeted by
 Expel Magic: Arcane, allowing them to run out to safety.
 - Pick up the Volatile Anomalies and drag them into a
 Suppression Field void zone as they are about to die.
Healers
- Watch out for the many moments in the encounter when small mistakes can
lead to high amounts of damage. Particularly, be careful when
Volatile Anomalies are being killed, and when
 Expel Magic: Fire
is about to expire.
Expel Magic: Fire
is about to expire. - Pay special attention to the health of the player who enters Ko'ragh's
rune to gain a
 Nullification Barrier.
 - Use cooldowns to quickly heal the raid up when they are affected by
 Expel Magic: Shadow.
 - In Mythic mode, pay special attention to the health of the players who are inside Ko'ragh's rune, as they will need a lot of healing.
DPS
- If assigned to do so, move into Ko'ragh's rune when he is recharging his
Nullification Barrier until you receive your own Nullification Barrier.
Then, use this to soak the falling balls caused by
 Overflowing Energy.
 - DPS the Volatile Anomalies, but only kill them when they are inside
a Suppression Field void zone.
- In Mythic mode, interrupt the mind controlled players' casts of
 Forfeit Power. Physical DPS players will have to attack these mind
controlled players until their mind control breaks (when they reach 20% of
their health).
Forfeit Power. Physical DPS players will have to attack these mind
controlled players until their mind control breaks (when they reach 20% of
their health).
Everyone
- Avoid standing in a Suppression Field void zone.
- Spread out at least 5 yards apart when Expel Magic: Fire is about to
expire.
- Do not stand next to the orb of Frost from
 Expel Magic: Frost.
 - In Mythic mode, if affected by
 Expel Magic: Fel, do not
run in an area that will cause the fire lines you leave behind to
inconvenience the raid. Ideally, try to stay still until the debuff
expires.
Expel Magic: Fel, do not
run in an area that will cause the fire lines you leave behind to
inconvenience the raid. Ideally, try to stay still until the debuff
expires.
Overview of the Fight
The encounter against Ko'ragh is a single-phase fight during which you will face Ko'ragh and one type of adds. Throughout the fight, Ko'ragh uses a number of basic abilities against your raid, but this is not the central element of the fight.
The fight revolves around the fact that Ko'ragh has a magic damage absorption shield on himself. This absorbs a large amount of magic damage (so, bringing at least some casters to the fight is required), and when it is depleted, Ko'ragh goes to the center of the room and spends 20 seconds recharging his shield. At this time, a raid member can join Ko'ragh at the center of the room and gain a (massive) damage absorption shield of their own. This is actually required to complete the fight, since one of Ko'ragh's abilities causes several damaging balls of energy to fall slowly to the floor throughout the fight. These balls deal lethal damage to anyone who intercepts them as they reach the ground, or very high raid damage if no one intercepts them. Therefore, players who get the damage absorption shield will go around intercepting the balls throughout the fight, to prevent the raid from taking damage.
We have released a video preview of the encounter against Ko'ragh, based on our (Heroic) Beta testing. You can watch this video to get a good idea of how the fight works, but keep in mind that some things can still change before the fight goes live.
Abilities
Throughout the fight, you will face Ko'ragh, and adds called Volatile Anomalies. We will go through all their abilities in this section.
Ko'ragh uses the following abilities against your raid.
- Nullification Barrier is a magic damage absorption shield
that Ko'ragh has on him at the start of the fight. It absorbs a massive
amount of damage (which scales with your raid's size). There are several
important elements connected with Nullification Barrier.
 Breaker's Strength is a buff that Ko'ragh continues to stack on
himself while Nullification Barrier is active. It increases Ko'ragh's
damage by 6% every 10 seconds. When Ko'ragh's Nullification Barrier is removed,
Breaker's Strength is also removed.
Breaker's Strength is a buff that Ko'ragh continues to stack on
himself while Nullification Barrier is active. It increases Ko'ragh's
damage by 6% every 10 seconds. When Ko'ragh's Nullification Barrier is removed,
Breaker's Strength is also removed.- As soon as Ko'ragh's Nullification Barrier is removed, he moves to the
center of the room to recharge it. A rune appears on the floor, and Ko'ragh
spends 20 seconds there recharging his Nullification Barrier. Additionally,
the first raid member to enter the rune receives a buff called
 Caustic Energy.
- Caustic Energy deals a moderate amount of Arcane damage to its
target every second, and causes them to receive 35% less healing. Caustic
Energy disappears as soon as a player exits the rune, and its damage cannot be
reduced or avoided through immunities. When Ko'ragh finally recharges
his Nullification Barrier, the player affected by Caustic Energy also receives
a Nullification Barrier of their own, the size of which is proportional to the
amount of time they spent inside the rune. The maximum size of the player's
Barrier is 15,000,000 damage.
- Overflowing Energy are balls of energy that fall slowly from the
ceiling to the ground. When a ball reaches the ground, it explodes and deals
a high amount of Arcane damage to all raid members. However, if the ball is
intercepted by a player as it is landing (that is to say, if the player is
standing under it), then it deals a fatal amount of Arcane damage to this
player instead (but it does not damage the raid). The damage done by
Overflowing Energy cannot be reduced, and it bypasses all immunities.
- Suppression Field is an ability that Ko'ragh regularly uses
throughout the fight. He charges a random player's location (he seems to prefer
ranged raid members), and deals high Arcane damage in an 8-yard radius. This
leaves behind a void zone that damages and silences players who stand in it.
The silence effect also affects the Volatile Anomalies (as we will see
below).
- Expel Magic: Fire is an ability that Ko'ragh uses throughout the
fight. He places a 10-second Fire damage DoT on all raid members. When the DoT
expires, it deals a high amount of Fire damage to all players in a 5-yard
radius.
- Expel Magic: Arcane is an ability that Ko'ragh uses against his
tank. It places a debuff on the player, causing them to mark their location
every 0.5 seconds for 10 seconds. 1.5 seconds after a location is marked, it
explodes, dealing a very high amount of Arcane damage in a 5-yard radius.
While active, this debuff also causes the tank to take 100% increased Physical
damage. This ability requires a tank switch.
- Expel Magic: Frost is an ability that Ko'ragh uses throughout the
fight. He creates an orb of Frost that moves around the room slowly. The orb
persists for 20 seconds, and when it spawns, it deals raid-wide Frost
damage. While it persists, it slows the movement speed of all players within 30 yards by up
to 85%, with the slow being weaker the farther players are from the orb.
- Expel Magic: Shadow is an ability that Ko'ragh uses throughout the
fight. He places a debuff on all raid members that absorbs healing (the
exact amount depends on your raid size and difficulty).
While Ko'ragh is recharging his ![]() Nullification Barrier, adds
called Volatile Anomalies spawn from the rune. 3 Anomalies spawn every
8 seconds (including 3 that spawn just as the boss begins recharging
Nullification Barrier), so a total of 9 spawn for each Nullification Barrier
recharge. The adds have normal threat tables and they have no abilities, but
when they die, they cast
Nullification Barrier, adds
called Volatile Anomalies spawn from the rune. 3 Anomalies spawn every
8 seconds (including 3 that spawn just as the boss begins recharging
Nullification Barrier), so a total of 9 spawn for each Nullification Barrier
recharge. The adds have normal threat tables and they have no abilities, but
when they die, they cast ![]() Destabilize. This deals a moderate
amount of raid-wide Arcane damage. If the Volatile Anomalies die inside a
Destabilize. This deals a moderate
amount of raid-wide Arcane damage. If the Volatile Anomalies die inside a
![]() Suppression Field void zone, the silence will affect them and
Destabilize will not be cast.
Suppression Field void zone, the silence will affect them and
Destabilize will not be cast.
Strategy
We will begin by giving you an overview of the strategy for this fight, before going into more detail about the important tasks your raid has to perform.
Strategy Overview
- Have your tanks perform a switch whenever Ko'ragh affects his tank with
Expel Magic: Arcane, and have this tank run out of the raid to avoid
damaging anyone with the explosions.
- When Suppression Field is about to be cast, try to avoid Ko'ragh's
charge (he faces his target while he casts Suppression Field, before
charging). Also make sure to avoid standing in any
Suppression Field void zones.
- Designate some ranged raid members to stand next to Ko'ragh while he is
recharging his Nullification Barrier in order to gain a Nullification
Barrier of their own (only one player can gain the shield each time). These
players should then go around the room soaking the balls caused by
Overflowing Energy.
- When the Volatile Anomalies spawn, have your tanks pick them up
and have them die inside Suppression Field void zones.
- When Ko'ragh uses Expel Magic: Fire, make sure that everyone in the
raid (including melee DPS players) be spread out at least 5 yards apart.
- When Ko'ragh uses Expel Magic: Frost, get away from the orb of
Frost. You will have a visual indication of where it will spawn a few seconds
before it starts dealing damage, allowing you to get a good distance away from
it.
- When Ko'ragh uses Expel Magic: Shadow, use healing cooldowns to heal
the raid up through the healing absorption.
Nullification Barrier and Soaking Overflowing Energy
To begin with, it should be stated that the boss'
![]() Nullification Barrier has only a small effect on your raid's raid
composition, assuming normal circumstances. If you bring a balanced raid
group, then you will be fine. Having only Physical DPS players in your raid
will cause you problems, leaving you unable to break the barrier, while having
only magic DPS players means you will break the barrier to quickly, and that
you will therefore have to deal with adds much too often.
Nullification Barrier has only a small effect on your raid's raid
composition, assuming normal circumstances. If you bring a balanced raid
group, then you will be fine. Having only Physical DPS players in your raid
will cause you problems, leaving you unable to break the barrier, while having
only magic DPS players means you will break the barrier to quickly, and that
you will therefore have to deal with adds much too often.
There is no special way to handle Nullification Barrier. All you have to do is DPS Ko'ragh normally, and eventually the barrier will break.
The next step is to decide which players will get to go into Ko'ragh's rune
and obtain their own Nullification Barriers. It is important to restate that
each time Ko'ragh is recharging his barrier, only the first player to step into
the rune will receive the ![]() Caustic Energy debuff, and will thus be able
to receive a Nullification Barrier at the end. So, it is not possible to send
multiple players in at once. However, a Nullification Barrier can last a player
for quite a long time, certainly longer than it takes your raid to break the
Ko'ragh's Nullification Barrier, meaning that a second player will be able to
go in and get their own Barrier while the first player still has theirs.
Caustic Energy debuff, and will thus be able
to receive a Nullification Barrier at the end. So, it is not possible to send
multiple players in at once. However, a Nullification Barrier can last a player
for quite a long time, certainly longer than it takes your raid to break the
Ko'ragh's Nullification Barrier, meaning that a second player will be able to
go in and get their own Barrier while the first player still has theirs.
Indeed, having multiple players assigned to do this in a rotation is
essentially, because a player who already has Nullification Barrier cannot
(or at least, could not, on the Beta) go in to have it refreshed. Moreover,
the number of balls from ![]() Overflowing Energy increases throughout the
fight, so having more players to soak them is needed.
Overflowing Energy increases throughout the
fight, so having more players to soak them is needed.
As soon as the boss begins charging his Nullification Barrier, it is important that the player who is assigned to this task be the first one to get inside the rune. All raid members will be slightly knocked back when the rune becomes active, but everyone should still make sure not to get too close. Inside the rune, the player will take damage, and the healing they receive is reduced by 35%, but the damage is not very high. As long as the healers are paying attention to this, there should be no problems. As we mentioned earlier, the damage done by Caustic Energy cannot be avoided or reduced in any way, so players who are inside the rune should not try using defensive cooldowns, since they will be wasted.
Likewise, there is no great complexity to soaking Overflowing Energy. Players just have to position themselves under the ball as it is about to reach the ground. A special resource bar indicates how much magic damage absorption is left on players' Nullification Barriers, and it is important to be mindful of this, because soaking Overflowing Energy without a Barrier is fatal.
Keep in mind that it is not possible to prevent all the balls of Overflowing Energy to land. One or two will be cast even before a raid member has a chance to obtain a Nullification Barrier, and even after that there will sometimes be cases when not all of them can be intercepted. The damage that they deal should be manageable.
DPS While Nullification Barrier is Recharging
When the boss goes to the center of the room to recharge his
![]() Nullification Barrier, Volatile Anomalies will begin to
spawn. Ko'ragh does not need to be tanked at this time, so the tanks can focus
on picking up these adds and moving them towards one of
the
Nullification Barrier, Volatile Anomalies will begin to
spawn. Ko'ragh does not need to be tanked at this time, so the tanks can focus
on picking up these adds and moving them towards one of
the ![]() Suppression Field void zones.
Suppression Field void zones.
During this time, the raid's DPS players should focus on DPSing the Volatile Anomalies, only killing them off when they are inside a Suppression Field.
It is not catastrophic if some Volatile Anomalies die outside of Suppression Fields, but this will certainly place unneeded strain on your healers, and it can even cause a wipe if it happens too many times.
Keep in mind that the Volatile Anomalies spawn in three waves, spaced out 8 seconds apart, meaning that picking them all up together is difficult. One possible strategy is to have the raid DPS Ko'ragh while the tanks pick up all 9 Anomalies, and only then have DPS players switch to them.
Handling Ko'ragh's Other Abilities
The rest of Ko'ragh's abilities are quite straightforward.
Whenever ![]() Expel Magic: Arcane is cast on the tank, the other tank will
have to taunt Ko'ragh. This will allow the first tank to run out, away from
other raid members, and leave behind the marked locations in places
where they will not damage anyone. Once the debuff wears off from this tank,
they can return and taunt Ko'ragh once again.
Expel Magic: Arcane is cast on the tank, the other tank will
have to taunt Ko'ragh. This will allow the first tank to run out, away from
other raid members, and leave behind the marked locations in places
where they will not damage anyone. Once the debuff wears off from this tank,
they can return and taunt Ko'ragh once again.
When ![]() Suppression Field is cast, Ko'ragh will face his target for
the duration of the cast time, and then he will charge them. Players located
where Ko'ragh is charging should move away and try to avoid being hit. When a
Suppression Field void zone is cast, raid
members will have to make sure to avoid standing in it. The zones are quite
large, and multiple of them will be up at the same time.
Suppression Field is cast, Ko'ragh will face his target for
the duration of the cast time, and then he will charge them. Players located
where Ko'ragh is charging should move away and try to avoid being hit. When a
Suppression Field void zone is cast, raid
members will have to make sure to avoid standing in it. The zones are quite
large, and multiple of them will be up at the same time.
With regards to Expel Magic: Fire, the raid must be extremely careful. The splash damage that this ability deals is very high, and if players are careless it is very easy to have many casualties.
Finally, it will be mostly up to the healers to handle
![]() Expel Magic: Frost and
Expel Magic: Frost and ![]() Expel Magic: Shadow. All raid members
should stay away from the orb of Frost caused by Expel Magic: Frost, and
healers will have to be prepared to heal the raid-wide damage it deals when it
spawns. Expel Magic:
Shadow will call for the use of healing cooldowns, because the healing
absorption can coincide with other damaging mechanics, which can make it
impossible to save damaged raid members. Therefore, healing everyone up until
the healing absorption debuff disappears is a high priority.
Expel Magic: Shadow. All raid members
should stay away from the orb of Frost caused by Expel Magic: Frost, and
healers will have to be prepared to heal the raid-wide damage it deals when it
spawns. Expel Magic:
Shadow will call for the use of healing cooldowns, because the healing
absorption can coincide with other damaging mechanics, which can make it
impossible to save damaged raid members. Therefore, healing everyone up until
the healing absorption debuff disappears is a high priority.
When to Use Heroism/Bloodlust/Time Warp
We recommend using ![]() Heroism/
Heroism/![]() Bloodlust/
Bloodlust/![]() Time Warp
at the start of the fight, when all players have their cooldowns and potions
available, and when there are no adds alive.
Time Warp
at the start of the fight, when all players have their cooldowns and potions
available, and when there are no adds alive.
Mythic Mode
The Mythic mode of the Ko'ragh encounter presents several differences from the Normal/Heroic mode versions, leading to moderate strategy changes. It is one of the more difficult Mythic modes in Highmaul.
Differences From Normal Mode
As with all Mythic modes, the mobs in the encounter deal increased damage with all their abilities and they have more health. In addition to this, there is one change to existing mechanics, and two entirely new abilities. We will first look at the change to the Normal/Heroic mode mechanic before talking about the Mythic-only abilities.
Two players can now receive a ![]() Nullification Barrier when Ko'ragh
is recharging his own, up from just one. This is compensated, however, by an
increase in the number of
Nullification Barrier when Ko'ragh
is recharging his own, up from just one. This is compensated, however, by an
increase in the number of ![]() Overflowing Energy balls that the raid has
to deal with.
Overflowing Energy balls that the raid has
to deal with.
The two new abilities are the following.
- Throughout the fight, Ko'ragh will cast an additional Expel Magic spell,
Expel Magic: Fel. This places a debuff on 3 raid members, lasting 12
seconds. While active, the debuff is harmless, but when it expires, it leaves
a damaging fire line on the floor. Each player's fire line is dropped at the
location that they traveled between when the debuff was applied and when it
expired. The fire lines persist for 90 seconds, and they deal heavy Fire damage
to players who come in contact with them.
- Every second wave of Overflowing Energy balls will cause the
players who come in contact with them (that is to say, the soakers) to become
affected by
 Dominating Power. These players become mind controlled,
and they also become immune to magic damage. The mind control is broken when
the players' health reaches 20%.
Dominating Power. These players become mind controlled,
and they also become immune to magic damage. The mind control is broken when
the players' health reaches 20%.- While mind controlled, the players will cast Forfeit Power. This is
an interruptible spell that removes 5% of the player's
Nullification Barrier and restores 5% of Ko'ragh's Nullification
Barrier.
- While mind controlled, the players will cast
Strategy
The strategy does not change fundamentally from Normal/Heroic mode, but there are two notable additions.
Firstly, the raid will now have to deal with the
players who are mind controlled by ![]() Dominating Power. This is achieved
by having all Physical DPS players in the raid quickly focus them down
(since they are immune to magic damage), and also by making sure that all
their casts of
Dominating Power. This is achieved
by having all Physical DPS players in the raid quickly focus them down
(since they are immune to magic damage), and also by making sure that all
their casts of ![]() Forfeit Power are interrupted.
Forfeit Power are interrupted.
This leads to another change in assignments from Normal/Heroic mode. Whereas
in that case, having Hunters soak the ![]() Overflowing Energy balls was
recommended (due to their high mobility and ability to DPS while moving),
on Mythic mode it is instead advised to assign casters to this task. This is
because Hunters deal Physical damage, and they will therefore be needed to
help break out the mind controlled players.
Overflowing Energy balls was
recommended (due to their high mobility and ability to DPS while moving),
on Mythic mode it is instead advised to assign casters to this task. This is
because Hunters deal Physical damage, and they will therefore be needed to
help break out the mind controlled players.
Secondly, players who are debuffed by ![]() Expel Magic: Fel will have to
be careful not to drop their fire lines in ways that inconvenience the raid by
cutting off portions of the room or otherwise crossing areas that are vital
to the raid's set-up. Ideally, you should try not to move at all while
affected by this debuff, so that you can drop it in a single location on the
floor.
Expel Magic: Fel will have to
be careful not to drop their fire lines in ways that inconvenience the raid by
cutting off portions of the room or otherwise crossing areas that are vital
to the raid's set-up. Ideally, you should try not to move at all while
affected by this debuff, so that you can drop it in a single location on the
floor.
The raid will also have to contend with
highly increased damage. This is especially true when it comes to healing the
two players who enter Ko'ragh's rune to obtain
![]() Nullification Barriers. Aside from the fact that there are now
two players taking damage and receiving reduced healing, the damage that they
take is higher as well (by virtue of the Mythic mode damage increase). This
means that all healers will have to focus on keeping these players alive while
they are inside the rune.
Nullification Barriers. Aside from the fact that there are now
two players taking damage and receiving reduced healing, the damage that they
take is higher as well (by virtue of the Mythic mode damage increase). This
means that all healers will have to focus on keeping these players alive while
they are inside the rune.
Learning the Fight
Most of the tasks that have to be performed throughout this encounter are
simple, so learning the fight is not more than a question of perseverance. That
said, you will have to pay special attention to some of the events in the
fight that require precise timing, most notably the killing of the
Volatile Anomalies inside the ![]() Suppression Field void zones,
and the proper spreading for
Suppression Field void zones,
and the proper spreading for ![]() Expel Magic: Fire.
Expel Magic: Fire.
Loot
In this section, you will find the loot table for Ko'ragh. The section is divided in 3 subsections: armor, weapons, and the rest (neck, back, finger, and trinket items).
Armor
| Item Name | Armor | Slot | Secondary Stats |
|---|---|---|---|
| Cloth | Head |
|
|
| Cloth | Feet |
|
|
| Leather | Head |
|
|
| Leather | Head |
|
|
| Chest |
|
||
| Legs |
|
||
| Plate | Wrists |
|
|
| Plate | Legs |
|
Weapons
| Item Name | Type | Main Stats | Secondary Stats |
|---|---|---|---|
| Wand | Intellect |
|
|
| Dagger | Agility |
|
|
| 2H Mace | Agility |
|
|
| Polearm | Agility |
|
|
| Bow | Agility |
|
|
| 2H Sword | Strength |
|
Amulets, Cloaks, Rings, and Trinkets
| Item Name | Type | Main Stats | Secondary Stats |
|---|---|---|---|
| Amulet | Agility |
|
|
| Amulet | Strength |
|
|
| Cloak | Intellect |
|
|
| Cloak | Intellect |
|
|
| Ring | Agility |
|
|
| Ring |
|
|
|
| Trinket | None |
|
|
| Trinket | None |
|
Concluding Remarks
This concludes our raid guide for Ko'ragh. We hope you have found it helpful. Please do not hesitate to post any feedback you may have on our forums.
Changelog
- 15 Dec. 2014: Added Mythic mode strategy.
- 08 Dec. 2014: Removed an outdated mention of the boss taking increased magic damage while recharging his Nullification Barrier.