

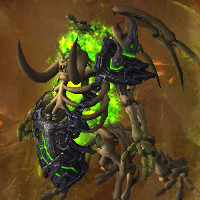
Mannoroth Detailed Strategy Guide (Heroic Mode included)
Introduction
This guide is intended to provide a comprehensive description of the encounter with Mannoroth in Hellfire Citadel. It is targeted at anyone who desires to understand the fight mechanics.
This guide is updated for World of Warcraft WoD 6.2.
Mannoroth is the penultimate boss encounter in the Hellfire Citadel raid instance. This is a 4-phase encounter the difficulty of which increases as time goes on. This long encounter will test all aspects of your raid's ability.
This guide is written and maintained by Azortharion, a top Hunter with 6 years of raiding experience, who currently raids in Ðanish Terrace, a world top 20 guild.
General Information
LFR Difficulty
For the Looking for Raid version of the fight, we provide you with a special LFR guide. This will tell you everything you need to know in order to complete the encounter, in a quick and concise way.
Normal and Heroic Difficulty
This guide covers both the Normal and Heroic versions of the encounter, as far as mechanics and general strategy is concerned. The only difference between these two modes is found in the tuning, with Heroic being more difficult.
When we speak of extreme situations (such as the difficulty of a soft enrage timer, or damage from a certain source being too high to survive), we mostly refer to Heroic mode.
Enrage Timer
We do not currently know what the hard enrage timer for this encounter is.
Overview of the Fight
Mannoroth is a 4-phase encounter.
- Phase One requires you to kill three adds called Fel Iron Summoners.
- Phase Two starts when the Fel Iron Summoners are killed, at which point Mannoroth spawns, and ends when Mannoroth reaches 65% health.
- Phase Three lasts from the end of Phase Two until Mannoroth reaches 35% health.
- Phase Four lasts from the end of Phase Three until the boss dies or the raid wipes.
As the fight goes on, Mannoroth gains a few, new abilities, before empowering them all in Phase Four.
Summing Things Up
In this section, we will very briefly summarise what the players belonging to each of the three roles have to do during this fight. This is by no means meant to provide sufficient information to master the encounter, and it is only supposed to give you a very rough idea of what to watch out for.
Tanks
- Perform a tank switch while using an active mitigation cooldown right after
 Massive Blast is cast. This must be done quickly.
 - Use an active mitigation cooldown to avoid getting
 Puncture Wound from
 Glaive Thrust.
 - In Phase Four, avoid the knock back waves that come for you
after Massive Blast.
Healers
Healing cooldowns are required during Phase One, and then for Phase Four's
![]() Empowered Felseeker. During Phase Three and Phase Four, they can be used
freely, as no other abilities call for their usage.
Empowered Felseeker. During Phase Three and Phase Four, they can be used
freely, as no other abilities call for their usage.
DPS
DPS the targets that appear in the following priority:
- Fel Iron Summoners;
- Doom Lords;
- Fel Imps;
- Dread Infernals (only ranged DPS);
- Mannoroth.
Everyone
- In Phase One
- Spread out at least 3 yards to avoid
 Fel Blast splash damage.
 - Interrupt Fel Blast as much as possible.
- Interrupt
 Shadow Bolt Volley as much as possible.
 - Avoid standing in
 Fel Streak ground effects.
 - Stay at least 30 yards away from the tank who is tanking Doom Lords.
- Spread out at least 3 yards to avoid
- Phase Two, Three, and Four
- Avoid standing in
 Fel Imp-losion ground effects (Phase Two).
 - Avoid standing in
 Inferno ground effects (Phase Two and Three).
 - Split damage from
 Mannoroth's Gaze by having a few raid members stand
in the circle surrounding the debuffed player. In Phase Four, make sure
to have as few players as possible soaking the damage, to minimise the
size of the resulting void zones.
Mannoroth's Gaze by having a few raid members stand
in the circle surrounding the debuffed player. In Phase Four, make sure
to have as few players as possible soaking the damage, to minimise the
size of the resulting void zones. - Run far away from
 Felseeker (and as far away as you can from Empowered Felseeker in Phase Four).
 - Run against the pushback if targeted by
 Shadowforce (Phase Three and Four only).
 - Avoid the meteors from
 Fel Hellstorm.
- Avoid standing in
Phase One: The Legion's Might
During Phase One, your raid does not have to deal with Mannoroth himself. Instead, you must contend with three Fel Iron Summoners. One of those adds is located on each side of Mannoroth's platform. They do not do anything until they are actively engaged, so you can choose the order in which you want to face them. Once engaged, they do nothing but spawn adds until their death.
Abilities
Each of the Fel Iron Summoner is different.
- The Fel Iron Summoner on the right (from where the raid spawns when they
reach the platform) casts
 Curse of the Legion and spawns Doom Lords.
 - The Fel Iron Summoner straight ahead casts Fel Imp-losion and spawns Fel Imps.
- The Fel Iron Summoner on the left casts Inferno and spawns Dread Infernals.
Right Fel Iron Summoner
Shortly after the right Fel Iron Summoner is engaged, it starts casting
![]() Curse of the Legion on random raid members. Curse of the Legion is a
20-second debuff that deals massive Shadow damage to its target
when it expires, or is dispelled, and spawns a Doom Lord at its location.
Curse of the Legion on random raid members. Curse of the Legion is a
20-second debuff that deals massive Shadow damage to its target
when it expires, or is dispelled, and spawns a Doom Lord at its location.
Doom Lords are large, tankable adds with moderate health and a number of abilities.
 Doom Spike is a debuff that the Doom Lord regularly stacks on its current
tank via its melee attacks. It deals moderate Shadow damage when it expires,
based on the amount of stacks it has when it expires. Doom Spike caps out
at 20 stacks. This ability does not necessarily require a tank switch.
Doom Spike is a debuff that the Doom Lord regularly stacks on its current
tank via its melee attacks. It deals moderate Shadow damage when it expires,
based on the amount of stacks it has when it expires. Doom Spike caps out
at 20 stacks. This ability does not necessarily require a tank switch. Mark of Doom is a debuff that the Doom Lord occasionally applies on at
least 3 random players. The debuff lasts 15 seconds, but disappear when
affected players take damage, which causes them to deal heavy Shadow damage to
all raid members within 20 yards of them (visualised by a purple ring around
affected raid members). If the debuff is allowed to run its course and
expire (that is to say, the affected player does not take damage during the 15
seconds that Mark of Doom lasts), the affected player dies instantly.
Mark of Doom is a debuff that the Doom Lord occasionally applies on at
least 3 random players. The debuff lasts 15 seconds, but disappear when
affected players take damage, which causes them to deal heavy Shadow damage to
all raid members within 20 yards of them (visualised by a purple ring around
affected raid members). If the debuff is allowed to run its course and
expire (that is to say, the affected player does not take damage during the 15
seconds that Mark of Doom lasts), the affected player dies instantly.- Shadow Bolt Volley deals moderate Shadow damage to all players within 50 yards.
When the rightmost Fel Iron Summoner is killed, Doom Lords that are still alive persist and need to be finished off.
Middle Fel Iron Summoner
![]() Fel Imp-losion is an ability that the middle Fel Iron Summoner regularly
casts. It places a number of ground effects (usually 3) under random raid
members. After a few seconds, each ground effect deals moderate Fire damage to
anyone standing in it and spawns a Fel Imp add at its location.
Fel Imp-losion is an ability that the middle Fel Iron Summoner regularly
casts. It places a number of ground effects (usually 3) under random raid
members. After a few seconds, each ground effect deals moderate Fire damage to
anyone standing in it and spawns a Fel Imp add at its location.
Fel Imps cannot be tanked, have relatively low health, and use two
abilities: ![]() Fel Blast and
Fel Blast and ![]() Phase Blink.
Phase Blink.
- Fel Blast is an interruptible ability that the Fel Imps almost
constantly cast. It deals moderate Fire damage to random raid members, and to all
raid members within 3 yards of them.
- The Fel Imp has a Mana bar that starts at 0 and automatically fills over
roughly 15 seconds. When the Fel Imp reaches full Mana, it will cast
 Phase Blink.
- Phase Blink teleports the Fel Imp to the location of a random raid
member, who triggers a
 Phase Explosion, which deals massive Arcane damage
to all players within 15 yards.
Phase Explosion, which deals massive Arcane damage
to all players within 15 yards.
When the middle Fel Iron Summoner is killed, Fel Imps that are still alive persist and need to be finished off.
Left Fel Iron Summoner
![]() Inferno is an ability that the leftmost Fel Iron Summoner occasionally
casts. It spawns a number of ground effects beneath random raid
members. After a few seconds, each of these ground effects deals moderate Fire
damage to anyone standing in them and spawns a Dread Infernal add at its
location.
Inferno is an ability that the leftmost Fel Iron Summoner occasionally
casts. It spawns a number of ground effects beneath random raid
members. After a few seconds, each of these ground effects deals moderate Fire
damage to anyone standing in them and spawns a Dread Infernal add at its
location.
Dread Infernals cannot be tanked, have relatively low health, and have three
abilities: ![]() Fel Streak and
Fel Streak and ![]() Fel Hellfire
Fel Hellfire
![]() Fel Streak and
Fel Streak and ![]() Fel Hellfire are linked and Dread Infernals keep
cycling them. Fel Streak causes the Infernals to charge a random location and
deal moderate damage to every raid member within 8 yards of that location,
after which time they activate
Fel Hellfire are linked and Dread Infernals keep
cycling them. Fel Streak causes the Infernals to charge a random location and
deal moderate damage to every raid member within 8 yards of that location,
after which time they activate ![]() Fel Hellfire. This aura causes the Dread Infernals to
deal moderate Fire damage to all raid members within 10 yard every second, for
17 seconds. During that time, they remain immobile, doing nothing. Once the
17 seconds are over, the Dread Infernals cast Fel Streak again and the cycle
starts anew.
Fel Hellfire. This aura causes the Dread Infernals to
deal moderate Fire damage to all raid members within 10 yard every second, for
17 seconds. During that time, they remain immobile, doing nothing. Once the
17 seconds are over, the Dread Infernals cast Fel Streak again and the cycle
starts anew.
Strategy
The goal of Phase One is to get through it as quickly as possible, without getting overwhelmed by the adds that spawn. Classes that deal high AoE damage while still being able to focus a single target are very powerful, here.
We recommend dealing with each Fel Iron Summoner individually, starting with
the right one (followed by middle and left). It is likely that the Mannoroth
encounter will last long enough for ![]() Bloodlust/
Bloodlust/![]() Heroism/
Heroism/![]() Time Warp to be used at the
start of the fight, which we recommend, and then again during Phase Four.
Time Warp to be used at the
start of the fight, which we recommend, and then again during Phase Four.
Tanking Concerns
Use a defensive cooldown for when ![]() Doom Spike expires at 20 stacks.
Alternatively, a tank switch can be performed at 10 stacks, in order to let the
two tanks alternate who takes damage.
Doom Spike expires at 20 stacks.
Alternatively, a tank switch can be performed at 10 stacks, in order to let the
two tanks alternate who takes damage.
Positioning
We recommend spreading around rather loosely near the Fel Iron Summoner that the raid is currently dealing with. Most of the adds that spawn have abilities that are based on proximity to each other.
Handling the Right Fel Iron Summoner
For ![]() Curse of the Legion, run close to a tank when the debuff is about to
expire, and use a defensive cooldown. This is to prevent the tank from having
to run more than necessary, in order to pick up the subsequent Doom Lord.
Curse of the Legion, run close to a tank when the debuff is about to
expire, and use a defensive cooldown. This is to prevent the tank from having
to run more than necessary, in order to pick up the subsequent Doom Lord.
For ![]() Mark of Doom, damage must be taken to avoid certain death. We
recommend running towards the middle of the room, and into the large, green
pool, while ensuring that no other raid members are within the large, purple
circle around you. This pool deals slight damage, and will trigger the Mark of
Doom.
Mark of Doom, damage must be taken to avoid certain death. We
recommend running towards the middle of the room, and into the large, green
pool, while ensuring that no other raid members are within the large, purple
circle around you. This pool deals slight damage, and will trigger the Mark of
Doom.
Interrupt ![]() Shadow Bolt Volley as much as possible.
Shadow Bolt Volley as much as possible.
Handling the Middle Fel Iron Summoner
For ![]() Fel Imp-losion, step out of the ground effects that spawn underneath you.
Fel Imp-losion, step out of the ground effects that spawn underneath you.
Fel Imps should not be focused down, but simply cleaved down as much as
possible. Ideally, they should be killed before they reach full Mana and start
doing ![]() Phase Blink.
Phase Blink.
Interrupt ![]() Fel Blast as much as possible. Spread at least 3 yards to avoid
taking splash damage from
Fel Blast as much as possible. Spread at least 3 yards to avoid
taking splash damage from ![]() Fel Blast casts that will inevitably go through,
due to the number of Fel Imps that are likely to be alive.
Fel Blast casts that will inevitably go through,
due to the number of Fel Imps that are likely to be alive.
Kill Fel Imps in a timely fashion to avoid them casting ![]() Phase Blink.
Phase Blink.
Handling the Left Fel Iron Summoner
For ![]() Inferno, step out of the ground effects that appear underneath you.
Inferno, step out of the ground effects that appear underneath you.
Dread Infernal should be focused down as a rather high priority, but only by ranged players.
For ![]() Fel Streak, move away from the targeted location.
Fel Streak, move away from the targeted location.
For ![]() Fel Hellfire, stand at least 10 yards away from any Dread Infernals.
Only ranged DPS players can deal damage to them.
Fel Hellfire, stand at least 10 yards away from any Dread Infernals.
Only ranged DPS players can deal damage to them.
Do not kill the final Fel Iron Summoner before all other adds have been killed, as Mannoroth will spawn shortly after it is killed.
Phase Two: The Resurrection
Phase Two begins immediately after the final Fel Iron Summoner dies. The large, green pool in the middle of the room will disappear, and Mannoroth will appear from it shortly after. This Phase lasts until Mannoroth reaches 65% health.
In Phase Two, Fel Imps and Dread Infernals will regularly spawn, in a similar fashion as they do in Phase One.
Abilities
![]() Fel Imp-losion is occasionally used and spawns Fel Imps, similarly to
Phase One.
Fel Imp-losion is occasionally used and spawns Fel Imps, similarly to
Phase One.
![]() Inferno is occasionally used and spawns Dread Infernals, similarly to
Phase One.
Inferno is occasionally used and spawns Dread Infernals, similarly to
Phase One.
![]() Glaive Combo is a combo of abilities that Mannoroth occasionally uses on
his tanks, in the following order:
Glaive Combo is a combo of abilities that Mannoroth occasionally uses on
his tanks, in the following order: ![]() Glaive Thrust,
Glaive Thrust, ![]() Massive Blast, and
Massive Blast, and
![]() Glaive Thrust again, in rapid succession.
Glaive Thrust again, in rapid succession.
- Glaive Thrust deals massive Physical damage to the tank, and affects them
with Puncture Wound, which deals moderate Physical damage every 1 second for
10 seconds. Tanks using active mitigation cooldowns when Glaive Thrust is cast
are not affected by Puncture Wound.
- Massive Blast deals massive Shadow damage to the tank, and knocks them
back, across the entire platform. Tanks struck by Massive Blast take 300%
increased damage from it for 45 seconds. This ability requires a tank switch.
![]() Mannoroth's Gaze is an ability that Mannoroth occasionally uses. It fears a
few random raid members for 4 seconds. When Mannoroth's Gaze is dispelled, or
expires by itself, it deals massive Shadow damage, split evenly between the
feared raid member, and all raid members within 8 yards of them.
Mannoroth's Gaze is an ability that Mannoroth occasionally uses. It fears a
few random raid members for 4 seconds. When Mannoroth's Gaze is dispelled, or
expires by itself, it deals massive Shadow damage, split evenly between the
feared raid member, and all raid members within 8 yards of them.
![]() Fel Hellstorm is an ability that Mannoroth occasionally uses. It causes a
number of meteors to fall down around him for 6 seconds. The locations where
the meteors are falling are clearly marked ahead of time with dark circles,
giving raid members time to move and avoid the moderate Fire damage that
these meteors inflict.
Fel Hellstorm is an ability that Mannoroth occasionally uses. It causes a
number of meteors to fall down around him for 6 seconds. The locations where
the meteors are falling are clearly marked ahead of time with dark circles,
giving raid members time to move and avoid the moderate Fire damage that
these meteors inflict.
![]() Felseeker is an ability that Mannoroth occasionally uses, causing a series
of 3 explosions at the location of a random raid member. The first explosion
deals a low amount of damage in a small area. 2 seconds afterwards, the second
explosion deals heavy damage in the same area, but with a larger radius.
Finally, after another 2 seconds, the third explosion deals a massive amount of
damage, still in the same area, but with a much larger radius.
Felseeker is an ability that Mannoroth occasionally uses, causing a series
of 3 explosions at the location of a random raid member. The first explosion
deals a low amount of damage in a small area. 2 seconds afterwards, the second
explosion deals heavy damage in the same area, but with a larger radius.
Finally, after another 2 seconds, the third explosion deals a massive amount of
damage, still in the same area, but with a much larger radius.
Strategy
During this phase, you still need to handle two of the adds from Phase One, the Fel Imps and the Dread Infernals, all the while dealing with Mannoroth's abilities.
Tanking Concerns
We recommend tanking Mannoroth towards any side of the room where a large
pillar is located. The boss is tanked facing in the direction of this pillar,
so that ![]() Massive Blast knockbacks cause the affected tank to hit this
pillar, instead of being knocked far back.
Massive Blast knockbacks cause the affected tank to hit this
pillar, instead of being knocked far back.
For ![]() Glaive Combo, Mannoroth's current tank needs to get hit by both the first
Glaive Combo, Mannoroth's current tank needs to get hit by both the first
![]() Glaive Thrust and
Glaive Thrust and ![]() Massive Blast, using an active mitigation cooldown for
Glaive Thrust, in order to prevent the application of
Massive Blast, using an active mitigation cooldown for
Glaive Thrust, in order to prevent the application of ![]() Puncture Wound. After
Massive Blast has been cast, the other tank should taunt Mannoroth to receive
the second Glaive Thrust, also using an active mitigation cooldown to reduce the
damage and prevent the application of Puncture Wound.
Puncture Wound. After
Massive Blast has been cast, the other tank should taunt Mannoroth to receive
the second Glaive Thrust, also using an active mitigation cooldown to reduce the
damage and prevent the application of Puncture Wound.
Positioning
For Phase Two, we recommend the entire raid stacking up near the sides of the boss. This positioning is assumed when we explain the boss' mechanics below.
Handling the Mechanics
For ![]() Mannoroth's Gaze, we recommend stacking up and immediately dispelling
affected raid members. If that fails, then have the raid split up to follow the
feared raid members, in order to split the damage.
Mannoroth's Gaze, we recommend stacking up and immediately dispelling
affected raid members. If that fails, then have the raid split up to follow the
feared raid members, in order to split the damage.
For ![]() Fel Imp-losion,
Fel Imp-losion, ![]() Inferno, and
Inferno, and ![]() Fel Hellstorm, the raid simply needs
to move away from the affected area.
Fel Hellstorm, the raid simply needs
to move away from the affected area.
![]() Felseeker's ground effect is very obvious, especially for the second and
third explosions. The 2-second interval between the explosions gives you enough
time to move out of harm's way, even if you cannot use movement speed-enhancing
abilities.
Felseeker's ground effect is very obvious, especially for the second and
third explosions. The 2-second interval between the explosions gives you enough
time to move out of harm's way, even if you cannot use movement speed-enhancing
abilities.
Phase Three: The Shadowfel Amalgamation
Phase Three starts when Mannoroth reaches 65% health and ends when he reaches 35% health. This phase is very similar to Phase Two, as Mannoroth only gains one ability.
Abilities
Mannoroth retains all his abilities from Phase Two: ![]() Glaive Combo,
Glaive Combo, ![]() Fel Hellstorm,
Fel Hellstorm,
![]() Mannoroth's Gaze, and
Mannoroth's Gaze, and ![]() Felseeker.
Felseeker. ![]() Inferno still spawns Dread Infernals, but
Inferno still spawns Dread Infernals, but
![]() Fel Imp-losion is no longer used, meaning that Fel Imps no longer appear.
Fel Imp-losion is no longer used, meaning that Fel Imps no longer appear.
In addition to those, Mannoroth gains a new ability called ![]() Shadowforce, which
he regularly channels. He targets a few, random raid members and pushes them away
from him, towards the edges of the platform for 6 seconds, dealing low Shadow
damage to them every second.
Shadowforce, which
he regularly channels. He targets a few, random raid members and pushes them away
from him, towards the edges of the platform for 6 seconds, dealing low Shadow
damage to them every second.
Strategy
The strategy for Phase Three is the mostly same as for Phase Two. Because of
![]() Glaive Combo, Mannoroth is already being tanked next to a pillar, on the edge
of the platform, which is the perfect location to have him for
Glaive Combo, Mannoroth is already being tanked next to a pillar, on the edge
of the platform, which is the perfect location to have him for ![]() Shadowforce.
Indeed, the ability pushes players away from him, so players just need to stand
between the boss and the center of the platform, to maximise the distance they
have before being pushed off the platform.
Shadowforce.
Indeed, the ability pushes players away from him, so players just need to stand
between the boss and the center of the platform, to maximise the distance they
have before being pushed off the platform.
Phase Four: EMPOWERMENT!
Phase Four starts when Mannoroth reaches 35% health and it lasts until he dies. In this phase, all of his abilities from Phase Three are empowered, making them slightly more difficult to handle.
Abilities
![]() Inferno is no longer used in Phase Four, meaning that the Dread Infernals
will no longer spawn.
Inferno is no longer used in Phase Four, meaning that the Dread Infernals
will no longer spawn.
Aside from that, Mannoroth retains all of his abilities and they become empowered.
 Empowered Glaive Combo causes Glaive Thrust to target a cone area in
front of the boss, instead of just the tank, and Massive Blast to send knock
back waves after the tank that has been knocked back, potentially knocking
them back further and off the platform.
Empowered Glaive Combo causes Glaive Thrust to target a cone area in
front of the boss, instead of just the tank, and Massive Blast to send knock
back waves after the tank that has been knocked back, potentially knocking
them back further and off the platform. Empowered Mannoroth's Gaze causes targeted players to leave a void
zone on the ground when the fear effect expires. The size of the void zone is
proportional to the number of players who helped soak the Shadow damage
explosion.
Empowered Mannoroth's Gaze causes targeted players to leave a void
zone on the ground when the fear effect expires. The size of the void zone is
proportional to the number of players who helped soak the Shadow damage
explosion.- Empowered Fel Hellstorm causes the meteor to now target random locations
over the entire platform, and the intensity of the meteor fall grows over time
(meaning that there will be an increasing number of falling meteors).
- Empowered Felseeker now deals damage proportional to how close people are
to the explosion.
- Empowered Shadowforce now targets every raid member, instead of just a
few.
Strategy
The strategy remains very similar to the strategy in Phase Three, with a few tweaks to account for the abilities having been empowered.
![]() Empowered Glaive Combo has the added positioning requirement that no one
besides the tank should stand in front of the boss. Additionally, the tank that
is knocked back must be careful not to get knocked over the edge of the
platform by the subsequent waves.
Empowered Glaive Combo has the added positioning requirement that no one
besides the tank should stand in front of the boss. Additionally, the tank that
is knocked back must be careful not to get knocked over the edge of the
platform by the subsequent waves.
![]() Empowered Mannoroth's Gaze requires the raid to minimise the size of the
void zones, by having as few raid members as possible soak the damage of the
explosion when the fear effect ends or is dispelled. We do not know yet the
optimal number of soakers.
Empowered Mannoroth's Gaze requires the raid to minimise the size of the
void zones, by having as few raid members as possible soak the damage of the
explosion when the fear effect ends or is dispelled. We do not know yet the
optimal number of soakers.
![]() Empowered Fel Hellstorm require raid members to move away from the falling
meteors with increasing frequency. Eventually, DPS players (particularly ranged
players) will no longer be able to avoid all of the meteors, because they
will need to stand still to some extent, in order to deal damage and kill the
boss.
Empowered Fel Hellstorm require raid members to move away from the falling
meteors with increasing frequency. Eventually, DPS players (particularly ranged
players) will no longer be able to avoid all of the meteors, because they
will need to stand still to some extent, in order to deal damage and kill the
boss.
![]() Empowered Felseeker should be handled in exactly the same way as before, just
that instead of stopping outside the marked area, players should keep moving
away to reduce the damage taken.
Empowered Felseeker should be handled in exactly the same way as before, just
that instead of stopping outside the marked area, players should keep moving
away to reduce the damage taken.
![]() Empowered Shadowforce targets everyone in the raid instead of just a few
players. The main problem with this ability is that the positioning it
requires (everyone between the boss and the center of the platform) is not
compatible with the positioning for Empowered Glaive Combo, where only the tank
should be standing in front of the boss, so it is important to properly switch
positioning for each ability.
Empowered Shadowforce targets everyone in the raid instead of just a few
players. The main problem with this ability is that the positioning it
requires (everyone between the boss and the center of the platform) is not
compatible with the positioning for Empowered Glaive Combo, where only the tank
should be standing in front of the boss, so it is important to properly switch
positioning for each ability.
When to use the Legendary Ring
We recommend that DPS players use the Legendary Ring as often as possible, while saving a usage for the beginning of Phase Four, as the numerous Empowered abilities can quickly overwhelm the raid.
We recommend that healing players use their Legendary Ring as often as possible. Almost all of Mannoroth's abilities deal damage, but few of them are raid-wide or lethal. We do recommend saving a usage for Phase Four, however.
Finally, we recommend that tank players use their Legendary Ring as often as
possible, while lining it up with Mannoroth's ![]() Glaive Combo. Additionally,
we recommend saving a usage for Phase Four.
Glaive Combo. Additionally,
we recommend saving a usage for Phase Four.
When to use Heroism/Bloodlust/Time Warp
We recommend using ![]() Heroism/
Heroism/![]() Bloodlust/
Bloodlust/![]() Time Warp at the start of the
fight, as well as when Mannoroth enters Phase Four, as the fight gets
extremely difficult at this point.
Time Warp at the start of the
fight, as well as when Mannoroth enters Phase Four, as the fight gets
extremely difficult at this point.
Learning the Fight
Each phase of the fight builds upon the previous phase to add a few elements and make the fight more difficult. When it comes to learning the fight, this makes for a smooth experience. Every time you reach a new phase, you still get to practice the previous phases, because of the elements that have been retained, making it easier to reach that new phase again.
The easiest way to make it through the various phases is to prevent
mistakes that lead to deaths. The most common causes of death will be bad
positioning for ![]() Shadowforce (and subsequently dying from being ejected from the
platform), not moving fast enough from
Shadowforce (and subsequently dying from being ejected from the
platform), not moving fast enough from ![]() Fel Hellstorm (and subsequently
dying from the massive damage of the third explosion), and not having
enough raid members to soak the explosion of
Fel Hellstorm (and subsequently
dying from the massive damage of the third explosion), and not having
enough raid members to soak the explosion of ![]() Mannoroth's Gaze. These are
deaths that can be avoided by prompt announcements from the raid leader(s).
Mannoroth's Gaze. These are
deaths that can be avoided by prompt announcements from the raid leader(s).
In Phase Four, things will become more hectic, but the phase is extremely
similar to Phase Three, with only one entirely new mechanics on
![]() Empowered Glaive Combo. So, the phase is not as difficult as it may seem, but it does
require proper positioning for the empowered combo and this needs to be
emphasised.
Empowered Glaive Combo. So, the phase is not as difficult as it may seem, but it does
require proper positioning for the empowered combo and this needs to be
emphasised.
Loot
In this section, you will find the loot table for Mannoroth. The section is divided in 3 subsections: armor, weapons, and the rest (neck, back, finger, and trinket items).
Armor
| Item Name | Armor | Slot | Secondary Stats |
|---|---|---|---|
| Cloth | Shoulders |
|
|
| Cloth | Chest |
|
|
| Cloth | Chest |
|
|
| Cloth | Chest |
|
|
| Cloth | Legs |
|
|
| Cloth | Legs |
|
|
| Leather | Head |
|
|
| Leather | Shoulders |
|
|
| Leather | Chest |
|
|
| Leather | Chest |
|
|
| Leather | Chest |
|
|
| Leather | Legs |
|
|
| Shoulders |
|
||
| Chest |
|
||
| Chest |
|
||
| Wrists |
|
||
| Feet |
|
||
| Plate | Shoulders |
|
|
| Plate | Chest |
|
|
| Plate | Chest |
|
|
| Plate | Chest |
|
|
| Plate | Wrists |
|
|
| Plate | Waist |
|
Weapons
| Item Name | Type | Main Stats | Secondary Stats |
|---|---|---|---|
| OH Frill | Intellect |
|
|
| OH Frill | Intellect |
|
|
| Bow | Agility |
|
|
| Bow | Agility |
|
|
| Dagger | Agility |
|
|
| Dagger | Agility |
|
|
| Staff | Agility |
|
|
| Polearm | Agility |
|
Amulets, Cloaks, Rings, and Trinkets
| Item Name | Type | Main Stats | Secondary Stats |
|---|---|---|---|
| Amulet | Intellect |
|
|
| Cloak | Agility |
|
|
| Ring | Strength |
|
|
| Ring |
|
|
|
| Trinket | Intellect | Extra damage | |
| Trinket | Strength | Extra damage |
Concluding Remarks
This concludes our raid guide for Mannoroth. We hope you have found it helpful. Please do not hesitate to post any feedback you may have on our forums.
Changelog
- 12 Aug. 2015: Added link to LFR guide.