


Introduction
This guide is intended to provide a comprehensive description of the encounter with Valiona and Theralion in Bastion of Twilight. It is mostly targeted to DPS who desire to have a short but detailed overview of what is expected of them during that fight.
This guide is updated for World of Warcraft WoD 6.1.2.
The Valiona and Theralion encounter will require you to sustain your DPS while moving to avoid or deal with rather obvious mechanics. Overall, this is an easy fight for DPS players.
Overview of the Fight
Valiona and Theralion are two dragons that your raid will fight during the encounter. There are two phases: Valiona Phase, during which Valiona is on the ground and Theralion is in the air, and Theralion Phase, during which Theralion is on the ground, and Valiona is in the air. These two phases alternate until Valiona and Theralion, which have a shared health pool and can both be damaged simultaneously, die or enrage. The first phase will always be a Valiona Phase, regardless of which dragon you choose to attack to start the encounter.
The alternation between the phases is time-dependant and as such can not be influenced by the raid actions. Valiona Phase lasts 100 seconds while Theralion Phase lasts 140 seconds.
A large part of the damage is avoidable and the rest is extremely predictable, which makes the fight a test to your rapid reactions, all while maintaining proper DPS.
Twilight Realm
The Twilight Realm is a parallel dimension of the room where the encounter occurs. Players can be transported there after failing to dodge one of two abilities: Dazzling Destruction and Twilight Flames. These abilities are the only ones that can also deal damage to players inside the Twilight Realm, who stand in their area of effect.
Here is a screenshot of the Twilight Realm Theralion at the end of a Valiona Phase:
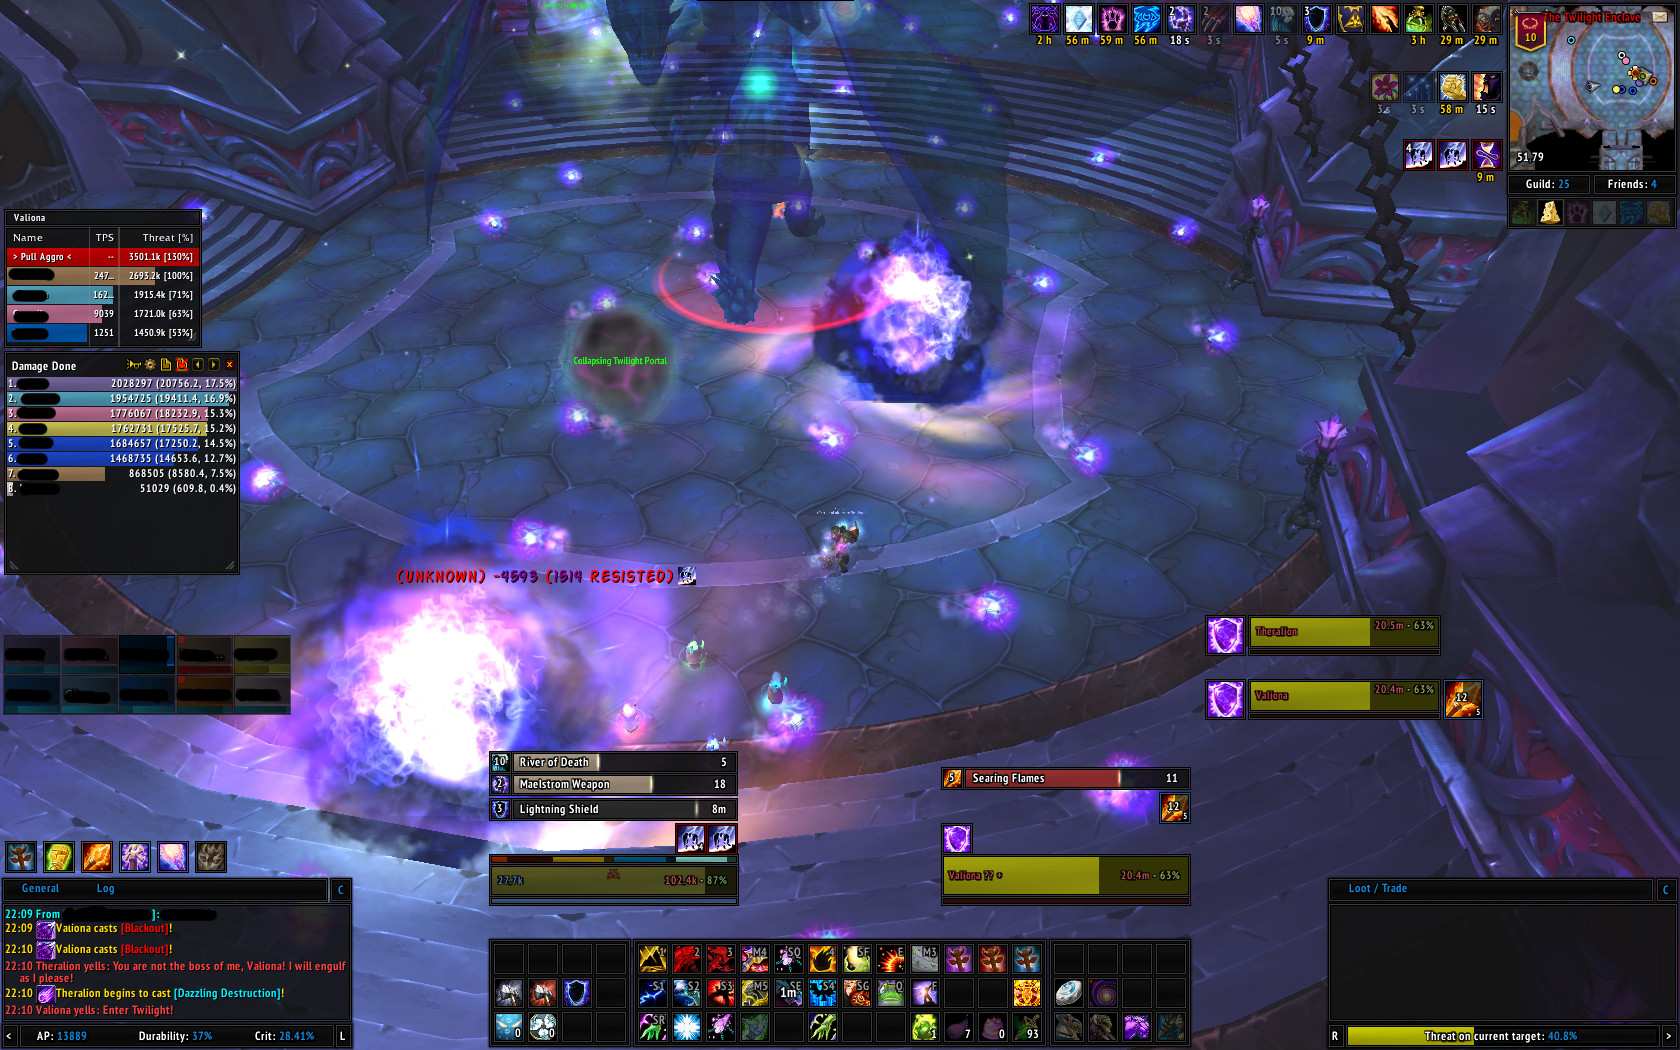
The 2 void zones you can see have been created by Dazzling Destruction, the ability that we used this time to enter the realm.
Players inside the realm need to look for exit portals, run to them, and click them to be transported back into the Normal Realm. The screenshot shows such a portal (Collapsing Twilight Portal), slightly north-west of the player's location.
Moving shadow orbs are scattered throughout the Twilight Realm and need to be avoided because they deal heavy Shadow damage.
Valiona Phase
During this phase, you will be asked to spread out 8 yards from everyone else. Ideally, try to find a spot close to the boss because it will make it easier to deal with the abilities. If you are a melee DPS, there might not be enough room for you and the other melee DPS to spread properly around Valiona. In that case, you might be required to stack by groups of 2 or 3.
Twice (sometimes 3 times), Valiona will cast Blackout on a random raid member. When you are affected by it, simply move behind Valiona, where everyone should join you to soak the damage done by this ability.
Immediately after a Blackout, Valiona casts Devouring Flames, a frontal breath-like attack. It covers a portion of the room with damaging flames. It is not possible to know in advance where this will happen, as Valiona will randomly choose a direction to face before casting this. Therefore, after each Blackout, you need to go back to spreading and be ready to move out of Devouring Flames if it happens to be cast in your direction. Note that if you cannot realistically move to a safe area, simply run away from Valiona, you will take less damage.
Note that if Valiona has the time to cast a third Blackout during her phase, she will, however, never cast a third Devouring Flames.
Every two seconds, Theralion casts Twilight Blast at a random raid member. This cannot be avoided and must be healed through. This ability is the reason why ranged players must spread out 8 yards.
At the end of the phase, Theralion will create void zones on the ground. You have 5 seconds to move out of them before being sent to the Twilight Realm.
Theralion Phase
During this phase, you will stay behind Theralion at all time if you are a melee DPS, or you will stay 10 yards from everyone else if you are a ranged DPS.
Melee DPS have an easy time here, simply stay behind Theralion at all times and none of the abilities will be of concern to you, with the exception of Valiona's breath attack towards the end of the fight.
Ranged DPS need to watch out for three things:
- If a void zone appears underneath you, move out of it;
- If you are targeted by Twilight Meteorite, you have 5 seconds to go stack with the melee group. Failure to do so will most likely result in your death.
- If you are affected by Engulfing Magic, stop casting spells until you have moved 10 yards away from everyone else.
At the end of the phase, Valiona will fly over the room 3 times, each time covering one third of it with flames. A player standing in the flames takes moderate Shadow damage and is shifted to the Twilight Realm.
Tips and Tricks
Classes which can apply DoTs on both Valiona and Theralion are favored by this encounter:
- Fire Mages can use
 Living Bomb;
 - Shadow Priests and Balance Druids should apply and refresh their DoTs on both dragons.
On Blackout, during Valiona Phase, the following classes can simply move 8 yards from everyone else and bypass the mechanics entirely:
- Mages can use
 Ice Block and
  Cauterize;
 - Rogues can use
 Cloak of Shadows and
  Cheat Death;
 - Retribution Paladins can use
 Divine Shield.
Engulfing Magic, during Theralion Phase, will increase your DPS: make good use of it (without damaging nearby players).
For Twilight Meteorite, during Theralion Phase, some classes can just move away from everyone else and bypass that mechanics:
- Mages can use Ice Block when targeted and count on
Cauterize to prevent them from dying;
- Rogues can use Cloak of Shadows and
Cheat Death;
- Retribution Paladins can use Divine Shield;
Additionally, Hunters can use ![]() Feign Death, which causes Valiona to
cancel her cast
and target someone else after a few seconds. Deterrence will make them
resist the damage, while
Feign Death, which causes Valiona to
cancel her cast
and target someone else after a few seconds. Deterrence will make them
resist the damage, while ![]() Disengage can be used as a means of reaching
the melee group.
Disengage can be used as a means of reaching
the melee group.
Heroic Mode
For most DPS players, the Heroic version of this encounter is exactly the same as in Normal mode, just that everything deals more damage.
Some DPS players, however, will be required to enter the Twilight Realm to kill some adds. Such players are advised to read the related section in our detailed guide.