Sha of Fear Detailed Strategy Guide (Heroic Mode included)
Table of Contents
Introduction
This guide is intended to provide a comprehensive description of the encounter with Sha of Fear in Terrace of Endless Spring. It is targeted at anyone who desires to understand the fight mechanics.
This guide is updated for World of Warcraft WoD 6.1.2.
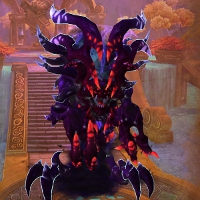
The Sha of Fear is the final boss encounter of the Terrace of Endless Spring, and it can be considered the final encounter of Tier 14. This is a very long fight.
The encounter will mostly test your raid's DPS and healing, but due to its length, it also strains your raid members' ability to maintain focus.
General Information
Health Values
| Difficulty | Sha of Fear | Terror Spawn | Terrace Guardians | Dread Spawns |
|---|---|---|---|---|
| 10-man | 138M | 4M | 14.4 | Heroic-only |
| 10-man Heroic | 544M | 6.1M | 23.6M | 5M |
| 25-man | 554M | 11.2M | 14.4 | Heroic-only |
| 25-man Heroic | 1.6B | 18.3M | 14.4 | 15M |
| LFR | 343M | 6.2M | 3M | Heroic-only |
Enrage Timer
The Sha of Fear has a 15-minute enrage timer, after which he will go
![]() Berserk, dealing greatly increased damage and wiping your
raid.
Berserk, dealing greatly increased damage and wiping your
raid.
In Heroic mode, the enrage timer is much longer. It appears to be at least 23 minutes, possibly more.
Raid Composition
| Difficulty | Tanks | Healers | DPS |
|---|---|---|---|
| 10-man | 2 | 2-3 | 5-6 |
| 10-man Heroic | 2 | 2-3 | 5-6 |
| 25-man | 3 | 5-7 | 16-18 |
| 25-man Heroic | 3 | 5-7 | 16-18 |
| LFR | 2 | 5-6 | 17-18 |
Loot
In addition to the items listed below, the Sha of Fear drops the tokens that you will need for buying your Tier 14 Head parts.
Armor
| Item Name | Armor | Slot | Main Stats |
|---|---|---|---|
| Cloth | Chest | Intellect/Spirit | |
| Cloth | Legs | Intellect/Hit | |
| Leather | Chest | Agility | |
| Waist | Agility |
Weapons
| Item Name | Type | Main Stats |
|---|---|---|
| Two-Handed Axe | Strength/Mastery | |
| One-Hand Sword | Strength/Mastery |
Trinkets
| Item Name | Type | Main Stats |
|---|---|---|
| Trinket | Intellect/Haste on damage |
Overview of the Fight
The fight against the Sha of Fear is a very long single-phase encounter. The Sha of Fear will use a variety of abilities against your raid, as well as summon adds, throughout the course of the fight.
You will fight the Sha of Fear on a large round platform, where he will remain stationary for the duration of the fight. Adjacent to this main platform, there are three other small platforms.
On the main platform, the raid will need to avoid a number of abilities from the Sha of Fear and often take cover in a safe zone that the tank will create by properly positioning themselves (see next section).
At regular intervals throughout the fight, 5 random raid members (always 1 tank, 1 healer, and 3 DPS players) will be sent to one of the adjacent platforms. A hostile Pandaren NPC will spawn and the group will have to defeat it. This NPC uses a number of abilities. When the NPC dies, the raid members can (and should) return to the main platform.
The difficulty of the fight is constant from start to finish. In addition to the hard enrage timer, the group of players who is sent away to fight the Terrace Guardian will have have to make sure that they defeat him before the Sha of Fear sends another group of players away. This is because if both tanks are sent away from the Sha of Fear, the raid will wipe.
We will first look at what must be done on the main platform, after which we will discuss what must be done on the adjacent platforms.
Main Platform: Sha of Fear
On the main platform, in addition to attacking the Sha of Fear,
the raid will have to make good use of the ![]() Wall of Light, a safe
zone activated by the tank being standing in the right place, and
deal with adds that the Sha of Fear spawn at random places on the
platform.
Wall of Light, a safe
zone activated by the tank being standing in the right place, and
deal with adds that the Sha of Fear spawn at random places on the
platform.
Wall of Light
On the main platform, you will notice a circle of light on the floor. This
is where the tank who is currently tanking the Sha of Fear must always stand.
Doing so creates a very obvious V-shaped safe zone, called the
![]() Wall of Light, behind the tank. Players who stand within the Wall of
Light take 10% less damage from all sources, and are immune to
Wall of Light, behind the tank. Players who stand within the Wall of
Light take 10% less damage from all sources, and are immune to
![]() Breath of Fear, one of the boss' most damaging attacks.
Breath of Fear, one of the boss' most damaging attacks.
Healers can remain within the safe zone for the entire fight.
Ranged DPS will sometimes have to exit the safe zone to deal with
adds spawning on the platform. Melee DPS will spend most of the fight
behind the boss (so outside the safe zone) and they will occasionally move to
deal with the adds that spawn on the platform or to take cover within the safe
for ![]() Breath of Fear.
Breath of Fear.
Abilities
The Sha of Fear makes use of several abilities. In addition to this, the
boss has an Energy bar that slowly fills up to maximum capacity over a period
of 30 seconds, independently of any factors. When the boss reaches maximum
Energy, he uses his ![]() Breath of Fear attack (detailed below), and his Energy
resets.
Breath of Fear attack (detailed below), and his Energy
resets.
 Thrash is a buff that the boss gains after every 3 melee
attacks that he makes, which causes him to attack 3 times instead of just once
on the 4th attack.
Thrash is a buff that the boss gains after every 3 melee
attacks that he makes, which causes him to attack 3 times instead of just once
on the 4th attack. Eerie Skull is a spell that the boss essentially spams at the raid.
It deals a high amount of Shadow damage to a random raid member, and anyone
else within 2 yards of their location.
Eerie Skull is a spell that the boss essentially spams at the raid.
It deals a high amount of Shadow damage to a random raid member, and anyone
else within 2 yards of their location. Breath of Fear is a spell that the boss casts every 30 seconds,
whenever his Energy bar fills up. This deals a massive amount of Shadow damage
to anyone on the platform who is not within the
Breath of Fear is a spell that the boss casts every 30 seconds,
whenever his Energy bar fills up. This deals a massive amount of Shadow damage
to anyone on the platform who is not within the  Wall of Light, fearing
them for 5 seconds.
Wall of Light, fearing
them for 5 seconds. Ominous Cackle is the spell that the boss uses to send a group of 5
random raid members to an adjacent platform, where they must defeat a corrupted
Terrace Guardian. The Sha of Fear casts this spell roughly ever 90 seconds in
10-man, and every 45 seconds in 25-man. We detail this part of the fight in a
specific section.
Ominous Cackle is the spell that the boss uses to send a group of 5
random raid members to an adjacent platform, where they must defeat a corrupted
Terrace Guardian. The Sha of Fear casts this spell roughly ever 90 seconds in
10-man, and every 45 seconds in 25-man. We detail this part of the fight in a
specific section.- Players who defeat a Terrace Guardian and are returned to the main
platform benefit from a buff called
 Fearless for 30 seconds. This
increases their damage, healing, and movement speed, and makes them immune to
the boss' Breath of Fear ability.
Fearless for 30 seconds. This
increases their damage, healing, and movement speed, and makes them immune to
the boss' Breath of Fear ability.
- Players who defeat a Terrace Guardian and are returned to the main
platform benefit from a buff called
- Throughout the fight, the Sha of Fear summons adds called
Terror Spawns, in random locations on the main platform (but never within
the Wall of Light).
- The Terror Spawns constantly spam
 Penetrating Bolt while they are
alive, which deals a large amount of Shadow damage in a 3-yard radius at the
location of a random raid member, also stacking a debuff on affected
players, which increases Shadow damage taken by 10% per stack, for 15
seconds. The point of impact of the Penetrating Bolts is clearly indicated by
a graphical effect, so avoiding them is entirely possible (it works like most
Shadow Crash mechanics).
Penetrating Bolt while they are
alive, which deals a large amount of Shadow damage in a 3-yard radius at the
location of a random raid member, also stacking a debuff on affected
players, which increases Shadow damage taken by 10% per stack, for 15
seconds. The point of impact of the Penetrating Bolts is clearly indicated by
a graphical effect, so avoiding them is entirely possible (it works like most
Shadow Crash mechanics). - The Terror Spawns are shielded in such a way that they cannot be damaged if attacked from the front.
- The Terror Spawns constantly spam
 Reaching Attack is a spell that the Sha of Fear casts if no targets
are within his melee range. It deals a large amount of Shadow damage to
players, and stacks a debuff on them that increases Shadow damage taken by
25% per stack.
Reaching Attack is a spell that the Sha of Fear casts if no targets
are within his melee range. It deals a large amount of Shadow damage to
players, and stacks a debuff on them that increases Shadow damage taken by
25% per stack.
Strategy
The strategy for the main platform is relatively simple.
- One of the tanks should always be in the circle of light, in order to form
the Wall of Light zone.
- Your entire raid should be within the V-shaped safe zone provided by the
Wall of Light. The only exception is for melee players who can stand behind the
boss and run inside the Wall of Light whenever Breath of Fear is coming up.
Your raid members should be spread out to minimise the damage
taken from Eerie Skull.
- Have DPS players venture out of the Wall of Light and kill as many
Terror Spawns as possible, by attacking them from behind. These players
must always be sure to return to the Wall of Light before the boss casts
Breath of Fear.
- Everyone will need to move (mostly side-stepping) to avoid taking damage
from the Penetrating Bolts cast by Terror Spawns.
- DPS the Sha of Fear.
Positioning
There are several positioning constraints for your raid during this fight.
First of all, the tank who is currently tanking the Sha of Fear (that is to
say, the tank who is not sent to a platform to fight a Terrace Guardian) must
always stand within the beam of light in order to maintain the
![]() Wall of Light. The location is unmistakable, being clearly marked on the
floor of the platform.
Wall of Light. The location is unmistakable, being clearly marked on the
floor of the platform.
Second of all, all players must always attempt to be at spread out more than
2 yards apart, to minimise the damage taken from ![]() Eerie Skull.
Eerie Skull.
Finally, the entire raid must stand within the ![]() Wall of Light safe
zone, with a few exceptions. Namely, DPS players must venture out of the Wall
of Light in between casts of
Wall of Light safe
zone, with a few exceptions. Namely, DPS players must venture out of the Wall
of Light in between casts of ![]() Breath of Fear in order to attack and kill
the Terror Spawns. Also, melee DPS can stand behind the boss for most
of the fight, and run inside the Wall of Light for Breath of Fear (they simply
need to keep track of the Sha's energy bar). Finally, players who are under the
effect of the
Breath of Fear in order to attack and kill
the Terror Spawns. Also, melee DPS can stand behind the boss for most
of the fight, and run inside the Wall of Light for Breath of Fear (they simply
need to keep track of the Sha's energy bar). Finally, players who are under the
effect of the ![]() Fearless buff can afford to remain outside of the Wall of
Light (to make it easier for the players inside to spread, and to maximise
their DPS uptime on the Terror Spawns).
Fearless buff can afford to remain outside of the Wall of
Light (to make it easier for the players inside to spread, and to maximise
their DPS uptime on the Terror Spawns).
Additionally, players will have to be careful and move if they are targeted
by a Terror Spawn's ![]() Penetrating Bolt.
Penetrating Bolt.
Dealing with Terror Spawns
Terror Spawns are a problem as they constantly bombard your raid with
![]() Penetrating Bolt, which means that you have to either be on the move, or
take a large amount of damage. As such, it is imperative that the number of
Terror Spawns that are alive be kept under control.
Penetrating Bolt, which means that you have to either be on the move, or
take a large amount of damage. As such, it is imperative that the number of
Terror Spawns that are alive be kept under control.
It is up to your DPS players to leave the safe zone of the ![]() Wall of Light,
and position themselves behind the Terror Spawns in order to DPS and kill them.
This is generally a simple task, but players must pay special attention not to
be caught outside the Wall of Light when the boss is about to reach maximum
Energy and cast
Wall of Light,
and position themselves behind the Terror Spawns in order to DPS and kill them.
This is generally a simple task, but players must pay special attention not to
be caught outside the Wall of Light when the boss is about to reach maximum
Energy and cast ![]() Breath of Fear.
Breath of Fear.
It may not always be possible to have the platform clear of all Terror Spawns, in which case your raid will have to strike a balance between how much DPS to apply to the adds and to the Sha of Fear. The idea is that there should not be too many Terror Spawns alive, because this will overwhelm your raid.
Healing Concerns
Healers (and tanks) must be aware of when ![]() Thrash is coming
up. This will result in a very large amount of damage on the tank, which can
kill them if they are not prepared.
Thrash is coming
up. This will result in a very large amount of damage on the tank, which can
kill them if they are not prepared.
In addition to this, healers will need to heal the damage that random
raid members take from ![]() Eerie Skull, as well as the damage that players
will sometimes take from
Eerie Skull, as well as the damage that players
will sometimes take from ![]() Penetrating Bolt (if they are careless, or if
there are too many Terror Spawns alive).
Penetrating Bolt (if they are careless, or if
there are too many Terror Spawns alive).
Terrace Guardian Platforms
Whenever the boss casts ![]() Ominous Cackle (every 90 seconds in 10-man, and
every 45 seconds in 25-man), a group of 5 randomly chosen raid members will be
sent to a platform adjacent to the main platform, where they will fight a
Terrace Guardian. This group of players will always have the composition of 1
tank, 1 healer, and 3 DPS players. Even though the players are randomly chosen, it seems that the game splits the raid into groups, and always sends the same
group configurations to the platforms throughout the fight. The only time we
have noticed a change is when a player is dead, in which case a new player
will be chosen to fill their place.
Ominous Cackle (every 90 seconds in 10-man, and
every 45 seconds in 25-man), a group of 5 randomly chosen raid members will be
sent to a platform adjacent to the main platform, where they will fight a
Terrace Guardian. This group of players will always have the composition of 1
tank, 1 healer, and 3 DPS players. Even though the players are randomly chosen, it seems that the game splits the raid into groups, and always sends the same
group configurations to the platforms throughout the fight. The only time we
have noticed a change is when a player is dead, in which case a new player
will be chosen to fill their place.
All 3 adjacent platforms will present the same challenge do your raid. The Terrace Guardian to defeat has the same abilities on all platforms, although its name will slightly change depending on the platform the group is teleported to. The Terrace Guardian of a platform always respawns after being defeated.
Each platform is round and of relatively small size. Around the edges of the platform, there are many pillars, behind which players can move in order to line of sight the Terrace Guardian (who is stationary, in the center of the platform).
Abilities
The Terrace Guardians make use of several abilities.
- Shoot is an attack that the Terrace Guardian spams at his main aggro target. It deals a moderate amount of Physical damage.
 Dread Spray is an attack that the Terrace Guardian casts at regular
intervals. He shoots volleys of Shadow damage in random directions for 8
seconds, firing a total of 16 volleys. Anyone who is hit by this ability takes
a small amount of Shadow damage. If a player is hit twice (within the same
Dread Spray cast), they will be feared for 2 seconds. The fear can be
dispelled. Each of the three Terrace Guardians fires these volleys in a
specific pattern, which we explain in the strategy section below.
Dread Spray is an attack that the Terrace Guardian casts at regular
intervals. He shoots volleys of Shadow damage in random directions for 8
seconds, firing a total of 16 volleys. Anyone who is hit by this ability takes
a small amount of Shadow damage. If a player is hit twice (within the same
Dread Spray cast), they will be feared for 2 seconds. The fear can be
dispelled. Each of the three Terrace Guardians fires these volleys in a
specific pattern, which we explain in the strategy section below. Death Blossom is an extremely damaging attack that the
Terrace Guardian sometimes channels. It deals a large amount of Physical
damage every second to all players in his line of sight.
Death Blossom is an extremely damaging attack that the
Terrace Guardian sometimes channels. It deals a large amount of Physical
damage every second to all players in his line of sight.- As the Terrace Guardian loses health, he regularly spawns
 Sha Globes
on the ground around him. Sha Globes can be picked up by players (by running
into them). When a player picks up a Sha Globe, they take a small amount of
Shadow damage but have their primary resource filled up over time. If a Sha
Globe is not picked up within 8 seconds of spawning, it will heal the
Terrace Guardian for 5% of his maximum health.
Sha Globes
on the ground around him. Sha Globes can be picked up by players (by running
into them). When a player picks up a Sha Globe, they take a small amount of
Shadow damage but have their primary resource filled up over time. If a Sha
Globe is not picked up within 8 seconds of spawning, it will heal the
Terrace Guardian for 5% of his maximum health.
As we have previously mentioned, whenever a group of players defeats a Terrace Guardian, they can return to the main platform by clicking a golden globe
that appears near the dead Terrace Guardian. Killing the Terrace Guardian buffs
the raid members with the ![]() Fearless buff, which increases damage and
healing done by 60%, movement speed by 60%, and renders the players immune to
Fearless buff, which increases damage and
healing done by 60%, movement speed by 60%, and renders the players immune to
![]() Breath of Fear for 30 seconds.
Breath of Fear for 30 seconds.
Strategy
Players who are sent to the platform of a Terrace Guardian have a few simple tasks to perform. We will summarise them before going into more details.
- Make sure that all the Sha Globes are picked up promptly by group
members.
- Dispel players affected by fears from Dread Spray, and heal the damage
that Dread Spray does.
- Hide behind the pillars of the platform when the Terrace Guardian casts
Death Blossom. The tank should remain out, and continue collecting
Sha Globes.
- DPS the Terrace Guardian.
As we stated before, the Terrace Guardian is stationary in the center of
the platform. Your raid should spread around him, and continuously collect
![]() Sha Globes as they appear.
Sha Globes as they appear.
While the directions in which the Terrace Guardian fires the volleys of
![]() Dread Spray will appear random at first, this is not so, and it follows a
very specific pattern. This means that it is possible to avoid being hit by
any of the volleys, by memorizing the patterns and positioning yourself
properly.
Dread Spray will appear random at first, this is not so, and it follows a
very specific pattern. This means that it is possible to avoid being hit by
any of the volleys, by memorizing the patterns and positioning yourself
properly.
We have created a diagram that shows the Dread Spray patterns on each of the three platforms (credit goes to Magicmoose who posted the original diagram on Wowhead).

We would note that it is not really needed to follow this strategy and avoid all the volleys of Dread Spray, since their damage is not very high. Dispelling the fears is also not recommended, due to their short duration (but using Fear Ward on the healer, where possible, is very helpful).
Line of sighting the ![]() Death Blossom spell is always needed, as
it deals a very large amount of damage. Sha Globes still need to be collected
during this time, and the tank is best suited for this task (the damage done
by Death Blossom is Physical, meaning that the tank will take little damage
overall and can afford to run around collecting globes instead of hiding
behind a pillar).
Death Blossom spell is always needed, as
it deals a very large amount of damage. Sha Globes still need to be collected
during this time, and the tank is best suited for this task (the damage done
by Death Blossom is Physical, meaning that the tank will take little damage
overall and can afford to run around collecting globes instead of hiding
behind a pillar).
A Few Words on Raid Composition
We would like to mention that in 10-man, it is highly advised (almost mandatory) that you use 2 healers. This allows you to have the required DPS to comfortably keep the number of adds in check, and also allows you to kill the Terrace Guardians faster. It may be possible to complete the fight with 3 healers, if you have exceptional DPS, but we believe that this would only make it harder.
In 25-man, you need to use 3 tanks, because the increased frequency of the
![]() Ominous Cackles means that two groups will have to be fighting Terrace
Guardians simultaneously (thus using up two tanks), you need to use 3 tanks
for the fight. You can even use 4 tanks, which gives you more time to kill the
Terrace Guardians.
Ominous Cackles means that two groups will have to be fighting Terrace
Guardians simultaneously (thus using up two tanks), you need to use 3 tanks
for the fight. You can even use 4 tanks, which gives you more time to kill the
Terrace Guardians.
When to Use Heroism/Bloodlust/Time Warp
We recommend using ![]() Heroism/
Heroism/![]() Bloodlust/
Bloodlust/![]() Time Warp towards at
the start of the fight. This is because the fight does not increase in
difficulty, and using Heroism/Bloodlust/Time Warp while all cooldowns and
potions are up is very beneficial.
Time Warp towards at
the start of the fight. This is because the fight does not increase in
difficulty, and using Heroism/Bloodlust/Time Warp while all cooldowns and
potions are up is very beneficial.
Alternatively, you can try to use it after a group of players has just
returned from defeating a Terrace Guardian, since they will be dealing 60%
increased damage due to the ![]() Fearless buff. If another group of players
is away from the main group during this time (something which is likely to
happen), then they can use Heroism/Bloodlust/Time Warp on the Terrace Guardian
platform, or on the main platform after they return.
Fearless buff. If another group of players
is away from the main group during this time (something which is likely to
happen), then they can use Heroism/Bloodlust/Time Warp on the Terrace Guardian
platform, or on the main platform after they return.
Learning the Fight
The encounter is not difficult to understand, but learning how to execute it properly will take a bit of practice.
On the main platform, your raid will need to become proficient at avoiding
the impact locations of ![]() Penetrating Bolts. In addition to this, you will
need to figure out what the most efficient way of killing the
Terror Spawns is for your raid, while also keeping up a good amount of
damage on the boss himself.
Penetrating Bolts. In addition to this, you will
need to figure out what the most efficient way of killing the
Terror Spawns is for your raid, while also keeping up a good amount of
damage on the boss himself.
On the Terrace Guardian platforms, players will have to be proficient at
picking up ![]() Sha Globes, since you really cannot afford to have the
Terrace Guardian healed. Additionally, players here must be aware of their boss
mod timers, and get ready to avoid
Sha Globes, since you really cannot afford to have the
Terrace Guardian healed. Additionally, players here must be aware of their boss
mod timers, and get ready to avoid ![]() Death Blossom by line of
sighting it.
Death Blossom by line of
sighting it.
Other than this, the remaining tasks are relatively simple, and your raid should be able to learn them through repetition.
Achievement: The Mind-Killer
The ![]() The Mind-Killer achievement is part of the
The Mind-Killer achievement is part of the
![]() Glory of the Pandaria Raider meta achievement. The achievement requires that
you defeat the Sha of Fear without anyone in your raid being feared by
Glory of the Pandaria Raider meta achievement. The achievement requires that
you defeat the Sha of Fear without anyone in your raid being feared by
![]() Dread Spray or
Dread Spray or ![]() Breath of Fear.
Breath of Fear.
This is simply an awareness check, since both abilities can be avoided
without much difficulty. Avoiding Breath of Fear requires that everyone be
within the ![]() Wall of Light when the Sha of Fear reaches 100 Energy.
Wall of Light when the Sha of Fear reaches 100 Energy.
Avoiding Dread Spray simply requires that everyone understand and memorize the patterns of the Dread Spray spell, which we explained above.
Heroic Mode
The Heroic mode of the Sha of Fear is arguably the most difficult raid encounter in Tier 14. It is an extremely long encounter, which requires a great deal of concentration from your raid. The fight presents significant changes from the Normal mode version.
Differences From Normal Mode
For the first 34% of the Sha of Fear's health, the fight will play out identically to Normal mode. That said, there are three differences, which we list here.
- The boss and the adds have more health than in Normal mode, and they deal more damage.
- The Sha Globes heal the Terrace Guardians for 8% of their maximum
health, up from 5% in Normal mode.
- The Dread Spray cast by the Terrace Guardians is so damaging that
getting hit twice by it will almost surely result in death.
When the Sha of Fear reaches 66% health, you will enter a brand new, Heroic-only phase. The boss will retreat to a new area called The Dread Expanse, and your raid will be pulled there too. We discuss the abilities of this phase in a subsequent section.
Lei's Hope
After you enter the Heroic-only phase (which starts when the Sha of Fear
reaches 66% health) for the first time, and until a soft reset of the instance
takes place (or a new lockout starts), you benefit from a raid-wide buff called
![]() Lei's Hope. This buff is active for the first 34% of the Sha of Fear's
health on all subsequent attempts after its activation, and it increases your
entire raid's attack and casting speed by 15%. This is designed to help you
get through the non-Heroic phase faster as you progress on the fight.
Lei's Hope. This buff is active for the first 34% of the Sha of Fear's
health on all subsequent attempts after its activation, and it increases your
entire raid's attack and casting speed by 15%. This is designed to help you
get through the non-Heroic phase faster as you progress on the fight.
The Dread Expanse
The Dread Expanse is essentially a very large, open area with no obstacles or any kind of constraints.
While in this phase, the Sha of Fear no longer uses any abilities from the previous phase. Instead, it gains a whole new set of abilities.
To begin with, as you transition into this phase, your entire raid is
healed to full health, all your mana is restored, and all your cooldowns are
reset, thanks to an ability called ![]() Fading Light. The player who
was standing in the beam of light that forms the V-shaped safe zone at the end
of the first phase gains a buff called Pure Light as you enter the
Heroic-only phase. This buff grants immunity to fear and horror effects, and a
30% damage reduction. This player can pass this buff on to another player
through the use of an extra action button,
Fading Light. The player who
was standing in the beam of light that forms the V-shaped safe zone at the end
of the first phase gains a buff called Pure Light as you enter the
Heroic-only phase. This buff grants immunity to fear and horror effects, and a
30% damage reduction. This player can pass this buff on to another player
through the use of an extra action button, ![]() Transfer Light (this removes
the buff from the first player). The buff can be passed around players with no
cooldown or resource cost.
Transfer Light (this removes
the buff from the first player). The buff can be passed around players with no
cooldown or resource cost.
The Sha of Fear uses the following abilities during this phase.
 Dread Thrash is a supercharged version of Thrash used
by the boss in the previous phase. On every fourth melee attack, the boss
will attack an additional 5 times.
Dread Thrash is a supercharged version of Thrash used
by the boss in the previous phase. On every fourth melee attack, the boss
will attack an additional 5 times. Implacable Strike is a frontal cone attack which deals an enormous
amount of damage to all affected players. This can be easily avoided by moving
out of the cone in front of the boss, since the ability has a cast-time, and
there is a visual effect on the ground as well.
Implacable Strike is a frontal cone attack which deals an enormous
amount of damage to all affected players. This can be easily avoided by moving
out of the cone in front of the boss, since the ability has a cast-time, and
there is a visual effect on the ground as well. Naked and Afraid is a debuff that the boss applies to its current
target, which reduces their armor and chance to parry by 100% for 25 seconds.
This forces a tank switch.
Naked and Afraid is a debuff that the boss applies to its current
target, which reduces their armor and chance to parry by 100% for 25 seconds.
This forces a tank switch. Waterspout is an ability that the boss regularly casts. It
places a jet of water under several random players, which, after 1.5 seconds,
explodes and deals a large amount of Frost damage in a 2-yard area.
Waterspout is an ability that the boss regularly casts. It
places a jet of water under several random players, which, after 1.5 seconds,
explodes and deals a large amount of Frost damage in a 2-yard area. Huddle in Terror horrifies several random players, causing them
to be feared in place and to take a large amount of Shadow damage every
second for 12 seconds. This effect cannot be dispelled in any other way but
by passing the Pure Light buff (which grants immunity to fears) to the
affected player.
Huddle in Terror horrifies several random players, causing them
to be feared in place and to take a large amount of Shadow damage every
second for 12 seconds. This effect cannot be dispelled in any other way but
by passing the Pure Light buff (which grants immunity to fears) to the
affected player. Submerge is an ability that the boss casts roughly every minute (this is now indicated by the boss' energy bar in the same way that the
Breath of Fear was indicated in the previous phase). The Sha of Fear
disappears underground (although it is under water, technically), and then
re-appears at a random location a few seconds later. The location where the
boss emerges is indicated by some clouds on the ground. Any players standing
in a 12-yard radius of where the boss emerges will take an enormous amount of
Frost damage. Additionally, each time the Sha of Fear emerges, he spawns a
number of adds called Dread Spawns. The number of adds increases with
each new submerge. These adds have several abilities.
Submerge is an ability that the boss casts roughly every minute (this is now indicated by the boss' energy bar in the same way that the
Breath of Fear was indicated in the previous phase). The Sha of Fear
disappears underground (although it is under water, technically), and then
re-appears at a random location a few seconds later. The location where the
boss emerges is indicated by some clouds on the ground. Any players standing
in a 12-yard radius of where the boss emerges will take an enormous amount of
Frost damage. Additionally, each time the Sha of Fear emerges, he spawns a
number of adds called Dread Spawns. The number of adds increases with
each new submerge. These adds have several abilities.- The Dread Spawns do not have aggro tables, and instead they fixate on
the player who is currently buffed with Pure Light. If
 Transfer Light is used to pass the buff on to someone else while the Dread
Spawns are alive, they will go for the new target.
Transfer Light is used to pass the buff on to someone else while the Dread
Spawns are alive, they will go for the new target. - If the Dread Spawns reach the player on whom they are fixated, they will instantly kill them.
- Whenever their target changes (that is to say, Pure Light is cast on
another player), each Dread Spawn casts
 Sha Spine, which deals raid-wide
damage.
Sha Spine, which deals raid-wide
damage. - The adds will sometimes gain a buff called
 Gathering Speed, which
boosts their movement speed, and stacks. The buff is reset whenever the
bearer of the Pure Light buff is changed.
Gathering Speed, which
boosts their movement speed, and stacks. The buff is reset whenever the
bearer of the Pure Light buff is changed.
- The Dread Spawns do not have aggro tables, and instead they fixate on
the player who is currently buffed with Pure Light. If
![]() Huddle in Terror,
Huddle in Terror, ![]() Implacable Strike, and
Implacable Strike, and ![]() Waterspout are each
cast once in the interval between two casts of
Waterspout are each
cast once in the interval between two casts of ![]() Submerge. There is no set
order or timing (although it seems that Huddle in Terror is always either the
first or the second ability cast).
Submerge. There is no set
order or timing (although it seems that Huddle in Terror is always either the
first or the second ability cast).
Non-Heroic Phase Strategy
During this part of the fight, everything plays out almost identically to Normal mode.
The only thing that you need to pay special attention to is
avoiding taking damage from ![]() Dread Spray. You have two options for how to
do this. The first option is to use an add-on that will enable you to know
where Dread Spray will hit next. The two best add-ons for this are
ShaOfFearAssist
and DreadSprayVR.
The second option is to use the diagram we
provided earlier in the guide to work out what the sequence is for each of the
three guardians, and where the safe spots are. Then, you can set up some raid
markers to help you figure out where you move.
Dread Spray. You have two options for how to
do this. The first option is to use an add-on that will enable you to know
where Dread Spray will hit next. The two best add-ons for this are
ShaOfFearAssist
and DreadSprayVR.
The second option is to use the diagram we
provided earlier in the guide to work out what the sequence is for each of the
three guardians, and where the safe spots are. Then, you can set up some raid
markers to help you figure out where you move.
Heroic-Only Phase Strategy
This phase of the fight plays out like a separate boss fight in its own right. That said, it is not a very complicated "fight", having only one phase.
The phase lasts for a long time, possibly as long as 12 minutes. While its
difficulty is not great at the start, as the number of Dread Spawns
increases with each new ![]() Submerge, the difficulty also increases.
Submerge, the difficulty also increases.
We will summarise the strategy briefly, before we detail a few specific issues.
- Have your tanks alternate who is tanking the Sha of Fear, so that the
tank currently affected by Naked and Afraid is never tanking the boss.
- Have the boss facing away from the raid, and make sure no one is hit by
Implacable Strike.
- Make sure that all players move if they are targeted by
Waterspout.
- Be prepared to heal the players affected by Huddle in Terror, as they
will be taking massive damage.
- Make sure no one stands in the area where the boss emerges after casting
Submerge.
- Kill all the Dread Spawns while passing the Pure Light buff
around so that they never reach their target, and so that their stacks of
Gathering Speed are regularly reset. Keep in mind though that your entire
raid will take damage from Sha Spine each time Pure Light is passed
around.
Positioning
The are no stringent positioning requirements during this phase. Your entire
raid should be loosely spread out in an arc around the boss. While there is no
specific reason not to stack up, it is best that you do not, since that means
that more people will need to move for ![]() Waterspout.
Waterspout.
Kiting the Dread Spawns
By far the greatest concern of this phase is going to be properly handling the Dread Spawns. This is not a difficult concept to understand, but due to their increasing number, it will prove quite a difficult task in practice.
Firstly, you need to remember three things.
- The Dread Spawns spawn in random locations around the raid, meaning that they will not all come from the same direction.
- The Dread Spawns will cast Sha Spine at the raid each time
Transfer Light is cast, so you should try not to cast this spell more than
is necessary.
- The Dread Spawns will progressively gain speed, and the only way to reset
their speed is to use Transfer Light.
For 25-man raids, three players should form a triangle position. One
player (such as a Hunter) should be designated to have Pure Light when
the adds spawn. This player should be positioned in the very center of the
Dread Expanse (this is somewhat hard to determine quickly, so you should use
the map/minimap to determine the position and use a raid marker on it) as the
adds spawn, and they should wait there until the adds are practically on top
of them. The other two raid members should be located some distance away from
him. When the adds are all close to the player who is in the center of the
Dread Expanse, this player should cast ![]() Transfer Light on one of the
other two players, and this player can then do the same when the adds get too
close.
Transfer Light on one of the
other two players, and this player can then do the same when the adds get too
close.
By doing the above, you ensure that the adds will all become stacked as they converge on the player located in the center of the Dread Expanse, and that they will travel together afterwards. This makes it easier to AoE and cleave the adds.
Other alternative strategies can of course work, so feel free to experiment.
In 10-man raids, you can adopt a more lax approach to the problem, simply
by having Pure Light on one of the healers, and having them stand close to
the center of the room. They can then pass the buff on to whoever is affected
by ![]() Huddle in Terror, so that their fear is dispelled.
Huddle in Terror, so that their fear is dispelled.
Since the adds get progressively faster while they are alive, you need to always keep this in mind when estimating how long is left before they reach their target.
Additionally, it is interesting to note that the adds have to be very close to their target in order to perform melee attacks, so passing the Pure Light buff can and should be done at the last moment (although this will probably require a bit of practice).
DPS Priority
While your goal during this phase is to always kill any new Dread Spawns, you must also do a considerable amount of damage to the boss in order to end the fight before you become overwhelmed by adds or the boss enrages.
That said, for the initial waves of adds (which will consist of one or a few adds), you should assign only specific players to them, while others should continue focusing full-time on the boss. When the number of adds becomes too great, you should assign any and all classes with good cleaving and AoE potential to the adds. Finally, when you reach the final waves, you will probably need to have everyone on the adds, but even at this time you should try to cleave the boss and maintain DoT uptime.
A good time for finishing off any remaining Dread Spawns is when the boss
has just cast ![]() Submerge. This is because Submerge is followed by
roughly 3-5 seconds when the boss cannot be attacked, so everyone can and
should switch to the adds.
Submerge. This is because Submerge is followed by
roughly 3-5 seconds when the boss cannot be attacked, so everyone can and
should switch to the adds.
Huddle in Terror
![]() Huddle in Terror cannot be dispelled through normal means, and so it
simply means that the affected players must receive copious amounts of
healing.
Huddle in Terror cannot be dispelled through normal means, and so it
simply means that the affected players must receive copious amounts of
healing.
Huddle in Terror can be removed by casting ![]() Transfer Light on an
affected player. This is a worthwhile tactic in 10-man, where you can employ
it regularly, but in 25-man it is not advised. This is because the
Dread Spawns cast
Transfer Light on an
affected player. This is a worthwhile tactic in 10-man, where you can employ
it regularly, but in 25-man it is not advised. This is because the
Dread Spawns cast ![]() Sha Spine on the whole raid each time Transfer
Light is used, so it is better to heal the players affected by Huddle in Terror
than to expose the raid to this damage. 25-man raids must be prepared for
situation where multiple healers are affected by Huddle in Terror, at which
time defensive cooldowns should be used.
Sha Spine on the whole raid each time Transfer
Light is used, so it is better to heal the players affected by Huddle in Terror
than to expose the raid to this damage. 25-man raids must be prepared for
situation where multiple healers are affected by Huddle in Terror, at which
time defensive cooldowns should be used.
Tanking Concerns
While we have outlined this above, it does not hurt to re-state the two tasks of tanks in this phase with more clarity.
The tanks must alternate tanking the boss due to the
![]() Naked and Afraid debuff. Trying to tank the boss with this debuff is
essentially a suicide, so whenever one tank is affected by it, the other tank
must take over the boss. The debuff will always expire from the first tank
before the boss casts it again.
Naked and Afraid debuff. Trying to tank the boss with this debuff is
essentially a suicide, so whenever one tank is affected by it, the other tank
must take over the boss. The debuff will always expire from the first tank
before the boss casts it again.
The tanks must also be very careful to move out of the frontal cone attack
of ![]() Implacable Strike. Running forward through the boss should not be
attempted - instead, you should simply run to the left or to the right, out of
the cone.
Implacable Strike. Running forward through the boss should not be
attempted - instead, you should simply run to the left or to the right, out of
the cone.
Concluding Remarks
This concludes our raid guide for the Sha of Fear. We hope you have found it helpful. Please do not hesitate to post any feedback you may have on our forums.


- WoW Is Turning This Beloved Tradition Into Its First Official Pride Event—The Darkspear Dash
- Prey Rep Buffs, Class and Dungeon Tuning, Raid and Delve Fixes: Midnight Weekly Hotfix Summary, March 23 – 30
- This Draconic Warlock Transmog Set Has Players Hunting Astalor Bloodsworn
- WoW Players Are About to Get Answers: Holly Longdale Q&A Happening Tomorrow
- Shadow, Arms, and More: Big Post-Mythic Class Tuning Details Announced!
- Recraft Crests Lost Bug Is Fixed, Blizzard Working on Restoration, If Possible
- Several WoW Promotion Items Joining the Trading Post in 12.0.5
- The First RWF Week Is Done! All Bosses Cleared on a Thursday! Liquid Down Crown and Head to 7/9