
On this page, you will find tips, tricks, and strategies tailored to your Protection Warrior for each boss of the following raid: Uldir. All our content is updated for World of Warcraft Patch Dragonflight 10.2.5.
Uldir Boss Tips for Protection Warriors
On this page you will find Protection Warrior specific information pertaining to each boss in the Uldir raid.
Additionally, this page assumes you are familiar with the mechanics on each fight. The basics of the tank mechanics are not explained, but rather advice is given on how Protection Warriors can best deal with those mechanics.
Talent Cheatsheet
The following talent build is used on every boss.
- Level 15:
 Into the Fray
 - Level 25:
 Bounding Stride
 - Level 30:
 Unstoppable Force
 - Level 35:
 Bolster
 - Level 40:
 Rumbling Earth
 - Level 45:
 Booming Voice
 - Level 50:
 Anger Management
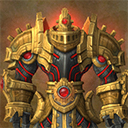
Taloc
More Taloc Guides on Icy Veins
In Phase One and Phase Three, when the boss casts ![]() Cudgel of Gore on
you, move into the
Cudgel of Gore on
you, move into the ![]() Blood Storm pools to clear them, and just as
the boss charges at you use
Blood Storm pools to clear them, and just as
the boss charges at you use ![]() Heroic Leap to jump away to avoid the
damage.
Heroic Leap to jump away to avoid the
damage.
In Phase Two, you can stun the Volatile Droplets with
![]() Shockwave if they get too close to your raid members. When soaking the
Volatile Droplets, use
Shockwave if they get too close to your raid members. When soaking the
Volatile Droplets, use ![]() Spell Reflection to reduce the damage you
take.
Spell Reflection to reduce the damage you
take.
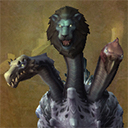
M.O.T.H.E.R.
More M.O.T.H.E.R. Guides on Icy Veins

![]() Sanitizing Strike can be sidestepped. You do not need to get hit by
it whatsoever.
Sanitizing Strike can be sidestepped. You do not need to get hit by
it whatsoever.
It is important that you face ![]() Sanitizing Strike away from the raid,
so during
Sanitizing Strike away from the raid,
so during ![]() Wind Tunnel, use
Wind Tunnel, use ![]() Heroic Leap to put yourself in a
good spot right before Sanitizing Strike is cast.
Heroic Leap to put yourself in a
good spot right before Sanitizing Strike is cast.
Fetid Devourer
More Fetid Devourer Guides on Icy Veins
Protection Warriors do extremely well as the "main" tank on this boss. All
the damage that you will take on this fight is Physical via the boss' auto
attacks, something Protection Warriors are good at dealing with. If you are
assigned to be the off tank/![]() Terrible Thrash tank, make sure you are
using your
Terrible Thrash tank, make sure you are
using your ![]() Shield Block charges intelligently since Terrible Thrash is
blockable.
Shield Block charges intelligently since Terrible Thrash is
blockable.
Use ![]() Intercept/
Intercept/![]() Heroic Leap to negate the knockback from
Heroic Leap to negate the knockback from
![]() Shockwave Stomp.
Shockwave Stomp.
Zek'voz, Herald of N'Zoth
More Zek'voz, Herald of N'Zoth Guides on Icy Veins
Use ![]() Shield Block to reduce damage from
Shield Block to reduce damage from ![]() Shatter as it is
blockable. Use
Shatter as it is
blockable. Use ![]() Spell Reflection to reduce the damage you take from
Spell Reflection to reduce the damage you take from
![]() Void Lash, preferably on the last one in the combo.
Void Lash, preferably on the last one in the combo.
Additionally, ![]() Last Stand will line up with every
Last Stand will line up with every
![]() Void Lash/
Void Lash/![]() Shatter combo, so using Last Stand there makes
it very easy to survive them.
Shatter combo, so using Last Stand there makes
it very easy to survive them.
Stun the various adds that spawn during this boss with
![]() Shockwave.
Shockwave.
![]() Heroic Leap is very useful for getting into the safe zone during
Heroic Leap is very useful for getting into the safe zone during
![]() Surging Darkness.
Surging Darkness.
Vectis
More Vectis Guides on Icy Veins
When ![]() Omega Vector is about to expire on you, use
Omega Vector is about to expire on you, use
![]() Spell Reflection to completely prevent the stack of
Spell Reflection to completely prevent the stack of
![]() Lingering Infection that you would normally get. Generally, tanks
avoid getting the Omega Vector, but as a Protection Warrior purposefully taking
every other Omega Vector can be extremely beneficial to your raid (assuming you
can survive the extra damage) as you greatly decrease the total number of stacks
your raid gets.
Lingering Infection that you would normally get. Generally, tanks
avoid getting the Omega Vector, but as a Protection Warrior purposefully taking
every other Omega Vector can be extremely beneficial to your raid (assuming you
can survive the extra damage) as you greatly decrease the total number of stacks
your raid gets.
You cannot use ![]() Spell Reflection to prevent stacks during the
intermission/
Spell Reflection to prevent stacks during the
intermission/![]() Plague Bomb soaking phase. You will still get the stack
during this phase.
Plague Bomb soaking phase. You will still get the stack
during this phase.
Use ![]() Heroic Leap to soak far away
Heroic Leap to soak far away ![]() Plague Bombs. Additionally,
you can block the Plague Bombs as long as you are facing the position of the
boss.
Plague Bombs. Additionally,
you can block the Plague Bombs as long as you are facing the position of the
boss.
Zul, Reborn
More Zul, Reborn Guides on Icy Veins

If you are tanking the Nazmani Crusher, you can block its
![]() Bloody Cleave.
Bloody Cleave.
During Phase Two, the ![]() Rupturing Blood DoT deals a substantial amount
of damage. You can have a Paladin cast
Rupturing Blood DoT deals a substantial amount
of damage. You can have a Paladin cast ![]() Blessing of Protection on you to
immediately remove your stacks. Note that this also immediately drops
the puddle as well. Make sure you are in a good spot for dropping the
puddle.
Blessing of Protection on you to
immediately remove your stacks. Note that this also immediately drops
the puddle as well. Make sure you are in a good spot for dropping the
puddle.
In the same vein, use ![]() Heroic Leap to position yourself on the edge of
the platform so you can drop the
Heroic Leap to position yourself on the edge of
the platform so you can drop the ![]() Rupturing Blood puddle in a good
spot.
Rupturing Blood puddle in a good
spot.
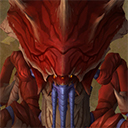
Mythrax the Unraveler
More Mythrax the Unraveler Guides on Icy Veins
Use ![]() Spell Reflection to reduce the damage you take from
Spell Reflection to reduce the damage you take from
![]() Essence Shear.
Essence Shear.
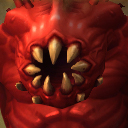
G'huun
More G'huun Guides on Icy Veins

You can block the ![]() Massive Smash that the Dark Youngs
cast.
Massive Smash that the Dark Youngs
cast.
You can completely prevent the application of ![]() Explosive Corruption by
using
Explosive Corruption by
using ![]() Spell Reflection before it is cast. Plan your taunt swaps around
this. The cooldown on Spell Reflection allows you to reflect every other
cast.
Spell Reflection before it is cast. Plan your taunt swaps around
this. The cooldown on Spell Reflection allows you to reflect every other
cast.
When you do get ![]() Explosive Corruption, use
Explosive Corruption, use ![]() Heroic Leap to
place the puddle and orbs in a good spot.
Heroic Leap to
place the puddle and orbs in a good spot.
Changelog
- 25 Jun. 2019: This page has been reviewed for the release of Patch 8.2 and no changes are necessary.
- 10 Dec. 2018: Updated for Patch 8.1.
- 29 Sep. 2018: Added note about Spell Reflection on Vectis.
- 10 Sep. 2018: Added tips for each boss.
- 13 Aug. 2018: Page added (empty for now).