Stormstout Brewery Heroic Dungeon Guide (WoD 6.1.2)
Table of Contents
The Stormstout Brewery is a 5-man dungeon located in the Valley of the Four Winds, on Pandaria. The Normal-difficulty version of the dungeon is open to players between level 85 and 90, while the Heroic-difficulty version of the dungeon is reserved to level 90 players. It houses 3 encounters: Ook-Ook, Hoptallus, and Yan-Zhu the Uncasked.
Introduction
The brewery has been overrun by strange creatures and Chen Stormstout, who has just arrived on Pandaria from the Wandering Isle, needs you to investigate the brewery of his ancestors and find out what happened to it.
The dungeon has a linear layout during which you will progress through four different zones and encounter three bosses. The dungeon features both Normal (level 85+) and Heroic (level 90) modes. There are no differences in mechanics between Normal and Heroic modes. The only differences are increased health and damage done for all bosses and enemies.
| Grain Cellar | Stormstout Brewhall (Ook-Ook) |
|---|---|
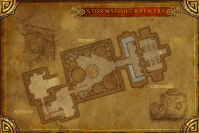
|
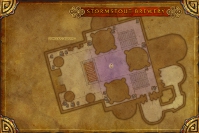
|
| The Great Wheel (Hoptallus) | The Tasting Room (Yan-Zhu) |
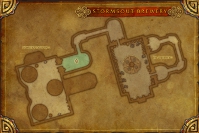
|
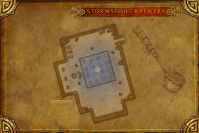
|
This guide will cover all of the three boss encounters, as well as the quests and achievements that are available in the dungeon.
Normal Difficulty Loot
In Normal Difficulty, the level of the items you can obtain from the Stormstout Brewery is 410.
Armor
| Item Name | Armor | Slot | Main Stats | Source |
|---|---|---|---|---|
| Cloth | Wrists | Intellect | Ook-Ook | |
| Cloth | Hands | Intellect | Trouble Brewing | |
| Cloth | Hands | Intellect | Trouble Brewing | |
| Cloth | Waist | Intellect/Spirit | Yan-Zhu the Uncasked | |
| Leather | Hands | Intellect | Trouble Brewing | |
| Leather | Chest | Agility | Ook-Ook | |
| Leather | Shoulders | Agility | Yan-Zhu the Uncasked | |
| Leather | Hands | Agility | Trouble Brewing | |
| Chest | Intellect | Yan-Zhu the Uncasked | ||
| Hands | Intellect | Trouble Brewing | ||
| Hands | Agility | Trouble Brewing | ||
| Legs | Agility | Hoptallus | ||
| Plate | Hands | Intellect | Trouble Brewing | |
| Plate | Legs | Intellect | Yan-Zhu the Uncasked | |
| Plate | Wrists | Strength/Dodge | Hoptallus | |
| Plate | Hands | Strength/Mastery | Trouble Brewing | |
| Plate | Hands | Strength/Dodge | Trouble Brewing |
Weapons
| Item Name | Type | Main Stats | Source |
|---|---|---|---|
| Off-Hand Frill | Intellect | Hoptallus | |
| One-Hand Mace | Agility | Yan-Zhu the Uncasked | |
| Gun | Agility | Yan-Zhu the Uncasked | |
| One-Hand Sword | Strength/Mastery | Ook-Ook |
Cloaks
| Item Name | Type | Main Stats | Source |
|---|---|---|---|
| Cloak | Intellect | Family Secrets | |
| Cloak | Intellect/Spirit | Family Secrets | |
| Cloak | Agility | Family Secrets | |
| Cloak | Strength/Mastery | Family Secrets | |
| Cloak | Strength/Dodge | Family Secrets |
Heroic Difficulty Loot
In Heroic Difficulty, the level of the items you can obtain from the
Stormstout Brewery is 463, with one exception,
![]() Inelava, Spirit of Inebriation, which has an item level of 476.
Inelava, Spirit of Inebriation, which has an item level of 476.
Armor
| Item Name | Armor | Slot | Main Stats | Source |
|---|---|---|---|---|
| Cloth | Wrists | Intellect | Ook-Ook | |
| Cloth | Waist | Intellect/Spirit | Yan-Zhu the Uncasked | |
| Leather | Shoulders | Agility | Yan-Zhu the Uncasked | |
| Leather | Chest | Agility | Ook-Ook | |
| Leather | Waist | Agility | Hoptallus | |
| Chest | Intellect | Yan-Zhu the Uncasked | ||
| Legs | Agility | Hoptallus | ||
| Plate | Legs | Intellect | Yan-Zhu the Uncasked | |
| Plate | Feet | Intellect | Ook-Ook | |
| Plate | Wrists | Strength/Dodge | Hoptallus |
Weapons
| Item Name | Type | Main Stats | Source |
|---|---|---|---|
| Staff | Intellect/Hit | Yan-Zhu the Uncasked | |
| Off-Hand Frill | Intellect | Hoptallus | |
| One-Hand Mace | Agility | Yan-Zhu the Uncasked | |
| Gun | Agility | Yan-Zhu the Uncasked | |
| One-Hand Axe | Strength/Mastery | Yan-Zhu the Uncasked | |
| One-Hand Sword | Strength/Mastery | Ook-Ook |
Cloaks, Rings, and Trinkets
| Item Name | Type | Main Stats | Source |
|---|---|---|---|
| Ring | Intellect | Yan-Zhu the Uncasked | |
| Cloak | Intellect/Spirit | Hoptallus | |
| Trinket | Spirit | Ook-Ook | |
| Ring | Strength/Parry | Yan-Zhu the Uncasked | |
| Trinket | Strength | Yan-Zhu the Uncasked |
Quests
There are 2 quests that can be completed within the instance. They are given by Auntie Stormstout and Chen Stormstout inside the brewery, at the entrance.
The first quest is Family Secrets. It requires you to
collect 5 ![]() Stormstout Secrets, which you will find on the ground
throughout the instance.
Stormstout Secrets, which you will find on the ground
throughout the instance.
The second quest is Trouble Brewing. It requires you to defeat Yan-Zhu, the last boss of the dungeon. You need to complete Into the Brewery before being given this quest.
The quests reward you with item level 410 gear (see loot section above).
Ook-Ook
As you enter the entrance, you will quickly notice a progression bar that appears on your screen. It counts the number of Hozen you have killed. The count will increase as you make your way through the instance, confronting the party Hozens that overrun the lower level of the brewery.

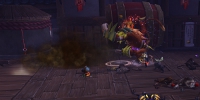
You will eventually reach the Stormstout Brewhall, where you are to fight Ook-Ook, the Hozen leader. He will only appear after you have filled the progression bar by killing a total of 40 Hozens.
The fight against Ook-Ook is straightforward. There are two things
that you need to watch out for. Ook-Ook will regularly cast
![]() Ground Pound and Rolling Barrel.
Ground Pound and Rolling Barrel.
-

 Ground Pound damages targets in front of
Ook-Ook and can easily be avoided.
 -
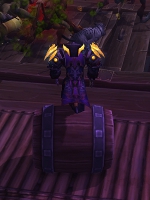
 Rolling Barrel is cast when Ook-Ook reaches 90%, 60%, and 30%
health. It causes guests around the fighting stage to throw barrels.
These barrels will roll and explode when touching a player or a wall,
dealing damage to nearby party members. You can approach a barrel
and click it, which allows you to control it and run it into Ook-Ook
(this will damage him and stack a debuff that causes him to take increased
damage).
To sum it up, avoid being in front of the boss and run as many barrels as you possibly can into him.
Tanks and healers need to be aware of ![]() Going Bananas, which causes
Ook-Ook to deal 15% more damage and to attack 15% faster. It will stack 3 times,
at 90%, 60%, and 30% remaining health.
Going Bananas, which causes
Ook-Ook to deal 15% more damage and to attack 15% faster. It will stack 3 times,
at 90%, 60%, and 30% remaining health.
Achievement: Keep Rollin' Rollin' Rollin'
To complete ![]() Keep Rollin' Rollin' Rollin', you need to run 20 barrels
into Ook-Ook before killing him, in the Heroic version of the encounter.
Keep Rollin' Rollin' Rollin', you need to run 20 barrels
into Ook-Ook before killing him, in the Heroic version of the encounter.
Hoptallus
After defeating Ook-Ook, you will make your way to the first outdoor portion of the instance. There, a gauntlet event will lead you to Hoptallus.
Gauntlet Event
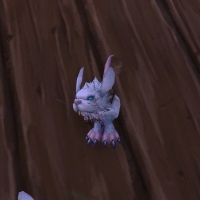
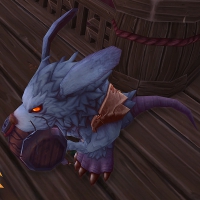
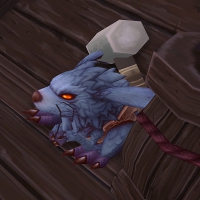
The gauntlet event starts just as you exit the Stormstout Brewhall, where you fought Ook-Ook. It ends when you reach Hoptallus. During the gauntlet, waves of ads will keep coming at you. They are made of:
- Hoplings, which are weak enemies that deal a bit of melee damage;
- Hoppers, which stop moving when they reach you and detonate the explosives they carry a few seconds later;
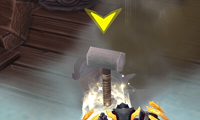
- Boppers, which carry a hammer that they drop when they die and that you can take.
| Hoplings | Hoppers | Boppers |
|---|---|---|
 |
 |
 |
The key to this event is to kill the Boppers first, then click on the hammers that they drop. Each time you do so, you will be granted 3 hammer charges. The charges stack, so you can keep clicking hammers and end up with 30 or 40 charges easily. When you have charges, you have access to a button in the middle of your screen. Clicking the button uses a hammer charge, sending all nearby virmens in the air, heavily damaging them.
Once you have acquired a hammer, the 3 charges it gives you should be enough to kill a few other Boppers, giving you more charges. As you progress through the gauntlet event, you (or someone else in your party) will stack an increasing number of hammer charges, making the event increasingly easier.
Achievement: How Did He Get Up There?
To complete ![]() How Did He Get Up There?, you will need to find the
Hozen Clinger, who is in the room right before Hoptallus,
where the gauntlet event ends.
How Did He Get Up There?, you will need to find the
Hozen Clinger, who is in the room right before Hoptallus,
where the gauntlet event ends.
Gather virmens underneath the Hozen Clinger and use a hammer to send them in their air. As he gets hit by virmens, he will loosen his grip and fall, triggering the achievement.
Achievement: Hopocalypse Now!
To complete ![]() Hopocalypse Now!, you need to kill 100 virmens with
a single swing of the hammer. This achievement will only trigger in the
Heroic difficulty version of the dungeon. Normally, the gauntlet event should provide
you with enough virmens to trigger the achievement. Go to the end
of the gauntlet (the room before Hoptallus) and round all the virmens up.
While a hit with the hammer will kill the Hoplings, it will not
kill the Boppers, so you will need to damage them a little before using
the hammer.
Hopocalypse Now!, you need to kill 100 virmens with
a single swing of the hammer. This achievement will only trigger in the
Heroic difficulty version of the dungeon. Normally, the gauntlet event should provide
you with enough virmens to trigger the achievement. Go to the end
of the gauntlet (the room before Hoptallus) and round all the virmens up.
While a hit with the hammer will kill the Hoplings, it will not
kill the Boppers, so you will need to damage them a little before using
the hammer.
If you fail to do the achievement during the gauntlet event, you can always try during the fight, by letting Hoptallus summon enough virmens. However, it will be difficult to survive his attacks all the while having to deal with dozens of virmen adds.
The Fight
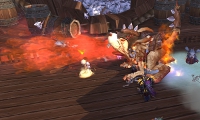
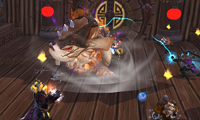
When you reach Hoptallus, the gauntlet event will finish and you can
engage him. During the fight, Hoptallus will melee the tank a bit and cast 2
abilities that you need to avoid. ![]() Carrot Breath is a frontal damaging
attack during which Hoptallus will slowly rotate on himself, several times.
To avoid the breath, you need to turn around Hoptallus.
Carrot Breath is a frontal damaging
attack during which Hoptallus will slowly rotate on himself, several times.
To avoid the breath, you need to turn around Hoptallus.
![]() Furlwind is a whirlwind-like attack that does proximity damage. You
need to move away from it.
Furlwind is a whirlwind-like attack that does proximity damage. You
need to move away from it.
|
|
Hoptallus will periodically call Hoplings, Hoppers, and Boppers for help. They should be dealt with in exactly the same way as during the gauntlet event. Kill the Boppers first, get hammer charges, and use the charges to kill the rest of the virmens. As the encounter progresses, you will stack more and more charges, allowing for a very liberal use of the hammer.
The only thing to watch out for is that using the hammer to obliterate
the adds is particularly enjoyable, to such an extent that you may lose
track of ![]() Carrot Breath and
Carrot Breath and ![]() Furlwind, and get him by them.
Furlwind, and get him by them.
Yan-Zhu the Uncasked
After defeating Hoptallus, you will have to fight your way to the top floor of the brewery by defeating a number of Alementals.
Alementals
The abilities used by the Alementals will be reused by Yan-Zhu, the final boss of the dungeon. All Alementals need to be tanked and will deal melee damage (in addition to their abilities).
Immediately after disposing of Hoptallus, you will find a Bloated Brew Alemental or a Stout Brew Alemental.
- Bloated Brew Alementals cast
 Bloat at
random targets, causing them to knock back and deal damage to
friendly players on their right and on their left.
 - Stout Brew Alementals afflict players with
 Blackout Brew.
Unless you remove the debuff by moving and jumping, it will quickly
stack to 10 stacks, stunning you for 10 seconds.
Then, you will enter a room with 9 Bubbling Brew Alementals or 9 Yeasty Brew Alementals.
- Bubbling Brew Alementals regularly use
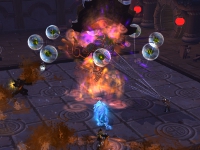
 Bubble Shield, which
grants damage protection to nearby Bubbling Brew Alementals. Since
each Bubble Shield will stack its effect on the Alementals, it is
important to destroy the shields when they appear, before resuming
your attacks on the Alementals.
 - Yeasty Brew Alementals will cast
 Brew Bolt, which deals a
bit of Frost damage to a random player.
When you exit the room, you will meet 2 Fizzy Brew Alementals
or 2 Sudsy Brew Alementals. They will respectively cast
![]() Suds and
Suds and ![]() Carbonation, which create damaging void zones
(under the Alemental for Suds and under the targeted player for Carbonation).
Carbonation, which create damaging void zones
(under the Alemental for Suds and under the targeted player for Carbonation).
Pre-Fight Alementals
After reaching the Tasting Room, you will have to fight 3 waves of Alementals before Yan-Zhu appears. They will be the same type of Alementals that you have just fought.
The first wave is comprised of:
- 2 Bloated Brew Alementals, if you previously fought a Bloated Brew Alemental, or
- 2 Stout Brew Alementals, if you previously fought a Stout Brew Alemental.
The second wave is comprised of:
- 9 Bubbling Brew Alementals, if you previously fought Bubbling Brew Alementals, or
- 9 Yeasty Brew Alementals, if you previously fought Yeasty Brew Alementals.
The third wave is comprised of:
- 4 Fizzy Brew Alementals, if you previously fought Fizzy Brew Alementals, or
- 4 Sudsy Brew Alementals, if you previously fought Sudsy Brew Alementals.
The Fight against Yan-Zhu
The encounter with Yan-Zhu the Uncasked will vary, according to the types of adds you previously encountered. Indeed, the boss will use the abilities of the Alementals that you defeat on your way to him.
Abilities
Yan-Zhu has three abilities. Each ability is one of two possible choices, based on the ads you fought on your way to him. The adds (and therefore Yan-Zhu's abilities) are decided randomly, on a per-lockout basis.
His first ability is either:
 Bloat, if you previously fought Bloated Brew Alementals;
 Blackout Brew, if you previously fought Stout Brew Alementals.
His second ability is either:
 Bubble Shield, if you previously fought Bubbling Brew Alementals;
- summoning Yeasty Brew Alementals, if you previously though Yeasty Brew Alementals.
In addition to ![]() Brew Bolt, Yeasty Brew Alementals gain a new ability
called
Brew Bolt, Yeasty Brew Alementals gain a new ability
called ![]() Ferment, which is channeled towards Yan-Zhu, restoring his mana
and health. The effect can be intercepted if you stand between Yan-Zhu and a
Yeasty Brew Alemental.
Ferment, which is channeled towards Yan-Zhu, restoring his mana
and health. The effect can be intercepted if you stand between Yan-Zhu and a
Yeasty Brew Alemental.
His third ability is either:
 Carbonation, if you previously fought Fizzy Brew Alementals;
 Wall of Suds, if you previously fought Sudsy Brew Alementals.
Strategy
Dealing with the first two abilities is easy, whichever they are:
 Bloat: make sure that you have no one on your left and right;
 Blackout Brew: move/jump often;
 Bubble Shield: destroy all 8 Bubble Shields;
- Yeasty Brew Alementals: kill them or intercept their channel (stand in the beam).
Dealing with the third ability is slightly more problematic.
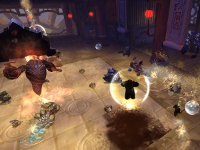
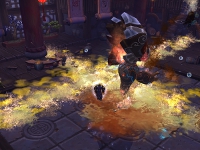
 Carbonation fills the room with a gas that prevents you from casting
your abilities. You need to click on one of the
  Fizzy Bubbles that appear
when Carbonation is cast. This will grant you the ability to fly and avoid
the dangerous gas. While flying, you will be able to cast your spells normally,
even when moving.
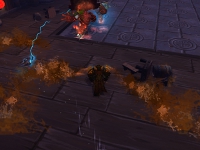
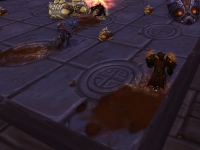
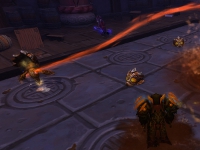
 Wall of Suds causes two damaging walls to travel the room in different
directions. To deal with these walls, you are given a passive buff called
 Sudsy, which allows you to jump higher than usual (high enough to avoid
the damage of the walls).
To optimise your jumps, you should try to jump near a point where the walls will
intersect. This way, you will jump over both walls at once.
|
|
|
|
|
|
Achievement: Ling-Ting's Herbal Journey
To complete ![]() Ling-Ting's Herbal Journey, you will first need to
buy
Ling-Ting's Herbal Journey, you will first need to
buy ![]() Ling-Ting's Favorite Tea from Auntie Stormstout at the
entrace of the dungeon. Drinking this tea will allow you to see the
Golden Hoplings that you need to gather. There are 30 of them
and, as the instance is linear, you will find them easily.
Ling-Ting's Favorite Tea from Auntie Stormstout at the
entrace of the dungeon. Drinking this tea will allow you to see the
Golden Hoplings that you need to gather. There are 30 of them
and, as the instance is linear, you will find them easily.
Here are a few tips/notes.
- The buff given by
 Ling-Ting's Favorite Tea only
lasts 5 minutes, so you should buy as many copies of this item
as you can (currently, the maximum is 5).
 - Credit for finding Hoplings is shared between party members.
- You can still find the Hoplings after the dungeon has been completed.
Final Considerations
This concludes our Stormstout Brewery dungeon guide. If you find any inconsistency or mistake, feel free to comment or send us an e-mail.
- Warcraft Returns! 10th Anniversary Edition SteelBook Now Available for Pre-Order
- Insane Solo Ritual Site Farm Is Printing Hero Crests in WoW Right Now
- This Bonus Roll Hack Could Boost Your BiS Chances in WoW This Week
- Class Fixes and Dungeon Tuning: Midnight 12.0.5 Hotfixes, April 28th
- Updating Quel’Thalas: New Blizzard Video on Rebuilding the Zone for Midnight
- How to Obtain All Collectibles From the Broken Throne Ritual Site
- Where Does Your Class Rank in DPS? 12.0.5’s Winners and Losers Are Clear
- WoW Patch 12.0.7 Is Already in Internal Testing and Adds Another One-Boss Raid
