

Strategy Guide for Torghast
Torghast was introduced in Shadowlands as a new game mode where the limitations of class and specialization balancing could be temporarily lifted in a controlled environment and allow you, the player, to create some truly overpowered characters through the wise choice of Anima Powers throughout your runs.
These powers and the way they interact with your baseline kit are a huge part of the experience, but so is the environment itself. There are multiple Cell Blocks to go through, each with its own unique bosses, enemies and layouts to beat, and they all combine inside the Twisting Corridors in order to create a deeper, and much harder, Torghast run.
In this guide, we will go into detail on multiple aspects of Torghast strategy, ranging from Anima Power picking strategies and puzzle-solving to unlock extra Anima Powers, to specialization and group size recommendations. You will also find detailed guides for each Cell Block and for the Twisting Corridors below.
Shadowlands Torghast Strategy Guide
Torghast is a new rogue-like play mode in Shadowlands. As you ascend the tower, you will constantly be finding Anima Powers which make your character much stronger, but also stronger enemies. These powers are tied to your current run and will stop being active as soon as you finish it.
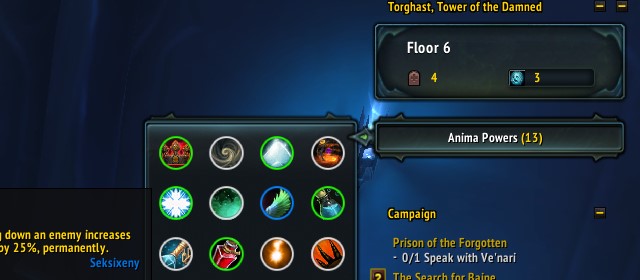
There are three main categories of powers:
- Offensive Powers, such as
 Blackened Boulder, which cause enemies
to take extra damage from your abilities, or like
Blackened Boulder, which cause enemies
to take extra damage from your abilities, or like  Elemental Core,
which empower your abilities to deal more damage.
Elemental Core,
which empower your abilities to deal more damage. - Defensive Powers, such as
 Rimeblood, which cause enemies to
deal lower damage, or like
Rimeblood, which cause enemies to
deal lower damage, or like  Vial of Soothing Waters, which cause
your abilities to heal you for more.
Vial of Soothing Waters, which cause
your abilities to heal you for more. - Crowd Control Powers / Utility Powers, such as
 Wailing Winds,
which allow you to keep enemy casts at a minimum, or
Wailing Winds,
which allow you to keep enemy casts at a minimum, or  Leeching Lilypad which
empowers the crowd control skills of your class.
Leeching Lilypad which
empowers the crowd control skills of your class.
Note that certain powers fulfill multiple roles, usually by granting you secondary
stats, such as ![]() Deathseer's Whip which grants a significant amount of Haste
with significant uptime. Class-specific powers can be very powerful, but need to
be considered on a case by case basis, so we would recommend consulting our
Torghast class guides for more class-specific
information.
Deathseer's Whip which grants a significant amount of Haste
with significant uptime. Class-specific powers can be very powerful, but need to
be considered on a case by case basis, so we would recommend consulting our
Torghast class guides for more class-specific
information.
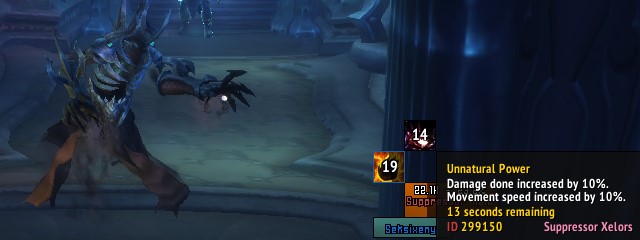
In general, you should look to prioritize offensive powers during your runs, as it will make the runs shorter and allow you to deal with the Unnatural Power buff of bosses and mini-bosses, which will eventually cause them to deal too much damage while being immune to crowd control at 10 stacks.
Defensive powers can also be great, especially when they increase your effective health by reducing damage intake. Getting a good amount of these is fundamental for successfully clearing the final floors of a Twisting Corridors Torghast run, as otherwise even basic enemies will one-shot you.
Crowd control and utility powers vary wildly in power and can usually
be safely ignored. This being said, there are a few that are situationally great,
such as ![]() Bottled Enigma which can be used to great effect against ranged
and caster enemies.
Bottled Enigma which can be used to great effect against ranged
and caster enemies.
Finally, it is important to note that you can delay the activation of a looted
Anima Power orb for as long as you wish, although you will need to use it
to pick up a new orb. This is of particular importance when the options you are
given include ![]() Crumbling Aegis or
Crumbling Aegis or ![]() Frostbite Wand. Aegis is best used
when pulling many, or particularly difficult enemies. The Wand works best when activated
at 60% life or lower of a difficult enemy, essentially one-shotting it with its
effect.
Frostbite Wand. Aegis is best used
when pulling many, or particularly difficult enemies. The Wand works best when activated
at 60% life or lower of a difficult enemy, essentially one-shotting it with its
effect.
Torghast Rewards
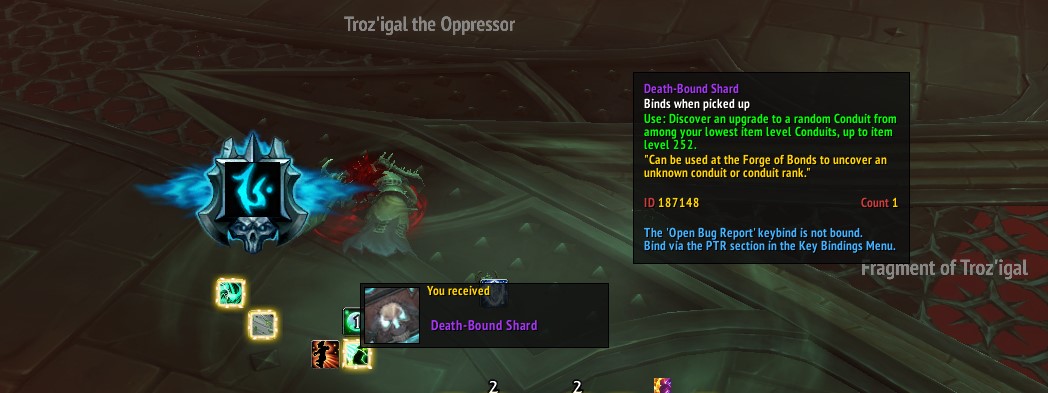
Besides power progression goodies such as Soul Ash, Soul Cinders
and the rare ![]() Death-Bound Shard item, you can also get cosmetic, pet, and
mount rewards from Torghast.
Death-Bound Shard item, you can also get cosmetic, pet, and
mount rewards from Torghast.
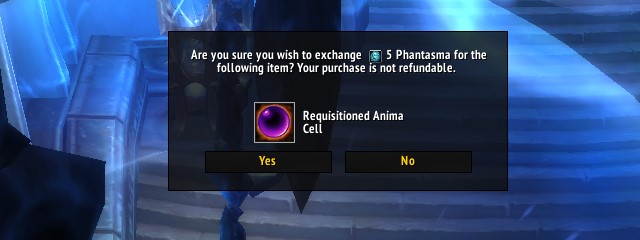
Broker Vendors sell cosmetic cloak (1000 Phantasma) and shoulder (300 Phantasma) transmog options, which are unique to Torghast but can be used by all characters in your account once unlocked.

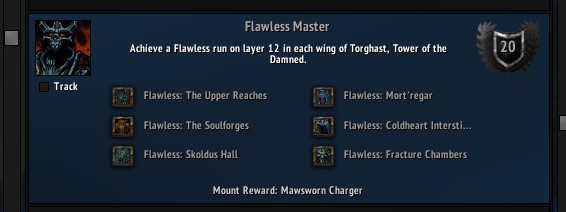
The Flawless Master achievement requires you to perform a flawless run on the maximum difficulty Cell Block layers, and rewards a mount, showcasing your mastery of Torghast!
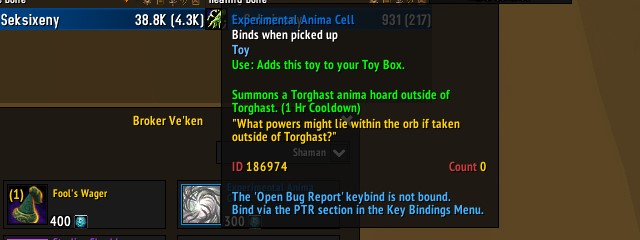
Finally, there is a new toy, which you can also buy from the broker vendors, the Experimental Anima Cell, which creates a cosmetic Anima Power orb when used.
Torghast Difficulty Levels
There are multiple difficulty levels, also called Layers on Torghast. When you enter a Cell Block, the Twisting Corridors, or the Jailer's Gauntlet, you are asked to choose the difficulty level of your run.

While initially, you can only do level 1, by completing it you unlock level 2, and so on until the current level cap. Higher levels unlock for all Cell Blocks simultaneously, but Twisting Corridors require their own separate level progression.
Higher levels grant more Soul Ash but their enemies have considerably more health and damage. Also, the Torments of the Tower will start at a more dangerous level and scale even higher as you progress!
Completing a layer gives you all the Soul Ash you have not collected yet from that Cell Block's lower layers, so in a given week all you need to do for maximum rewards is one maximum level run of each Cell Block available.
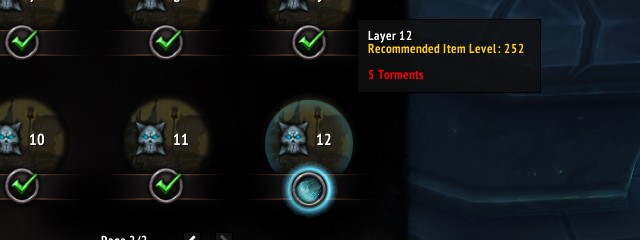
Also, while there are in-game item level recommendations for each layer, these are merely indicative and Torghast is easily doable on lower than recommended item level, as long as you pick good powers and follow the strategies in this guide.
The Box of Many Things
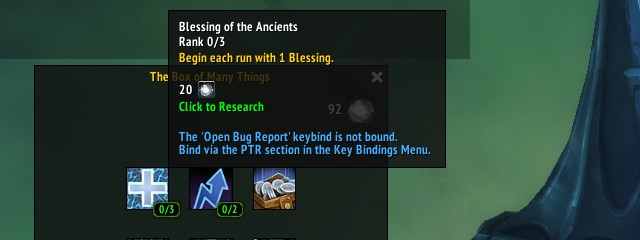
A new meta-progression system within Torghast, The Box of Many Things is unlocked with a short quest you can pick up in Korthia and provides a talent tree that can be unlocked by completing Torghast runs and whose talents make your Torghast runs more rewarding, easier, or both.
Read our detailed guide below for more details on what each talent does and which order best to unlock them on:
Failing a Torghast Run
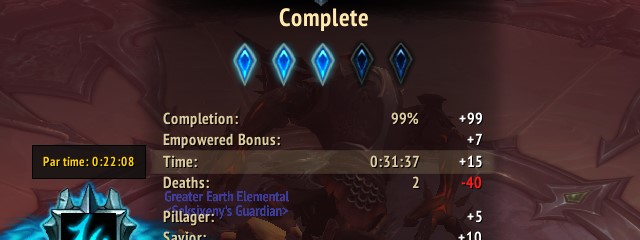
Dying too much in Torghast will reduce your Score drastically, with 20 points being deducted from your score per death, as seen in the screenshot above.
The bosses at the end of each Torghast Cell Block, every 6 floors on the Twisting Corridors and every floor in the Jailer's Gauntlet can be tough to defeat for some classes, and are common sources of deaths. You can learn more about them and their abilities and counters on our specialized guide below:
Even if a layer is tough for your character, you will still get full Soul Ash and Soul Cinders upon completion, and it is usually worth to keep going at it as long as there is any chance that you can complete it. Creating a group for Torghast generally makes it much easier, as well!
Shadowlands Torghast: Solo or Group
While you can play through Torghast solo, depending on your gear, class, and luck with Anima Powers, it can be extremely challenging to survive certain types of enemies.
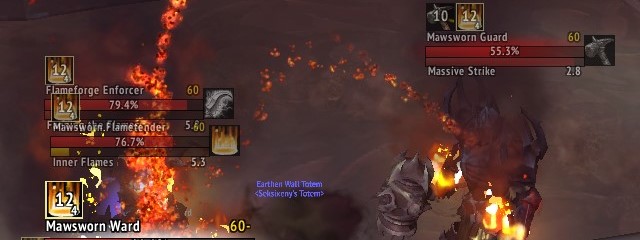
For example, the Flametender caster enemies in The Soulforges wing periodically cast Inner Flames, an extremely dangerous cast that heals nearby enemies by 5% every second and increases their damage by 5%, stacking. Needless to say, healer classes that do not possess interrupts will have a hard time against these.
By bringing extra people to the run, even if enemies have higher damage and health, they will still use the same amount of abilities as if you were solo, making it way more likely that someone in your group has the right ability to counter, and thus making group runs generally be much easier to complete than solo runs.
Another good reason to play in a group is that everyone gets Phantasma during the climb, but the Anima Power orbs bought at the Broker vendors are usable by all members of the group even though they can only be bought once, freeing more Phantasma for individual power purchases.
Shadowlands Torghast Role Pick: Tank, Healer, or DPS
While the advantages of having at least one of each role in a group are obvious, it is less perceptible what the differences of solo queuing as a Tank, Healer or DPS are.
Tank roles generally have the easiest time: enemies have less health to compensate for a tank's lower damage, but that only means that most tanks have a very easy time rounding up multiple mobs every floor, more than compensating for slower bosses later on. Many anima powers add a lot of damage to tanks, making their low starting damage less of an issue, and tanks generally have good tools to crowd control and interrupt dangerous enemies. Finally, their high mitigation and health make surviving Unnatural Power a lot easier, even at higher stacks.
Healers are the most volatile of roles: depending on your class and the anima powers you get, you can either have the smoothest of runs with very powerful anima damage powers against enemies with almost half of their baseline health, or struggle with a lot of overkill defensiveness but no damage to deal with Unnatural Power on bosses or crowd control and interrupts to deal with dangerous enemy abilities.
Finally, DPS tend to have the quickest potential runs, as they sport the highest damage of all roles right from the start, and can evolve it even further with the right anima powers along the way, but they also run the serious risk of not being able to finish their run at all if they lack enough defenses and crowd control at the end of their run, so make sure to not skimp on defense, especially if your gear is on the weaker side!
Easy Torghast Chest Solving
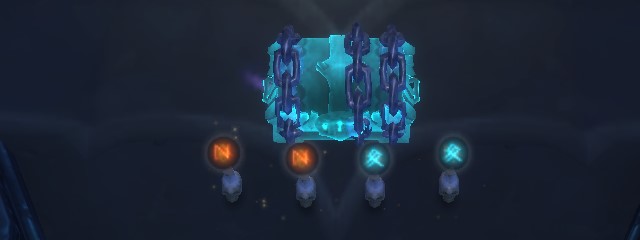
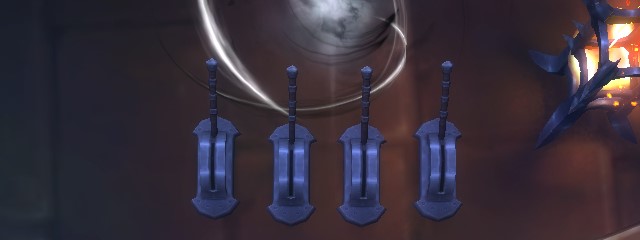
There are three types of locked chests in Torghast: rune-locked, lever-locked, and key-locked chests.
When dealing with rune-locked chests, the clickable runes will change the colors of 1, 2, 3, or 4 runes, respectively and each rune has a color that unlocks the chains in front of it. Thus, the easiest solution is to click the rune that changes 4 colors until the chains in front of that rune are disabled, and then repeat the process for the 3, 2, and 1 color changing runes, respectively.
Lever-locked chests have one lever combination that opens the chest. You need to try all of the possible combinations, so one way to go about it is to first flip them all to be in the same position, and if this did not unlock the chest, click them in the following order: 1234-1232-4321-432. This will ensure that you test out all possible combinations with as few individual clicks as possible.
Finally, in key-locked chest floors, you will occasionally find keys in the ground, pick them all to open the chest.
It is also worth noting that you can use ![]() Sticky-Fingered Skeletal Hand
(bought from Ve'nari) to instantly solve one
of these chests without needing to solve the puzzle, but this is generally not
a worthwhile use of Stygia.
Sticky-Fingered Skeletal Hand
(bought from Ve'nari) to instantly solve one
of these chests without needing to solve the puzzle, but this is generally not
a worthwhile use of Stygia.
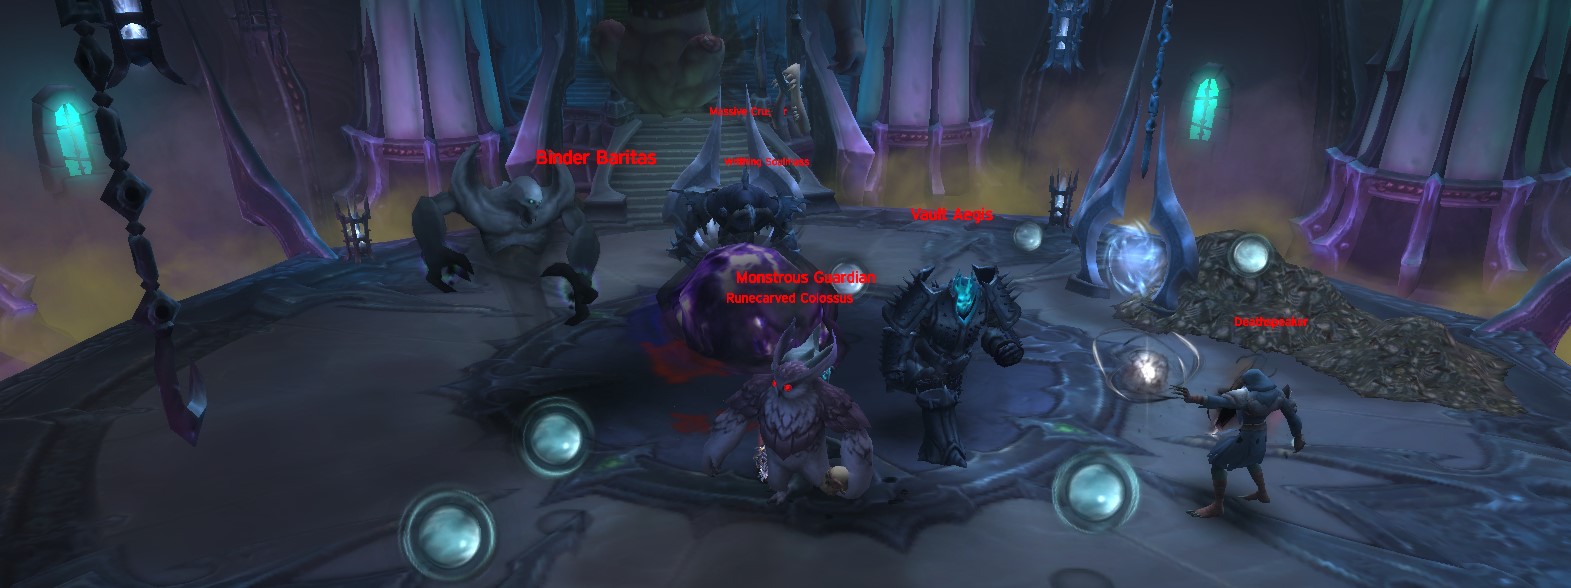
Torghast Cell Blocks
There are six types of Torghast wings, all of which have their own layouts, ambience, and enemy types. Two of them are available every week, and you can get Soul Ash from them, which is used to craft legendaries at the Runecarver.
You can also access the new Adamant Vaults if you get a perfect 5-Star
Score in layer 9 or higher. These Vaults contain new enemies,
layouts, traps, bosses, and can drop new rewards, such as the coveted
![]() Death-Bound Shard power progression item!
Death-Bound Shard power progression item!
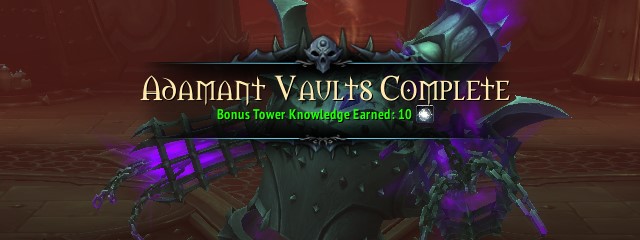
You can find a detailed guide for the Adamant Vaults below.
We have also compiled a small number of tips and tricks for each of the regular layers, which you can find in the links below:
- Skoldus Halls;
- Fracture Chambers;
- The Soulforges;
- Coldheart Interstitia;
- Mort'regar;
- The Upper Reaches.
As you go through, killing and looting enemies and breaking objects in Torghast will grant you Phantasma, which is used to buy Anima Powers and other Torghast-specific consumables at the Broker vendors on floors 3 and 6. You can also change your talents and soulbinds near the vendors, as their bubble is considered a rest zone.

These are special floors with no enemies, other than the final cell block boss in floor 6, and can be regarded as break floors where you should focus on powering up as much as possible before the challenges increase drastically in difficulty in the final floors or the final boss.
Finally, remember that you should use any cooldowns (including ![]() Bloodlust
or equivalent effects) you have left on the final boss of each floor, as moving
to a new floor will reset all of your cooldowns. Usually, this means you should look
to use all your cooldowns for a big pull at the start of each floor and
then on the boss at the end of the floor.
Bloodlust
or equivalent effects) you have left on the final boss of each floor, as moving
to a new floor will reset all of your cooldowns. Usually, this means you should look
to use all your cooldowns for a big pull at the start of each floor and
then on the boss at the end of the floor.
Twisting Corridors
You can think of the Twisting Corridors as a run of three Cell Blocks in a row, where you get to keep your Anima Powers between Cell Blocks, but enemies and torments also scale accordingly. This makes these corridors a much more exciting Torghast experience, as by the end, you will either be dealing way more damage and having much more effective health than you started with, or you will be one-shot by everything.
Succeeding at these is mastering Torghast, and while you should take into account all of the tips we gave so far, some more Twisting Corridor specific tips are in our specialized guide below:
Jailer's Gauntlet
The Jailer's Gauntlet is the ultimate Torghast challenge, where you face a boss rush of epic proportions with multiple bosses and elites attacking simultaneously!
Due to its boss-rush nature and lack of clickable items, runs are very fast,
making the gauntlet a fine way to farm ![]() Soul Ash,
Soul Ash, ![]() Soul Cinders,
and
Soul Cinders,
and ![]() Cosmic Flux. You can learn more on our detailed guide below:
Cosmic Flux. You can learn more on our detailed guide below:
Ve'nari Permanent Torghast Upgrades
You can buy some account-wide items that improve your odds in Torghast through Ve'nari, in the Maw, as explained in the guide below.
From these, the most significant are:
 Vessel of Unfortunate Spirits, allows you to have one extra death.
 Bangle of Seniority can be very strong if your class has strong uncommon
powers, such as Rimeblood.
Bangle of Seniority can be very strong if your class has strong uncommon
powers, such as Rimeblood. Ritual Prism of Fortune can also be great if your class has good epic
powers, such as
Ritual Prism of Fortune can also be great if your class has good epic
powers, such as  Deathseer's Whip.
 Phantasmic Infuser consumes 100 Phantasma for a significant
stat buff for 30 minutes.
Phantasmic Infuser consumes 100 Phantasma for a significant
stat buff for 30 minutes. Loupe of Unusual Charm is by far the best upgrade of all and makes
every Torghast vendor sell you a 5 Phantasma Anima Power orb, essentially
giving you extra power choices for free.
Loupe of Unusual Charm is by far the best upgrade of all and makes
every Torghast vendor sell you a 5 Phantasma Anima Power orb, essentially
giving you extra power choices for free. Rank Insignia: Acquisitionist, the final of its kind, is great if your
class has valuable rare powers, such as Blackened Boulder.
Rank Insignia: Acquisitionist, the final of its kind, is great if your
class has valuable rare powers, such as Blackened Boulder. Possibility Matrix increases your anima power options to a minimum
of two, which is of particular value when using small anima power orbs (from killing
non-elite enemies) which only contain a single power, otherwise.
Possibility Matrix increases your anima power options to a minimum
of two, which is of particular value when using small anima power orbs (from killing
non-elite enemies) which only contain a single power, otherwise.
Torghast Class Guides
Although this guide is meant to give you general pointers on how to complete your runs efficiently, ranking specialization and class-specific powers is the job of the Torghast Class Guides, which you can find in the links below:
Changelog
- 11 Feb. 2022: Added information on the Jailer's Gauntlet new wing.
- 26 Jun. 2021: Added information on the Box of Many Things, the Adamant Vaults and Torghast scoring.
- 10 Mar. 2021: Added a note on the recommended item levels for Torghast.
- 03 Feb. 2021: Guide added.